Notch
Rolling Mirror Bathroom Wall Cabinet
Step-by-step build — 14 steps. Also available as a print sheet.
1Cut boards and Gooves
- Following the cut diagram, use a Kreg Accu-Cut and circular saw or table saw to cut your box pieces to size from a 1 x 12 x 96" and a 1 x 6 x 36" board.
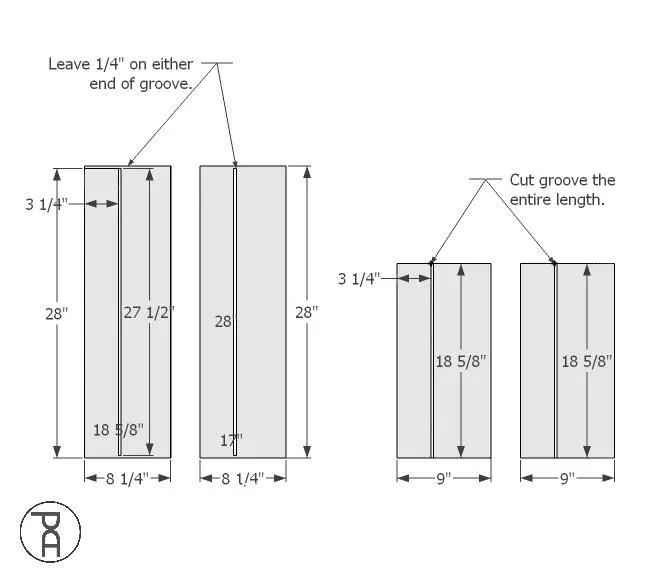
- Cut two at 8-1/4" x 28" Cut two at 9" x 18-5/8" Cut one at 5-1/2" x 28" Grooves need to be cut into the top, bottom and sides to accommodate a 1/4" inset plywood panel. This can be done by taking multiple passes using the Kreg Accu-Cut guide track and a circular saw, on a table saw, or by using a router and 1/4" straight cutting bit.
- Cut 1/4" x 1/4" grooves along the length of the side pieces, 3-1/4" from the front edge of the board.
- Cut a 1/4" x 1/4" groove along the length of the top and bottom pieces, but stop 1/4" from either end. Do not cut through the ends of the board.
2Assemble Mirror Frames
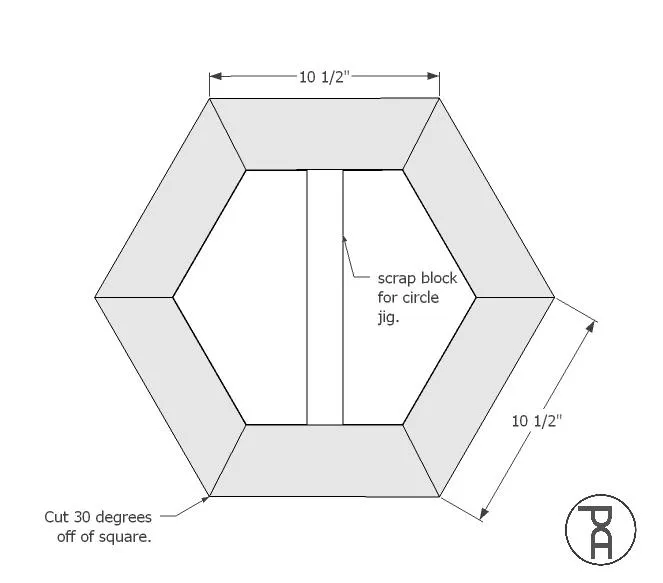
- Cut 12 trapezoids from 1 x 4 boards, 30 degrees off of square, the longest side measuring 10-1/2". For each frame: Align 6 trapezoids in a hexagon shape.
- Measure the exact length between two parallel pieces and cut a scrap piece of wood to fit between them.
- Apply glue to all adjoining faces and clamp together to create a hexagon. Allow to dry overnight.
3Cut Mirror Frames
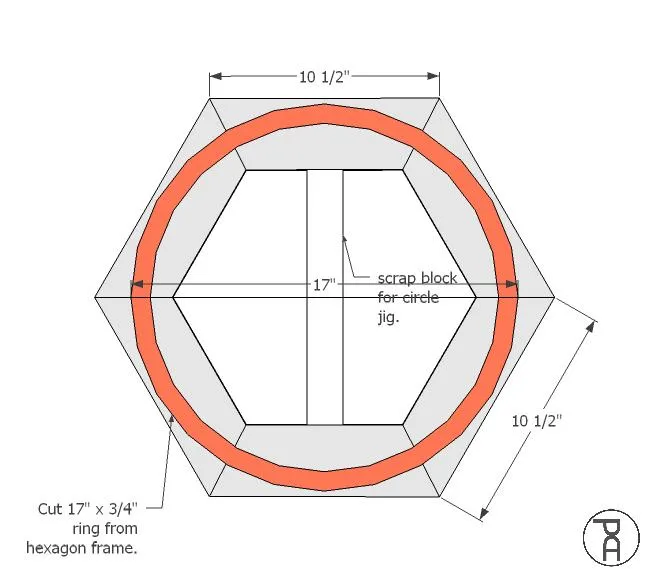
Using a router and circle jig, bandsaw, or jigsaw, cut a 3/4" wide ring with an outer diameter of 17" and an inner diameter of 15-1/2".
4Cut Rabbet
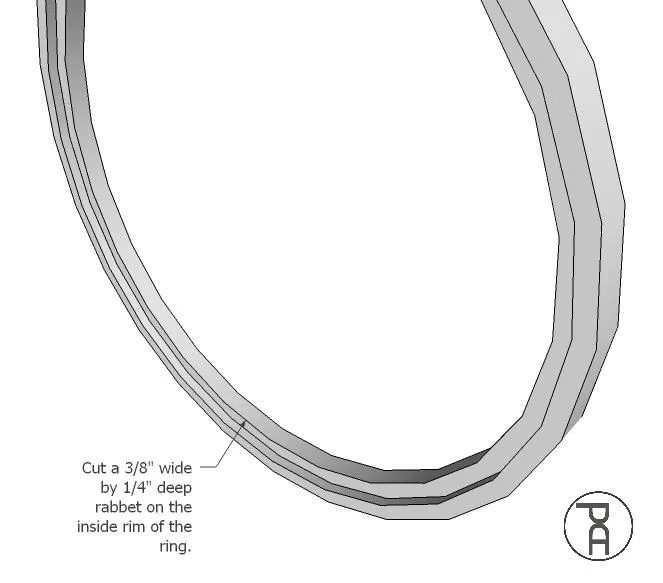
Use a router to cut a 3/8" wide by 1/4" deep rabbet on the inside rim of the mirror frame ring.
5Add Mirror to Frame
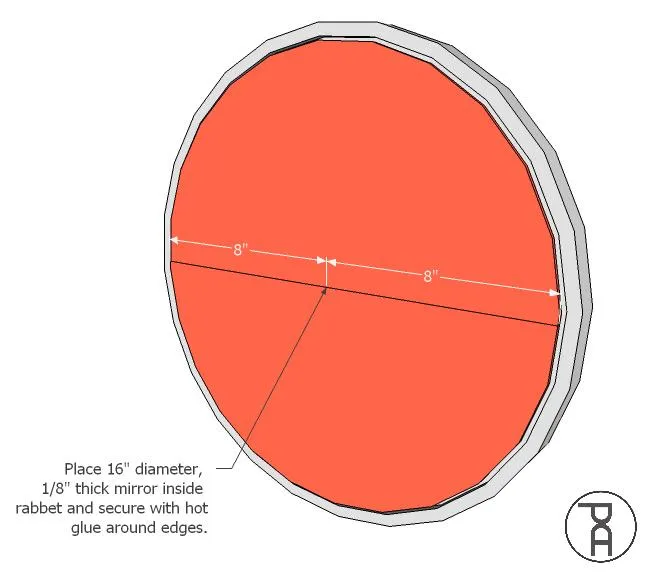
Sand and apply finish to both mirror frame rings and allow to dry. Inside each each frame, place a 16" diameter, 1/8" thick mirror within the rabbet. Secure in place using hot glue around edges.
6Cut Plywood Panel
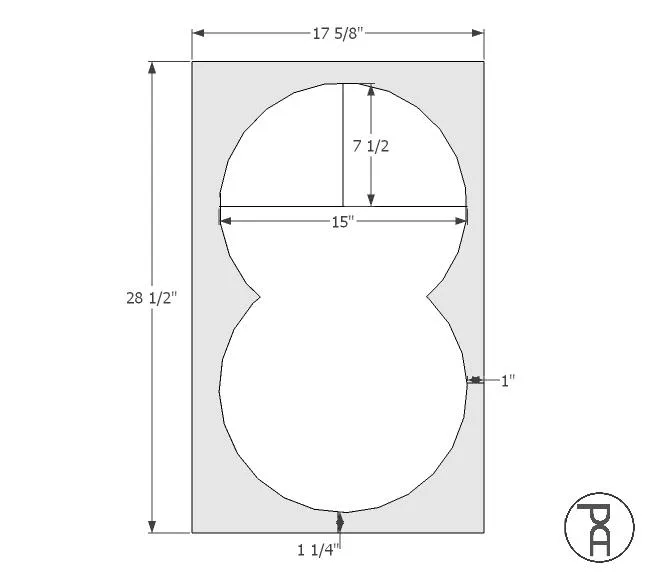
Use a Kreg Accu-Cut track and circular saw to cut a 17-5/8" x 28-1/2" panel from 1/4" plywood or MDF. Measure 1-1/4" from both short sides and 1" from both long sides. Use a jigsaw to cut two, intersecting, 15" diameter circles.
7Insert Panel Into Sides
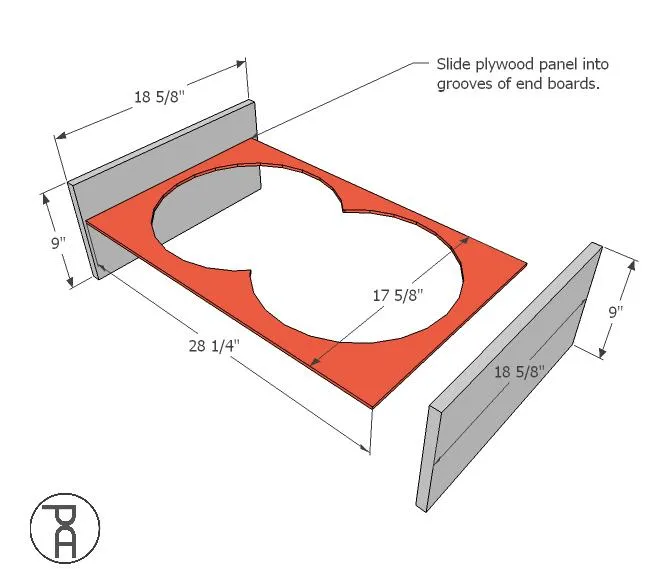
Slide the plywood panel into 1/4" grooves of side boards.
8Insert Panel Into Top & Bottom
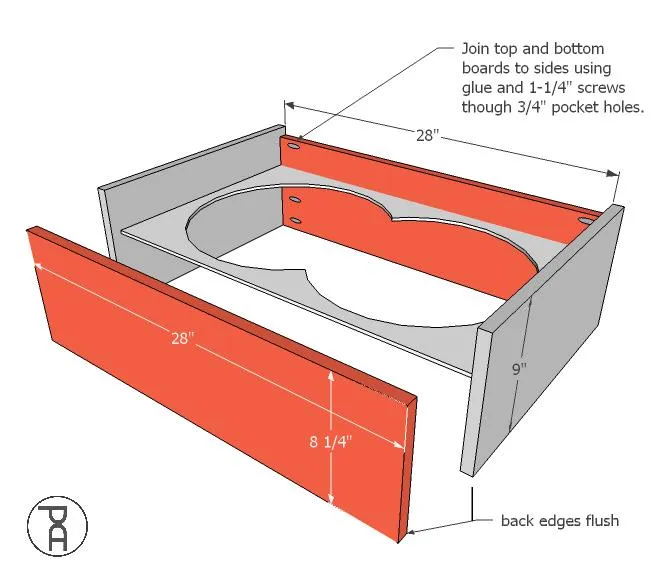
Align the plywood panel inside the grooves of the top and bottom boards. Join top and bottom boards to sides using glue and 1-1/4" screws though 3/4" pocket holes.
9Add Shelf
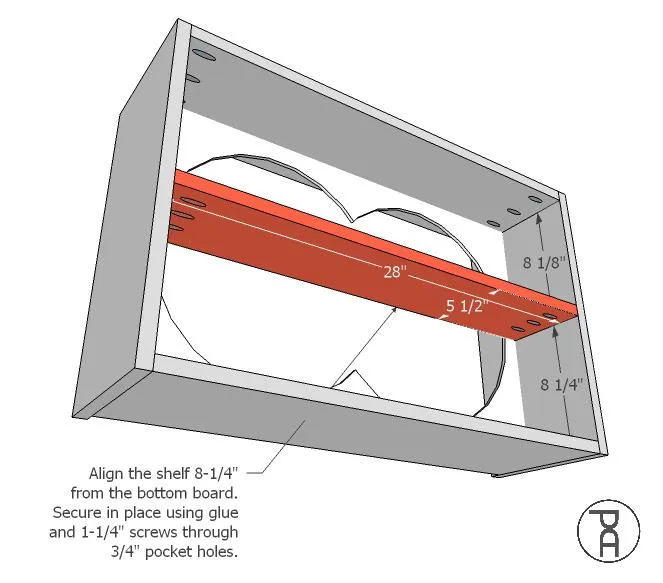
On the inside of the box, align the shelf 8-1/4" from the bottom board. Secure in place using glue and 1-1/4" screws through 3/4" pocket holes. Sand and apply finish to cabinet box, unattached face frame pieces and center rails.
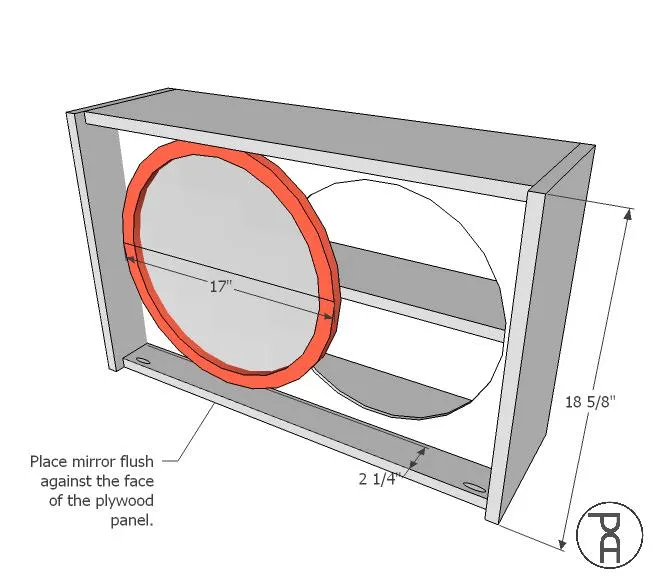
10Place First Mirror
Place first mirror flush against the front face of the plywood panel.
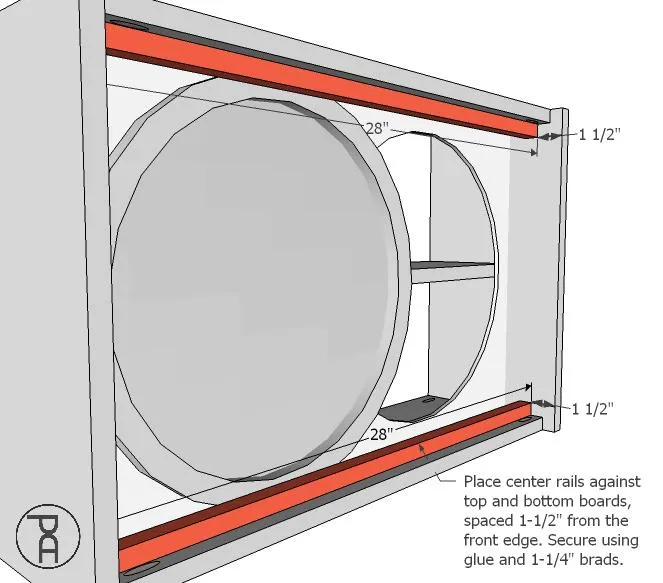
11Add Center Rails
Place 3/4" x 3/4" x 28" center rails against top and bottom boards, spaced 1-1/2" from the front edge. Secure in place using glue and 1-1/4" brads.
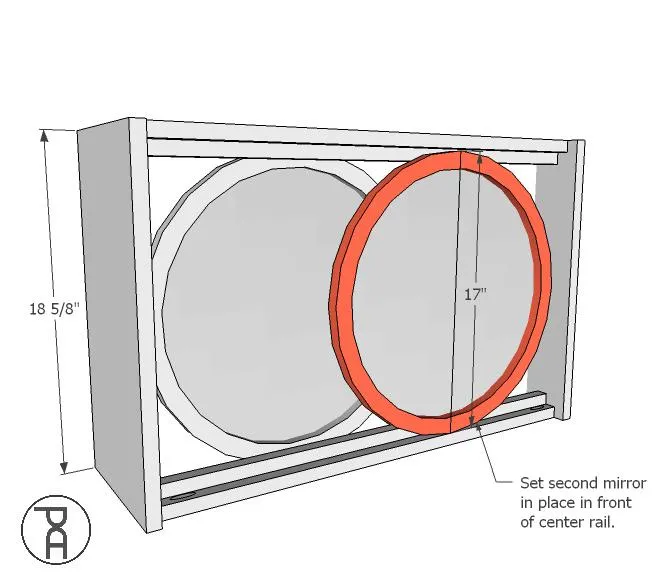
12Place Second Mirror
Place the second mirror in place in front of the center rails.
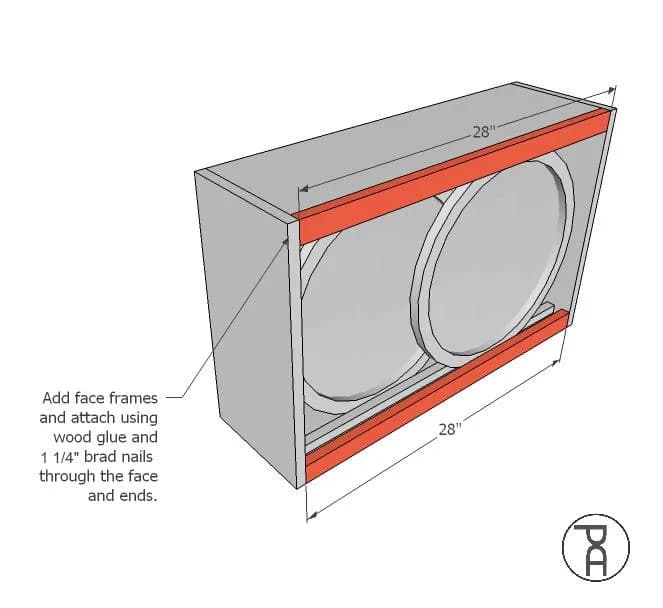
13Attach Face Frames
Add 1 x 2 x 28" face frames, flush to the front edges of top and bottom boards. Attach using wood glue and 1-1/4" brad nails through the face and ends.
14Get More Tips and Tricks
Head to www.PneumaticAddict.com for additional DIY tips, ideas, and free building plans.