 Notch
NotchRecord Player Cabinet
Step-by-step build — 12 steps. Also available as a print sheet.
1Sides and BottomAssembly
Drill pocket five holes on each end of the BOTTOM, as shown. Attach BOTTOM to SIDES, 4" from the bottom of each side using wood glue and 1-1/4" pocket hole screws.
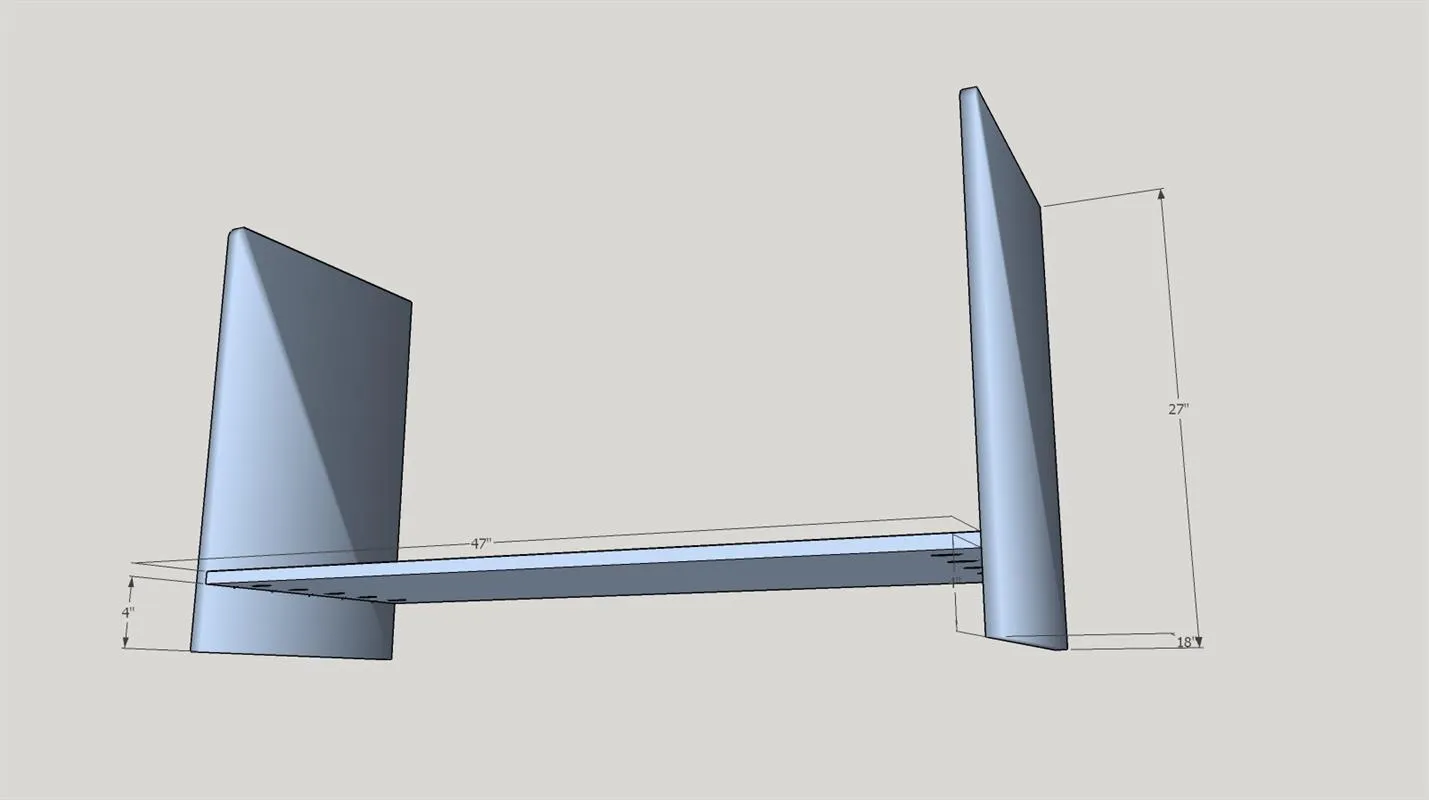
2Attach Inside Panel
Drill four pocket holes along one of the 18" edges of the INSIDE PANEL. Attach 18" from the left SIDE with wood glue and 1-1/4" pocket hole screws.
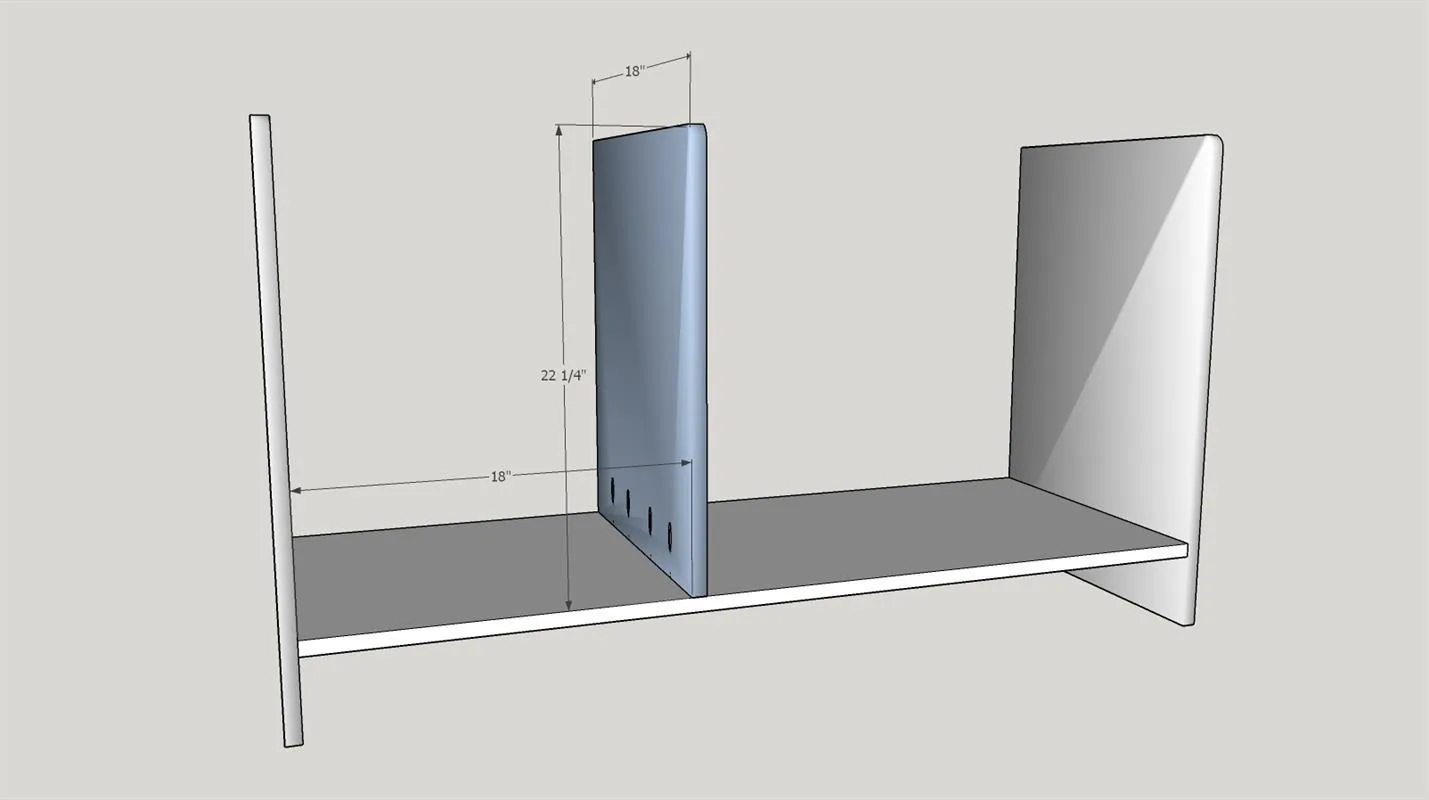
3Attach Record Base & Shelf
Drill pocket holes as shown on the RECORD DISPLAY BASE and LEFT PERMANENT SHELF. Attach the LEFT PERMANENT SHELF 12-1/4" from the BOTTOM piece, and the RECORD DISPLAY BASE 13" from the bottom piece, and flush with the front of the cabinet, using wood glue and 1-1/4" pocket hole screws.
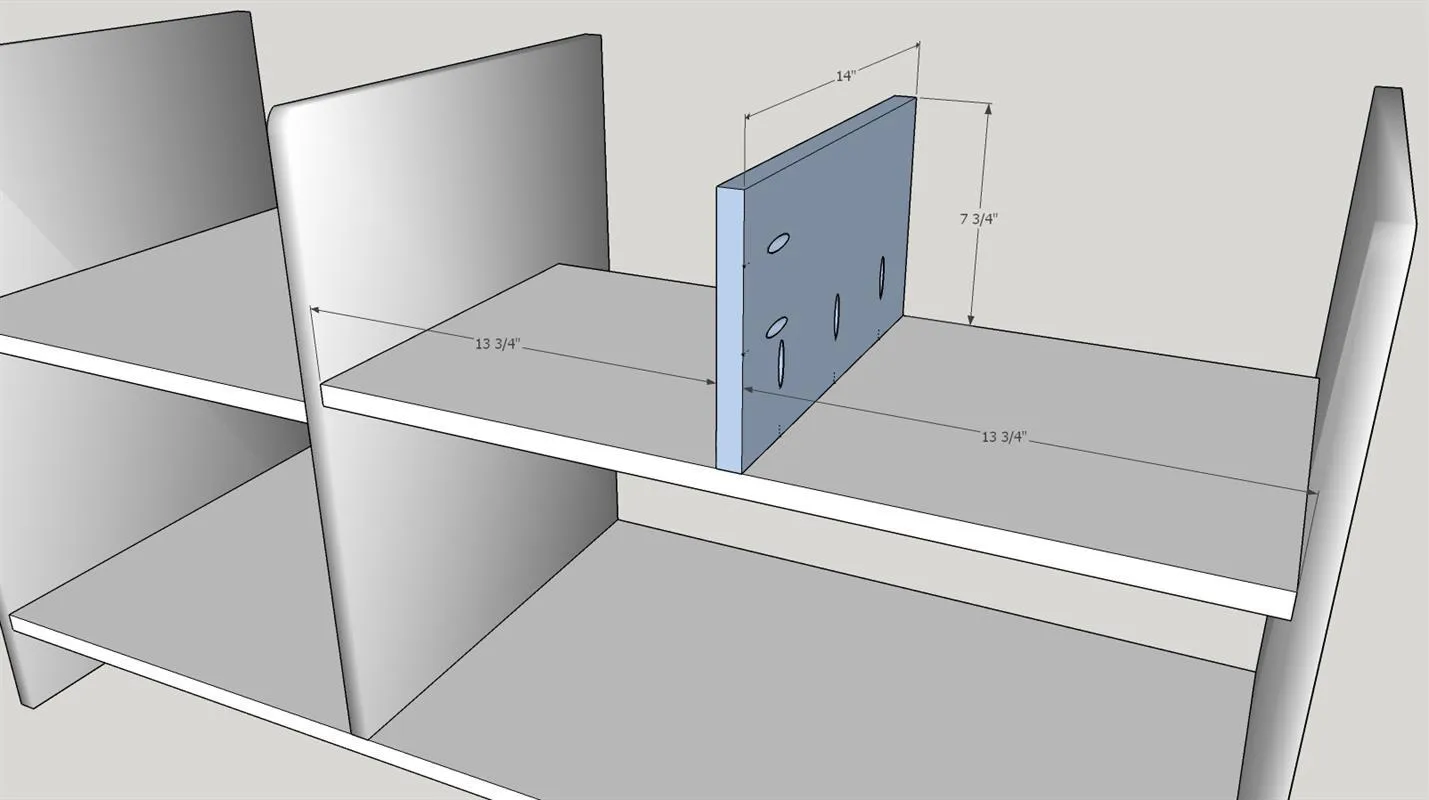
4Attach Record Display Mid Piece
Attach the RECORD DISPLAY MID PIECE in the center of the RECORD DISPLAY BASE (13-3/4" from each side). Secure with wood glue and 1-1/4" pocket hole screws.
5Attach Record Display Backs
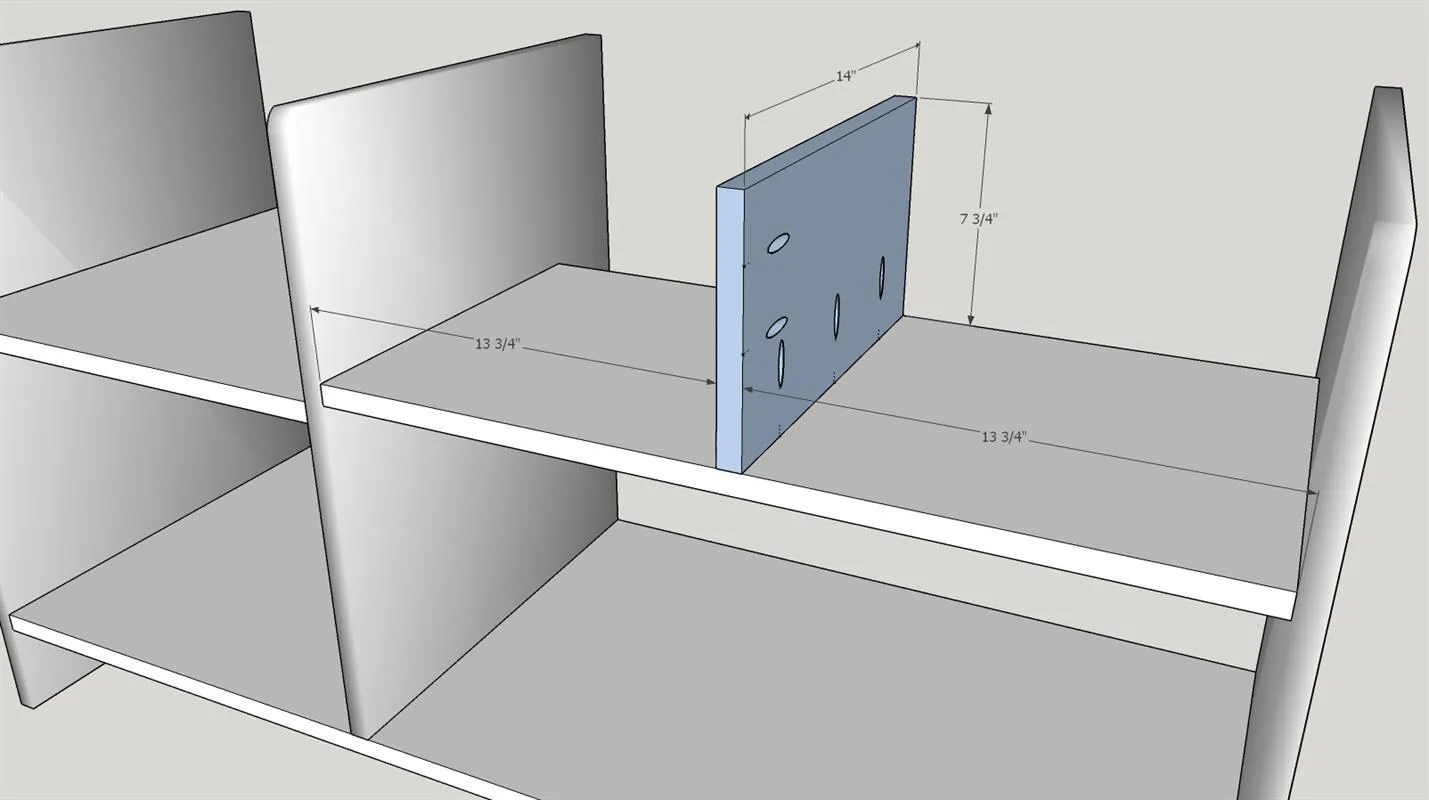
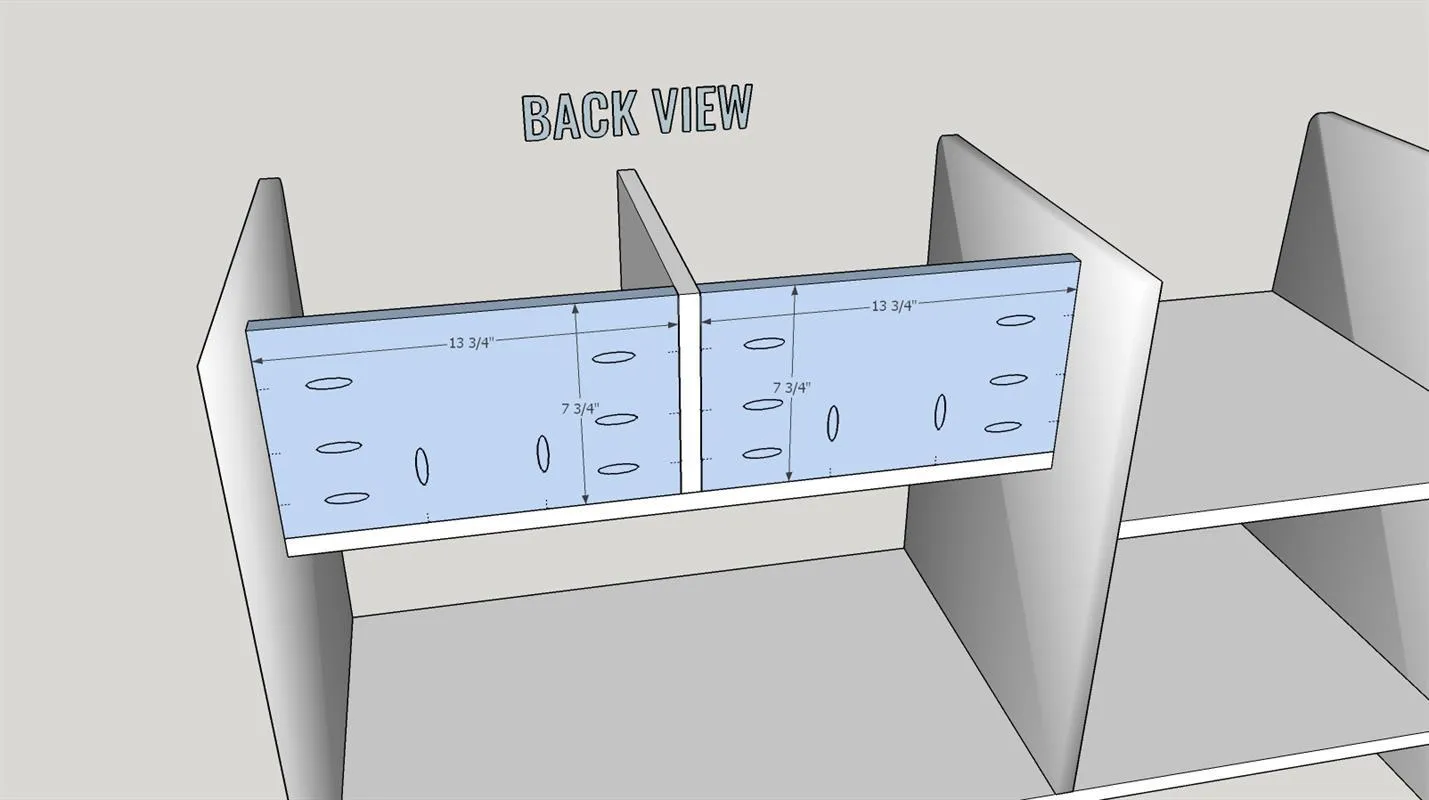
- Drill pocket holes as shown on the RECORD DISPLAY BACKS. Offset the holes that screw into the RECORD DISPLAY MID PIECE so that they don't run into each other when assembling.
- Attach with wood glue and 1-1/4" pocket hole screws.
6Attach Left Top Piece
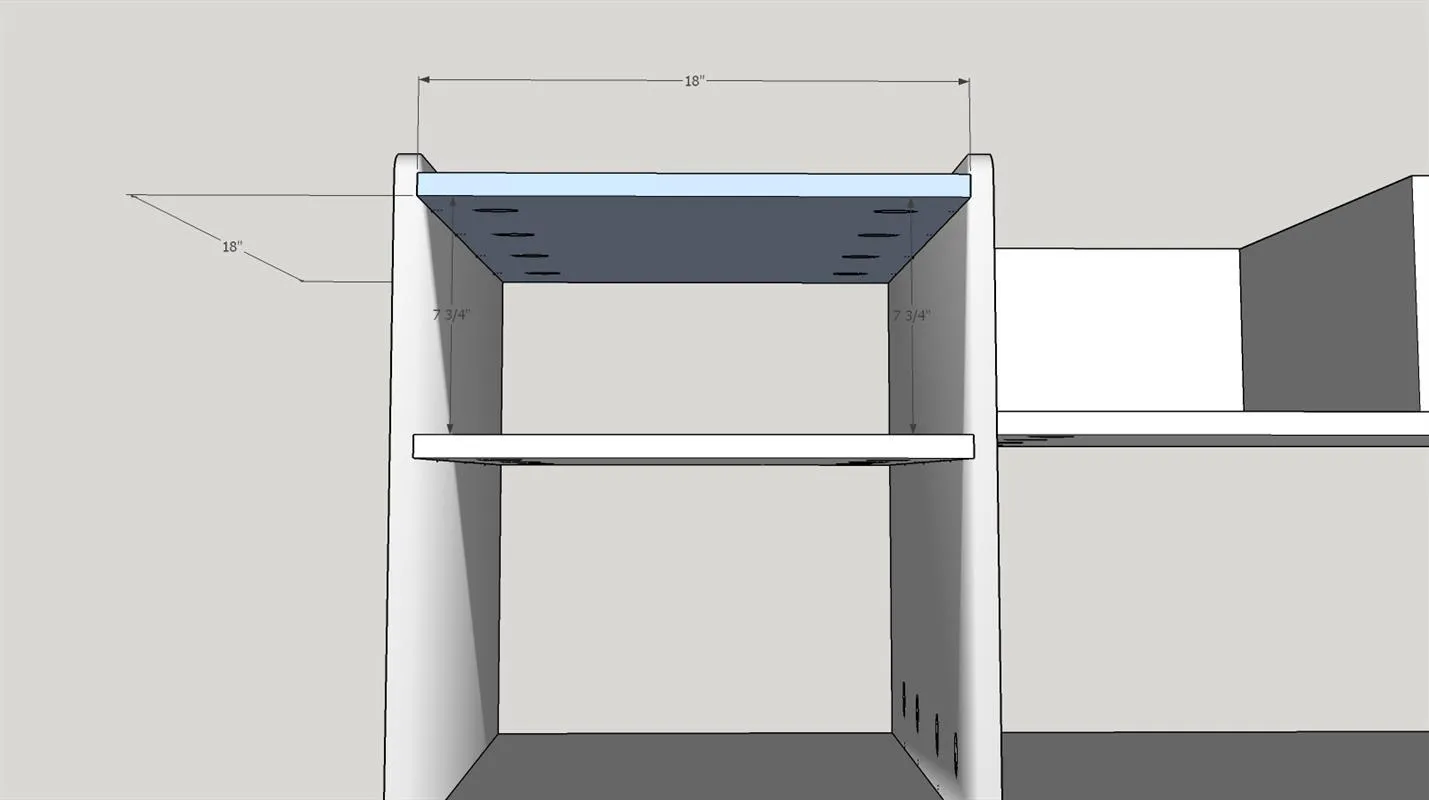
Drill pocket holes on the underside of the TOP LEFT piece and attach 7-3/4" from the shelf location below with wood glue and 1-1/4" pocket hole screws.
7Attach Back Top Piece
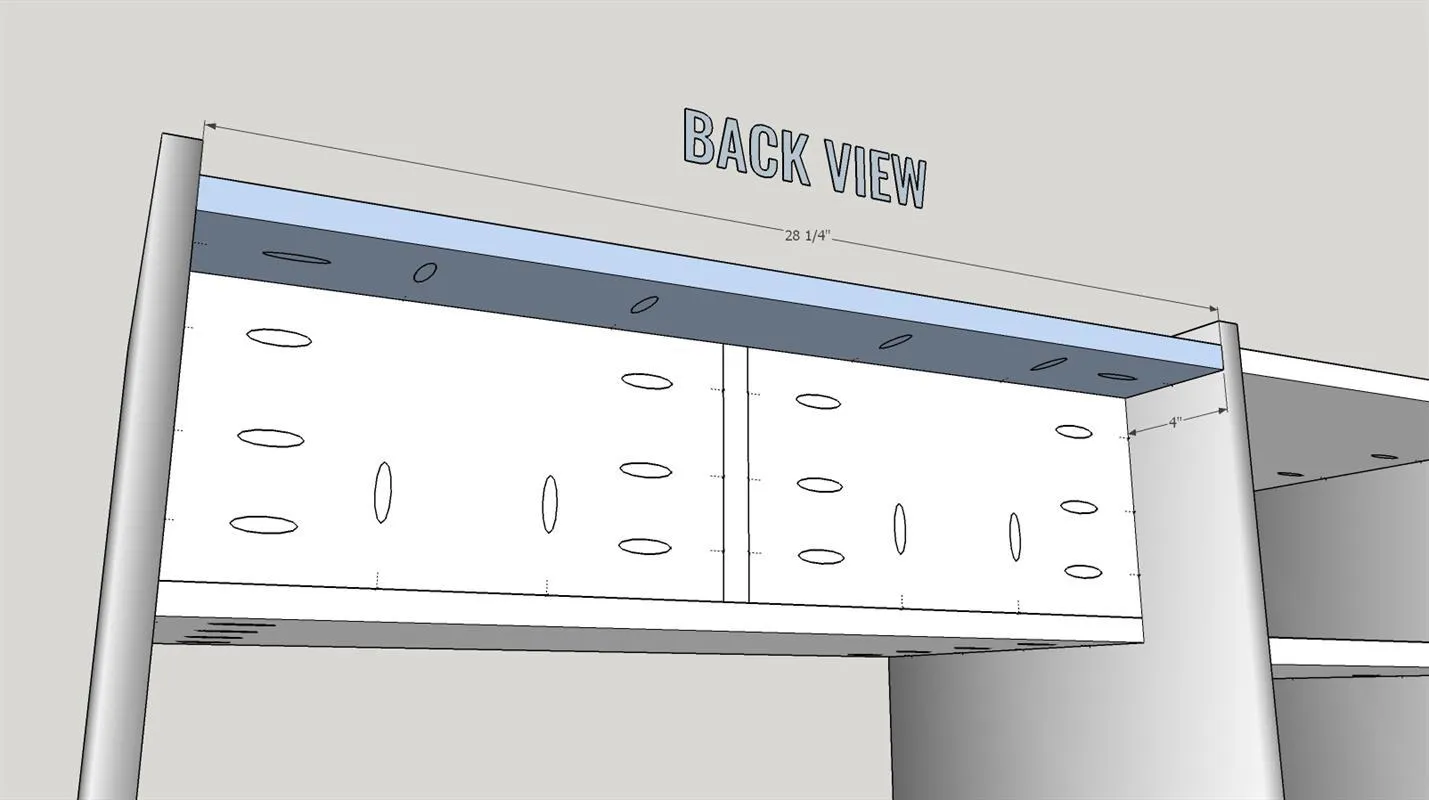
Drill pocket holes in the approximate locations indicated on the diagram of the BACK TOP PIECE. Secure to the RECORD DISPLAY BACK PIECES and the sides of that area with wood glue and 1-1/4" pocket hole screws.
8Attach Record Holder
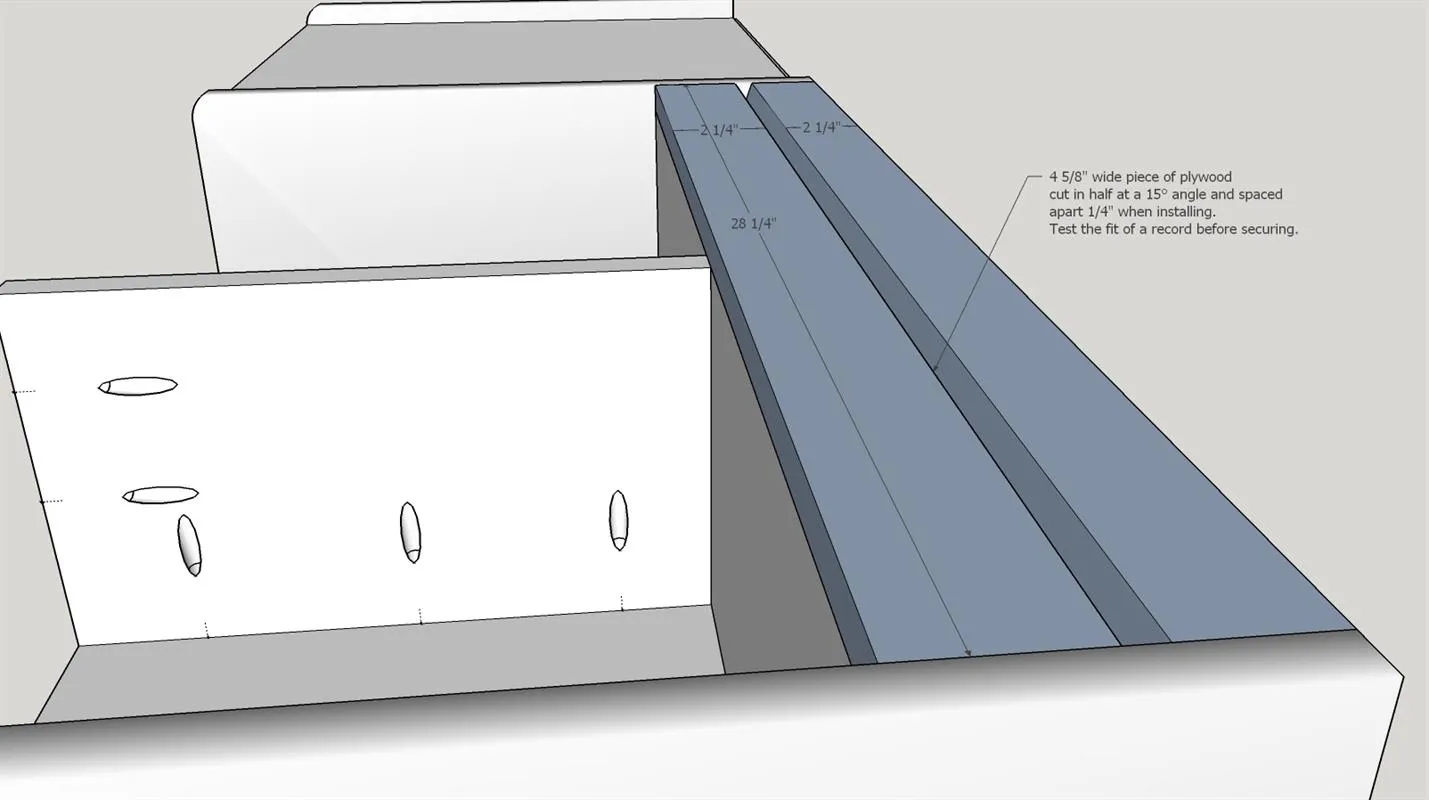
- Rip RECORD HOLDER PIECE approximately in half as shown on the diagram. Table saw blade should be set to 15°.
- Leave a gap of about 1/4" between the boards when installing.
- Test a record before securing to make sure it fits. Secure with wood glue and 1-1/4" brad nails.
9Attach Back Panel
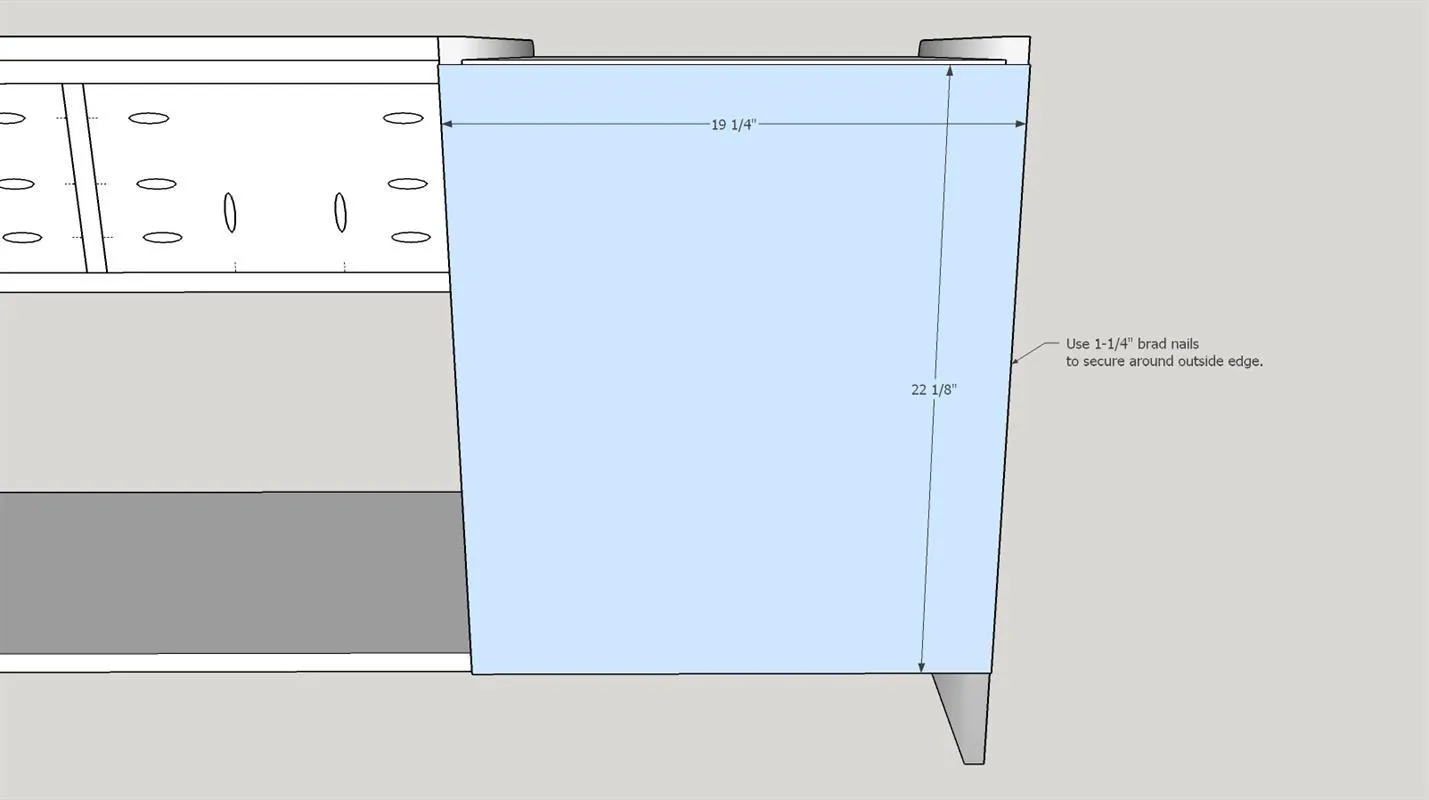
Attach 1/4" plywood BACK PANEL using 1-1/4" brad nails.
10Attach Record Front & Door
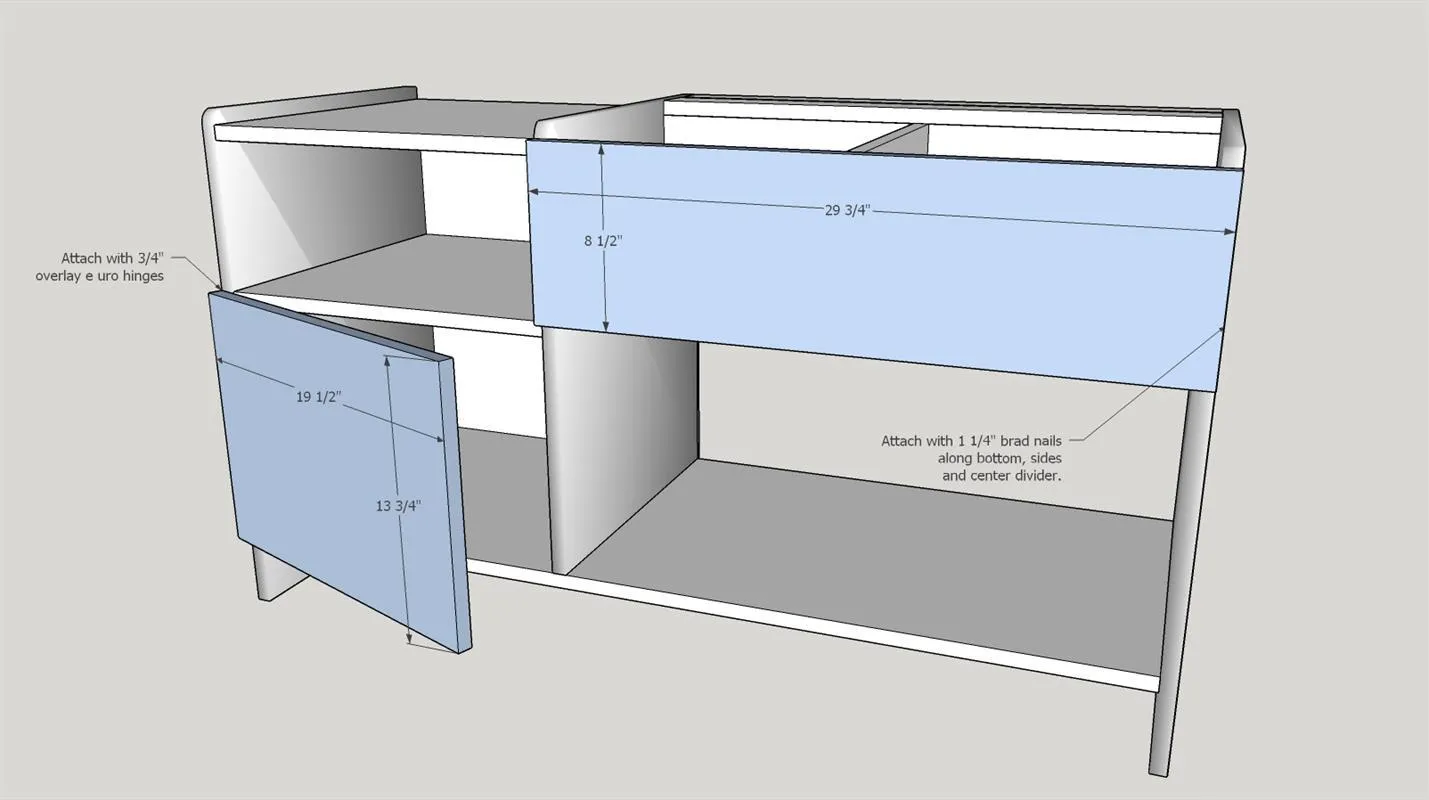
- Attach RECORD DISPLAY FRONT using wood glue and 1-1/4" brad nails along the sides and bottom.
- Also, attach from the rear using the two pocket holes you drilled into the RECORD DISPLAY MID PIECE using 1-1/4" pocket hole screws. Using your Kreg Concealed Hinge Jig, drill holes approximately 2" from the top and bottom of the door. Mount door to left SIDE using concealed Euro hinges. You can also use alternative hinges but will need to follow the manufacturer's instructions for those specific hinges.
11Add Hardware
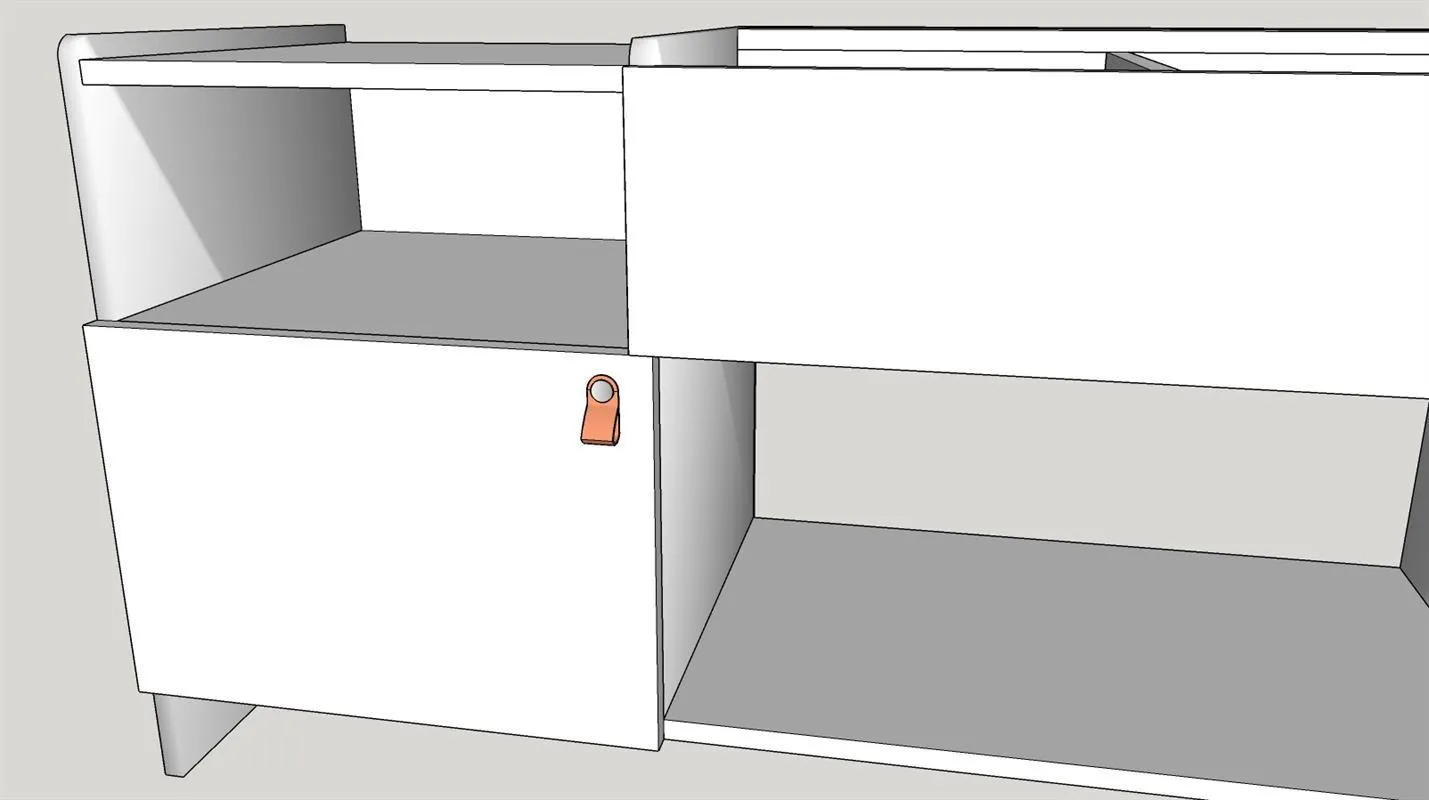
Add one knob of your choice to the upper right corner of the door.
12Sand, Stain, Seal
- Sand all edges of the piece well, you can also use a router to round-over the edges before sanding.
- Fill any voids in the plywood layers with stainable wood filler.
- Stain your color choice, and seal using satin polyurethane.