Notch
NotchRaised Planter With Built In Compost
Step-by-step build — 16 steps. Also available as a print sheet.
1Lateral Frame Support
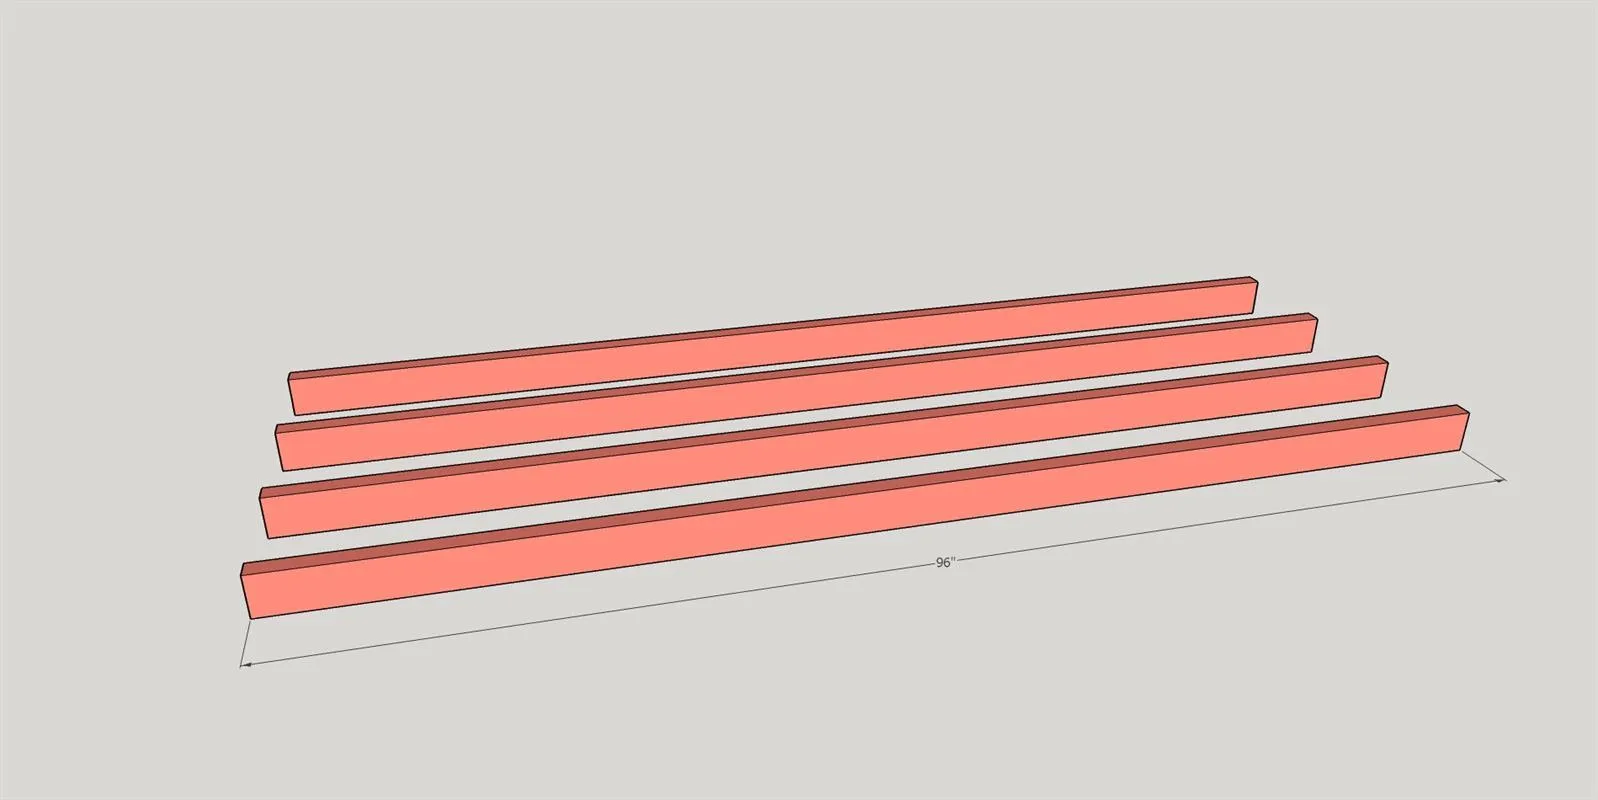
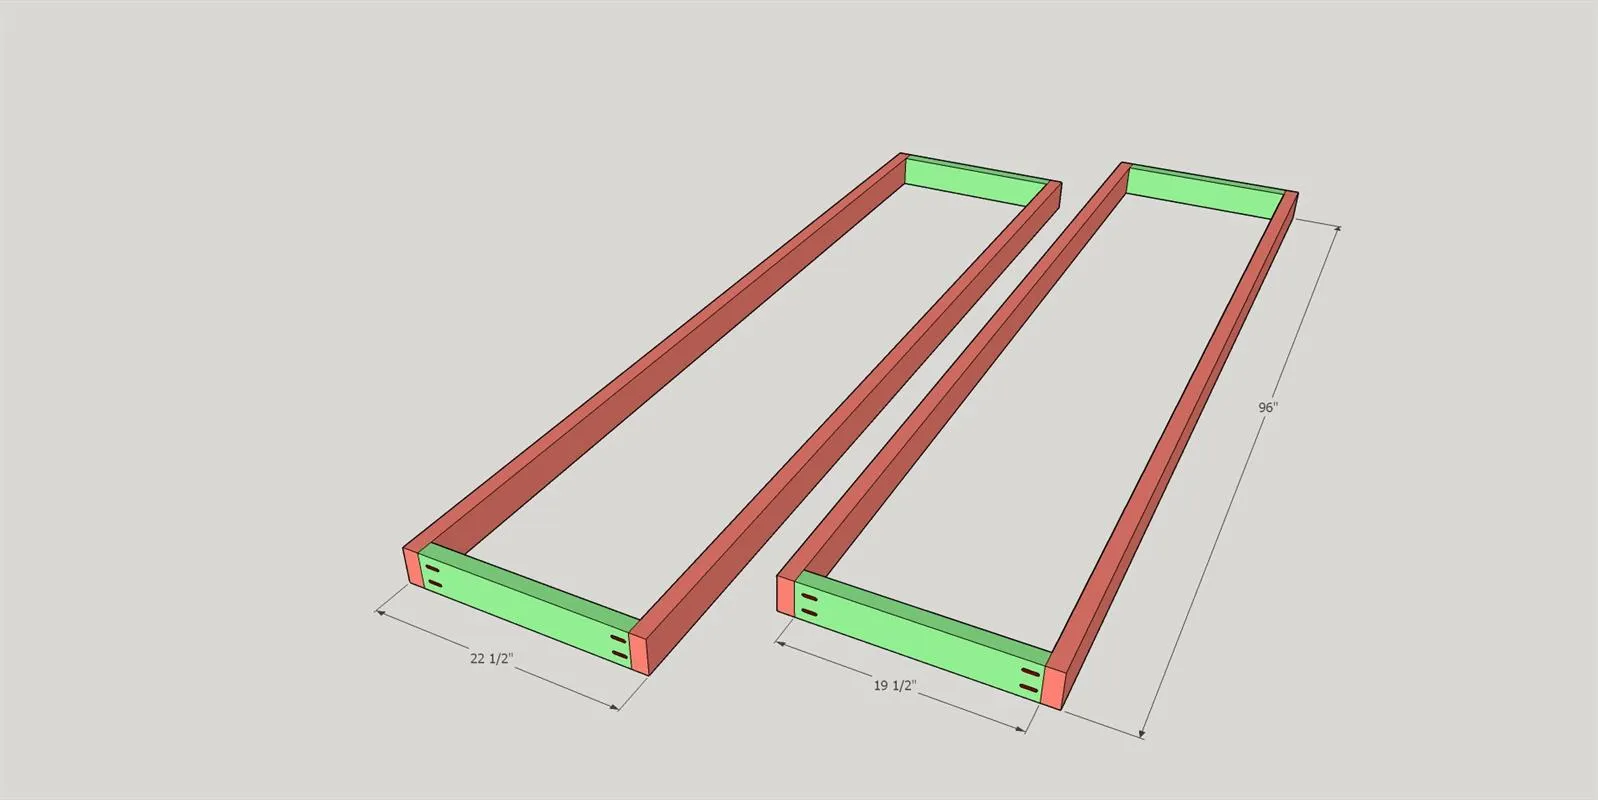
Trim down any excess on four of the straightest 2x4's to 96" for the lateral frame supports.
2Cut Cross Braces
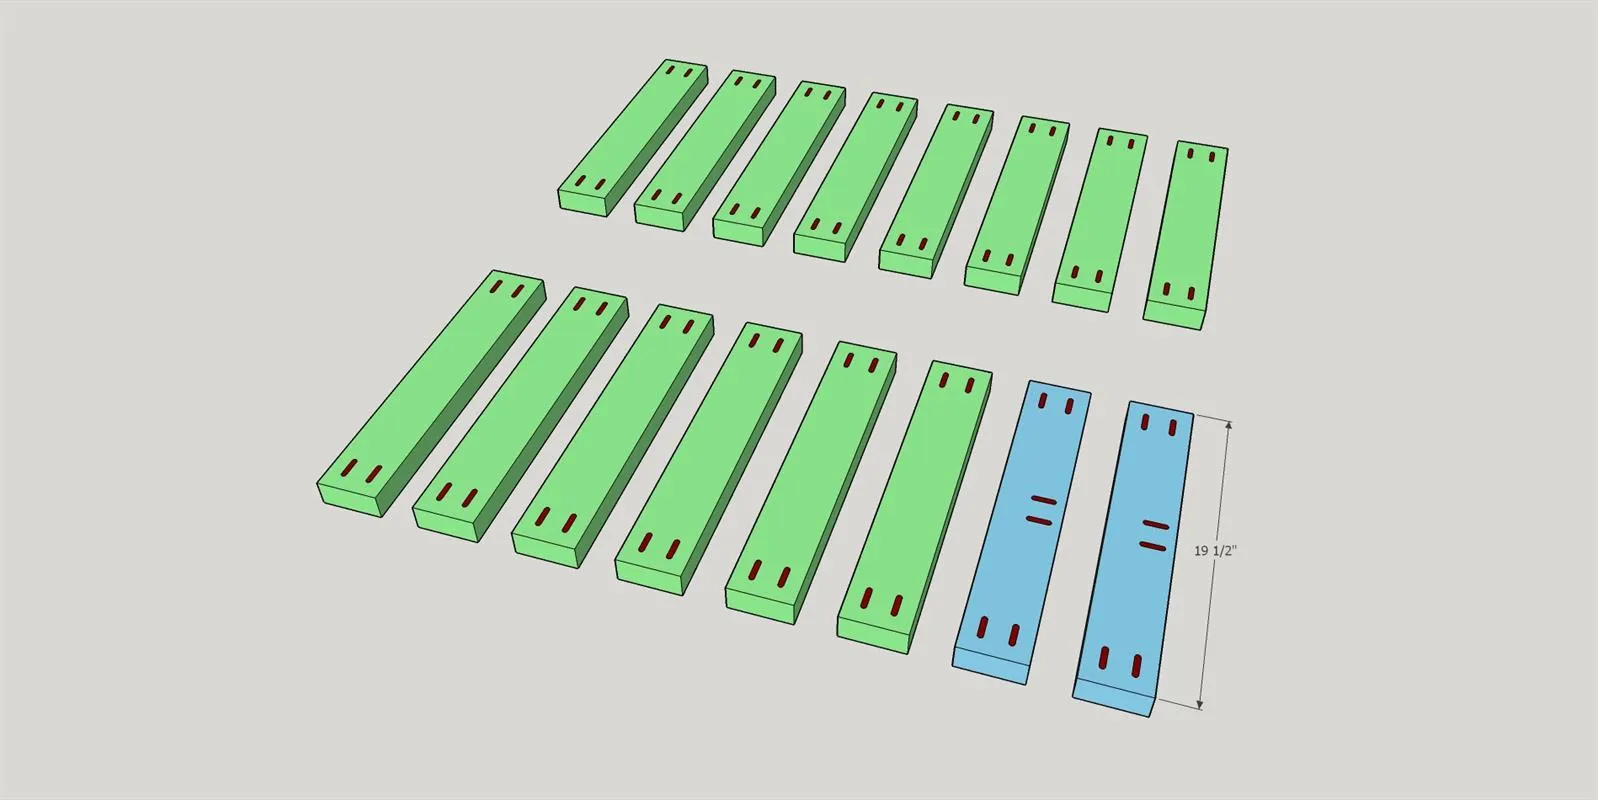
- Cut 16 2x4's to 19.50".
- Then pre-drill a pair of 1-1/2" pocket holes into both ends of each board using your Kreg Jig. On two of those cross braces, add a pair of inward facing 1-1/2" pocket holes on center that will be used to support the center post.
3Cut Vertical Spacers
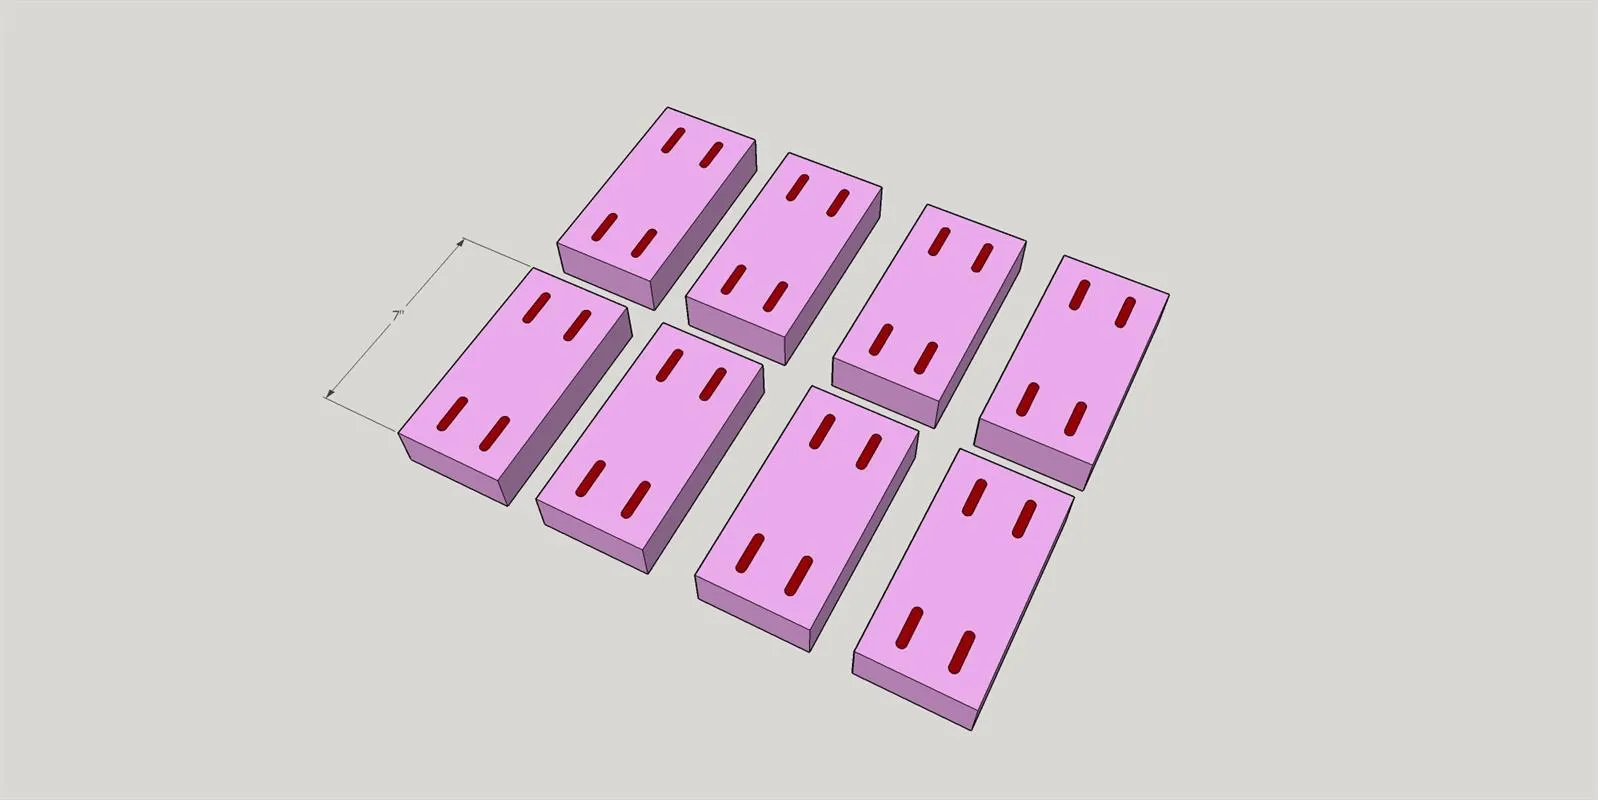
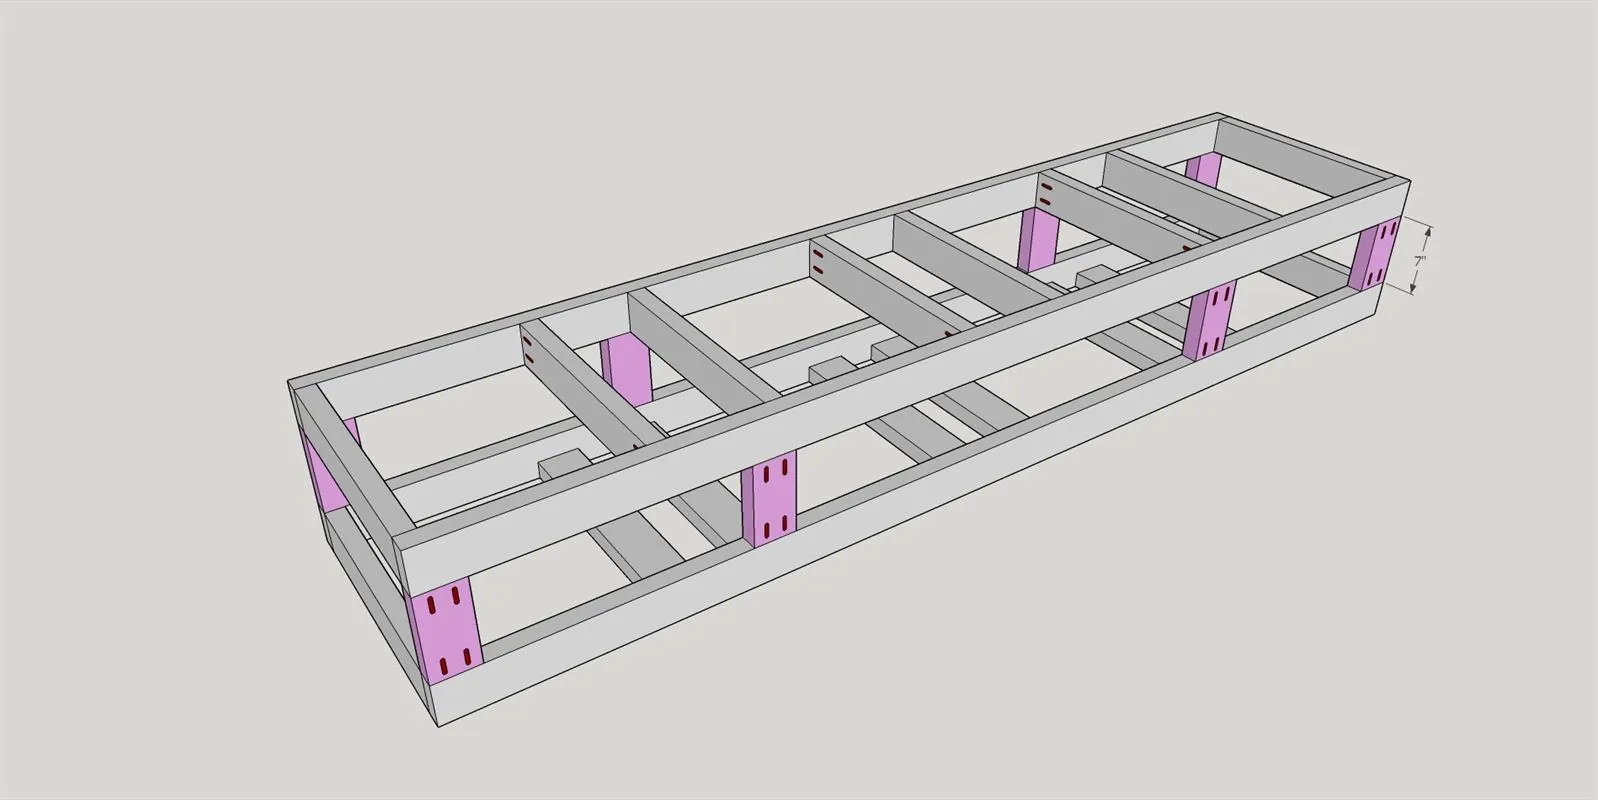
Cut eight 2x4's to 7" for the vertical spacers that will separate the top and bottom frames. Using your Kreg Jig, Pre-drill a pair of 1-1/2" pocket holes into each end.
4Assemble Frame
Using the pre-drilled 1-1/2" pocket holes, assemble two rectangular frames with the 96" lateral supports and the 19.50" cross braces using 2-1/2" Blue Kote Screws. Make sure to point your pocket holes outward for easier attachment.
5Assemble Inner Frame
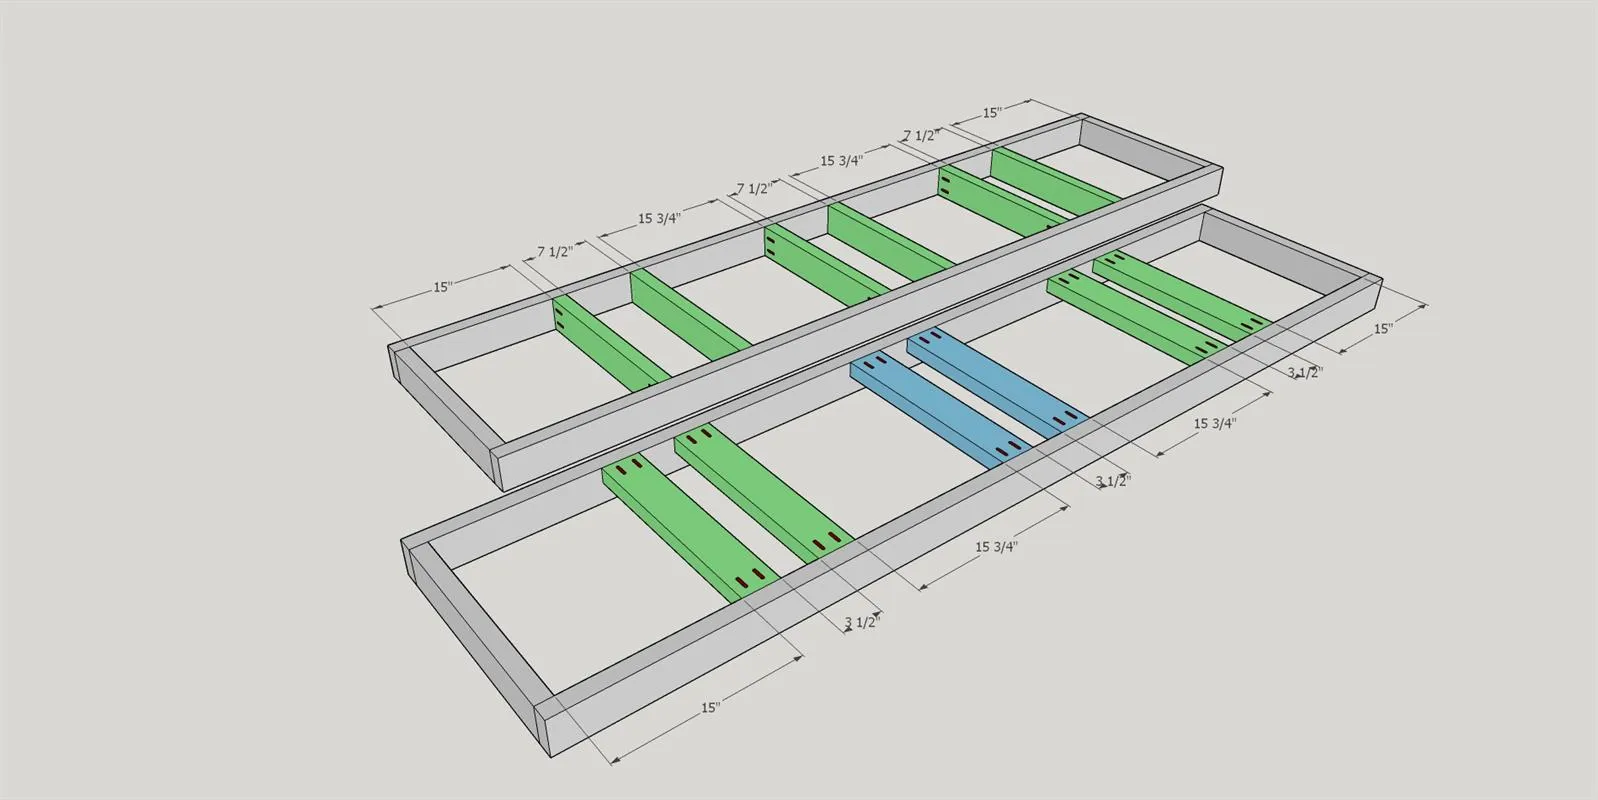
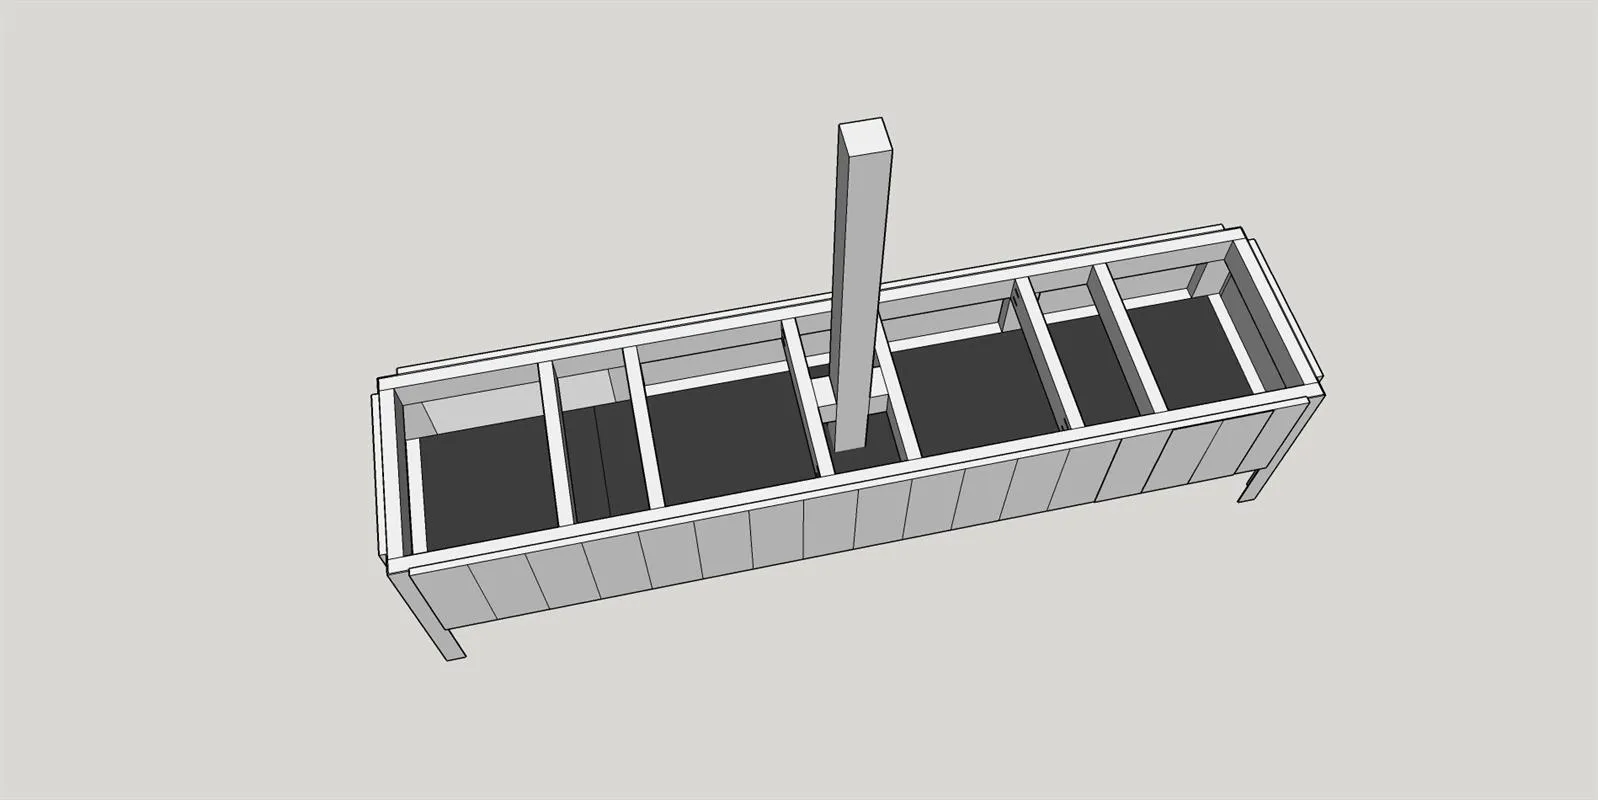
Using the 12 pre-drilled 19.50" cross braces, assemble the inner frame using 2-1/2" Blue Kote Screws. The bottom frame (pictured closest) will be assembled upside down the with cross braces mounted horizontal and flush with the frame bottom. The top frame will have the cross braces mounted on their sides. Take note of the spacing: outside boxes 15", middle boxes 15.75". Spacing between cross braces on bottom frame 3.50". Spacing between cross braces on top frame 7-1/2". Notice the inward facing pocket holes on the blue cross braces will be facing upward to attach the post.
6Connect Frames
Flipping the bottom frame back over so the cross braces are flush with the ground, attach the top frame to the bottom frame using the 7" pre-drill vertical spacers. Make sure the pocket holes are outward facing when you attach with 2-1/2" Blue Kote screws for easier assembly.
7Add Legs
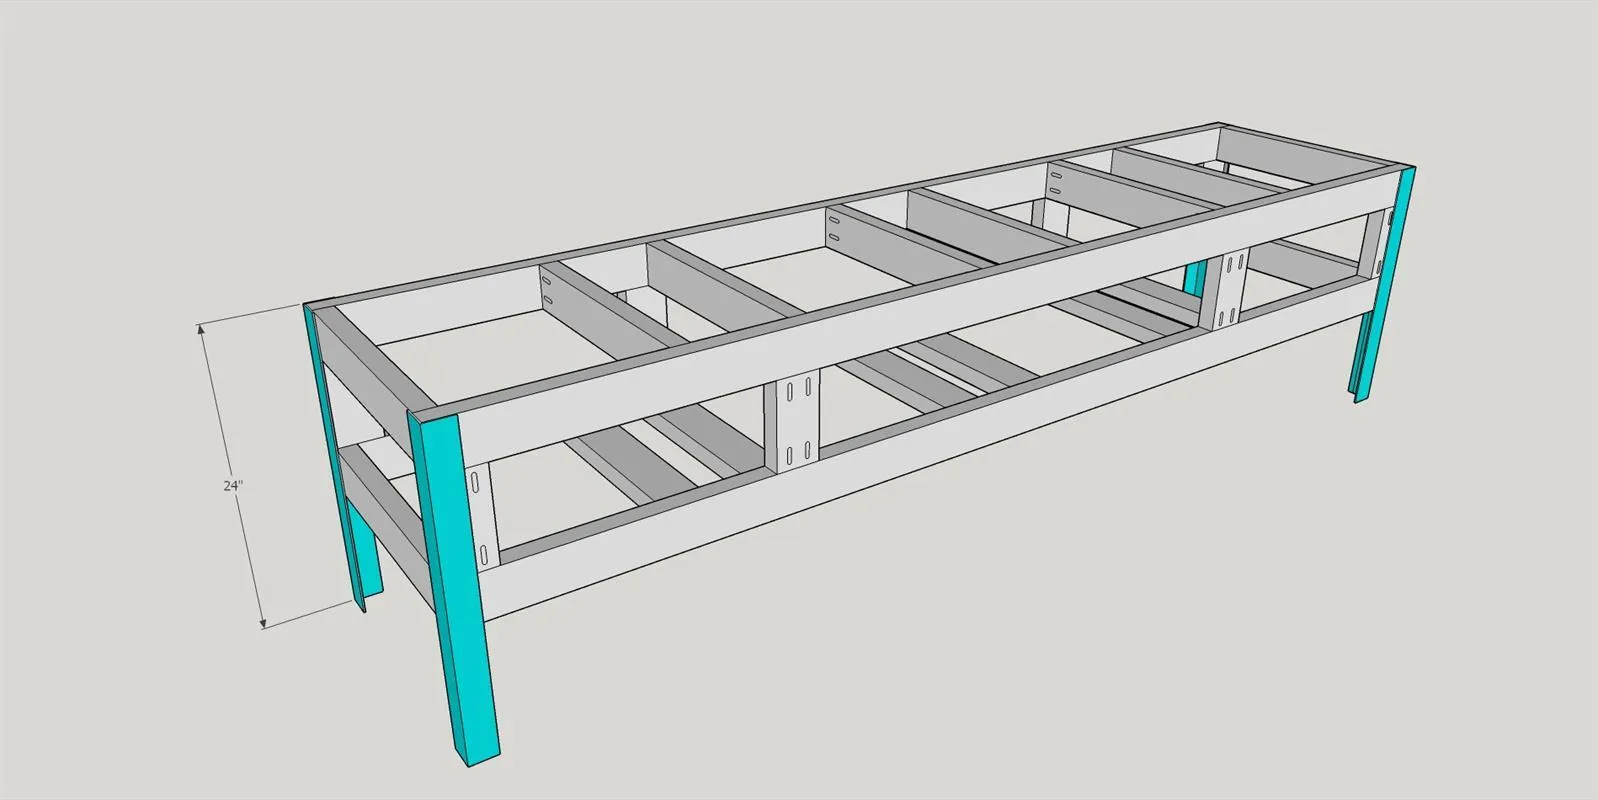
Prep the 24"x2" angle iron by sanding away the oxidation and sealing with metal specific spray paint. You can get your angle iron pre- cut or cut your own like I did with the Diablo Steel Demon Blade with a Circular Saw. Pre-drill pilot holes with a metal safe drill bit and then attach to the frame using the 2" lag screws.
8Add Cedar Siding
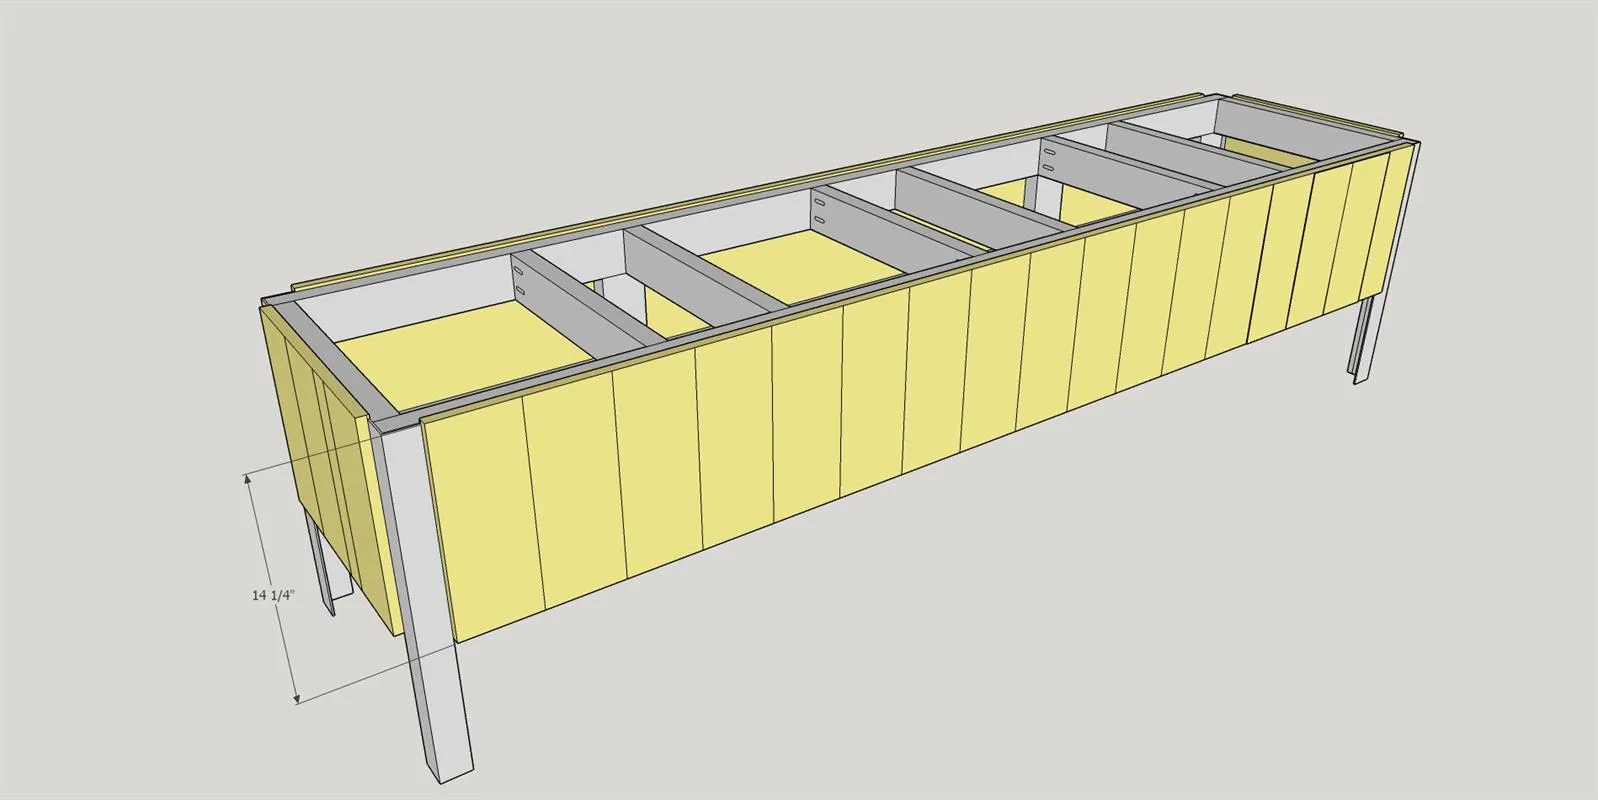
Cut 41 pieces of cedar fence plank to 14.25". Pre-drill a pilot hole (because they'll split) and attach to frame using 1-1/2" decking screws. I used 17 planks per each long side and left about 1/4" overhang on the top. On the short sides I did have to trim down a smaller piece to fill a short gap.
9Add Center Post
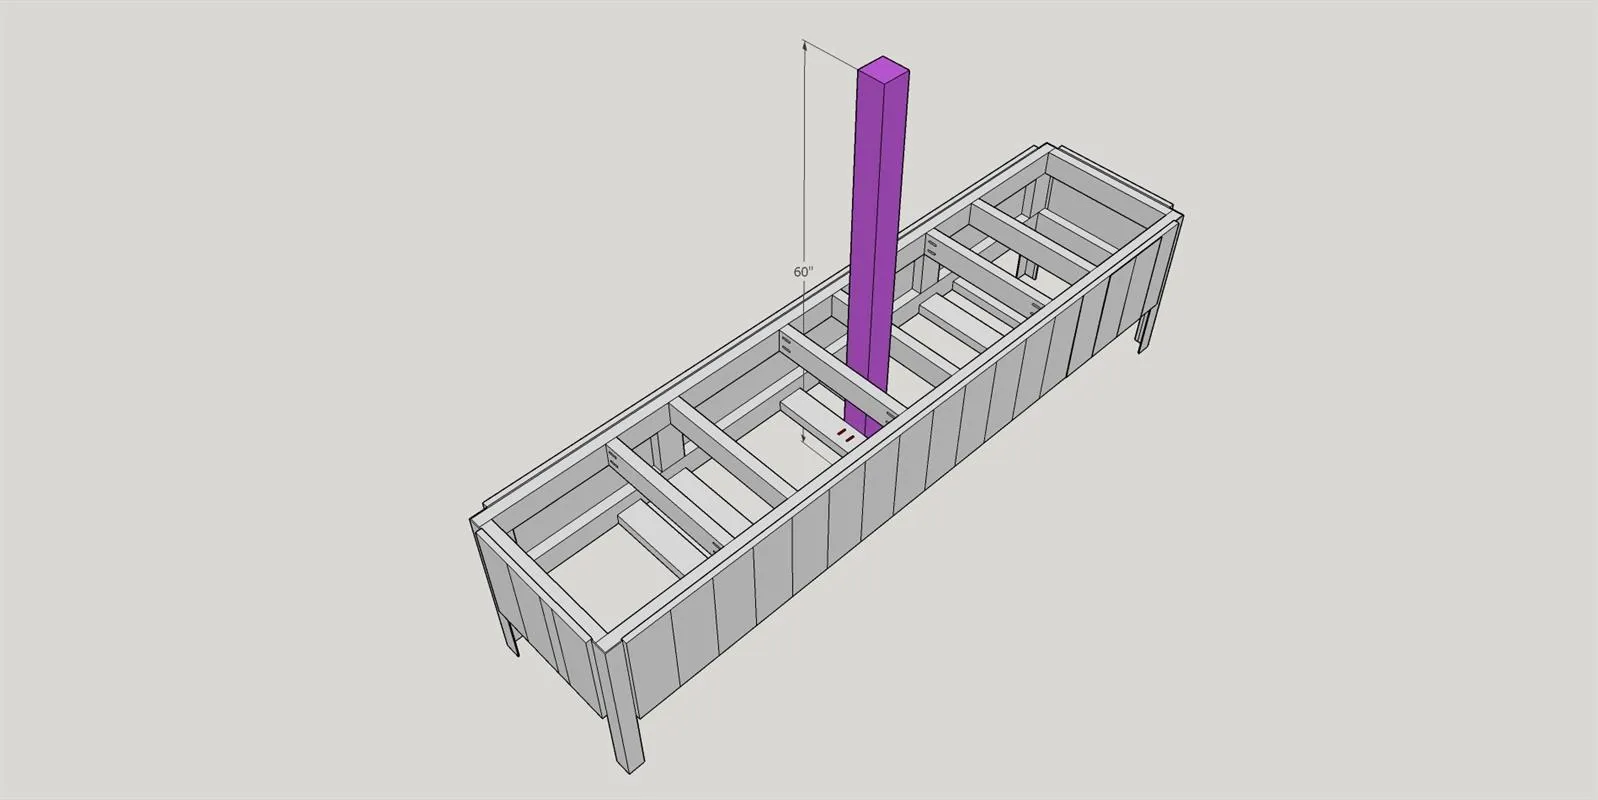
Cut the pressure treated 4x4 to 60" and then center and attach using the pre-drill pocket holes and 2-1/2" screws on the center cross braces.
10Add Post Spacers
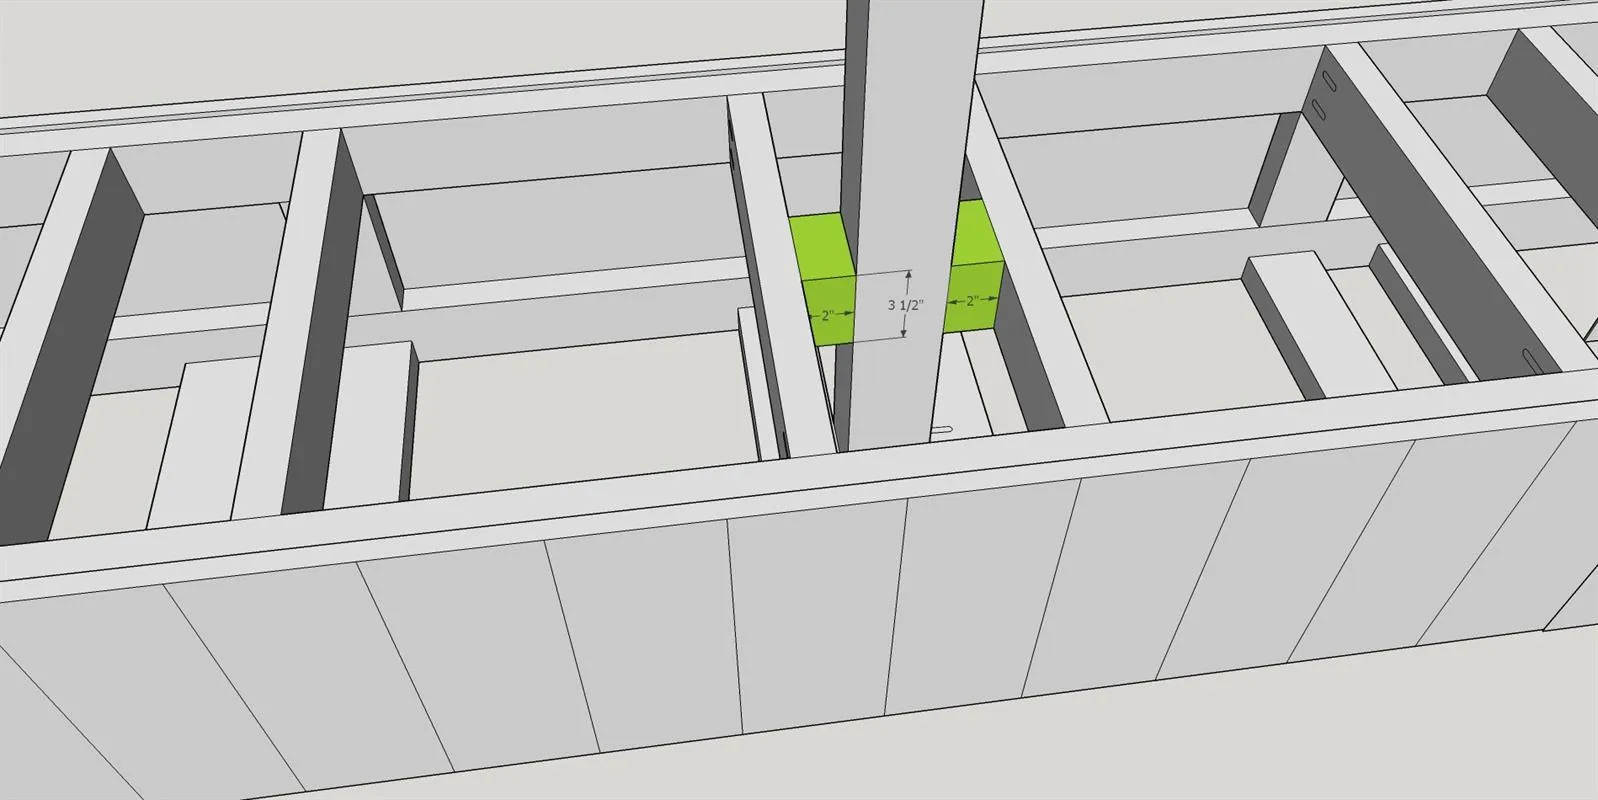
Cut two 2" blocks off the scrap leftover from the 4x4 and use it as a spacer between the top cross braces and the center post. Use a level to make sure the post is straight. Toenail the block to the post with 2-1/2" screws and then attach the space blocks to the cross braces.
11Add Bottom Supports
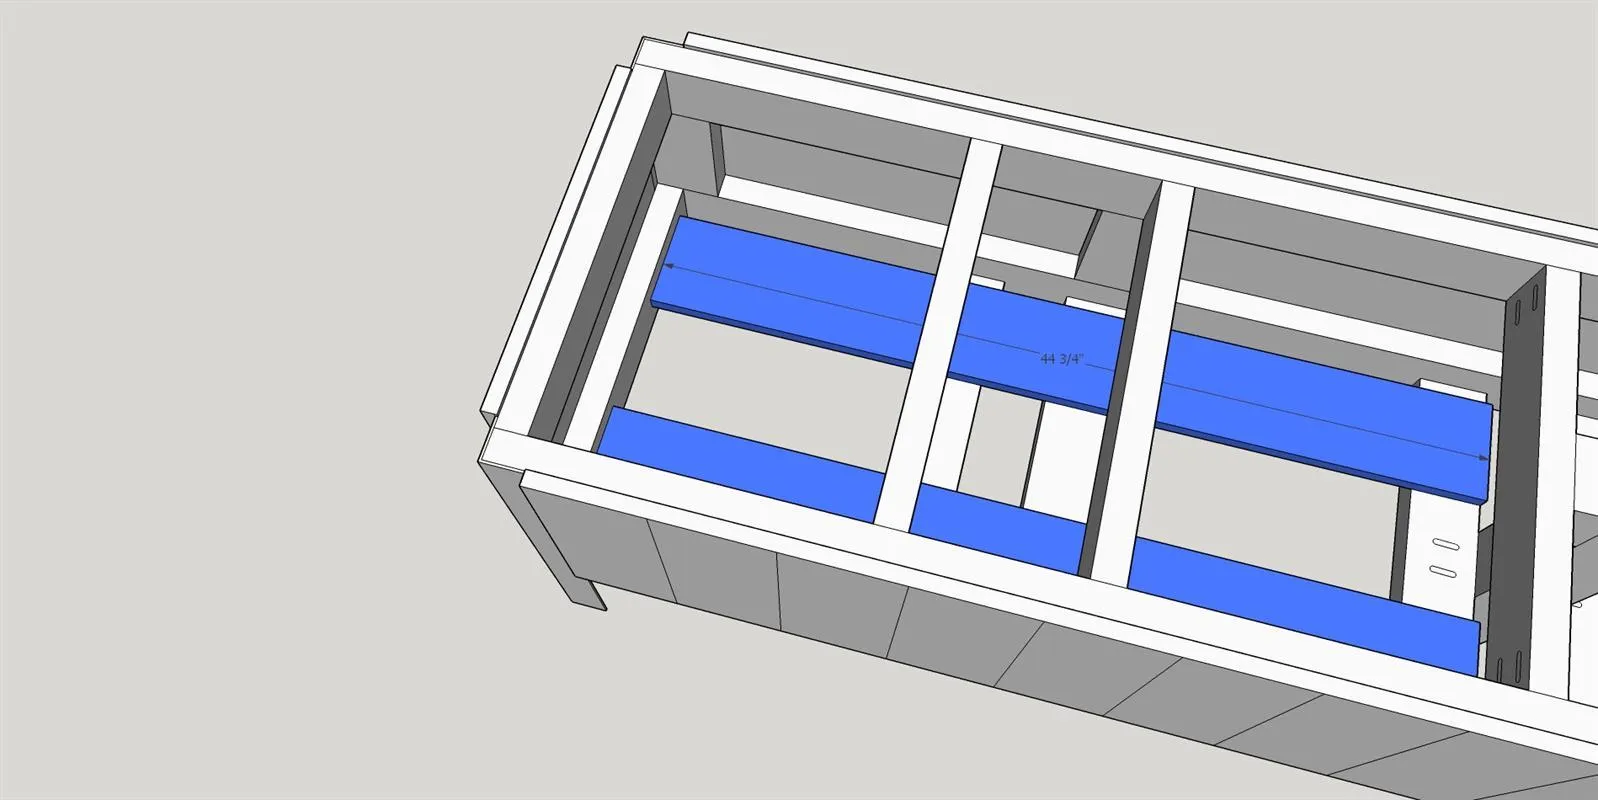
Cut four pieces of cedar fence picket to 44" and attach to the bottom cross braces to add support to the liner. Pre-drill and use the 1-1/2" decking screws to attach.
12Add Liner
Cut the reinforced garden liner into panels and attach the bottom frame of the planter. I folded my garden line into 2 ply and then attached with screws. You can also try staplers or roofing nails to attach it. Just make sure you have plenty of coverage.
13Add Bin Dividers
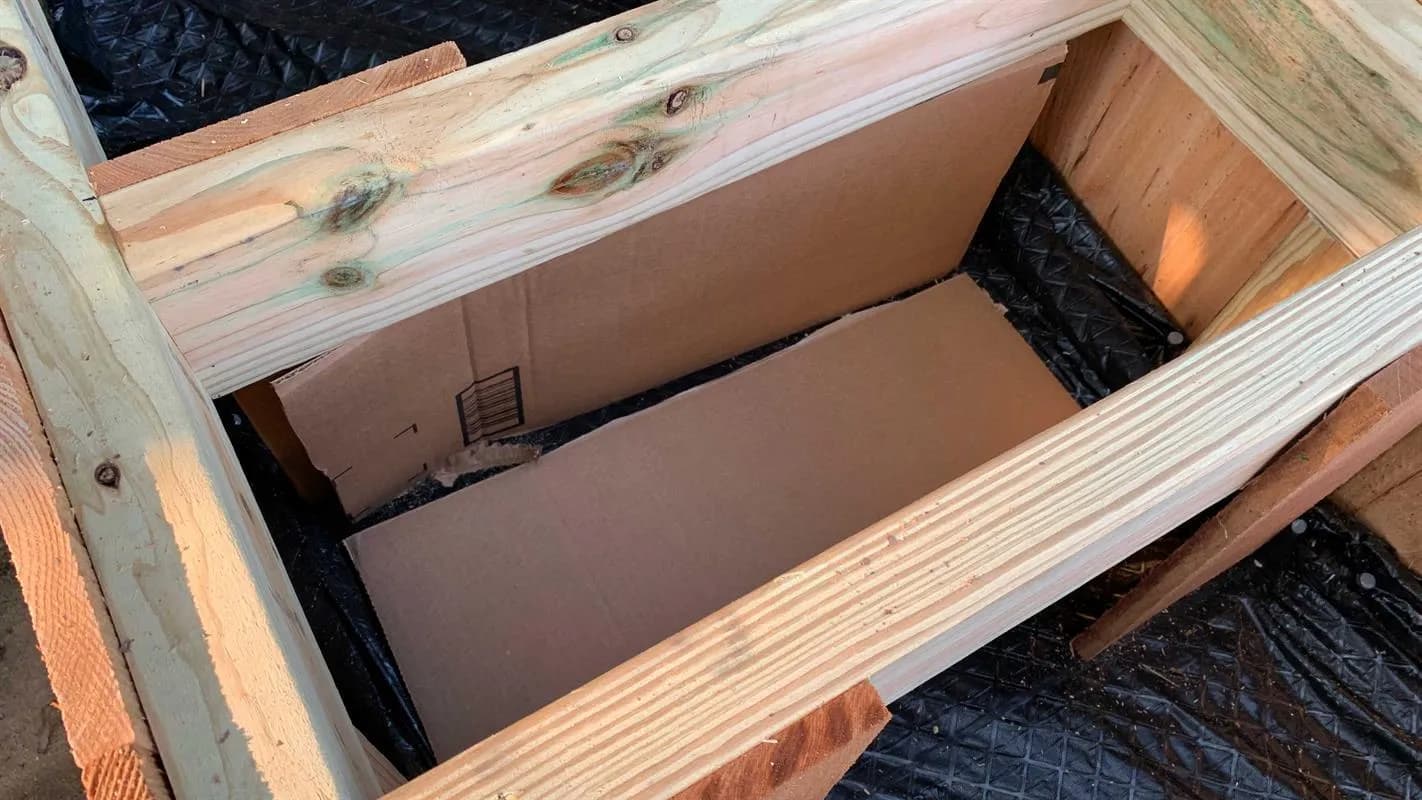
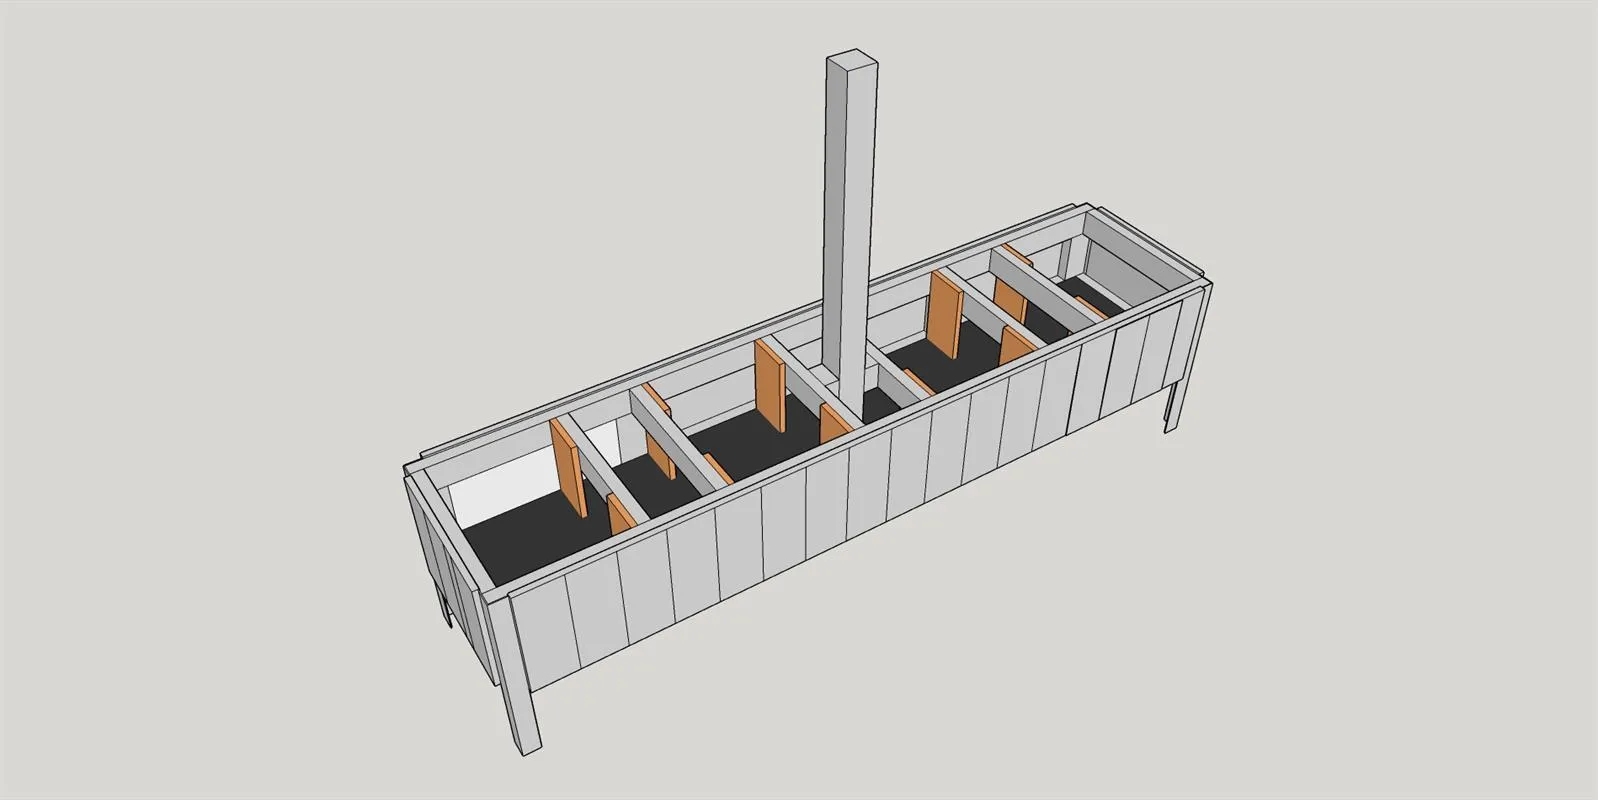
Using the remaining scrap cedar fence pickets, cut 12 pieces to 12" long and then attach on the outside of each bin divider. Be sure to pre-drill and use the 1-1/2" decking screws. I left the center open and will be closing those holes with cardboard that will act as a divider for the compost bins and degrade.
14Attach Hanging Basket Support
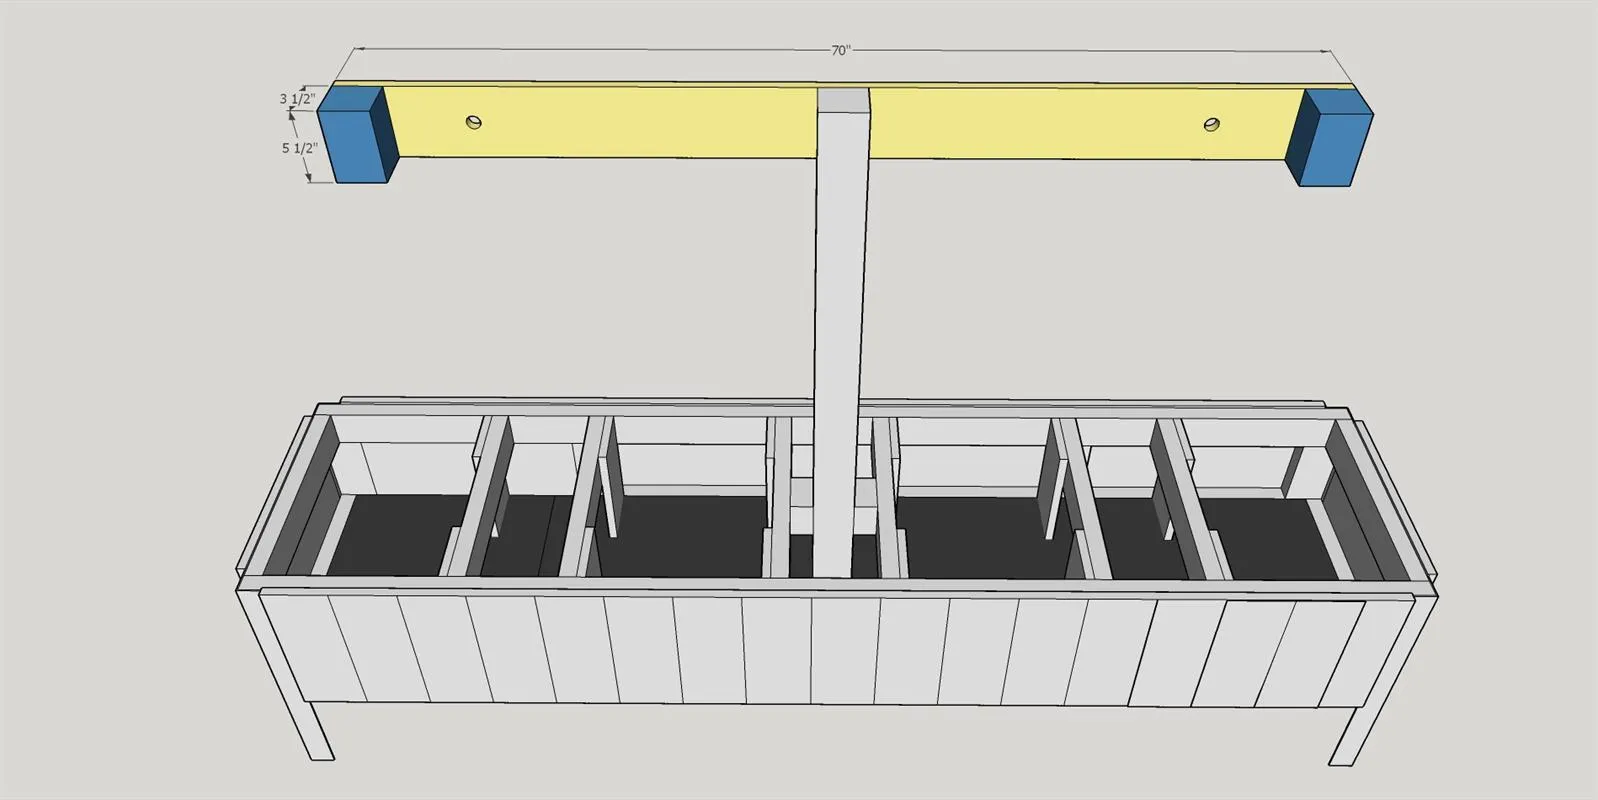
- Cut both pressure treated pieces of 1x6 to 70". Stack them and then pre-drill the 7/8" holes for the dowel rod to hold the hanging planters.
- Then cut two blocks of your scrap 4x4 to 5-1/2" and attach to the ends of one of the 1x6's using decking screws.
- Then center your 1x6 on the 4x4 beam and attach using the 2" lag screws. Be sure to pre-drill to avoid splitting.
15Attach Final Hanging Basket Support
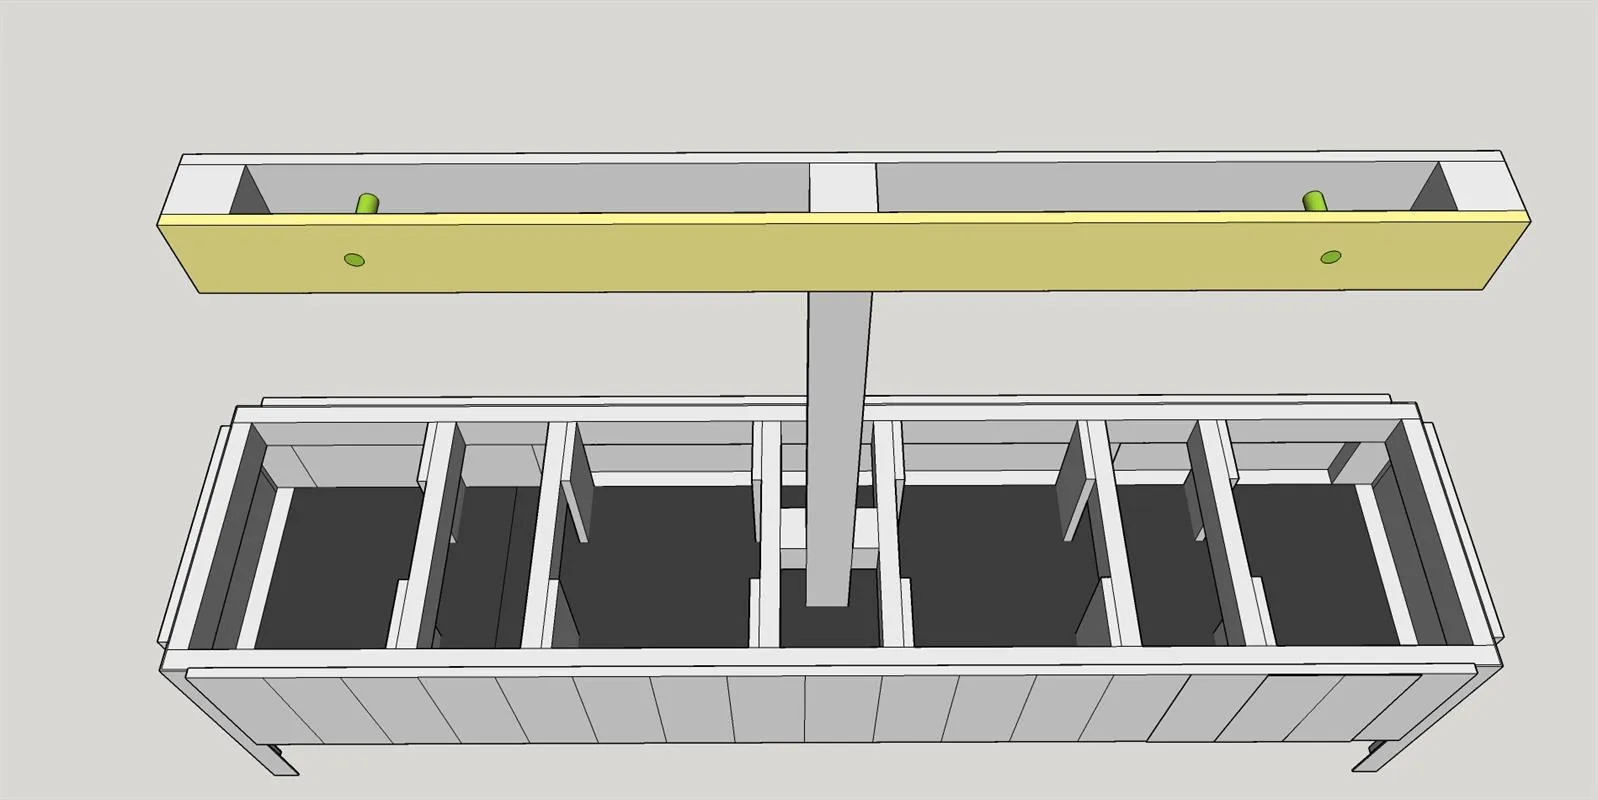
- Attach the final portion of the hanging basket support with decking nails and lag screws.
- Then drive the 7/8" dowel road through the holes.
- Cut off any extra with a hand saw. If the dowels aren't going in easily, widen the hole on only one side.
16Compost Bins
For the compost bins I just used cut up pieces of cardboard as a divider. I then added a layer of gravel, then sticks and leaves and then leftover compost dirt from my old bin. I'll continue to add and stir this compost and let it add nutrients to the planters on either side. Be sure to take note of what items you can and cannot add to compost bins to ensure best results!