 Notch
- Difficulty
- Easy
- Time
- 2–3.8 hours
- Cost
- $$
About this build
Learn how to make these easy DIY planter boxes for your front porch using the Kreg Pocket-Hole Jig 720. The black painted legs and trim add a modern style with extra contrast.
Tools
Essential
- Impact Driver
- Miter Saw
- Pocket Hole Jig
- Random Orbit Sander
- Staple Gun
Optional / nice to have
- Bar / Pipe Clamps
- Combination Square
- Tape Measure
Materials
| Item | Qty |
|---|---|
| Board, 1x4 96" | 1 board |
| Board, 2x6 96" | 1 board |
| Board, 2x6 120" | 1 board |
| Board, 2x2 96" | 1 board |
| Kreg Blue-Kote WR pocket screws (1 1/2") | 100 each |
| Quart black exterior paint | 1 each |
| Plastic Wood X wood filler | 1 each |
Overall cost: $$. Lumber prices vary by region, species, and season, so we give a band rather than a figure we would only be pretending to know.
Cut list
| Part | Qty | T × W × L |
|---|---|---|
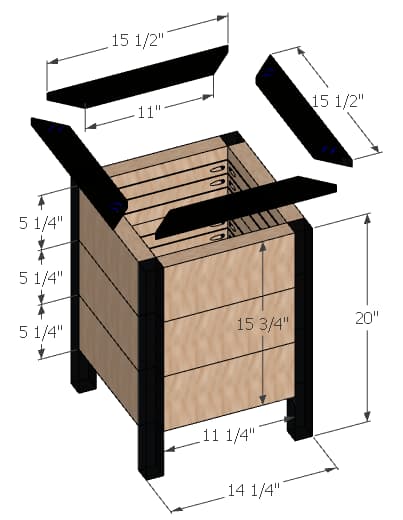
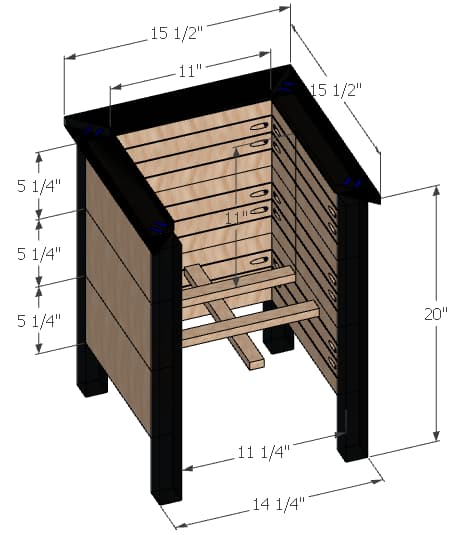
| Top Trim | 4 | 11/16" × 3" × 15" |
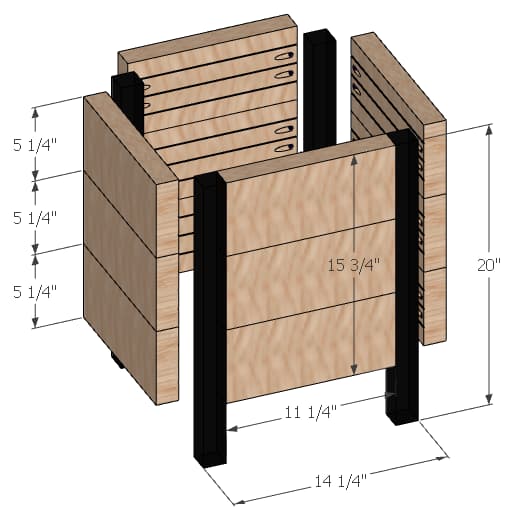
| Side Pieces | 12 | 1" × 5" × 11" |
| Legs | 4 | 1" × 1" × 20" |
| Slats on inside | 3 | 1" × 1" × 11" |
What to buy
Buy 5 boards at 8 ft.
1" × 5"
2 boards
1" × 1"
2 boards
11/16" × 3"
1 board
Assumes 8 ft stock, a 1/8" saw kerf, and buying each part at its own width. Change the board size or kerf on the full board plan →
Instructions
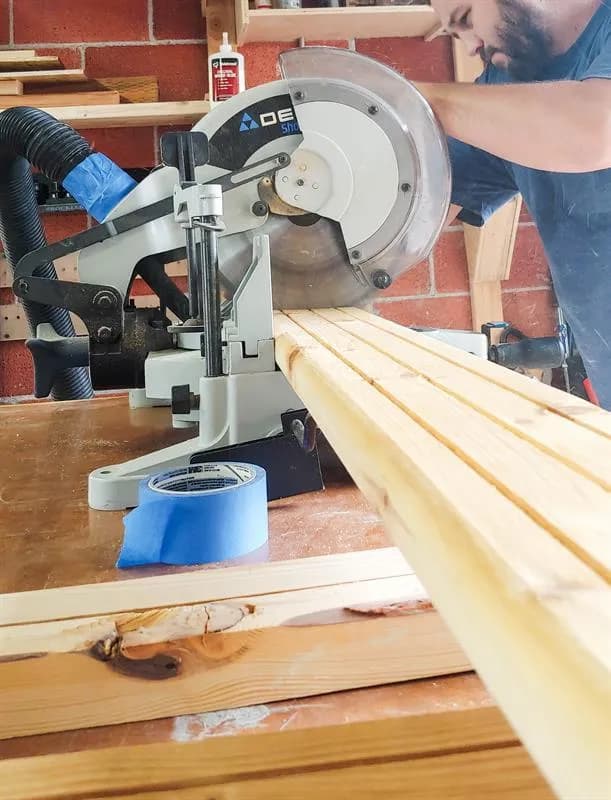
1Cut wood to size
- Cut wood to size using miter saw. Refer to attached plans for cut list with sizes.
- Sand any wood that will be painted with orbital hand sander.
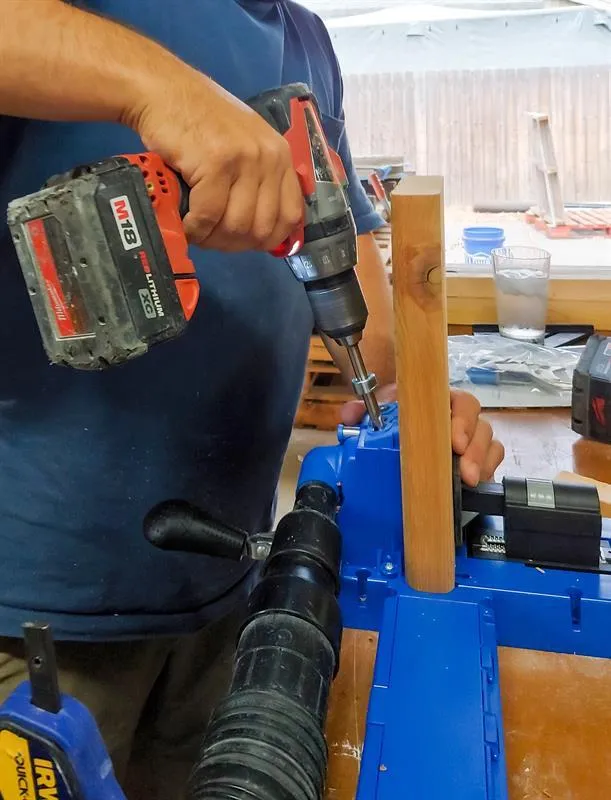
2Drill pocket holes
Using the Kreg Jig system, drill 2 pocket holes on the edges of each side piece.
3Assemble sides
Put sides together into box by attaching to legs. Prepaint legs before assembly if desired.
4Add top trim
The trim is made from cedar that is three inches side and cut at 45 degree angles at the corners and connected with pocket holes on the underside. Prepaint the pieces black if desired and attach with staple gun from the top. Fill all holes with wood filler, sand and repaint black.
5Add slats
The planter pots will sit directly onto the slats so it is easy to swap out seasonally. We attached the slats (1 inch pieces of cedar) 11 inches from the top of the planter.
Tags
- Outdoor Living
- Beginner
Reviews & builds
No reviews yet
Sign in to review this plan or share your build.
No reviews yet. Be the first to build this.