 Notch
Use your browser's Print (Ctrl/Cmd + P) and choose Save as PDF. This page works offline once you've opened it with a signal.
Outdoor Sofa with Armrests
This DIY outdoor sofa is made out of pieces of 2x6 that are screwed together with pocket holes.
- Difficulty
- Beginner
- Time
- 2–3.8 hours
- Cost
- $$
Cut list
| Part | Qty | T × W × L | Material | ✓ |
|---|---|---|---|---|
| Backs/seat | 8 | 2" × 6" × 96" | — | ☐ |
| Side panels | 8 | 2" × 6" × 30" | — | ☐ |
Materials
| Item | Qty | ✓ |
|---|---|---|
| Boards, 2"x6"x12' | 8 board | ☐ |
| Boards, 2"x6"x8' | 3 board | ☐ |
| Box of Kreg Blue-Kote screws (See tools list) | 1 each | ☐ |
| Wood putty or dowels, for filling pocket holes | 1 each | ☐ |
| Outdoor stain/sealer | 1 each | ☐ |
| 24" wide cushions for sofa | 6 each | ☐ |
Overall cost: $$. Lumber varies by region, species, and season, so we give a band rather than a figure.
Tools
- Circular Saw
- Drill / Driver
- Pocket Hole Jig
- Random Orbit Sander
- Bar / Pipe Clamps — optional
Instructions
1. Cut the 2x6s
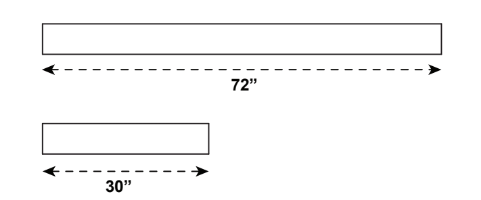
Cut 8 pieces of 2x6 at a length of 72". Cut 8 pieces of 2x6 at a length of 30".
2. Assemble the side panels
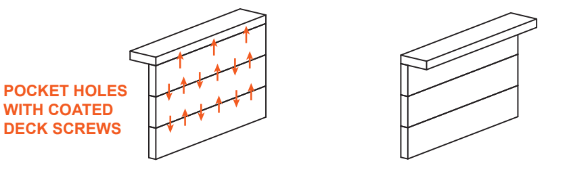
Use pocket holes to connect the pieces. I placed the holes on the inside or under side of the pieces so that they would be less visible.
3. Assemble the seat and back panels
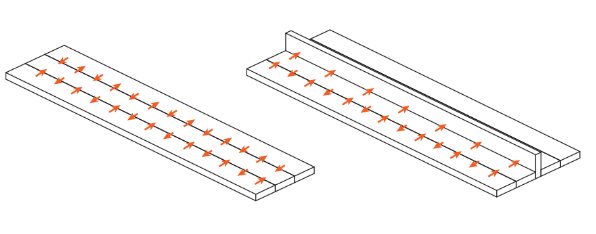
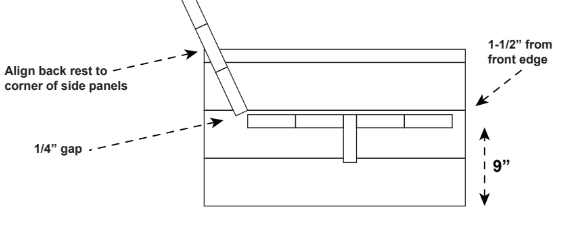
Use pocket holes to connect the pieces. I placed the holes on the inside or under side of the pieces so that they would be less visible. The seat panel has a middle piece that is perpendicular to provide strength. See image for details.
4. Add the seat panel
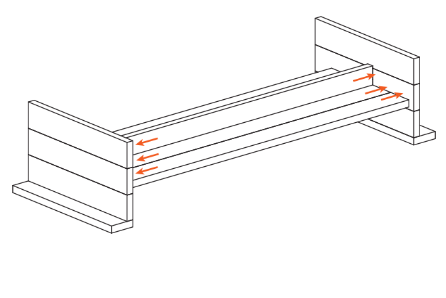
Placing the side panels upside down makes it easier to install the seat panel. I left 1-1/2" space between the front side of the side panels and the front edge of the seat panel.
5. Add the back rest
I left a 1/4" gap between the back rest and seat panel and set the angle to align with the corner of the side panels.
6. Sand if desired, and seal
Sand the sofa if desired, and then seal with an outdoor sealer. Enjoy!