 Notch
Use your browser's Print (Ctrl/Cmd + P) and choose Save as PDF. This page works offline once you've opened it with a signal.
Modern Farmhouse Square Coffee Table
Classic square coffee table with painted base and rustic stained table top complete with bottom shelf for storage.
- Difficulty
- Intermediate
- Time
- 3.5–6.5 hours
- Cost
- $$
Cut list
| Part | Qty | T × W × L | Material | ✓ |
|---|---|---|---|---|
| Legs | 4 | 1" × 1" × 17" | — | ☐ |
| Top Frame Supports | 4 | 1" × 1" × 30" | — | ☐ |
| Bottom Shelf Supports | 4 | 1" × 1" × 30" | — | ☐ |
| Angled Supports | 8 | 1" × 1" × 14" | — | ☐ |
| Bottom Shelf | 1 | 3/4" × 30" × 30" | — | ☐ |
| Table Top Center | 4 | 3/4" × 7" × 29" | — | ☐ |
| Outer Table Top Sides | 4 | 3/4" × 3" × 35" | — | ☐ |
| Table Top Center Support | 1 | 1" × 1" × 30" | — | ☐ |
Materials
| Item | Qty | ✓ |
|---|---|---|
| Plywood, 3/4" Thick Half Sheet | 1 board | ☐ |
| Board, 1x8 120" | 1 board | ☐ |
| Board, 1x4 120" | 1 board | ☐ |
| Board, 2x2 96" | 5 board | ☐ |
| Board, 2x2 48" | 1 board | ☐ |
| Box 2" Kreg Screws | 1 each | ☐ |
| Box 1" Kreg Scews | 1 each | ☐ |
| 2" Wood Screws or 1 1/4" Kreg Screws | 20 each | ☐ |
Overall cost: $$. Lumber varies by region, species, and season, so we give a band rather than a figure.
Tools
- Brad Nailer
- Drill / Driver
- Miter Saw
- Pocket Hole Jig
- Random Orbit Sander
- Bar / Pipe Clamps — optional
- Tape Measure — optional
Instructions
1. Assemble The Sides
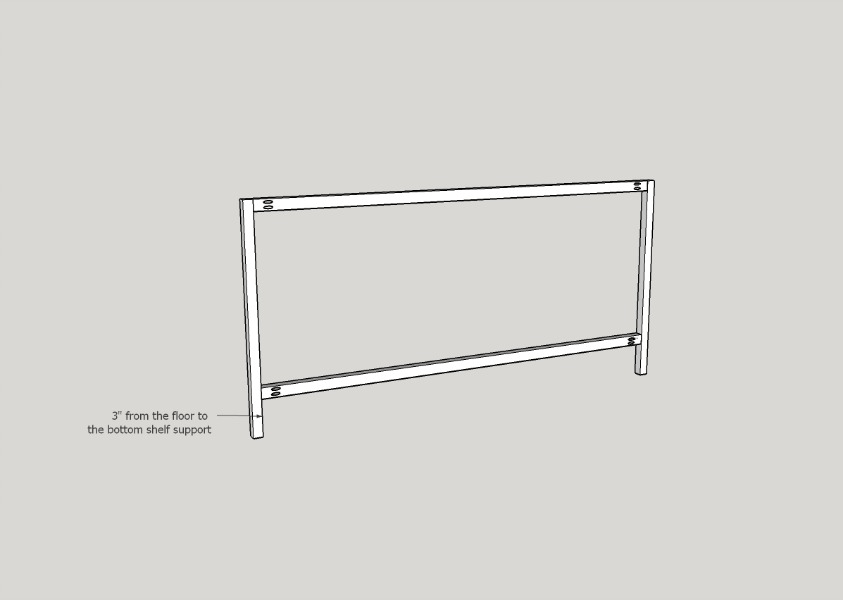
Using 2" Kreg screws, attach the top support flush with the top of the legs. Attach the bottom support to the legs 3" up from the ground. Use these same steps to make the second side.
2. Connect the Table Base
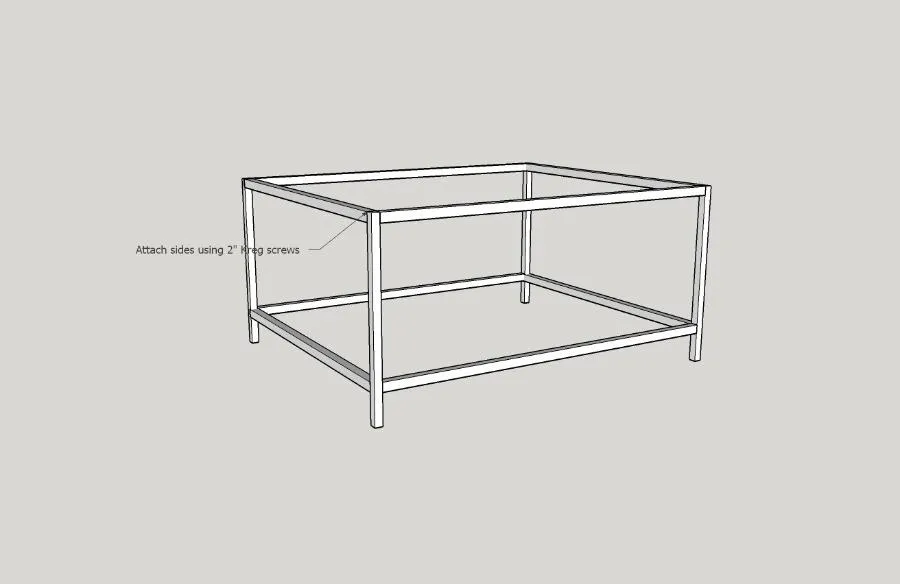
Using 2" Kreg screws, attach your two sides with the two top and bottom shelf supports, making a square. Make sure that the top supports are flush with all the top of the legs so your table top is level.
3. Attach Angled Supports
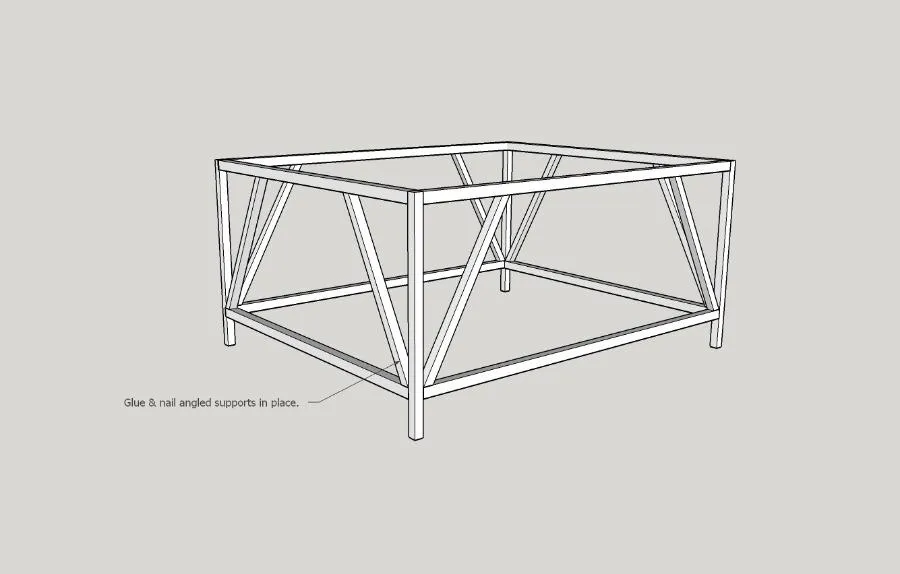
Using 2" Kreg screws attach the angled, side supports. Supports should run from the bottom shelf support to the top support bar. Glue and nail in place with brad nails. We recommend you cut these to fit. 14 1/2" from longest end to longest end is a good place to start.
4. Add Bottom Shelf
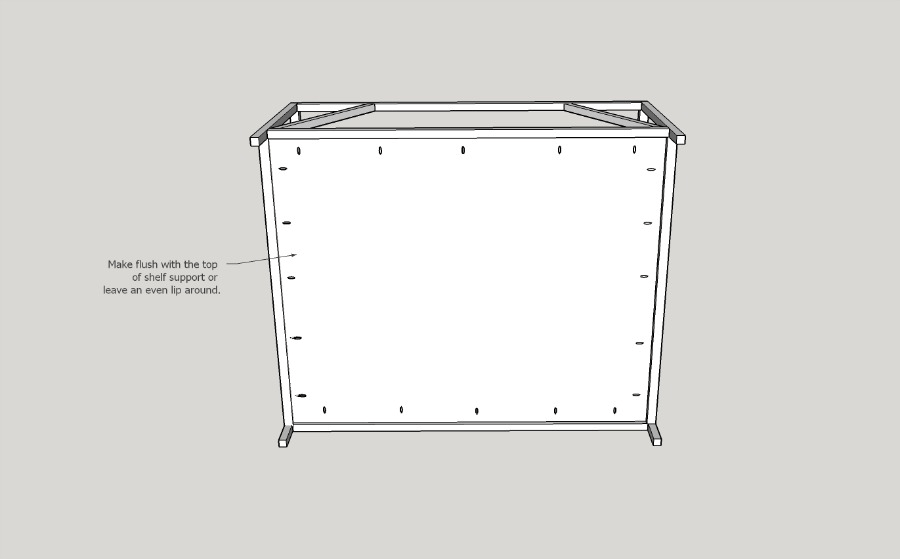
Attach the bottom shelf to the bottom shelf supports using 2" Kreg screws. You can make the shelf flush with the top or leave 1/4" lip. This is personal preference. The coffee table in the photo has a 1/4" lip all the way around. We used a wood spacer to keep the lip even on all sides.
5. Add Table Top Support
Attach a table top support to the two top support boards using 2" Kreg screws. This will give your top some extra support.
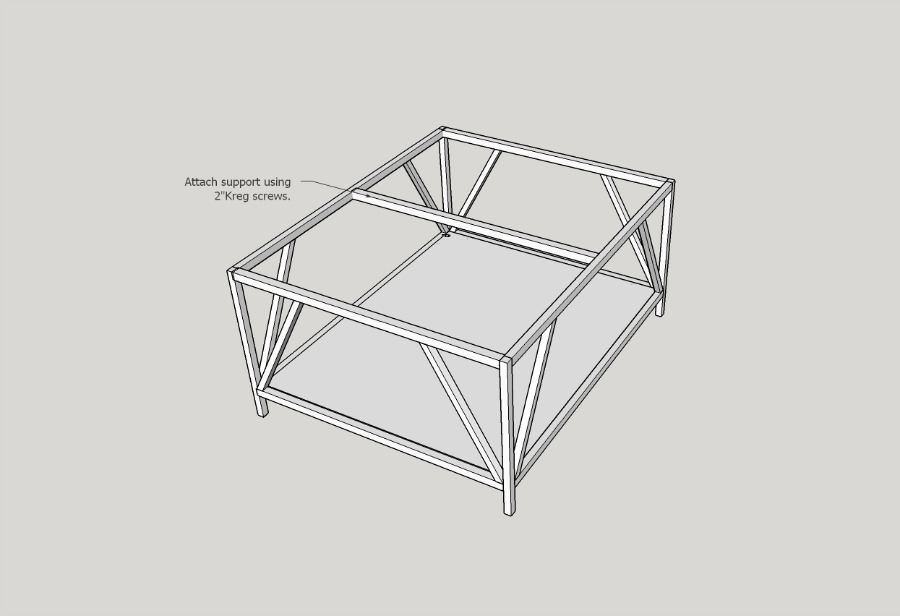
6. Assemble the Top
- Using glue and 1" Kreg screws assemble the top.
- Start by assembling the center 1x8"s.
- Add the right and left 1x4"s next.
- Add the last two side 1x4"s making sure you cut them to size to guarantee a snug fit.
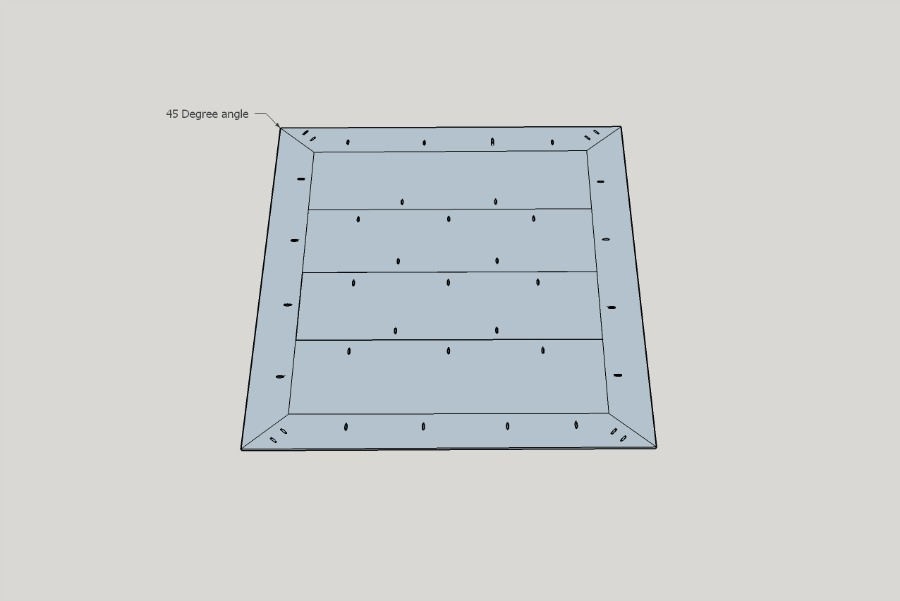
7. Attach the Top
Attach the top of the table to the base using 2" wood screws. Screw up from the bottom of the top supports into the table top, just barely sinking the screws. *If you choose to make pocket holes in the top supports, use 1 1/4" Kreg screws to attach the top.
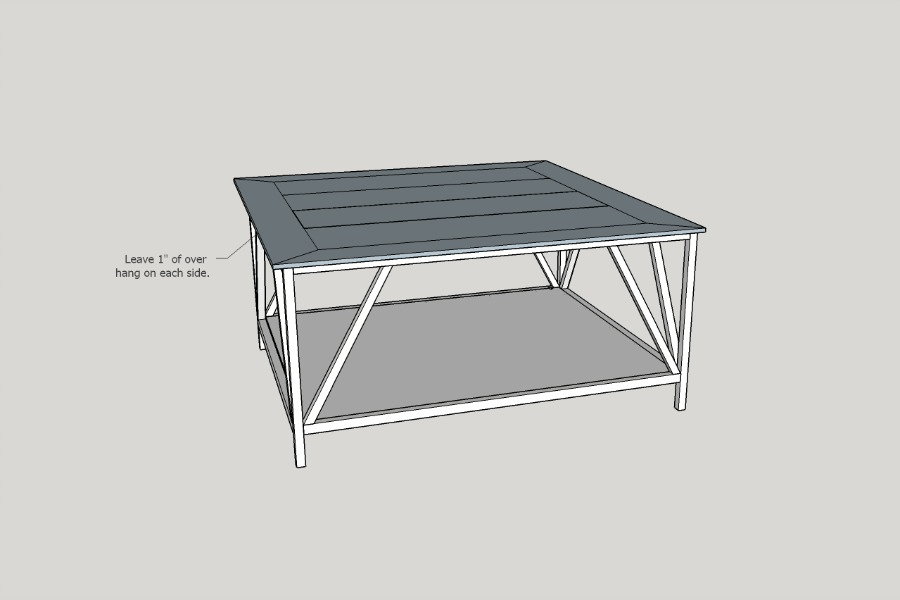
8. Finishing
- Sand the coffee table and wipe clean.
- Paint and stain in your color of choice. This table is painted in Decorators White by Benjamin Moore and the top is stained Sun-bleached by Varathane with a dark antiquing wax on top.