 Notch
- Difficulty
- Intermediate
- Time
- 3.8–7 hours
- Cost
- $$
About this build
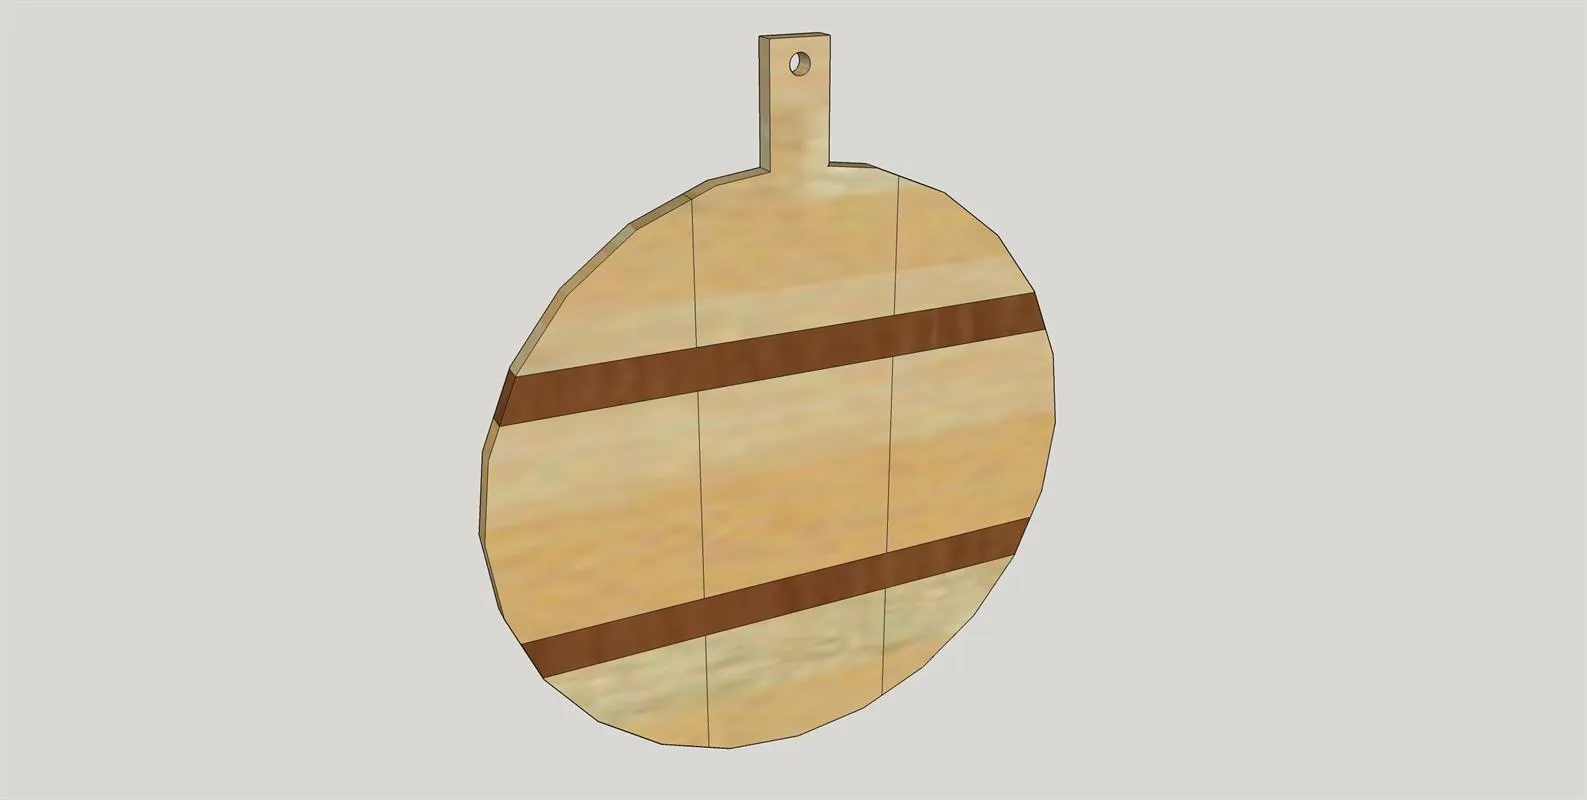
This bread board is a perfect display piece in your kitchen or on a dining room table. It is functional as a serving board. It's a quick and easy afternoon project that's a great addition in your home or makes a great gift. It is made from beautiful maple and walnut hardwoods. www.nickandalicia.com
Tools
Essential
- Drill / Driver
- Jigsaw
- Miter Saw
- Pocket Hole Jig
- Random Orbit Sander
- Router
- Table Saw
Optional / nice to have
- Bar / Pipe Clamps
- Tape Measure
Materials
| Item | Qty |
|---|---|
| Maple Board, 1x8 72" | 1 board |
| Walnut Board, 1x2 48" | 1 board |
| 1 1/4" Kreg Pocket Hole Screws (Hardwood) | 24 each |
| Wood Glue | 1 each |
| Pocket Hole Plugs (purchased or made with a Kreg Plug Cutter) | 24 each |
Overall cost: $$. Lumber prices vary by region, species, and season, so we give a band rather than a figure we would only be pretending to know.
Cut list
| Part | Qty | T × W × L |
|---|---|---|
| Maple Board | 8 | 3/4" × 7" × 7" |
| Maple Board | 1 | 3/4" × 7" × 9" |
| Walnut Boards | 2 | 3/4" × 1" × 21" |
What to buy
Buy 2 boards at 8 ft.
3/4" × 7"
1 board
3/4" × 1"
1 board
Assumes 8 ft stock, a 1/8" saw kerf, and buying each part at its own width. Change the board size or kerf on the full board plan →
Instructions
1Cut & Arrange
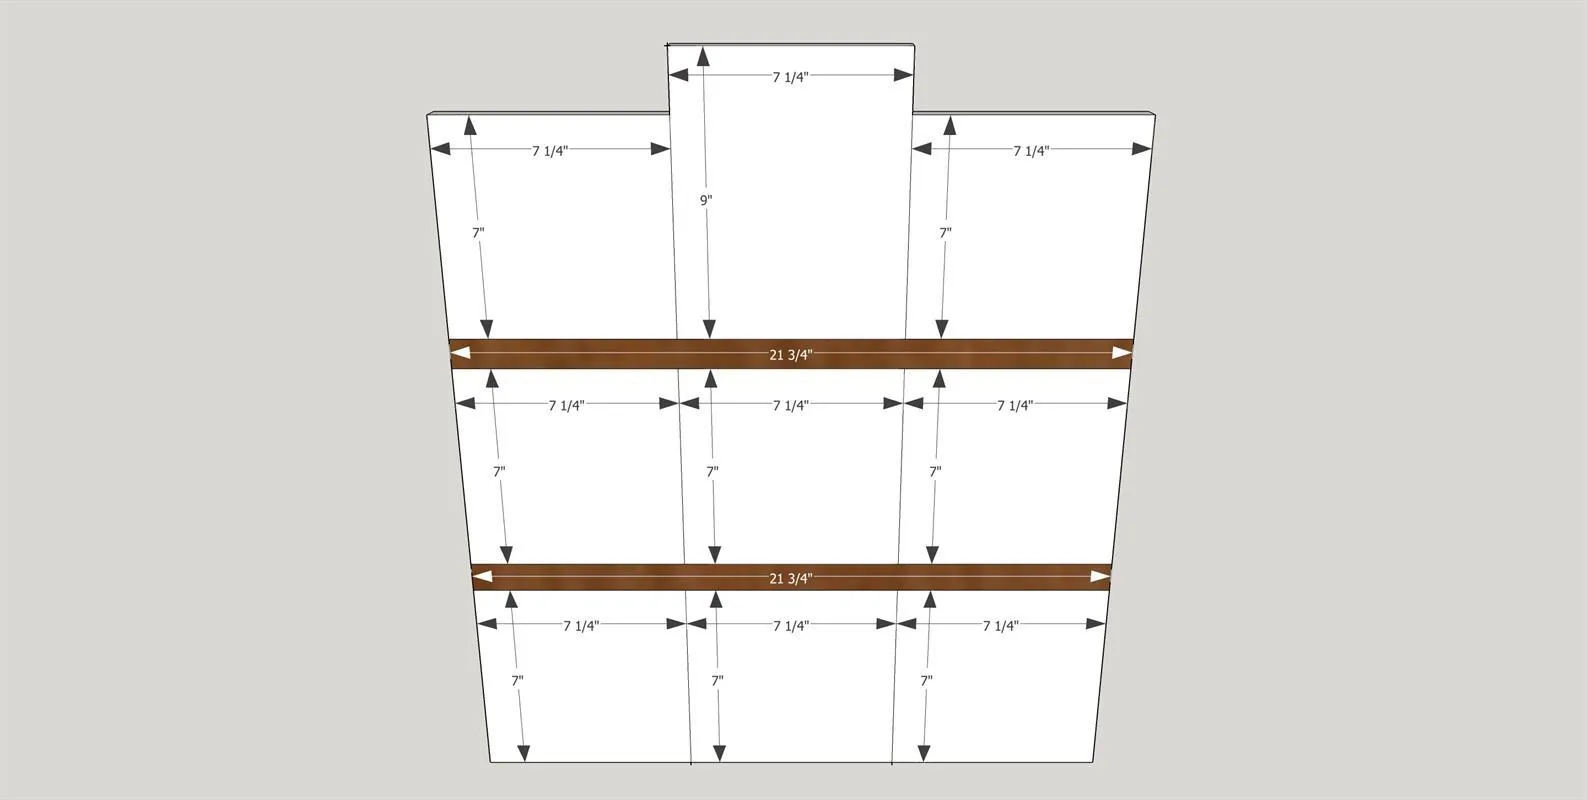
Cut the maple and walnut pieces to size and layout on a flat surface as per the diagram.
2Drill Pocket Holes
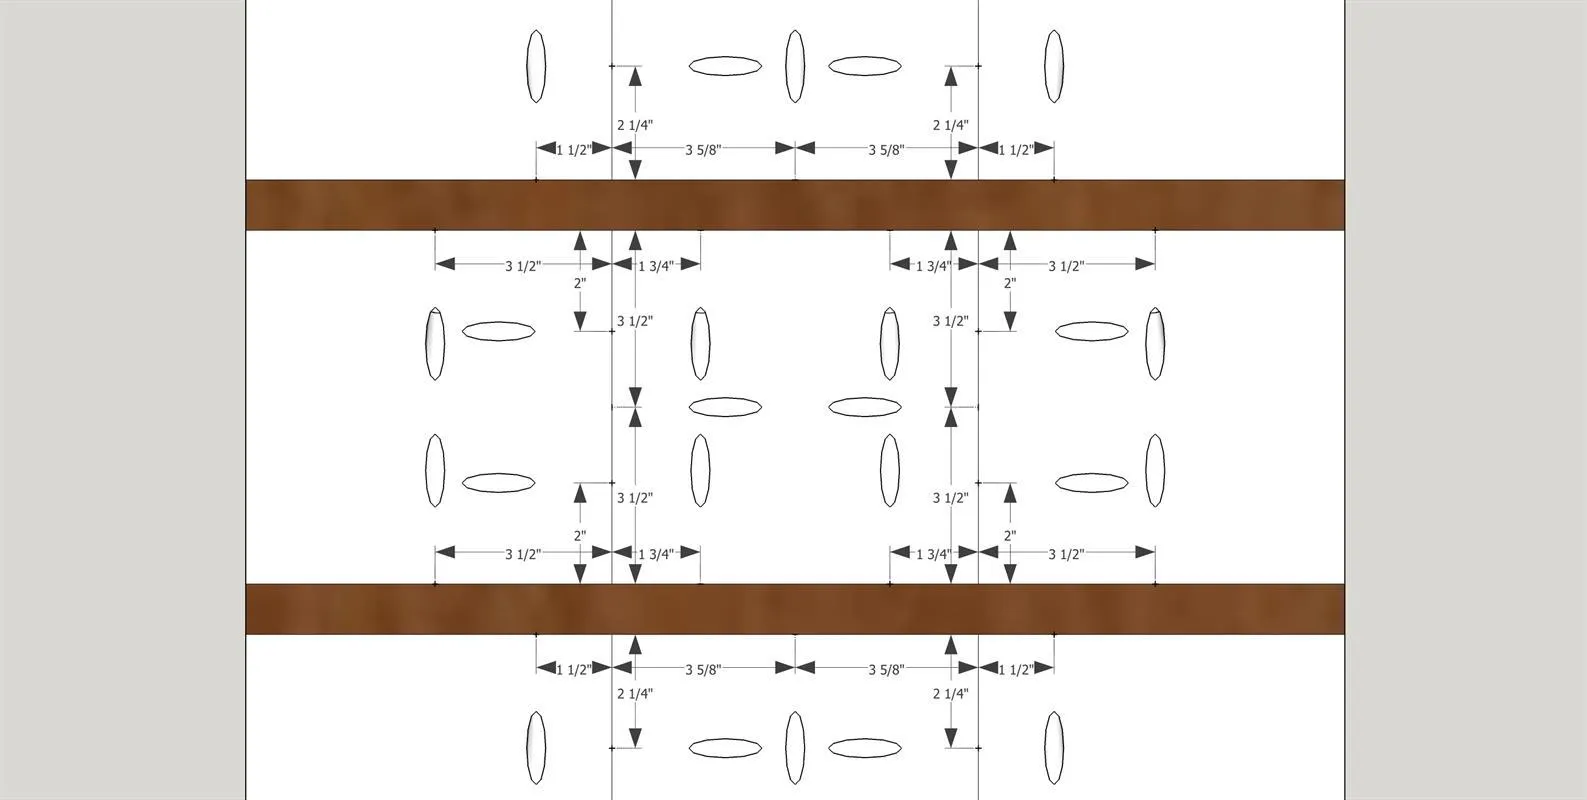
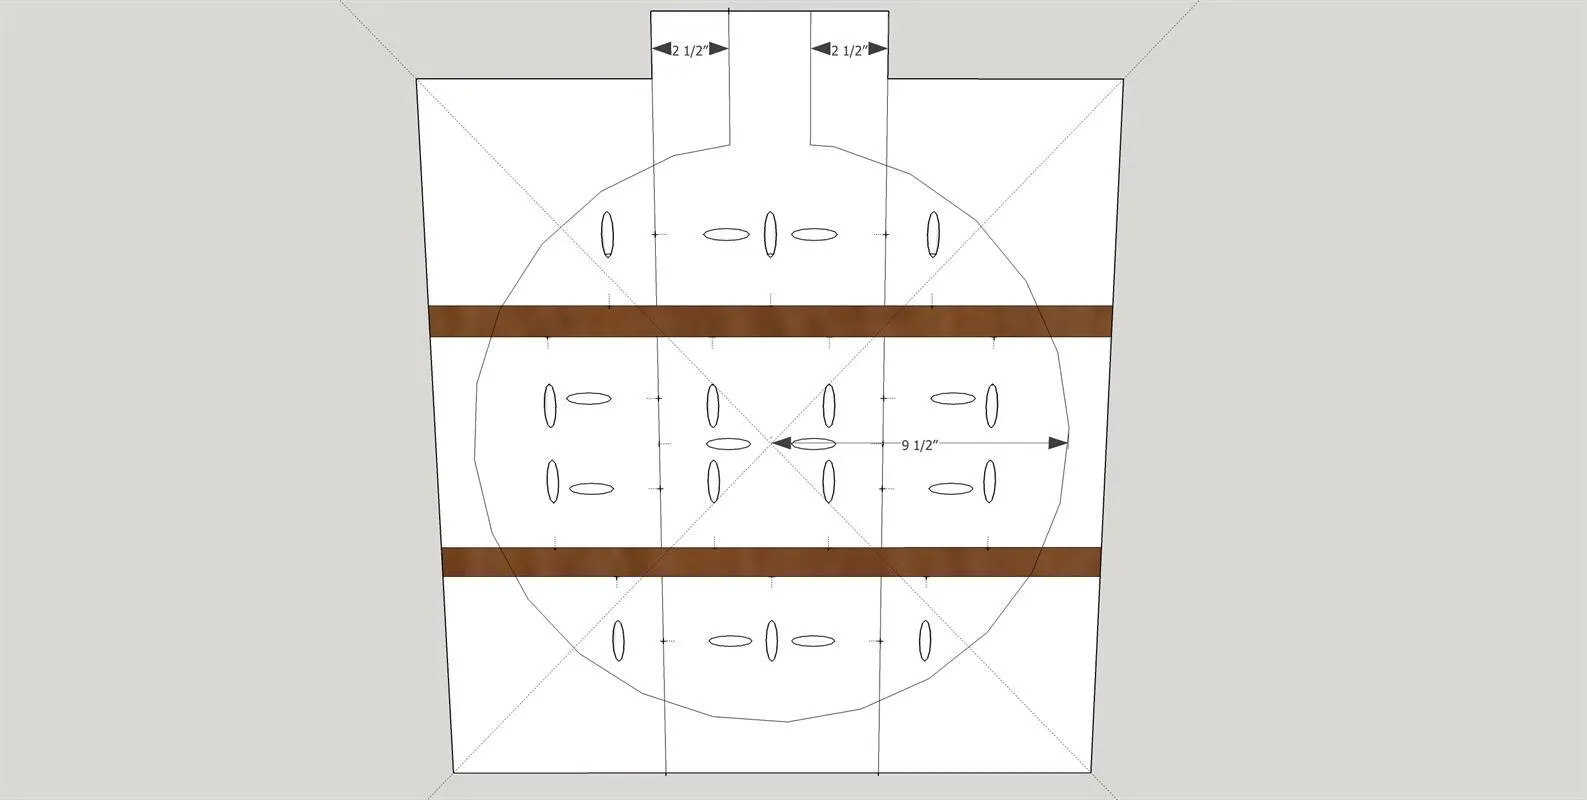
Drill pocket holes as per the attached diagram and measurements provided. After you drill the pocket holes in each piece, place it back in order.
3Attach Maple Sections
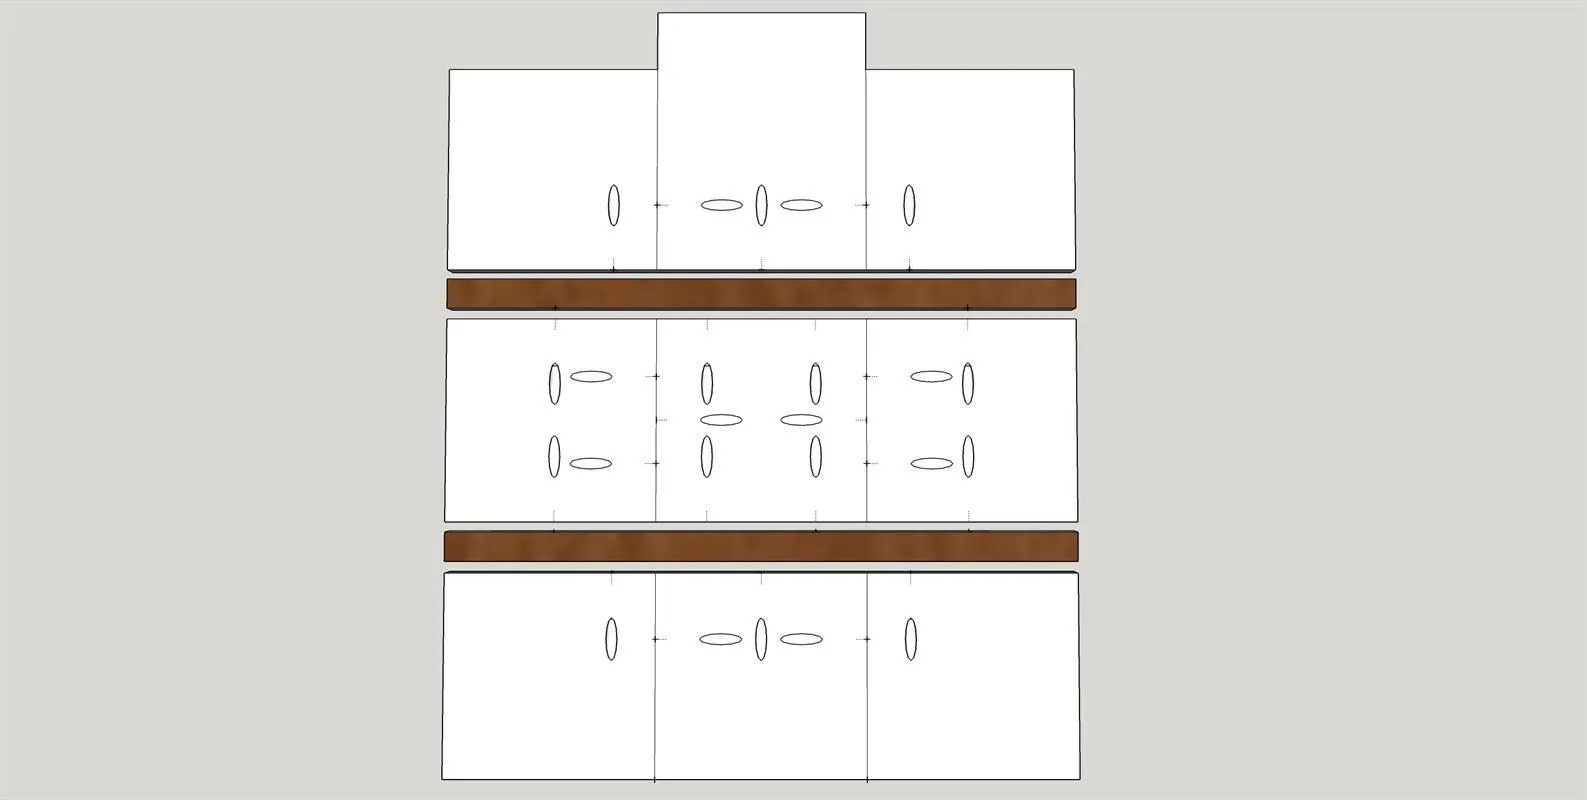
Attach the maple boards in each section to each other using wood glue, clamps and 1 1/4" Kreg hardwood pocket hole screws.
4Attach Sections to Walnut
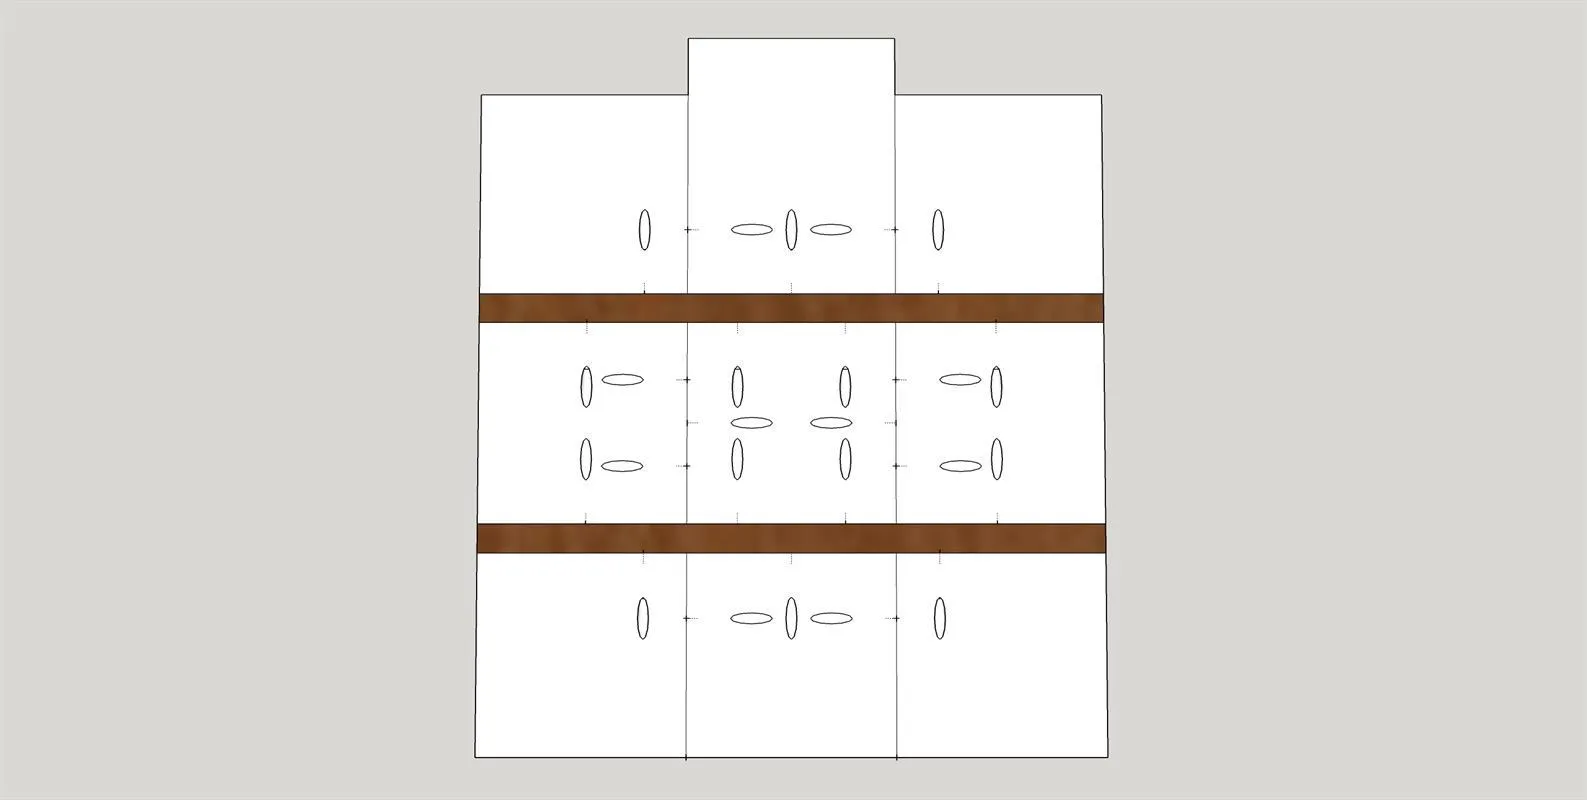
Attach the three maple sections to the walnut pieces with wood glue, clamps and 1 1/4" Kreg Pocket Hole Screws.
5Fill Holes with Plugs (optional)
- Fill all pocket holes with maple pocket hole plugs. You can either purchase these from Kreg or purchase the Kreg Plug Cutter and make 24 plugs from the leftover maple lumber. This will give your board a clean and finished look on both sides.
- Add wood glue in each hole and then insert a plug.
6Initial Sanding
Sand using an orbital sander fitted with either a 60 or 80 grit sandpaper to smooth out the seams and pocket hole plugs.
7Cut Circle & Handle
- Find the center of the board by drawing a line from corner to corner as shown on the diagram. Create a circle jig using a scrap piece of wood or cardboard that is about 1/4" thick, 1" wide and 10" long.
- Drill a 3/16" hole at one end, and then drill another 3/16" hole 9 1/2" from that hole. Temporarily attach the one end to the center mark of the board with a nail or screw. Use a pencil in the other hole to scribe the outline of the circle. Draw a straight line 2 1/2" from either side of the center board at the top down to the top of the circle to create the handle. You can also round out the area where the handle meets the bread board.
- Cut out carefully using a jigsaw fitted with a scroll blade.
8Cut Hole in the Handle
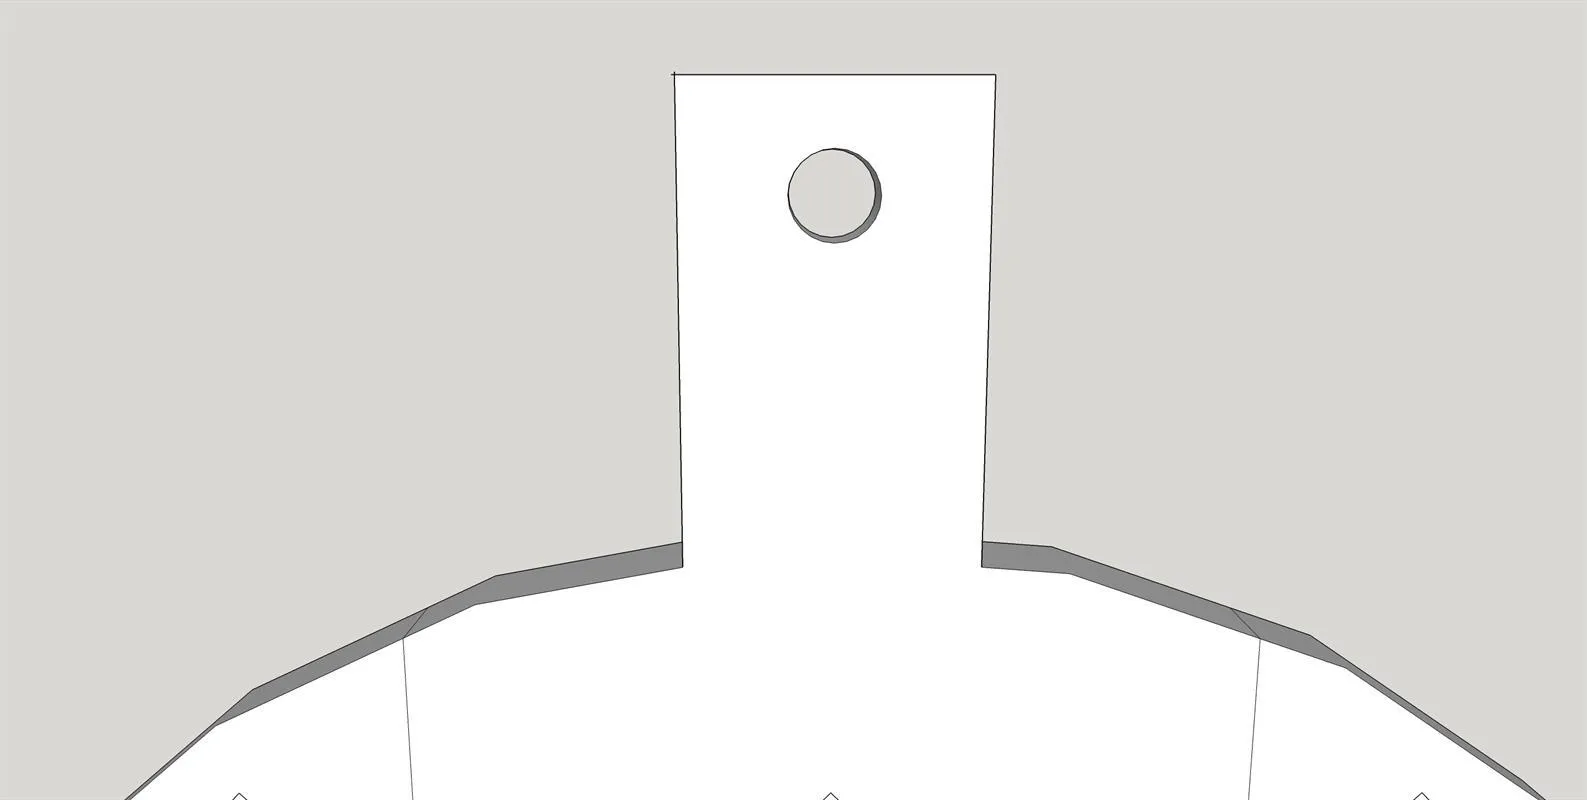
Using a 3/4" spade drill bit to cut a hole in the handle. You can choose a location higher up in the handle or closer to the center.
9Round Edges (optional)
If you own a router, you can round out the corners on the front and back with a roundover bit. If you don't own a router and still want to round them out, just use your orbital sander and carefully sand down the edges to round them out.
10Final Sand & Oil
Sand with a 120 grit sandpaper, followed by 220 grit sandpaper to give the bread board a smooth finish. Use a butcher block oil, mineral oil, or other food-safe oil on the board by coating it several times, letting the oil soak in between coats.
Tags
- Beginning Woodworking Projects
- Intermediate
Reviews & builds
No reviews yet
Sign in to review this plan or share your build.
No reviews yet. Be the first to build this.