Notch
NotchUse your browser's Print (Ctrl/Cmd + P) and choose Save as PDF. This page works offline once you've opened it with a signal.
Ladder Shelves
Here’s proof that DIY projects don’t have to be all about straight lines and square corners.
- Difficulty
- Intermediate
- Time
- 3.3–6.5 hours
- Cost
- $$
Cut list
| Part | Qty | T × W × L | Material | ✓ |
|---|---|---|---|---|
| Leg | 2 | 3/4" × 2" × 72" | — | ☐ |
| Shelf | 3 | 3" × 11" × 24" | — | ☐ |
| Front Shelf Edge | 6 | 3/4" × 1" × 4" | — | ☐ |
| Back Shelf Edge | 6 | 3/4" × 1" × 4" | — | ☐ |
| Case Top/Bottom | 2 | 3" × 18" × 22" | — | ☐ |
| Case Side | 2 | 3" × 14" × 18" | — | ☐ |
| Case Back | 1 | 1" × 14" × 24" | — | ☐ |
Materials
| Item | Qty | ✓ |
|---|---|---|
| Board, 1x3 96" | 2 board | ☐ |
| Board, 1x2 96" | 1 board | ☐ |
| Plywood, 3/4" Thick Full Sheet | 1 board | ☐ |
| Plywood, 1/4" Thick 24" x 24" | 1 board | ☐ |
| 1 1/4" coarse-thread pocket screws | 58 each | ☐ |
| 3/4" brad nails | 20 each | ☐ |
| Roll of iron-on edge banding | 1 each | ☐ |
Overall cost: $$. Lumber varies by region, species, and season, so we give a band rather than a figure.
Tools
- Circular Saw
- Drill / Driver
- Iron for Edge Banding
- Miter Saw
- Pocket Hole Jig
- Random Orbit Sander
- Tape Measure — optional
Instructions
1. Create the Shelves
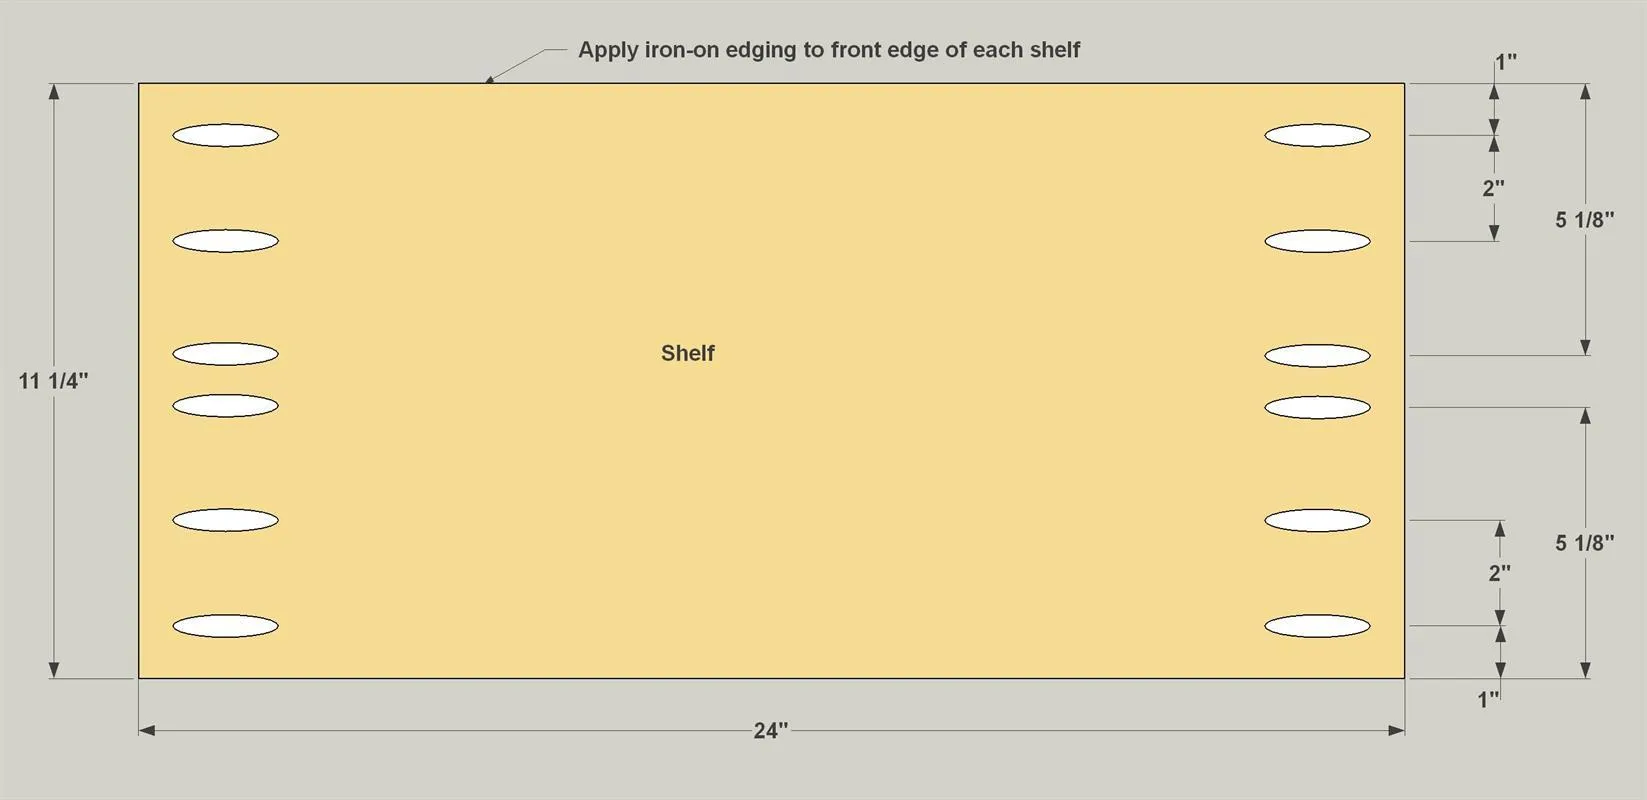
- Cut three Shelves to size from 3/4" plywood.
- Then drill pocket holes in the Shelves, as shown, with your pocket hole jig set up for 3/4" material. To cover up the exposed plies, apply iron-on edge banding to the front edge of each shelf.
2. Make the Shelf Edges
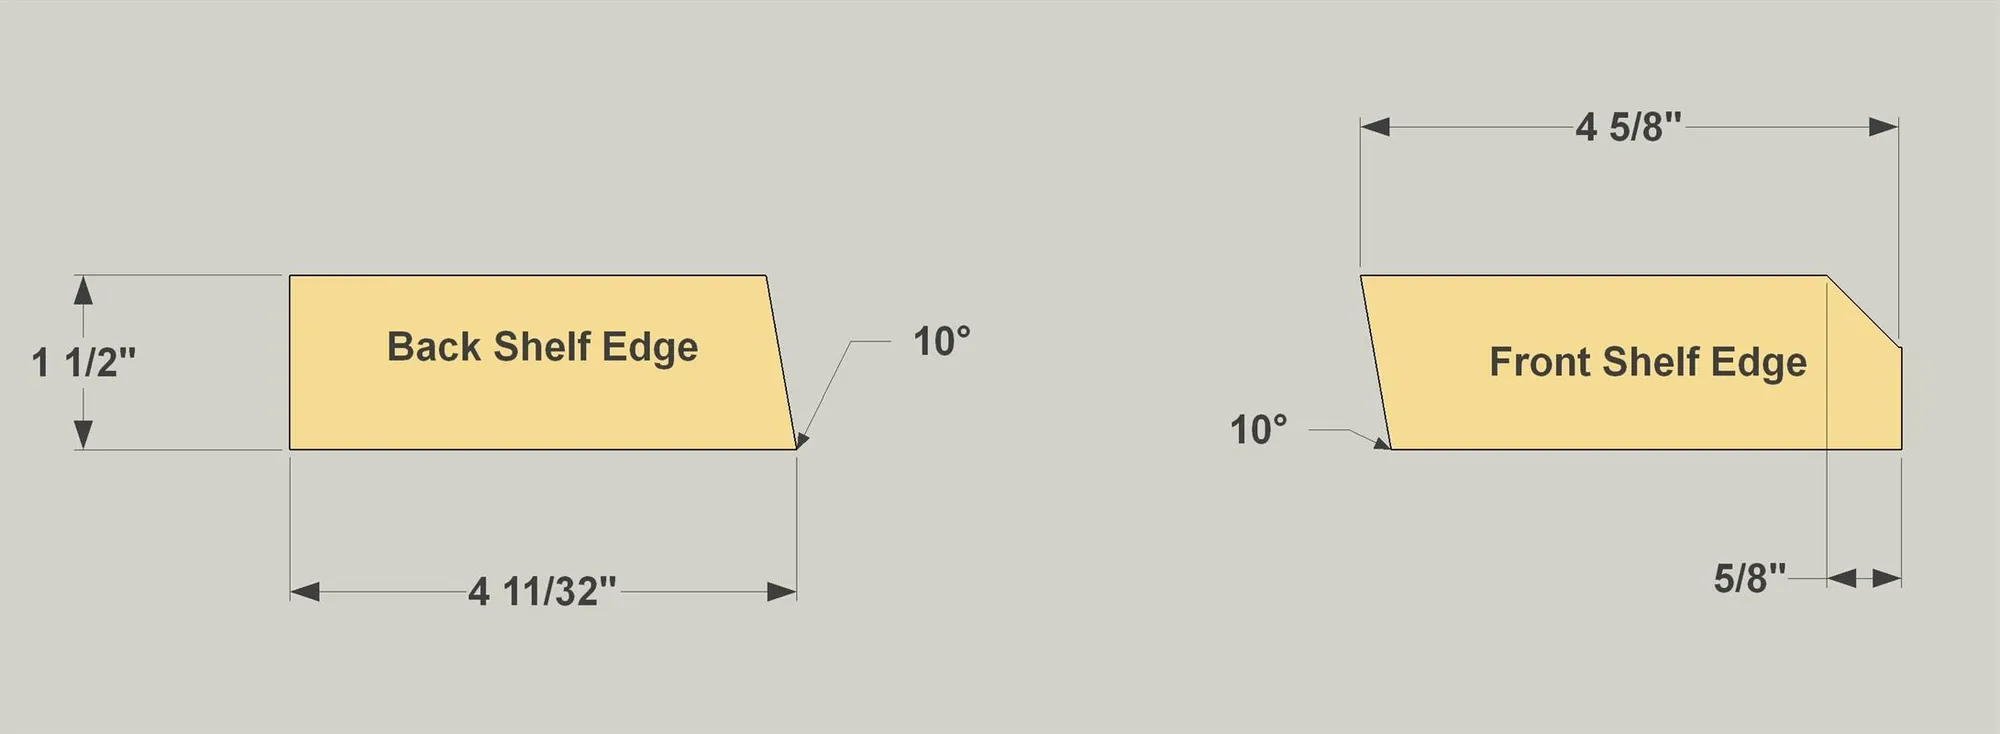
Cut six Front Shelf Edges and six Back Shelf Edges to length from a 1x2 board. Make sure to pay attention to the angles as you cut. After cutting the Front Edges to length, also trim off one corner, as shown.
3. Apply the Edges
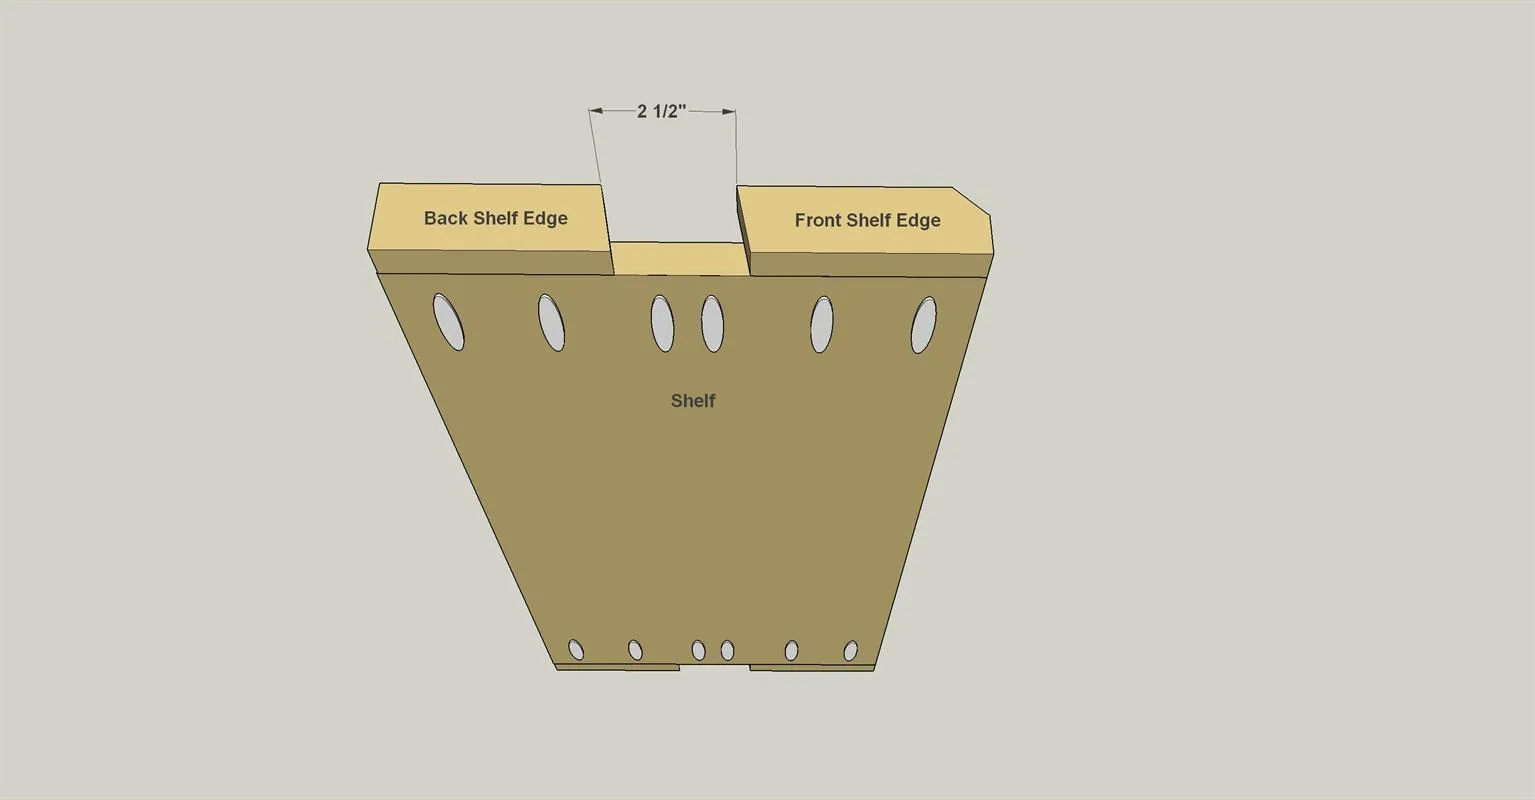
- Attach the Front Shelf Edges to each Shelf using 1 1/4" coarse-thread pocket hole screws. Make sure they sit flush with the front of the shelf.
- Then cut a scrap block from 1 x 3 material to sue as a spacer.
- Position it behind the Front Edge, set each Back Shelf Edge in place, and attach it using 1 1/4" coarse -thread pocket hole screws.
4. Add Angled Legs
- Cut two Legs to length from 1x3 boards, as shown in the cutting diagram.
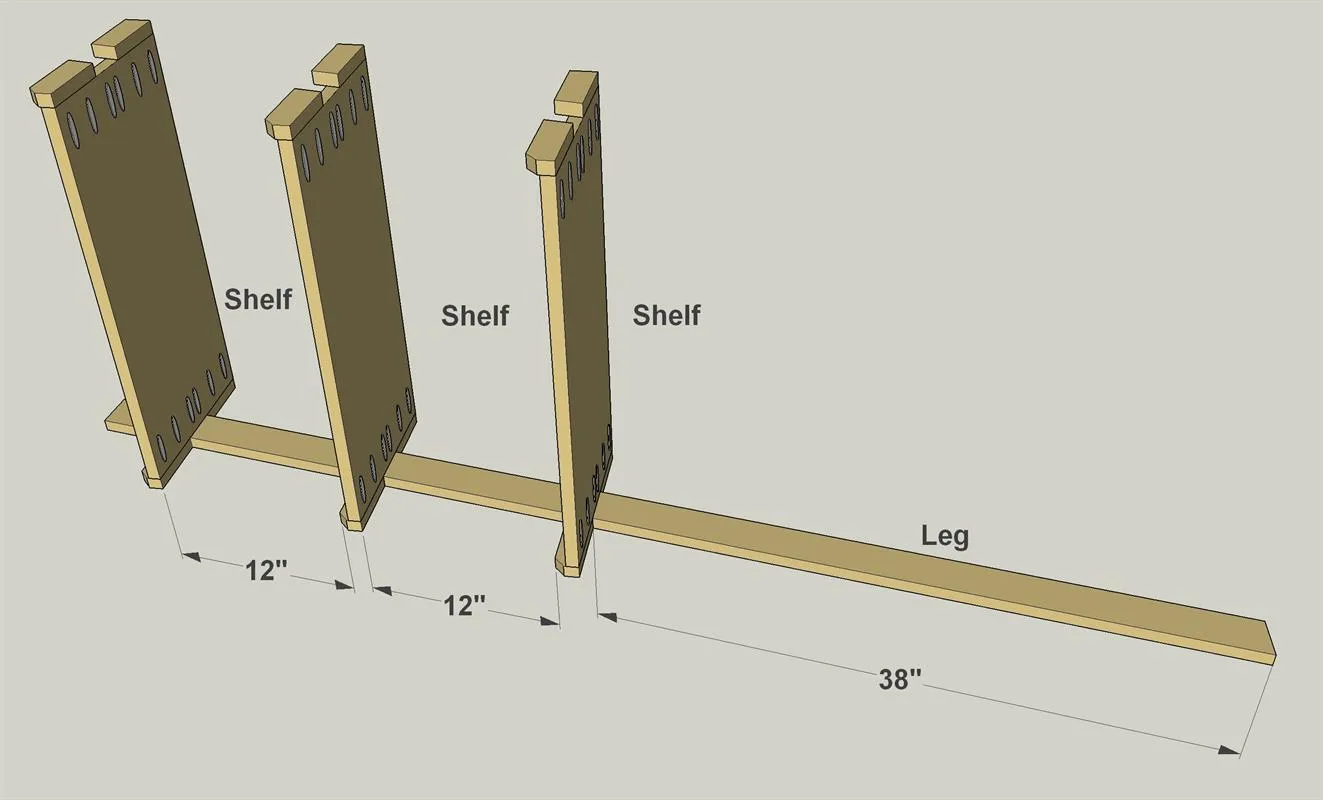
- Then lay out the locations of the shelf assemblies on one leg, and attach the Shelves to the Leg using 1 1/4" coarse-thread pocket hole screws.
- Add the second Leg, making sure the shelves align.
5. Cut the Case Parts
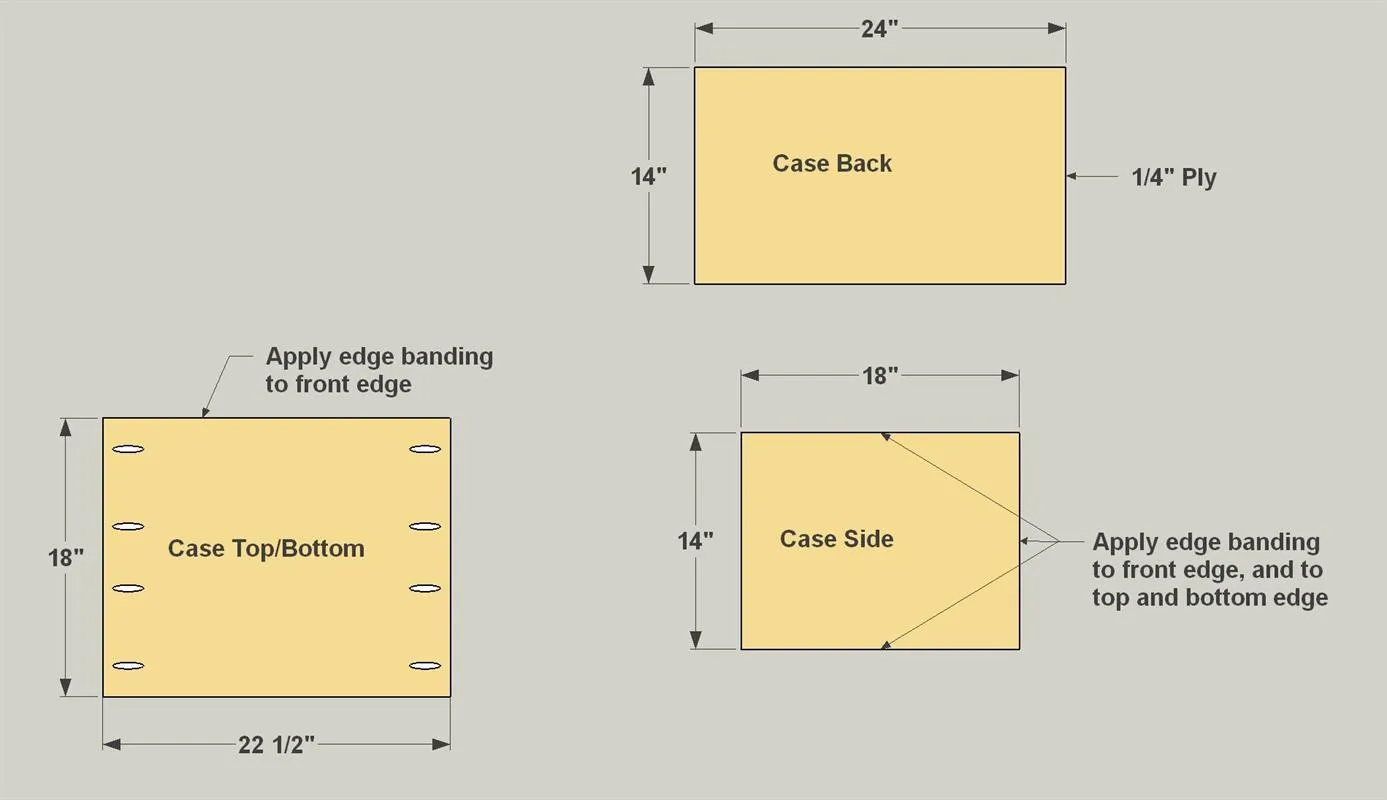
- Cut one Case Top, one Case Bottom, and two Case Sides to size from 3/4" plywood, as shown in the cutting diagram.
- Also cut a Case back to Case Top and Bottom, as shown. With your pocket hole jig set up for 3/4" material, drill pocket holes in the Case Top and Case Bottom, as shown.
- Then, apply iron-on edge banding to the front edge of the Case Top and Bottom.
- Apply banding to three edges of the Case Sides, as shown.
6. Begin Case Assembly
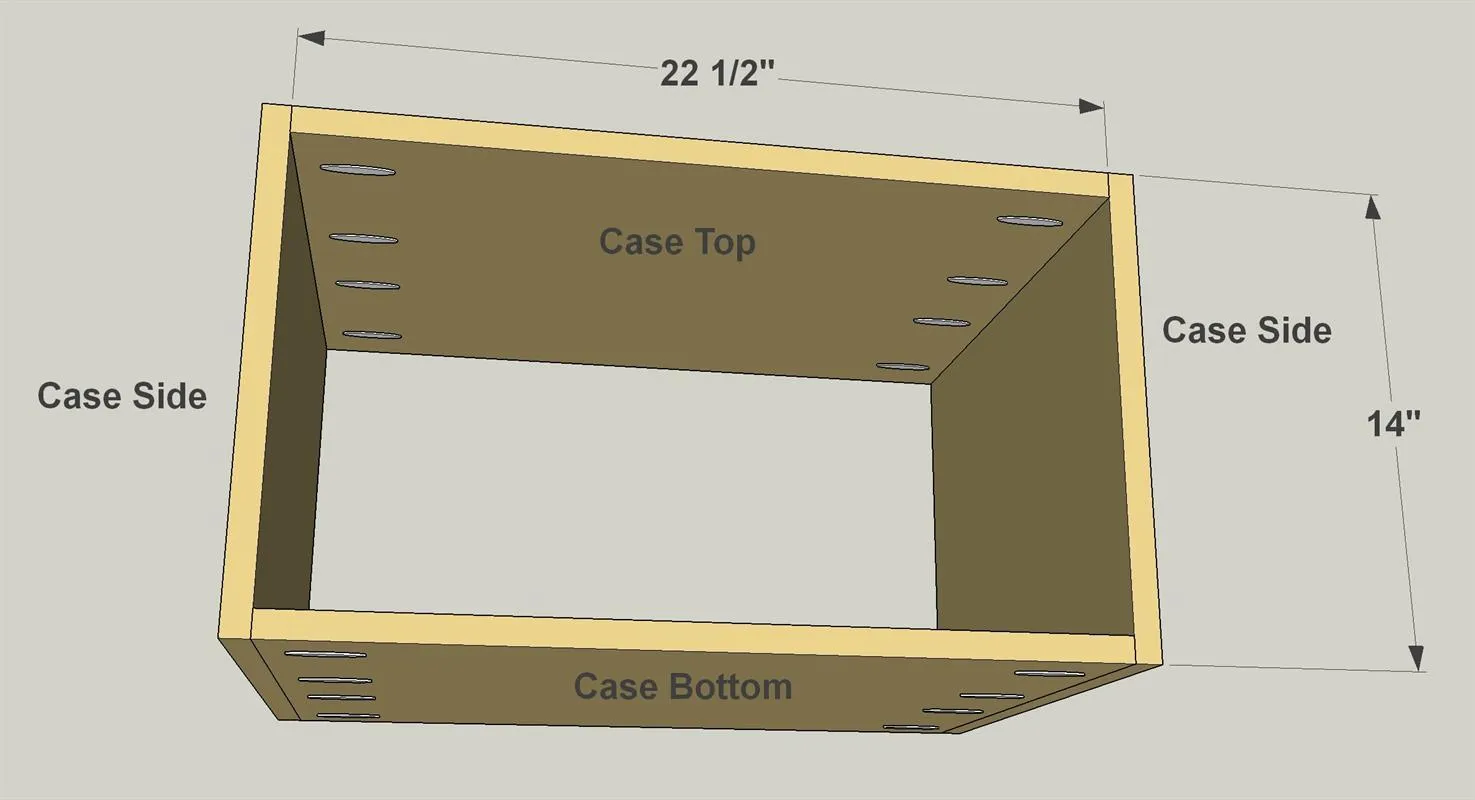
Now you can attach the Case Top and Case Bottom to the Case Sides using 1 1/4" coarse-thread pocket hole screws.
7. Add the Case Back
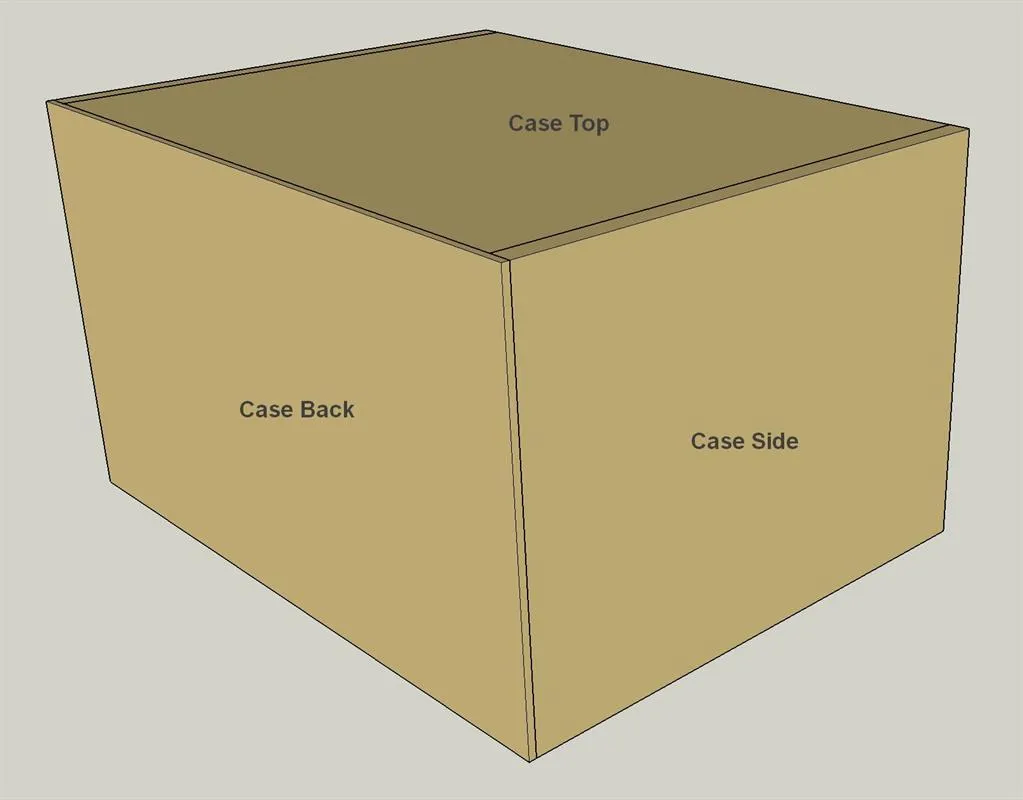
Now you can attach the Case Back. Just align it, and then drive 3/4" brad nails into the back edges of the Case Top, Bottom, and Sides.
8. Mount the Case
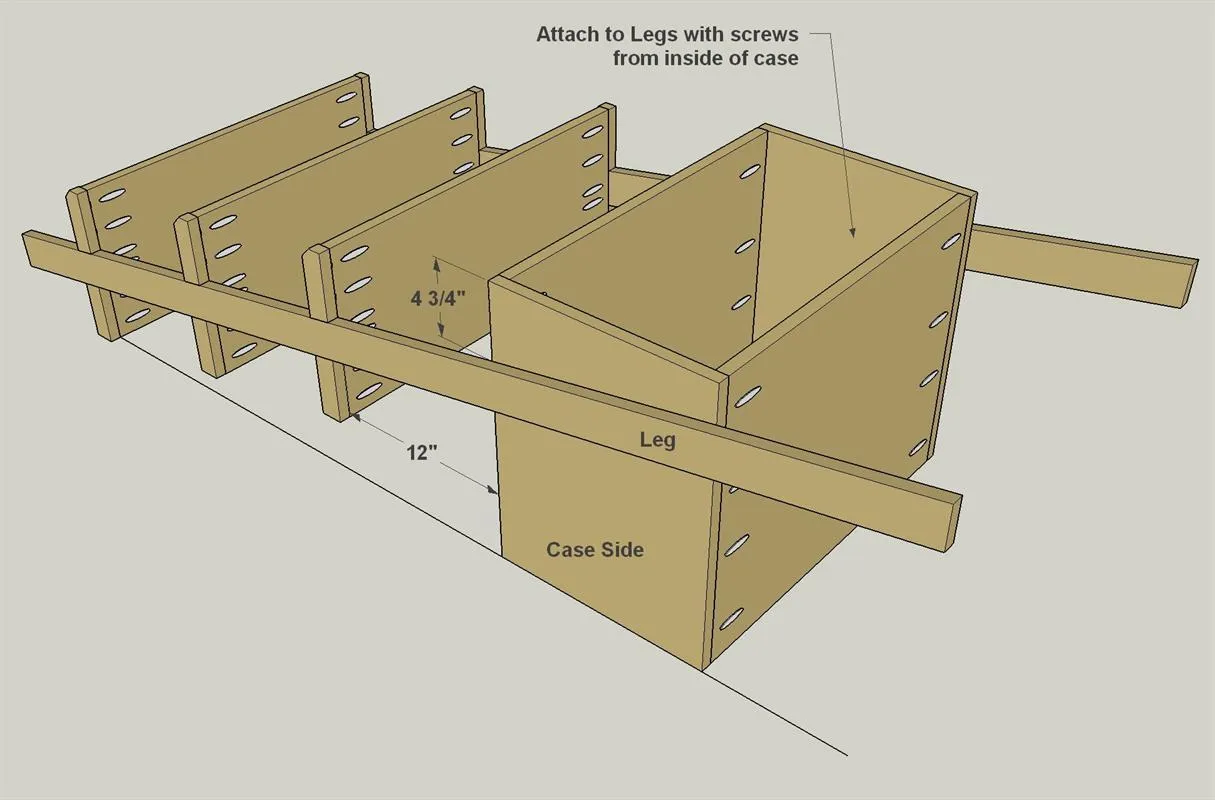
- Lay the case assembly on its back on a flat surface, then position the leg/shelf assembly so that the case sits parallel with the shelves, and the upper shelf is also resting on your flat surface.
- Then attach the case to the Legs by driving three 1 1/4" coarse-thread pocket hole screws through each Case Side and into the Leg. The screws work great, even though you’re not using pocket holes. You won’t even need to drill pilot holes for the screws. After that, you can give your project a final sanding, and then apply stain, finish, or paint.