 Notch
NotchUse your browser's Print (Ctrl/Cmd + P) and choose Save as PDF. This page works offline once you've opened it with a signal.
Industrial Nightstand
This industrial nightstand features a large drawer to hide all the necessities and extras needed at bedtime along with a small charging space for phones and tablets!
- Difficulty
- Intermediate
- Time
- 8.5–16.5 hours
- Cost
- $$
Cut list
| Part | Qty | T × W × L | Material | ✓ |
|---|---|---|---|---|
| Top Front and Back Rails | 2 | 1" × 1" × 25" | — | ☐ |
| Shelf Rails, Bottom Front and Back Rails | 4 | 1" × 1" × 22" | — | ☐ |
| Side Top and Bottom Rails | 4 | 1" × 1" × 18" | — | ☐ |
| Legs | 4 | 1" × 1" × 23" | — | ☐ |
| Mitered Accents | 4 | 1" × 1" × 6" | — | ☐ |
| Top Boards | 4 | 3/4" × 5" × 18" | — | ☐ |
| Side Boards | 4 | 3/4" × 5" × 16" | — | ☐ |
| Shelf Boards | 2 | 3/4" × 5" × 23" | — | ☐ |
| Side Boards | 4 | 3/4" × 3" × 16" | — | ☐ |
| Shelf Boards | 2 | 3/4" × 3" × 23" | — | ☐ |
| Drawer Box Front and Back | 2 | 3/4" × 9" × 19" | — | ☐ |
| Drawer Box Sides | 2 | 3/4" × 9" × 19" | — | ☐ |
| Drawer Face | 1 | 3/4" × 11" × 21" | — | ☐ |
| Drawer Bottom | 1 | 1/4" × 19" × 21" | — | ☐ |
| Drawer slide braces | 2 | 3/4" × 2" × 18" | — | ☐ |
Materials
| Item | Qty | ✓ |
|---|---|---|
| Board, 2x2 96" | 4 board | ☐ |
| Board, 1x6 120" | 2 board | ☐ |
| Board, 1x4 120" | 1 board | ☐ |
| Plywood, 1/4" Thick Quarter Sheet | 1 board | ☐ |
| Board, 1x3 96" | 1 board | ☐ |
| Board, 1x10 96" | 1 board | ☐ |
| Board, 1x12 96" | 1 board | ☐ |
| Set of 18" Drawer Slides | 1 each | ☐ |
| Drawer pull | 1 each | ☐ |
| Pkg. of furniture tacks | 1 each | ☐ |
Overall cost: $$. Lumber varies by region, species, and season, so we give a band rather than a figure.
Tools
- Brad Nailer
- Drill / Driver
- Miter Saw
- Pocket Hole Jig
- Random Orbit Sander
- Bar / Pipe Clamps — optional
- Combination Square — optional
- Tape Measure — optional
Instructions
1. Step 1
- Start by building the back frame!
- Join your Top Back Rail to two Legs using pocket holes drilled at 1 1/2" and using 2 1/2" screws and wood glue to attach!!
- Also attach the Bottom Back Rail with the same pocket holes, screws and glue! *Black ovals indicate pocket hole placement!
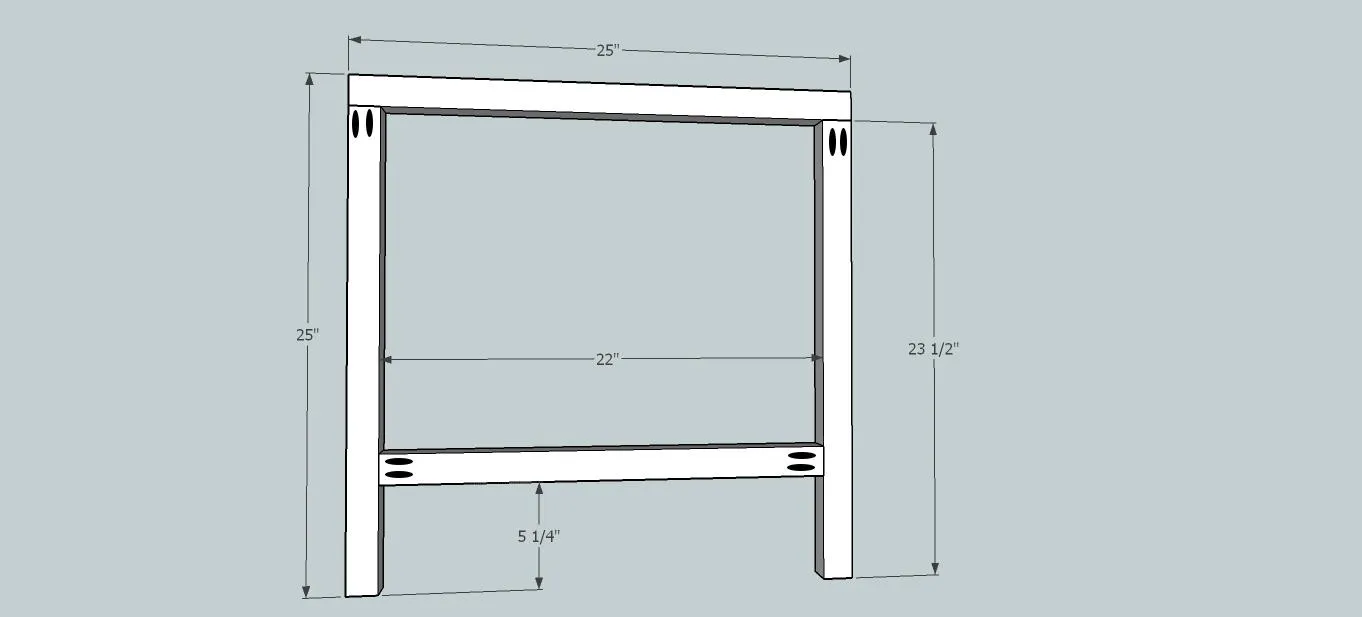
2. Step 2
With the back frame laying on the floor, attach the top side rails to the back frame! Again using pocket holes drilled at 1 1/2" and using 2 1/2" screws and wood glue!
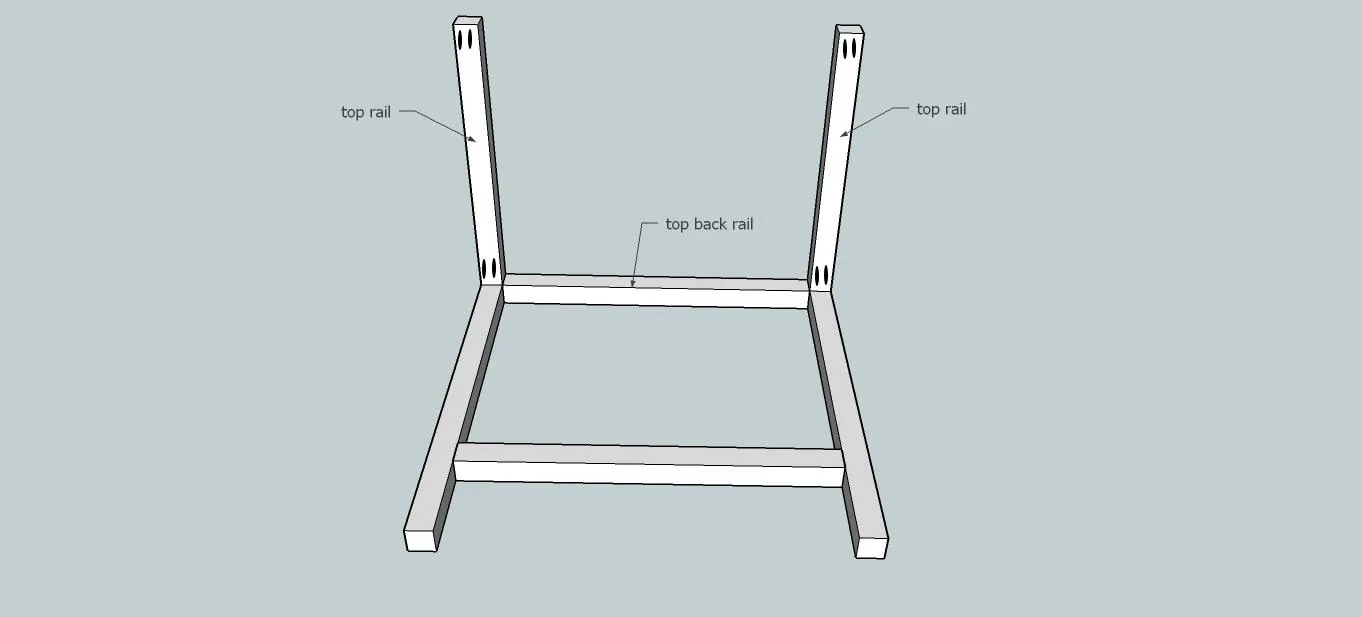
3. Step 3
Attach the bottom side rails! Keeping with the same pocket hole depth and screw size!! Make sure to use glue!!
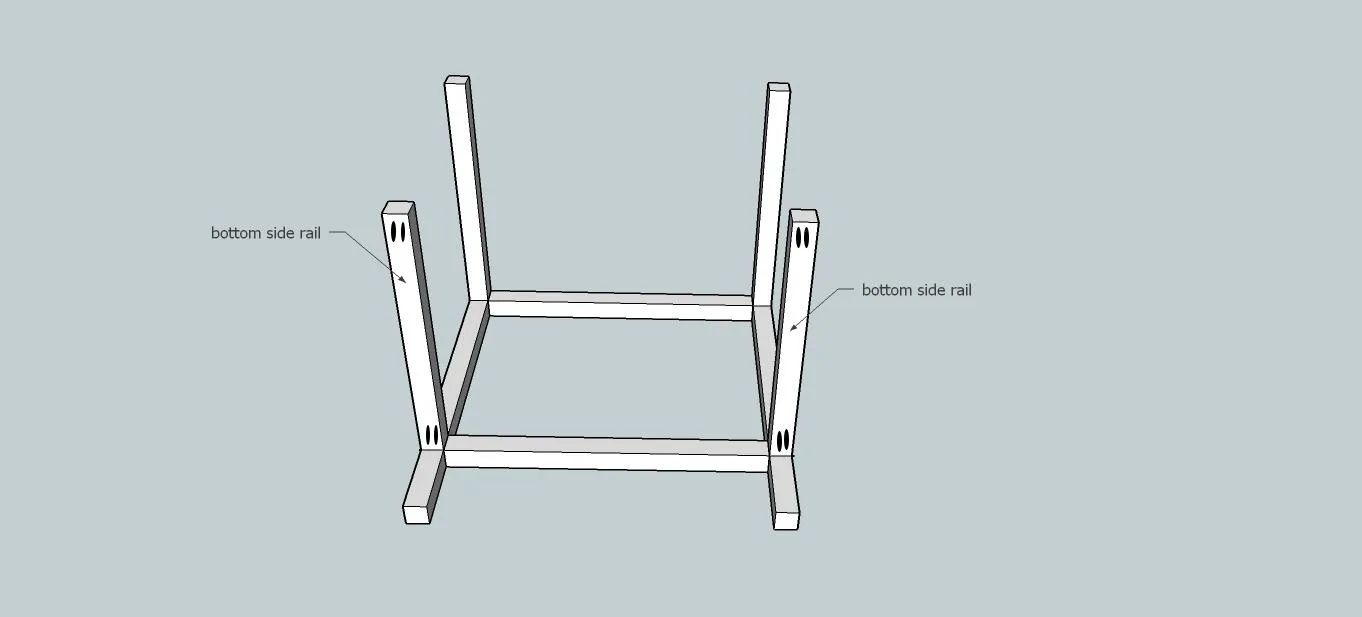
4. Step 4
Attach the top, front rail! Keeping with the same pocket hole depth and screw size...still making sure to glue! ;)
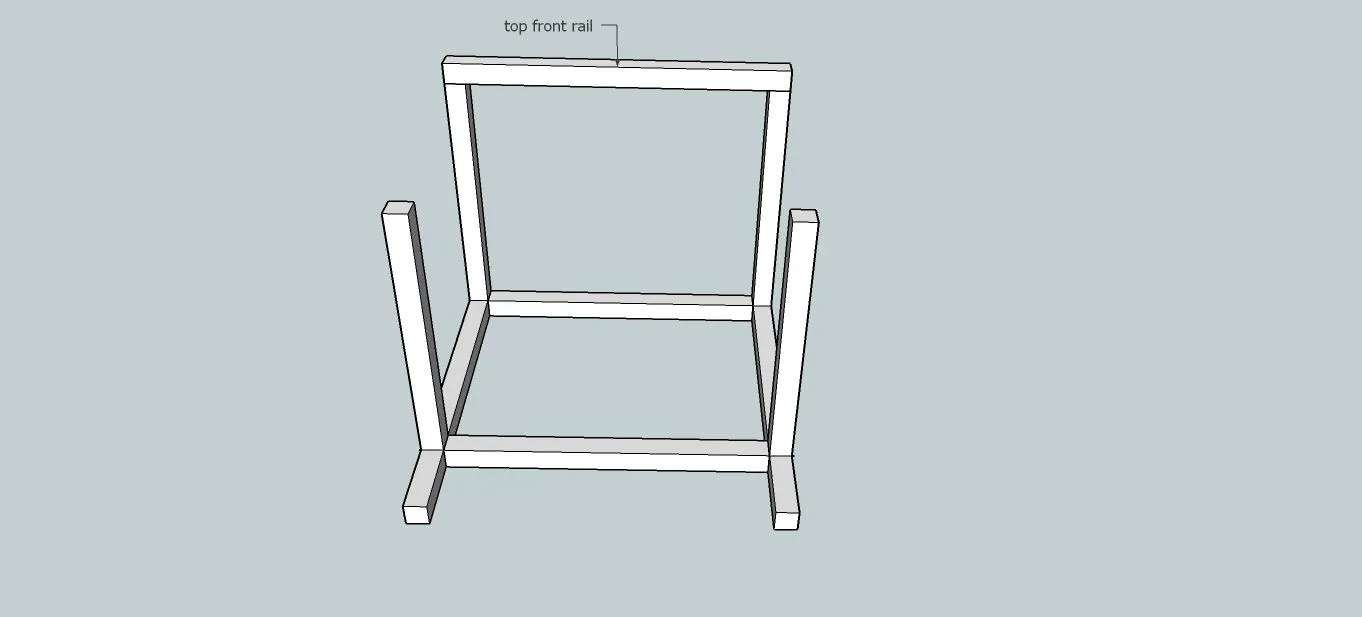
5. Step 5
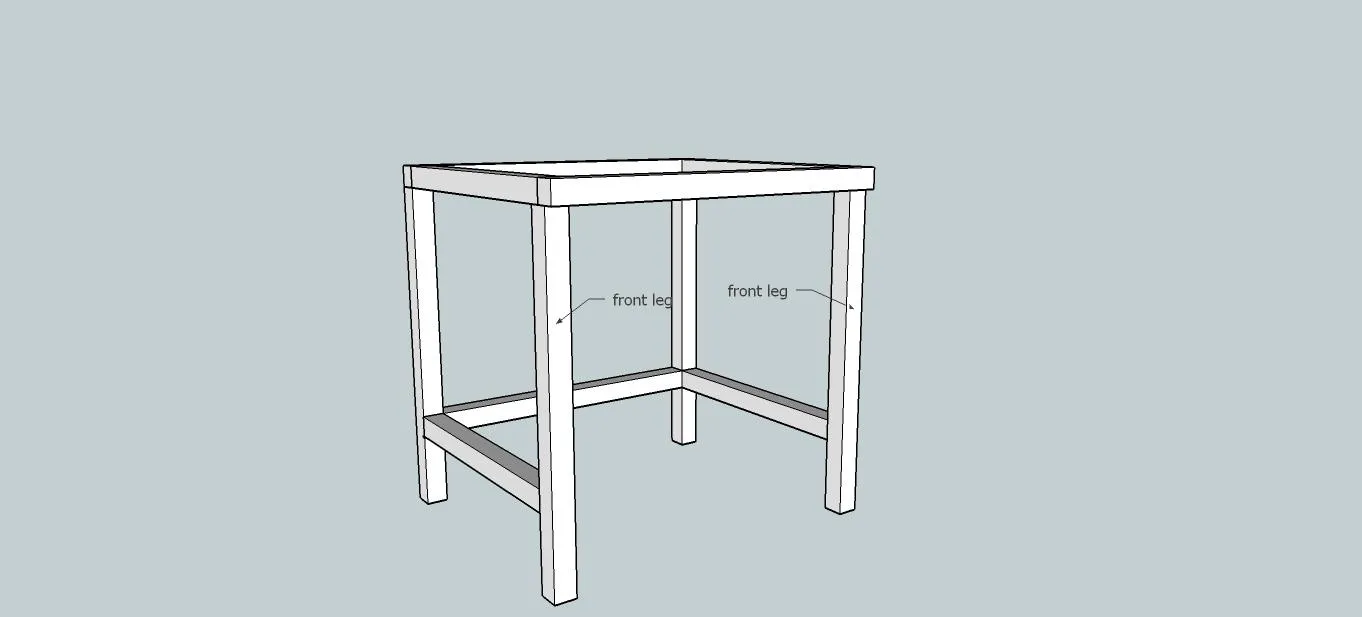
Attach front legs to the top front rail...pocket hole placement is not shown in the picture but they are on the back of the legs just as the back ones were done! Still using the same 1 1/2" pocket holes and 2 1/2" screws to attach!!
6. Step 6
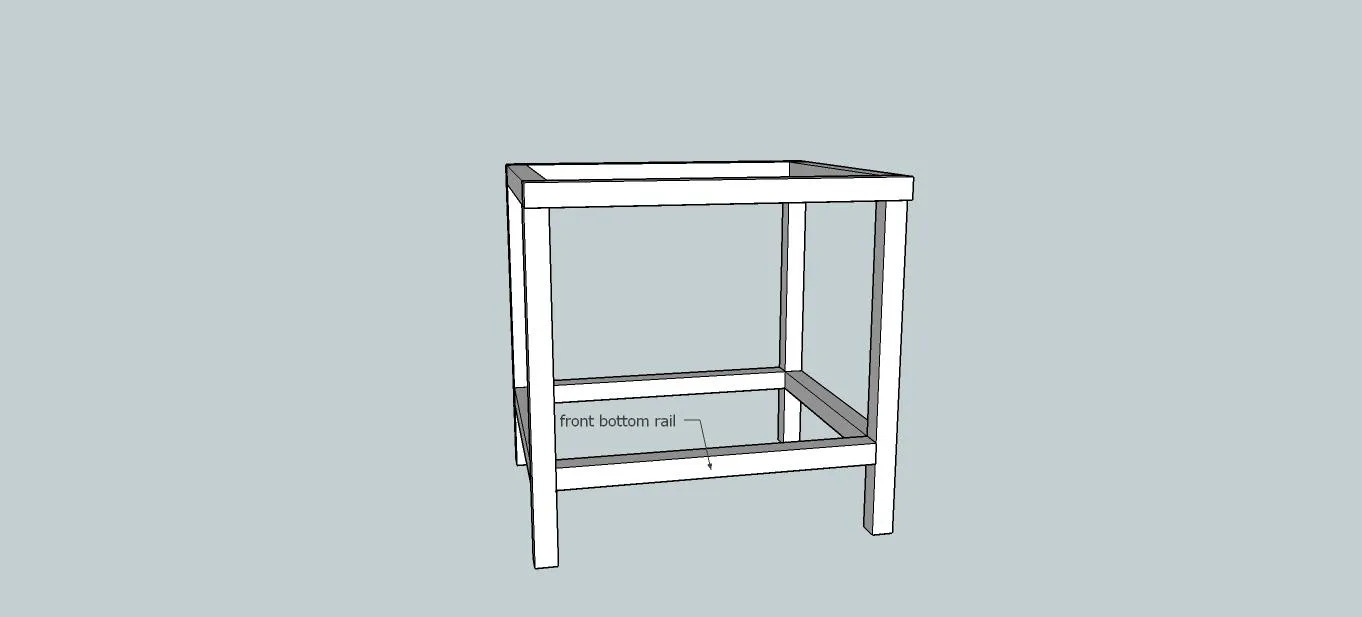
Attach front, bottom rail! Pocket holes are to the back of this board! Same pocket hole depth and screws...making sure to glue!
7. Step 7
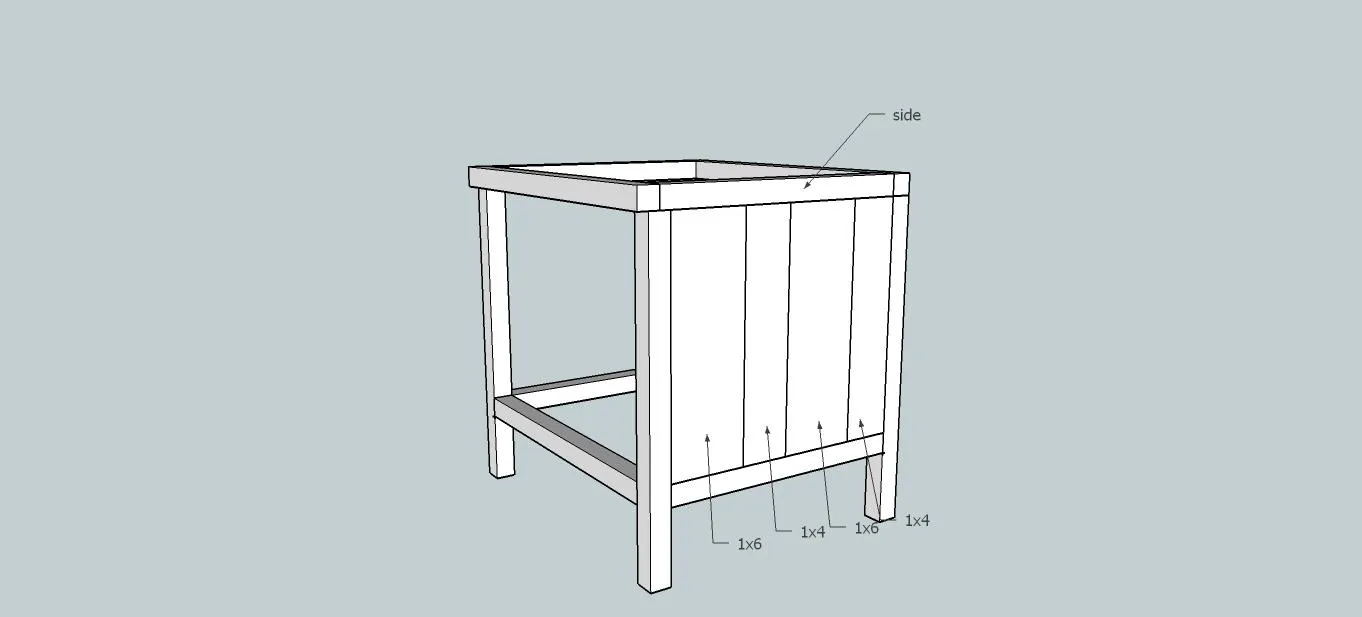
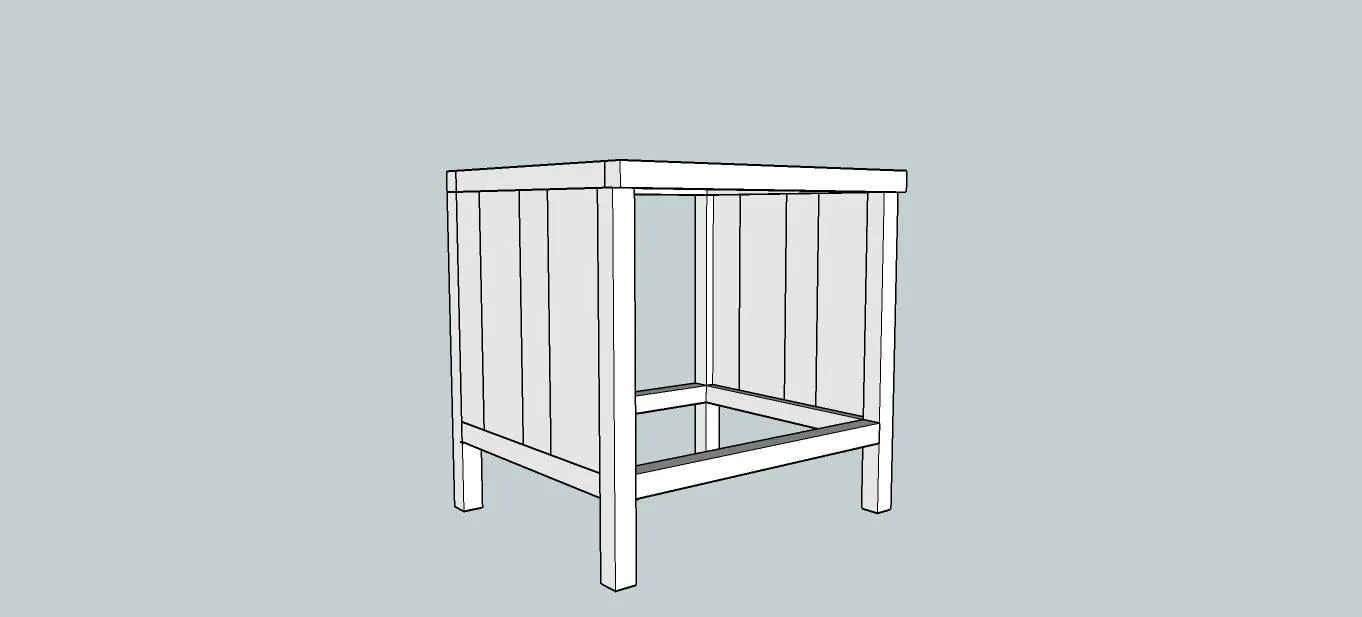
Moving on to filling in the side frame with the side boards! The pocket hole depth is changing to 3/4" pocket holes and 1 1/4" screws! You will still want to glue all joints as best as you can! I alternated my 1x6s and 1x4s, you can arrange them however you would like as long as there are 2 of each on each side!
8. Step 7 (cont)
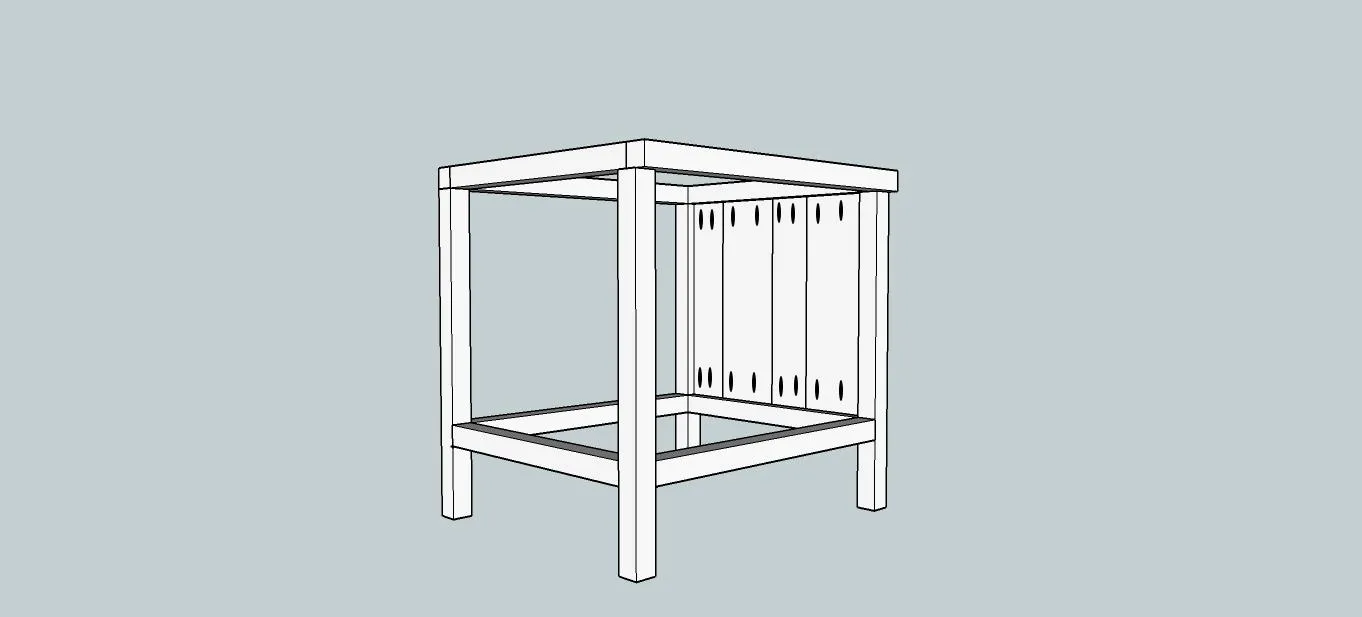
Here is an inside look!
9. Step 8
Attach the side boards on the other side! :)
10. Step 9
Flip the nightstand upside down to attach top boards...Using pocket holes drilled at 3/4" and 1 1/4" screws and glue!
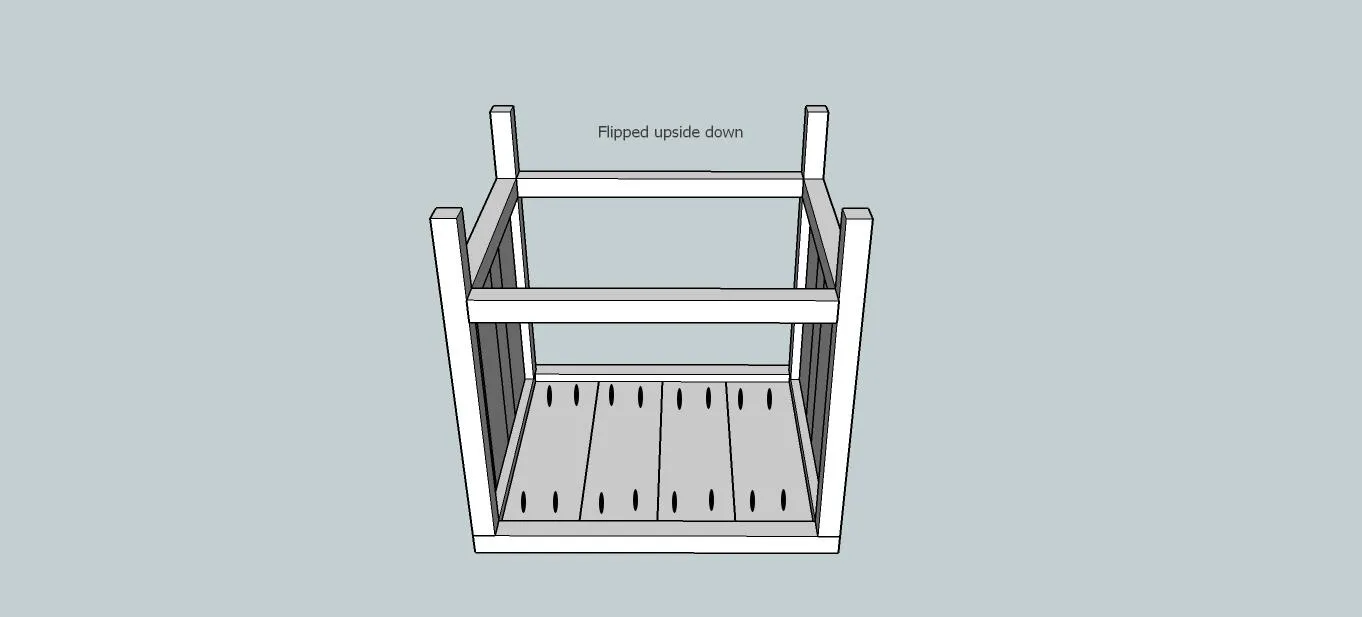
11. Step 10
Attach front and back shelf rails! Switching back to a pocket hole depth of 1 1/2" and 2 1/2" screws and glue to attach!
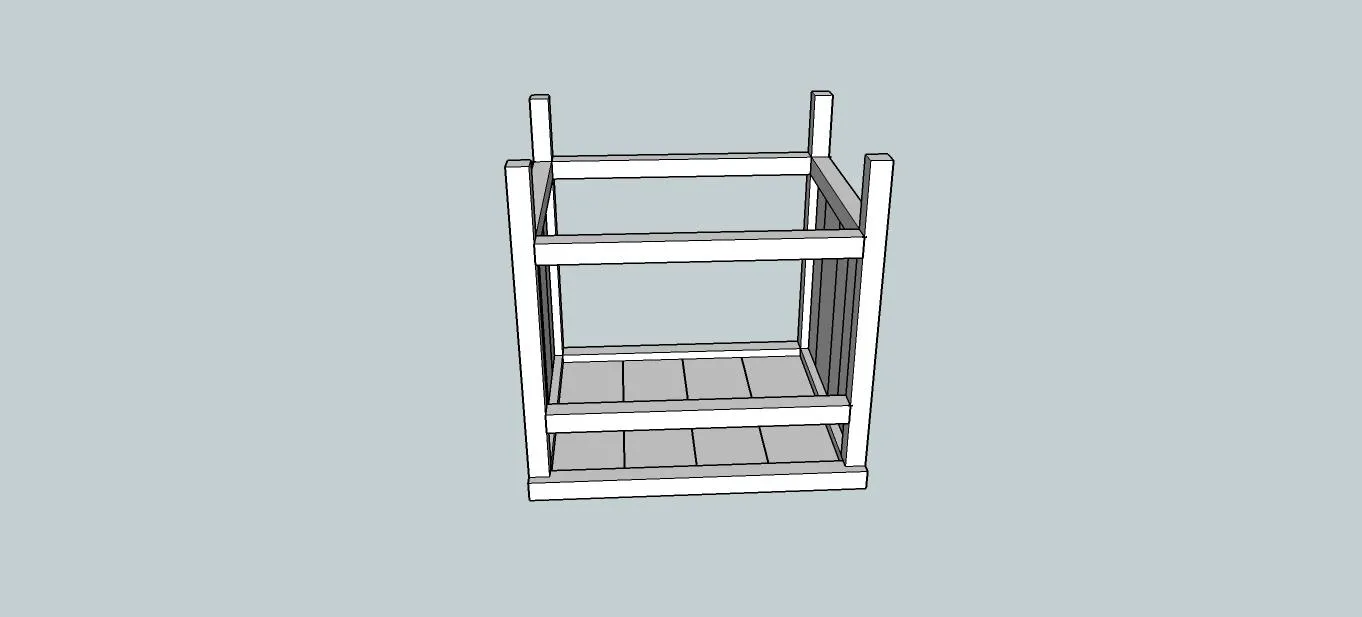
12. Step 10 (cont)
Here's the back view!
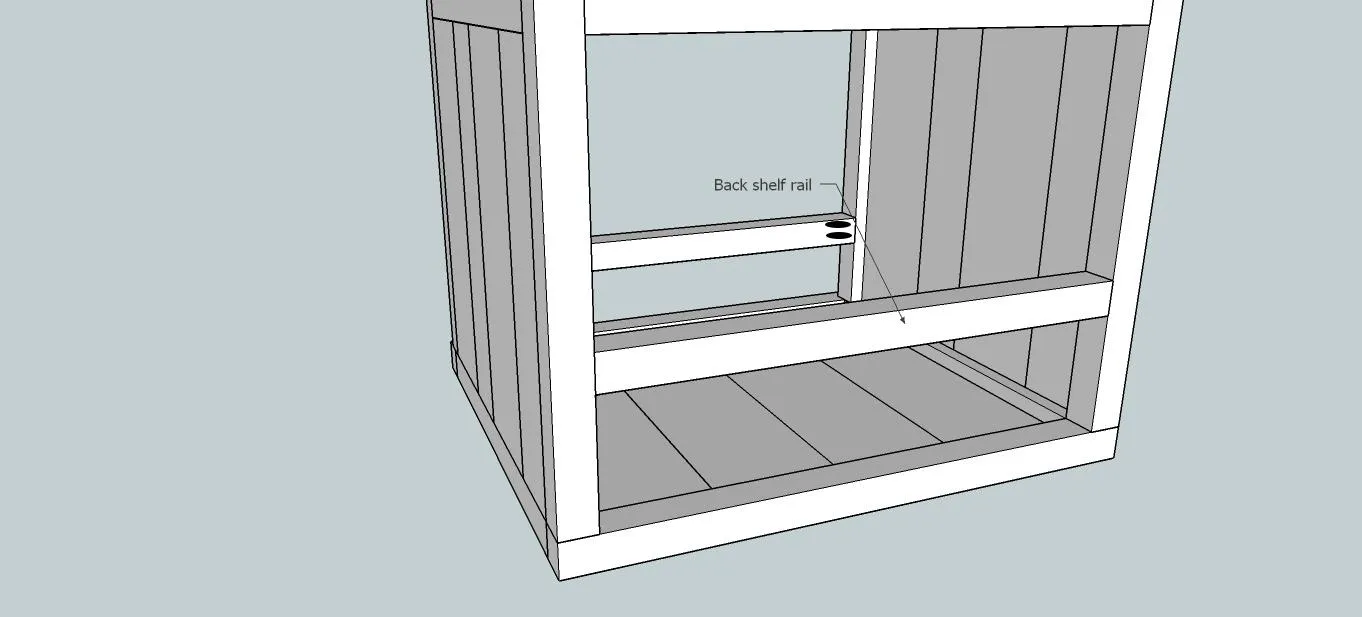
13. Step 11
Attach shelf boards! And switching back to a pocket hole depth of 3/4" and using 1 1/4" screws! Of course, don't forget the glue!! Haha!!
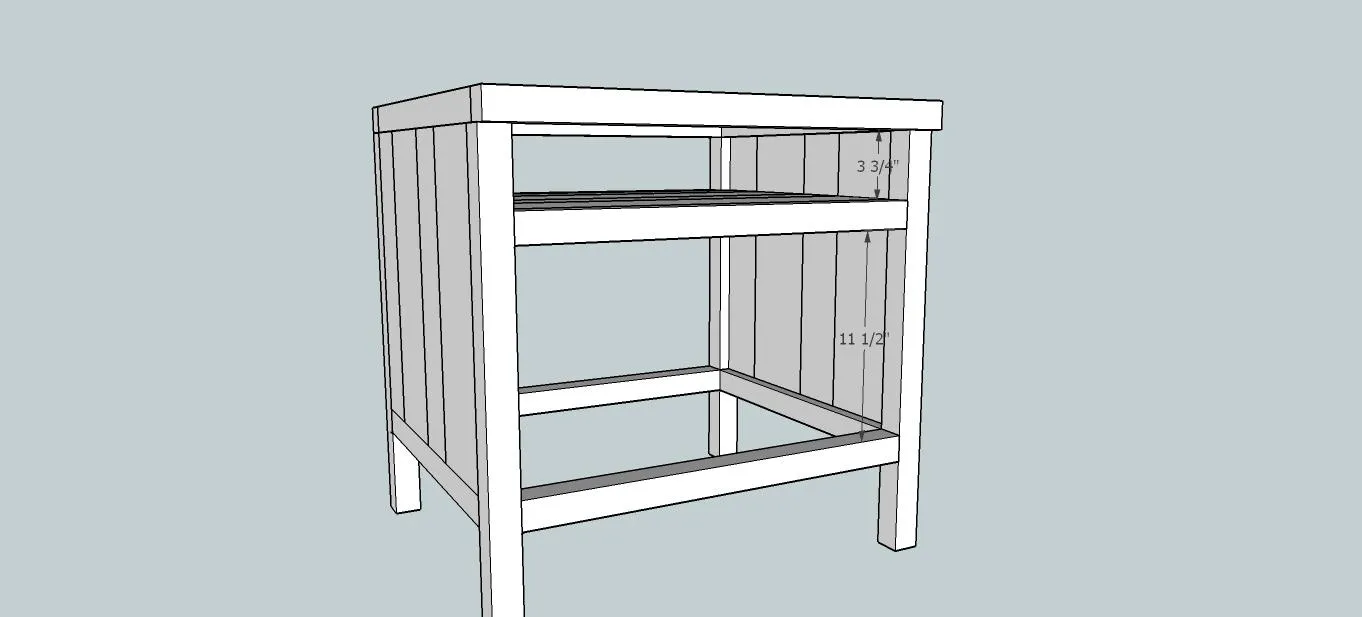
14. Step 12
Attach drawer slide braces (I cannot for the life of me remember what this is actually called...brain fart!!)Just and glue and screw them straight into the side with 1 1/4" flat head screws...make sure they are completely flush with the board or slightly sunk into the board!
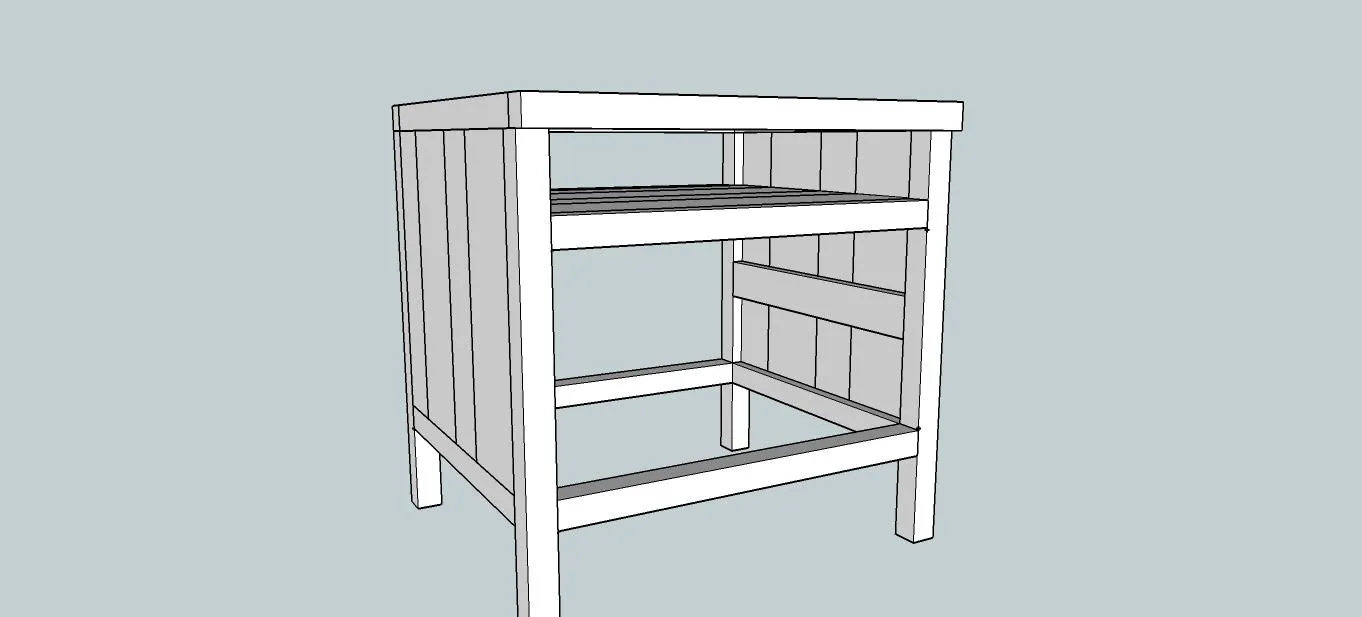
15. Step 13
Attach your drawer slides!! I have to say, I have hated drawers...until NOW!! This new drawer slide jig is UH-MAZING!! Just clamp it on and screw the screws into the side brace attaching the slides...then flip the jig out the opposite direction and set your drawer box on it and screw the slides into your drawer box!! It's really that simple!! Pretty much EVERYTHING went wrong while I was building this nightstand except the drawer!! Normally its the other way around!! Lol!!
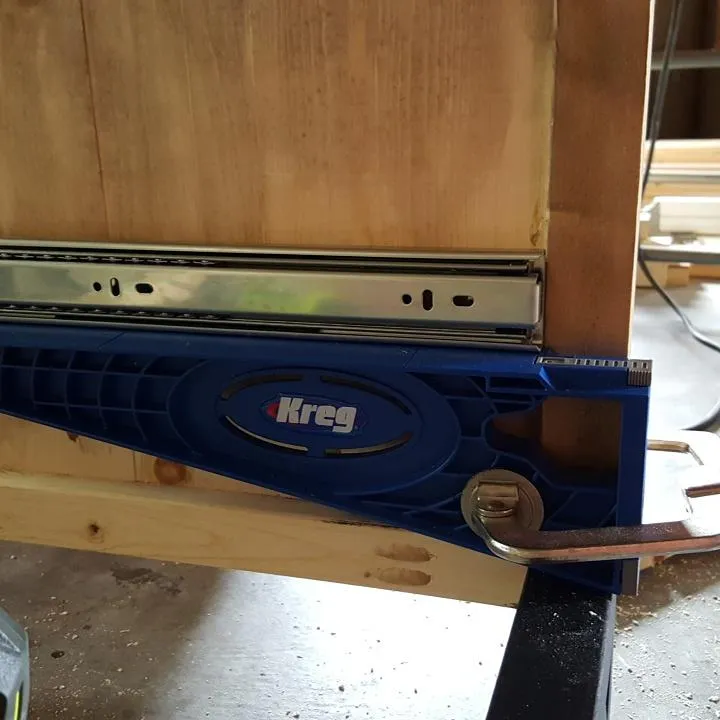
16. Step 14
- MEASURE between your drawer slides!!! DO not go off of the measurements listed here...these measurements are based off of living in a perfect world where we don't make mistakes...you want to make your drawer box the correct size to fit your nightstand, so make sure and measure or you risk wasting a ton of time, energy, and supplies!! I know all too well!! Ha!!
- Once you have measured, build your drawer box!
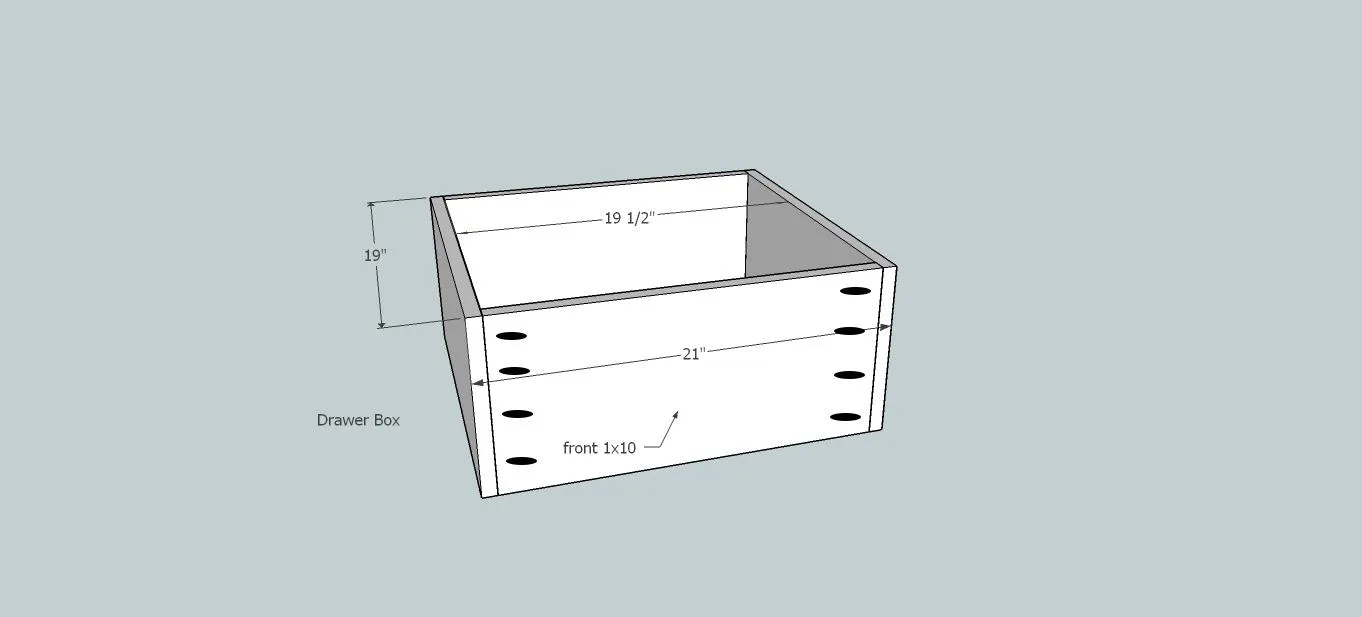
17. Step 15
Attach the 1/4" plywood to the bottom of your drawer!! I usually just glue and staple it to the bottom of my drawer...I know it's the not so fancy pants woodworker way...and I am totally down with that!!
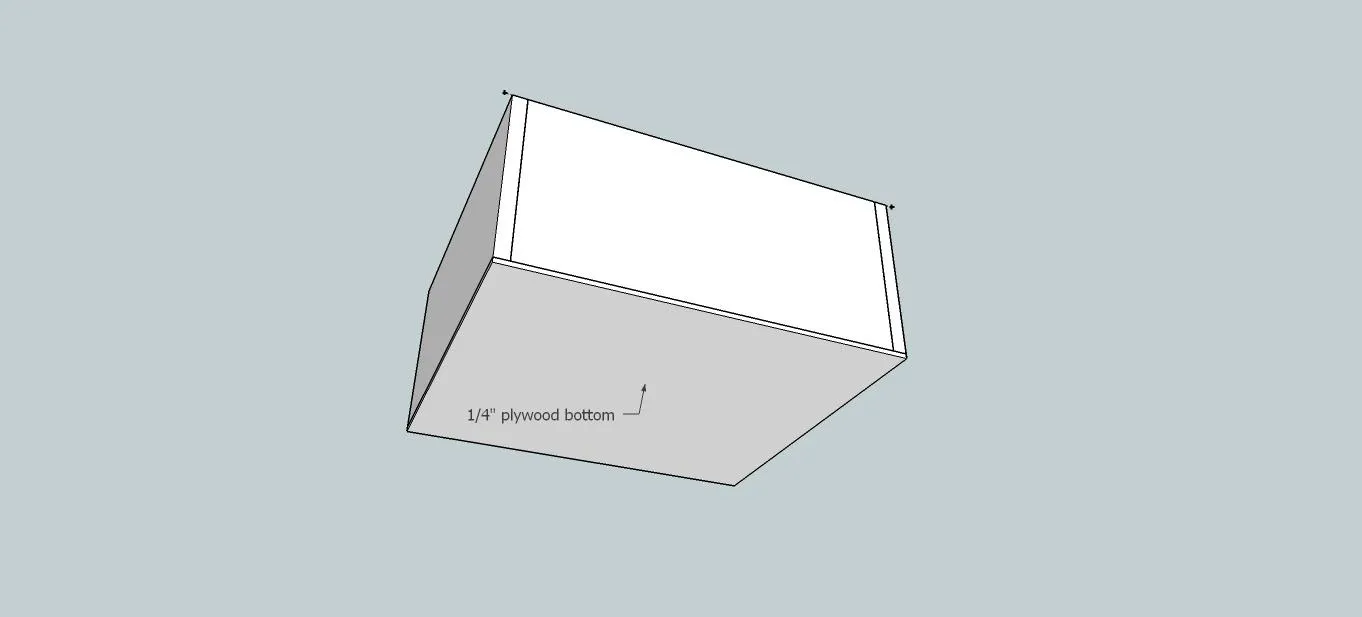
18. Step 16
Attach the drawer to the drawer slides!! I didn't take a picture while I was doing this and I really wish I would have to show you how well the drawer slide jig works!! I was just too excited about how simple it was to use and forgot all about taking pictures!!
19. Step 17
Attach your Drawer face! I just put plenty of glue, line it up just how I want it, and brad nail it into place from the inside of the drawer!! The picture is just for reference, your drawer should already be in your nightstand!
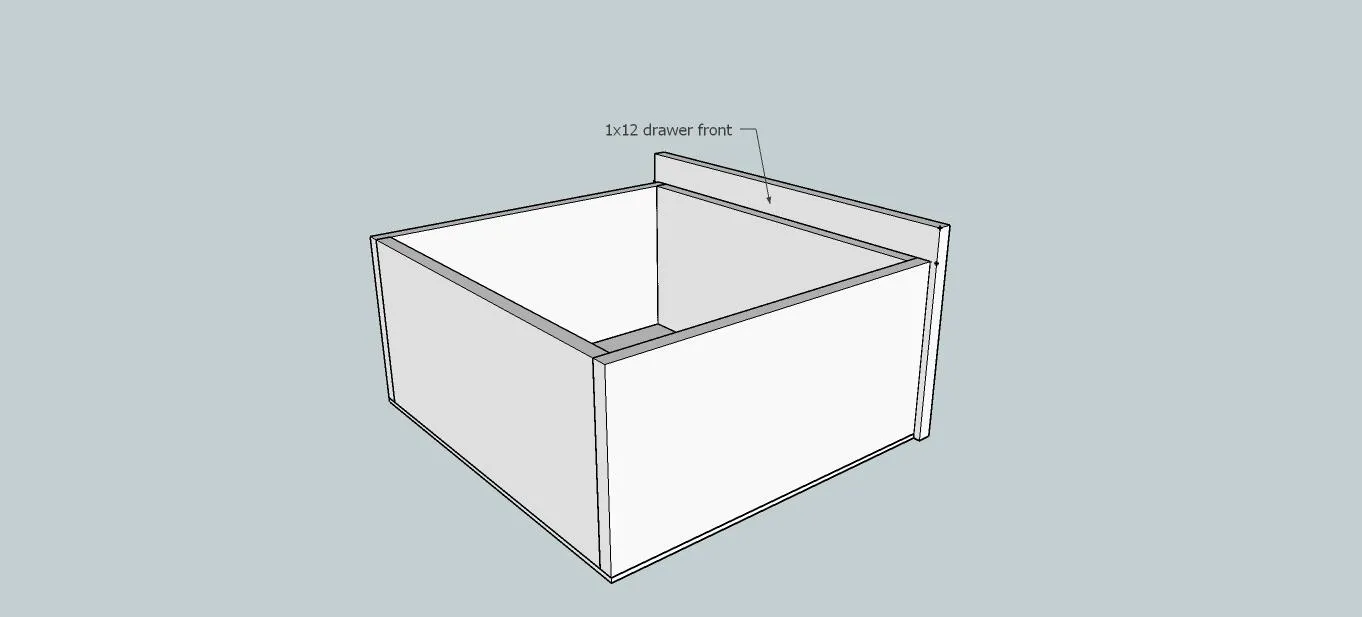
20. Step 18
The mitered accents are cut at 45 degrees off square...they are six inches long at their longest point! I just used glue and brad nailed them into place since it was just for looks not structure!
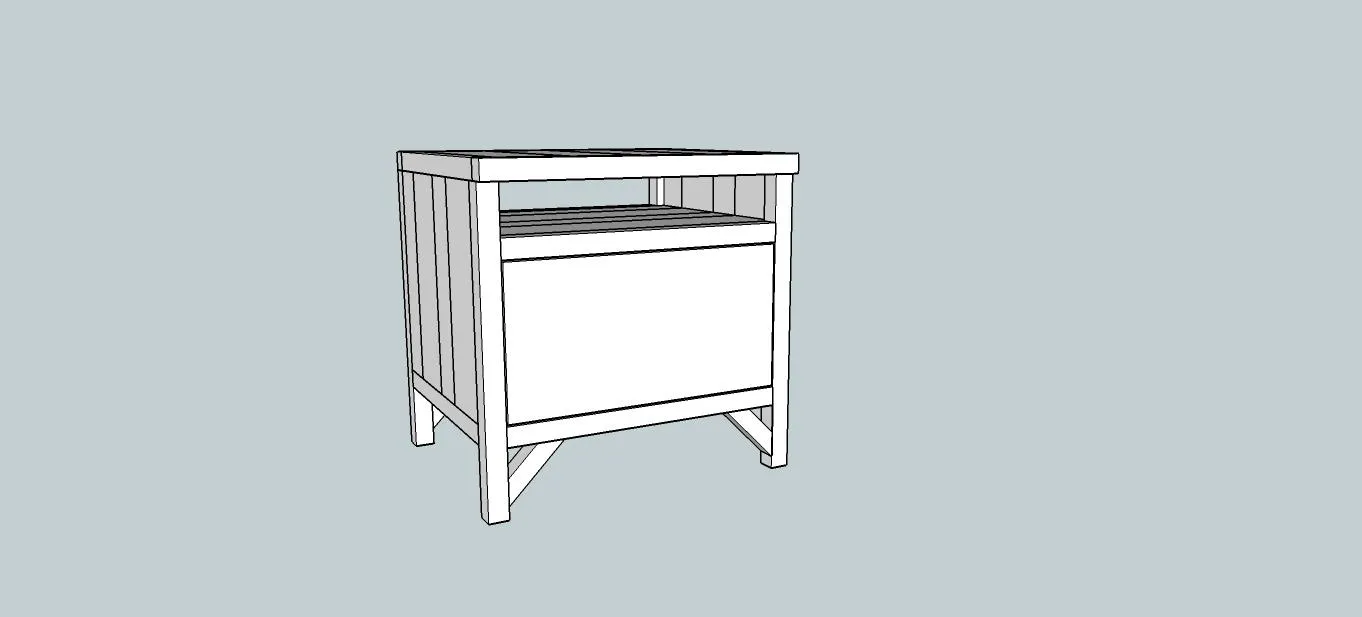
21. Step 17 (cont)
View with the drawer installed!
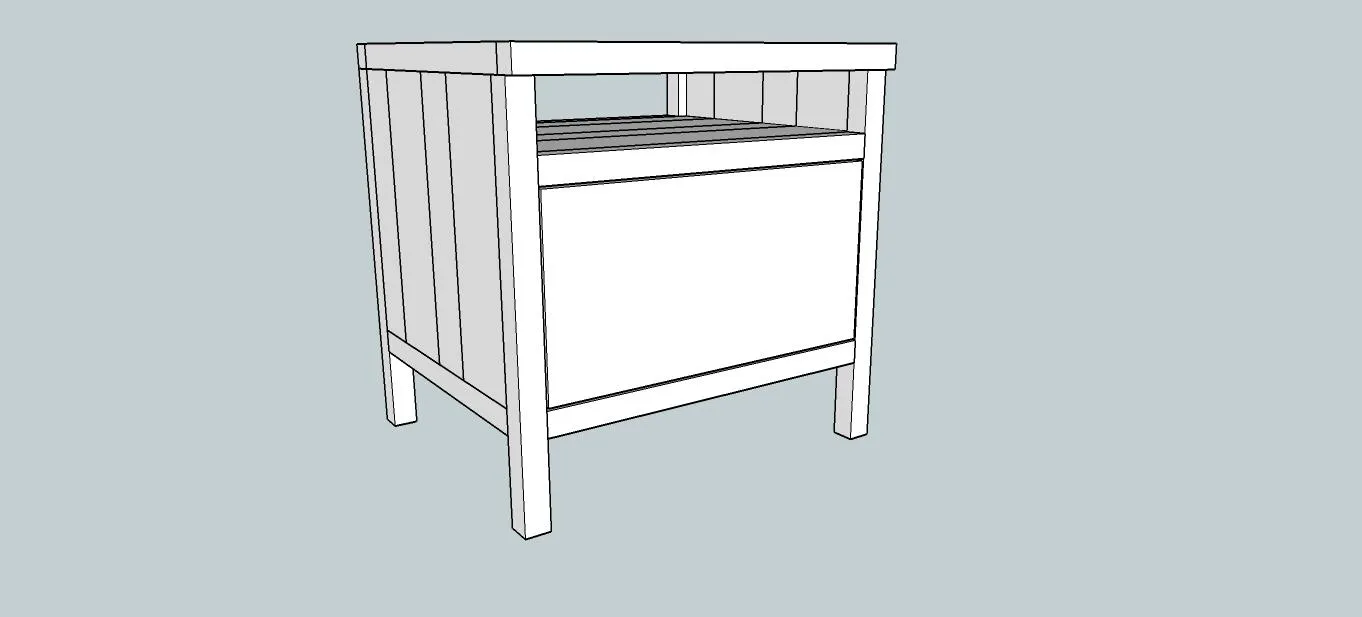
22. Step 19
Choose the finish you would like to use and apply it to this beauty!! I used the same flat black paint from Rust-oleum on the bottom...then I went over it with an acrylic craft paint in sterling silver because the stain was too light up against the harsh black! The stain I used here I wasn't crazy about...in the garage when I stained it, it looked great...then I brought it into the house and did not care for it at all!! It was a mixture of several stain colors! I cut the faux metal accents from the left over 1/4" plywood I had and painted them the same way I painted the bottom with the black and silver and used the furniture tacks to attach them!! And that's it...it's done!! Woohoo!!
23. Step 20
Make sure and check out my website Build It Craft It Love It for more awesome, free plans!!