Notch
NotchUse your browser's Print (Ctrl/Cmd + P) and choose Save as PDF. This page works offline once you've opened it with a signal.
Holiday Gift Wrapping Caddy
This easy to build gift wrapping caddy keeps all of your essentials organized and in one place during the holiday season.
- Difficulty
- Easy
- Time
- 3–5.8 hours
- Cost
- $$
Cut list
| Part | Qty | T × W × L | Material | ✓ |
|---|---|---|---|---|
| Base | 1 | 3/4" × 11" × 31" | — | ☐ |
| Sides | 2 | 3/4" × 5" × 12" | — | ☐ |
| Interior Divide | 1 | 3/4" × 4" × 31" | — | ☐ |
| Back | 1 | 3/4" × 5" × 31" | — | ☐ |
| Dividers | 3 | 3/4" × 3" × 4" | — | ☐ |
Materials
| Item | Qty | ✓ |
|---|---|---|
| Board, 1x12 96" | 1 board | ☐ |
| Hardwood Dowels, 7/8" 48" | 2 board | ☐ |
| 1 1/4 Kreg Pocket Hole Screws | 23 each | ☐ |
| 1 1/4" Brad Nails | 12 each | ☐ |
| 1/8" Cotter Pins | 8 each | ☐ |
| Wood Glue | 1 each | ☐ |
| Paint and Stain (optional) | 1 each | ☐ |
Overall cost: $$. Lumber varies by region, species, and season, so we give a band rather than a figure.
Tools
- Brad Nailer
- Drill / Driver
- Miter Saw
- Pocket Hole Jig
- Random Orbit Sander
- Table Saw
- Bar / Pipe Clamps — optional
- Combination Square — optional
- Tape Measure — optional
Instructions
1. Cut Base & Drill Pocket Holes
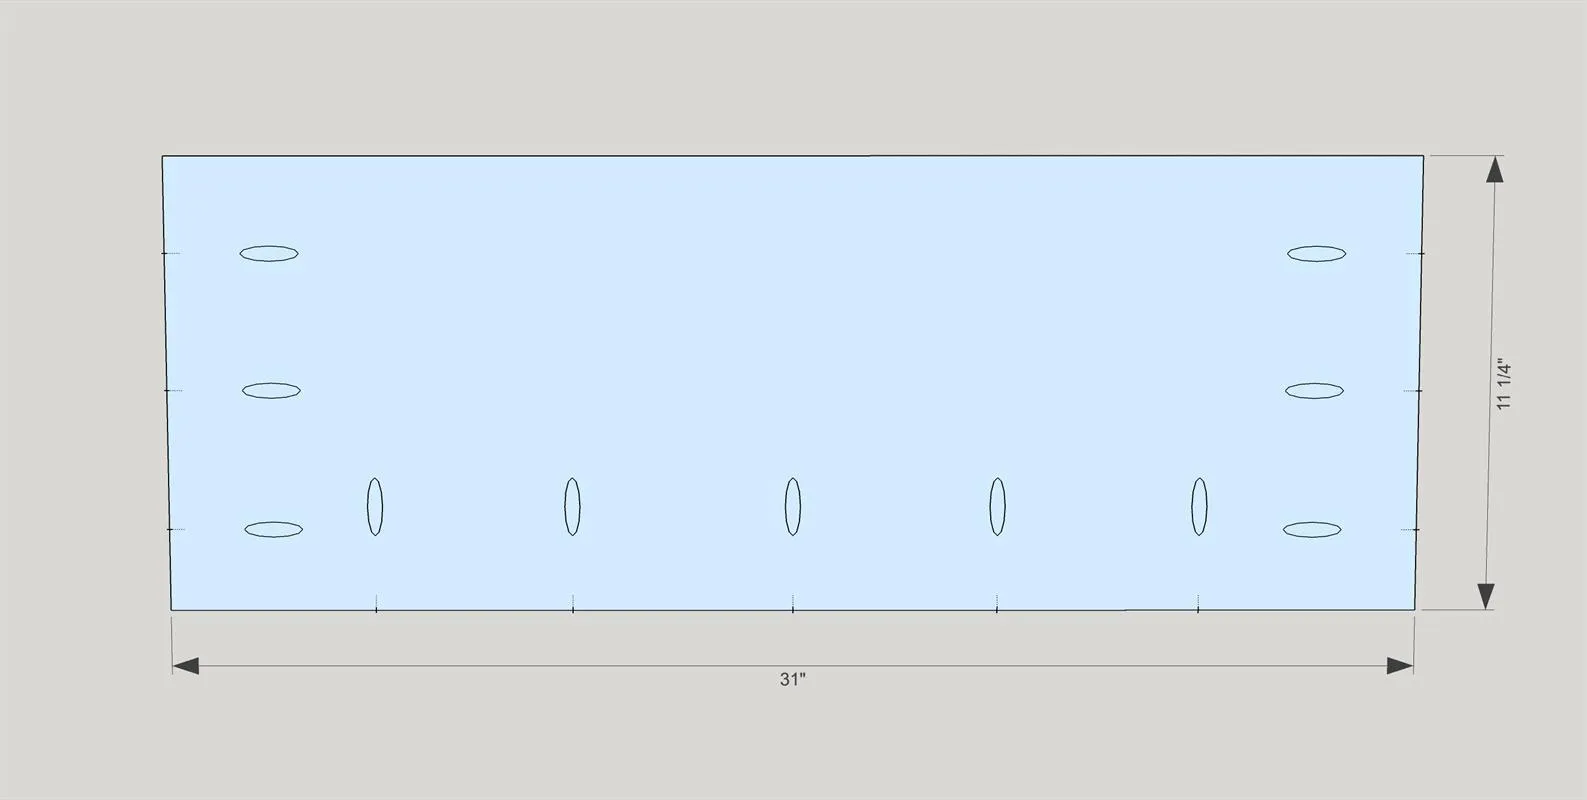
Cut the BASE to size and drill three pocket holes on the 12" sides, and five along one of the 31" sides.
2. Cut Sides & Drill Holes
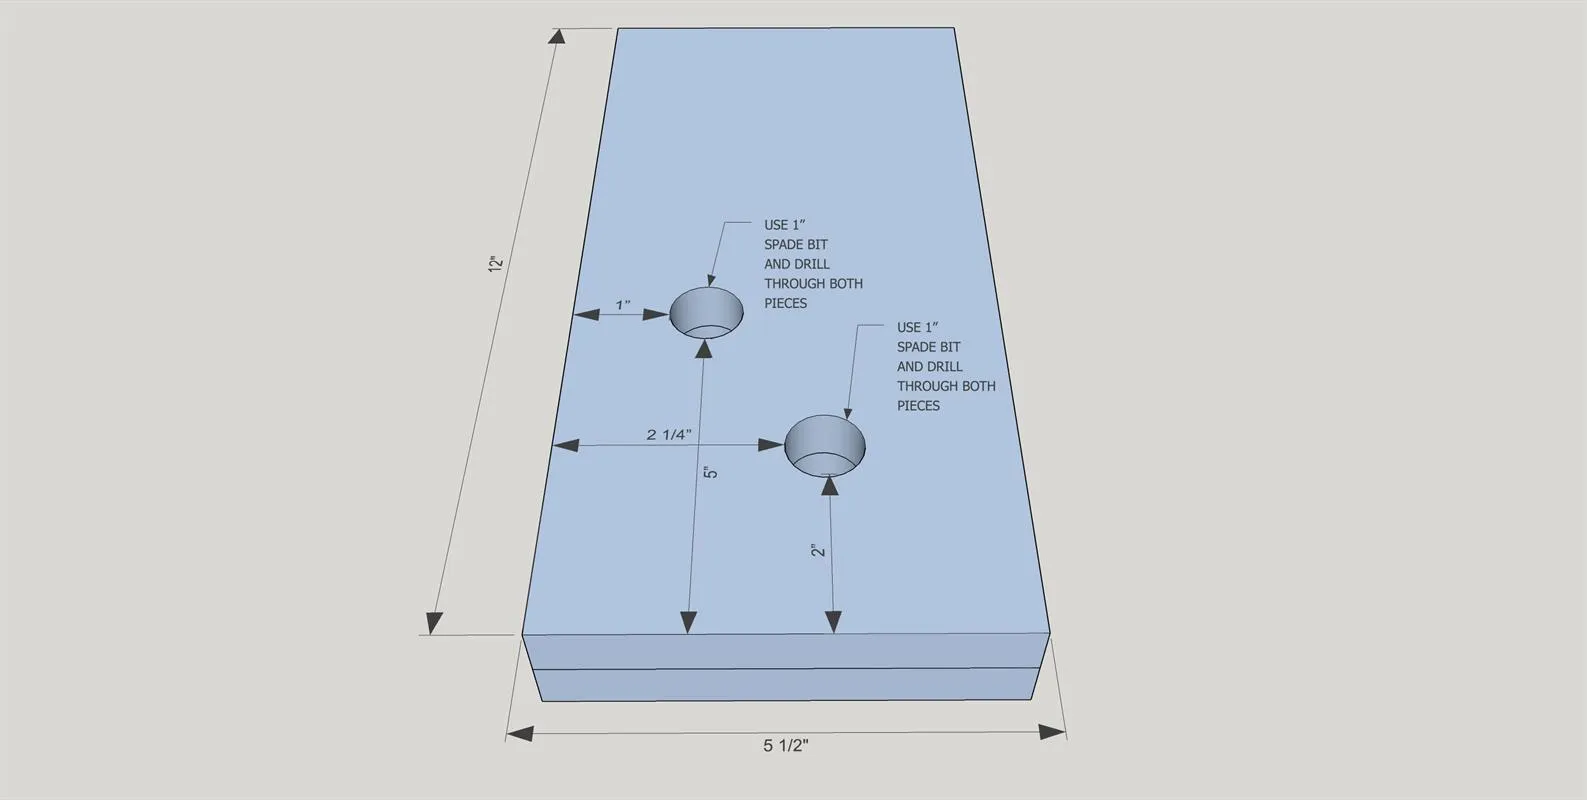
- Cut the SIDE pieces to size, then stack both pieces on top of each other with a scrap board underneath.
- Clamp securely to your work surface.
- Drill holes with a 1" spade bit in the locations indicated on the sketch.
3. Attach Sides to Base
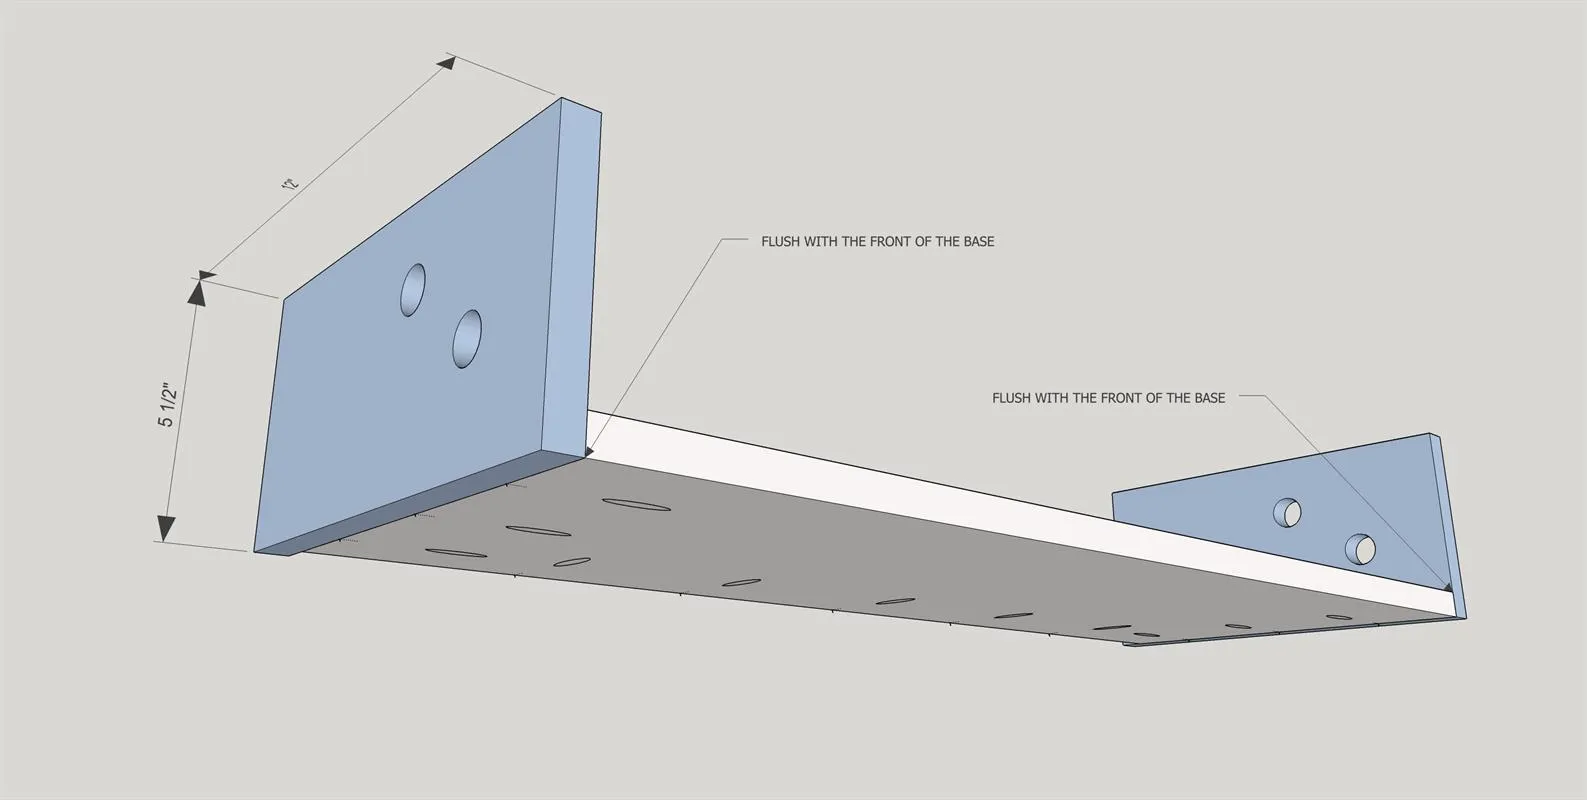
Attach the SIDES to the BASE, making sure that the front of the side pieces are flush with the front of the base (the edge of the base with no pocket holes underneath). Secure with wood glue and 3 - 1 1/4" pocket hole screws on each side.
4. Attach Interior Divide
Attach the INTERIOR DIVIDE piece 3 1/2" from the back edge of the base using wood glue and 8 - 1 1/4" pocket hole screws.
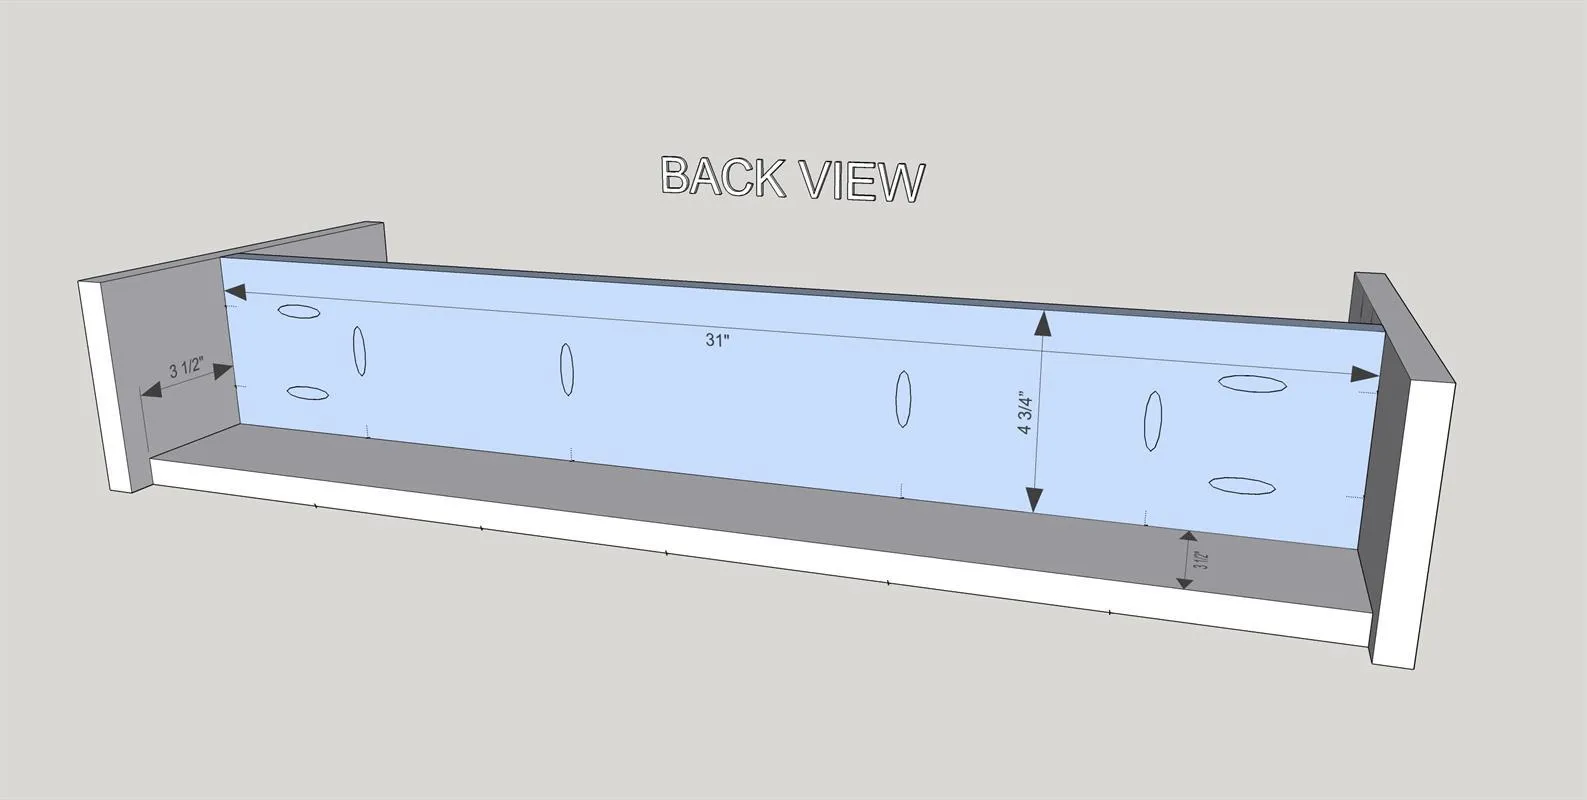
5. Attach Back Piece
Attach the BACK using wood glue and 1 1/4" pocket hole screws - 2 on each side, and 5 on the bottom (attached to the base). We found the attach the BACK was to turn the entire wrapping caddy upside down.
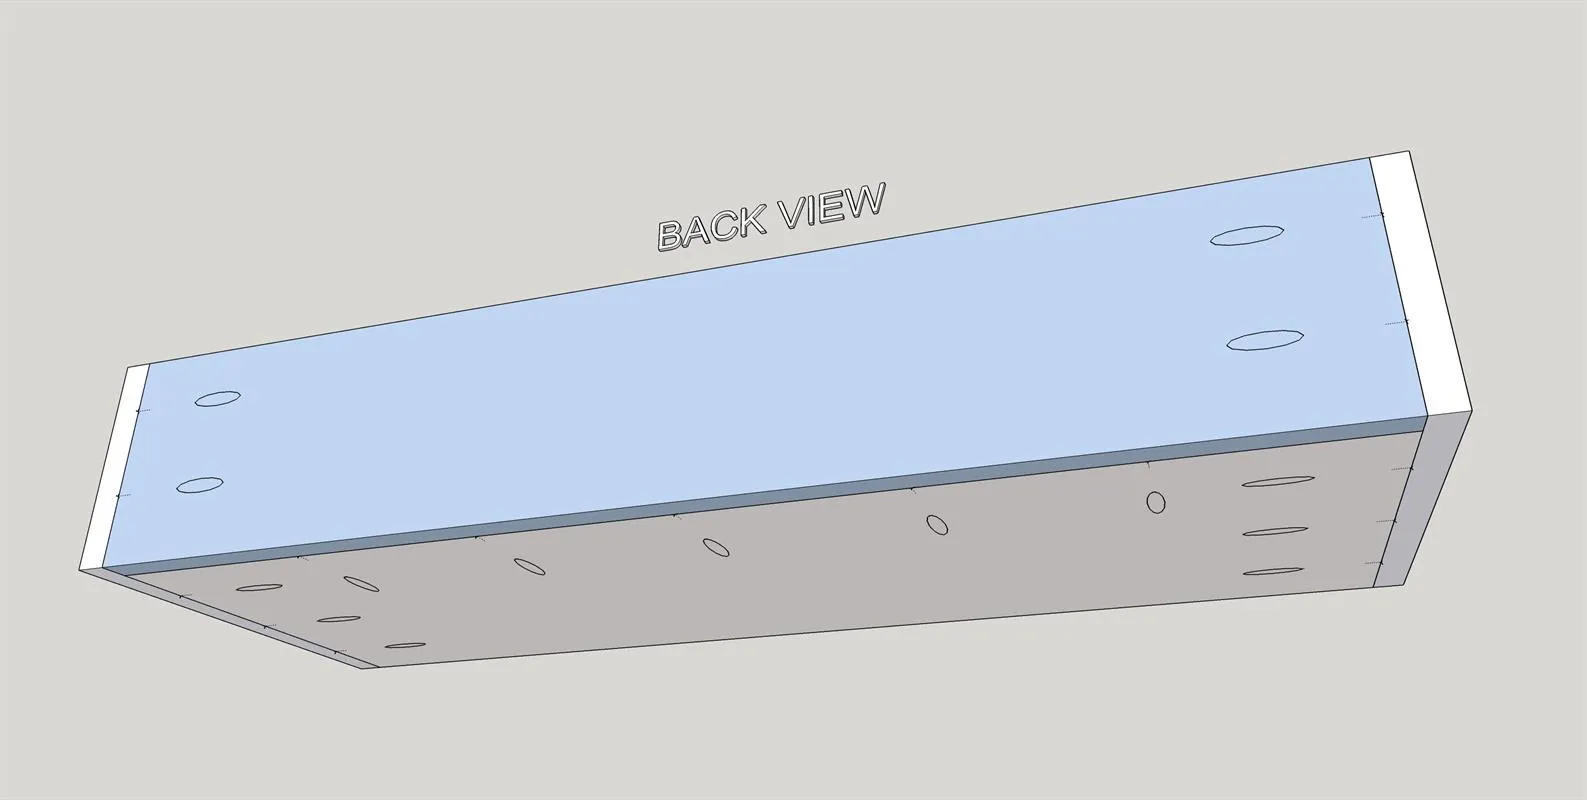
6. Insert Dividers
Insert DIVIDERS 7 3/16" apart and secure with 1 1/4" brad nails through the BACK and INTERIOR DIVIDE.
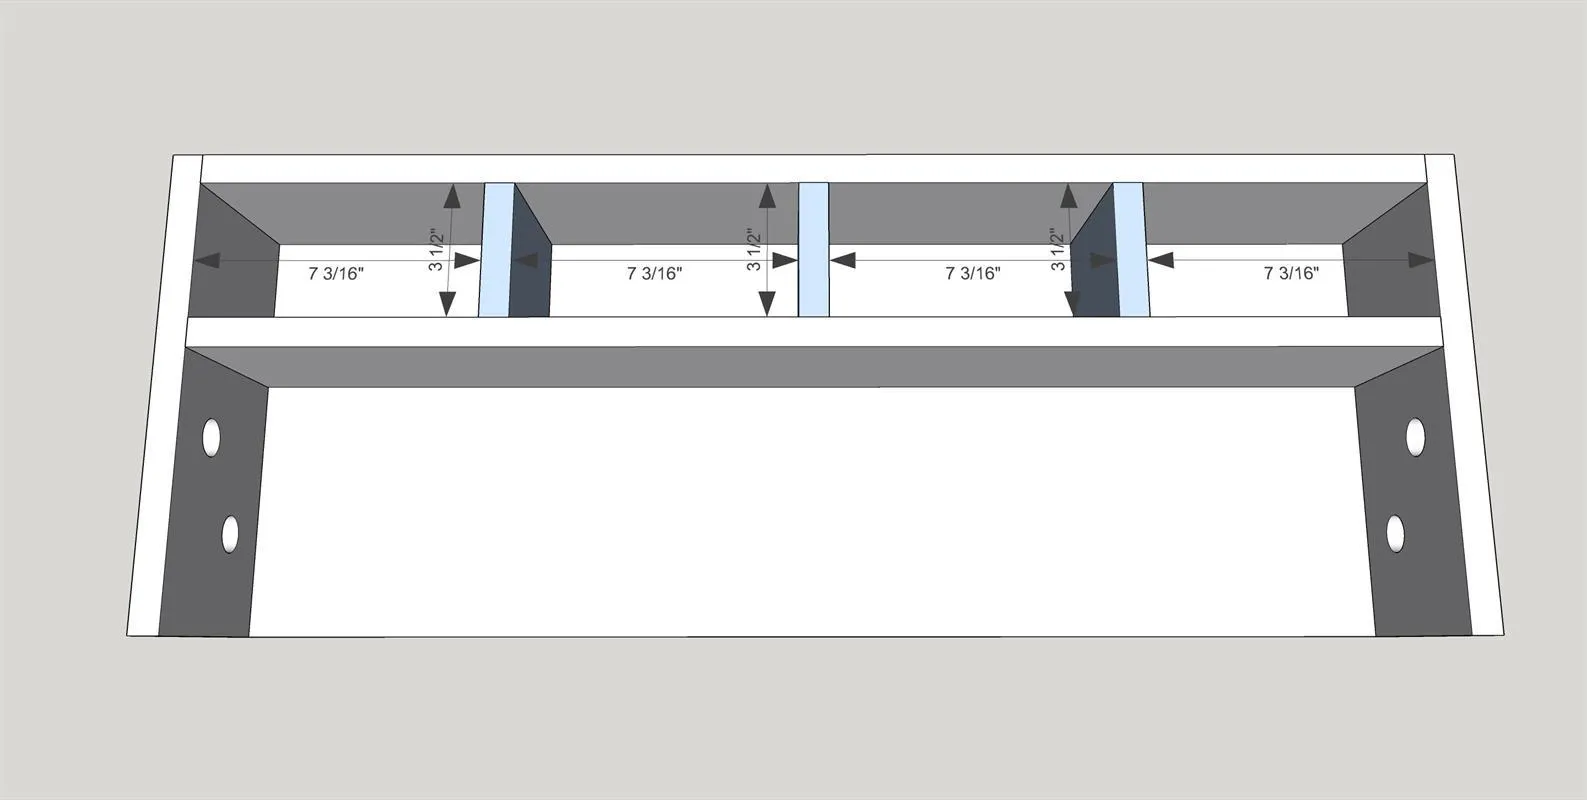
7. Cut and Insert Dowels
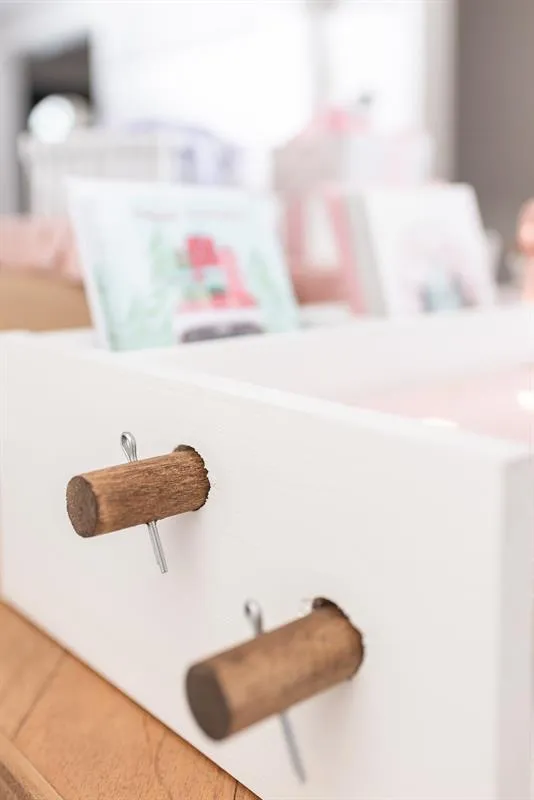
Cut the dowels to 35" long and drill 1/8" holes 1 1/2" from each end for the cotter pins.
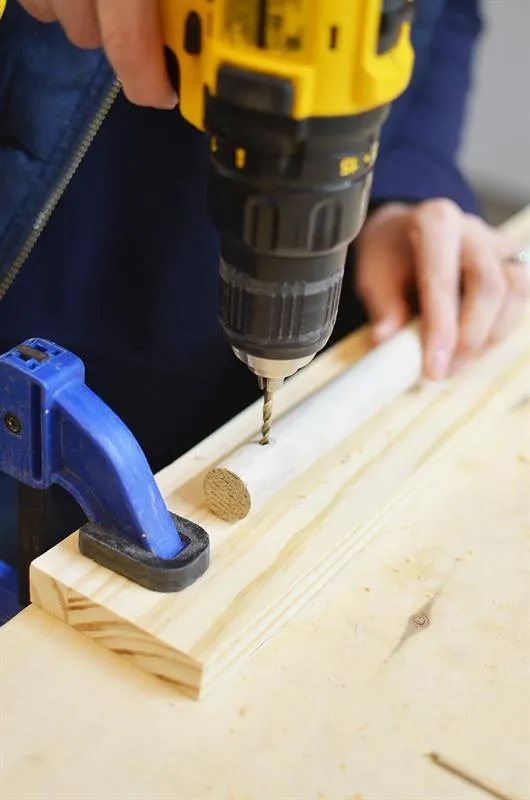
8. Finishing
We chose to paint the main section of the caddy white, and stained the dowels Provincial by Minwax. You can choose your own colors and stain, or just leave it natural.
9. Insert Dowels & Cotter Pins
Insert the dowels and insert cotter pins into each end.