Notch
NotchUse your browser's Print (Ctrl/Cmd + P) and choose Save as PDF. This page works offline once you've opened it with a signal.
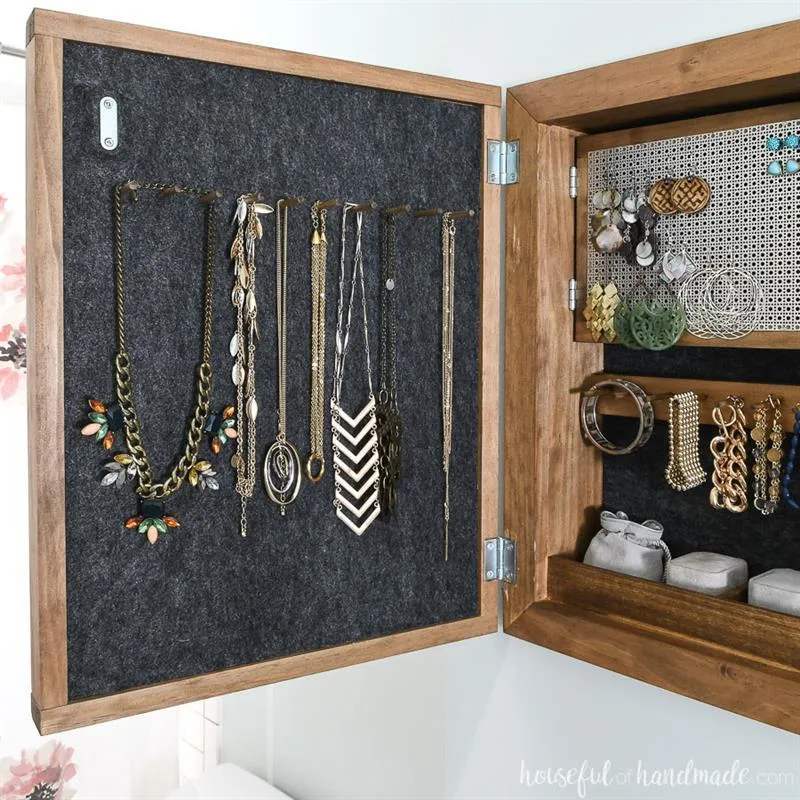
Hidden Jewelry Cabinet
Organize and store your jewelry behind a modern wood sign.
- Difficulty
- Easy
- Time
- 5.3–10 hours
- Cost
- $$$
Cut list
| Part | Qty | T × W × L | Material | ✓ |
|---|---|---|---|---|
| Box sides | 2 | 3/4" × 3" × 17" | — | ☐ |
| Box top/bottom | 2 | 3/4" × 3" × 14" | — | ☐ |
| Box frame sides | 2 | 3/4" × 1" × 20" | — | ☐ |
| Box frame top/bottom | 2 | 3/4" × 1" × 16" | — | ☐ |
| Bracelet rack | 1 | 3/4" × 1" × 13" | — | ☐ |
| Sign frame sides | 2 | 3/4" × 1" × 18" | — | ☐ |
| Sign frame top/bottom | 2 | 3/4" × 1" × 16" | — | ☐ |
| Ring box front | 1 | 1/4" × 1" × 13" | — | ☐ |
| Ring box divider | 1 | 1/4" × 1" × 3" | — | ☐ |
| Box back | 1 | 1/4" × 14" × 18" | — | ☐ |
| Sign | 1 | 3/4" × 14" × 18" | — | ☐ |
| Pegs | 20 | 3/16" × 3/16" × 2" | — | ☐ |
Materials
| Item | Qty | ✓ |
|---|---|---|
| Board, 1x4 96" | 1 board | ☐ |
| Board, 1x2 96" | 2 board | ☐ |
| Board, 1/4" x 1 1/2" 36" | 1 board | ☐ |
| Board, 1x1 36" | 1 board | ☐ |
| Plywood, 1/4" Thick Quarter Sheet | 1 board | ☐ |
| Plywood, 3/4" Thick Quarter Sheet | 1 board | ☐ |
| Dowel, 3/16" round 48" | 1 board | ☐ |
| 1 1/4" pocket hole screws | 40 each | ☐ |
| 1 1/4" finish nails | 10 each | ☐ |
| Decorative metal sheet | 1 each | ☐ |
| 24" x 36" felt | 1 each | ☐ |
| Spray glue | 1 each | ☐ |
| Wood glue | 1 each | ☐ |
| 5/8" wire nails | 20 each | ☐ |
| 1" hinges | 2 each | ☐ |
| 2" hinges | 2 each | ☐ |
Overall cost: $$$. Lumber varies by region, species, and season, so we give a band rather than a figure.
Tools
- Brad Nailer
- Circular Saw
- Drill / Driver
- Impact Driver
- Miter Saw
- Pocket Hole Jig
- Bar / Pipe Clamps — optional
- Combination Square — optional
- Tape Measure — optional
Instructions
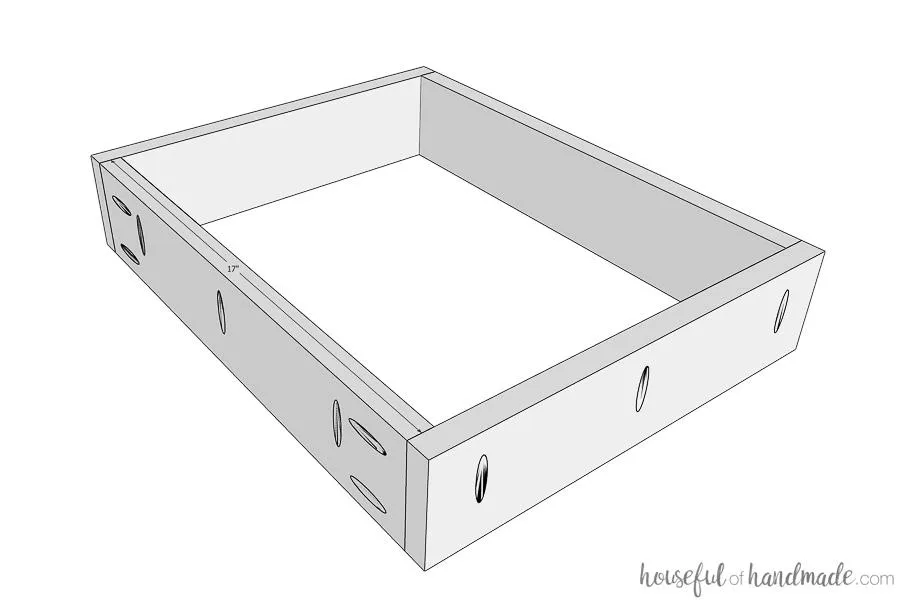
1. Build box
- Add pocket holes set for 3/4" material to each end of the box side pieces.
- Also add pocket holes along the front of both the box side and box top/bottom pieces (to attach the frame later).
- Build a box by attaching the box side to the top/bottom with wood glue and the pocket hole screws.
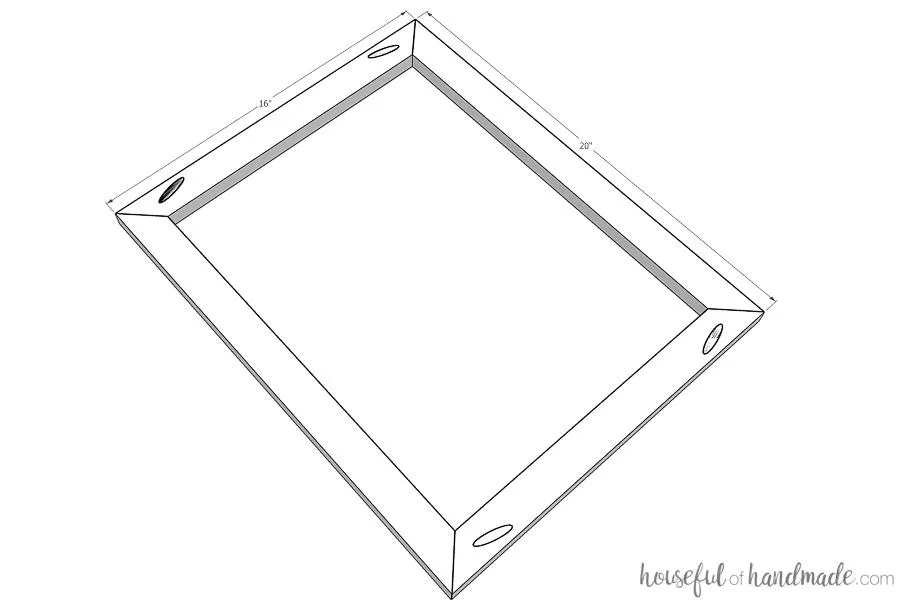
2. Build box frame
- Build the frame for the box by cutting the box frame sides and top/bottom pieces at a 45 degree miter on each end.
- Add a pocket hole set for 3/4" material to the end of each of the top/bottom pieces. When adding a pocket hole to the mitered pieces, you might want to angle the cut of the wood so it is not flush with the bottom of the pocket hole system and don't drill quite to the end. This allows the pocket hole to be hidden in frame and not visible on the edges.
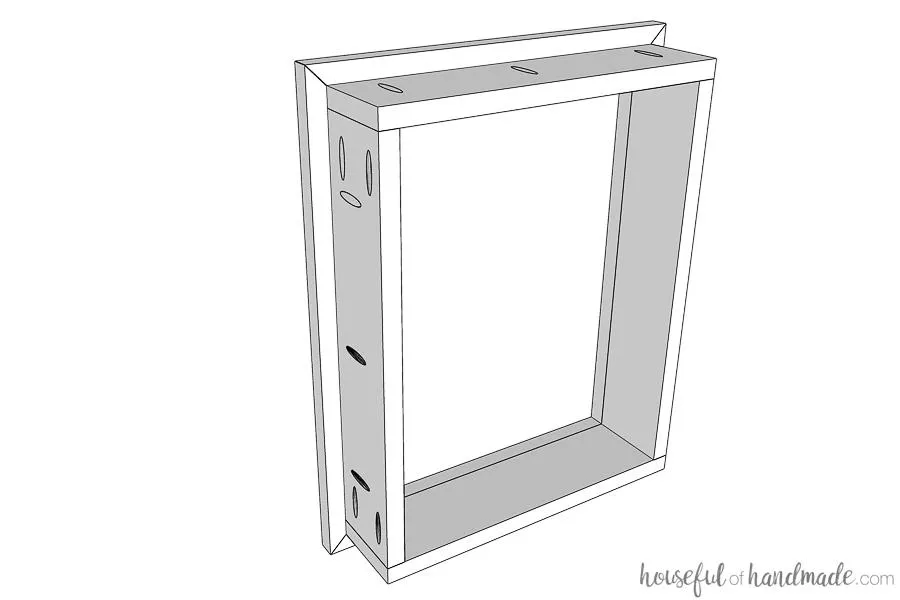
3. Attach frame to box
Using the pocket holes in the front of the box, attach the frame to the box. Use pocket hole screws and wood glue. Make sure the inside of the frame is flush with the inside of the box all the way around.
4. Add ring compartments
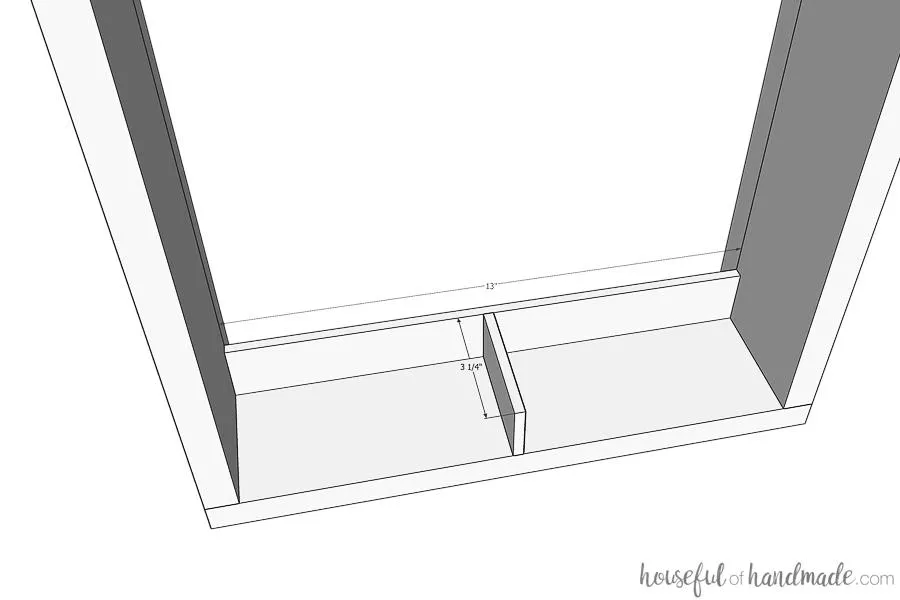
To make two small compartments to the bottom of the jewelry cabinet for rings and other small items, use 1/4" thick hobby boards and cut to size. Make sure they fit tightly into the cabinet and attach with wood glue. Once dry the wood glue will hold the ring compartment together without the need for other fasteners.
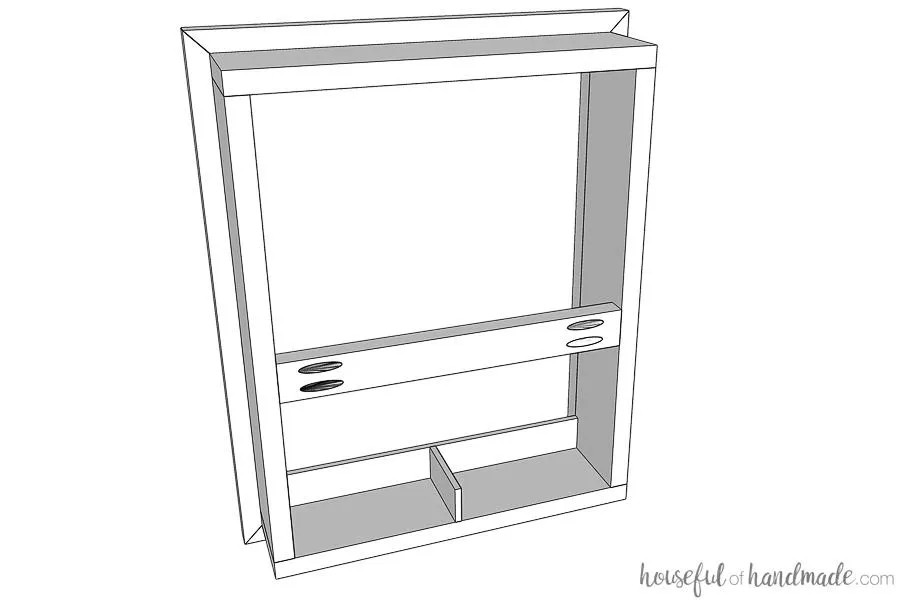
5. Build bracelet rack
- For the bracelet rack, cut a piece of 1x2 to fit into the jewelry cabinet box.
- Drill pocket holes set for 3/4" material on either end of it.
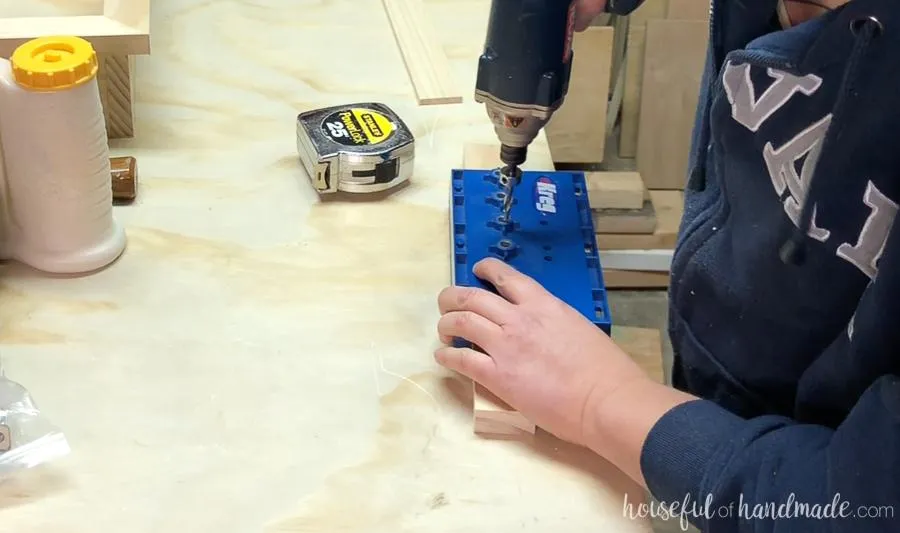
- Flip it over and using the Kreg shelf pin jig, drill 5mm shelf pin holes along the entire bracelet rack board.
6. Build wood sign
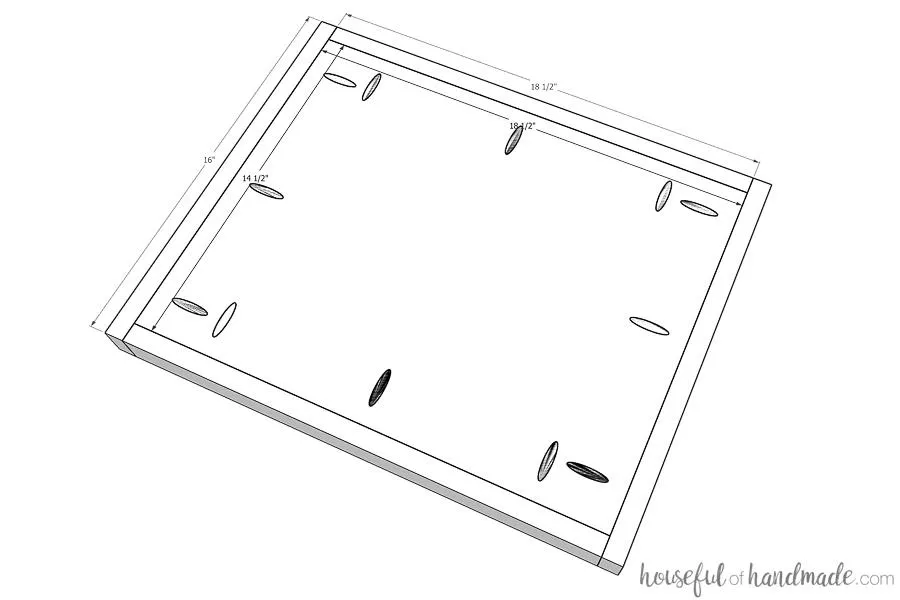
After they are painted/stained/sealed, attach the sides of the wood sign frame to the sides of the sign with 1 1/4" pocket hole screws. Make sure the back of the plywood is flush with the back of the frame board leaving 3/4" inset in the front. Repeat for the top/bottom sign frame pieces.
7. Sand and finish the pieces
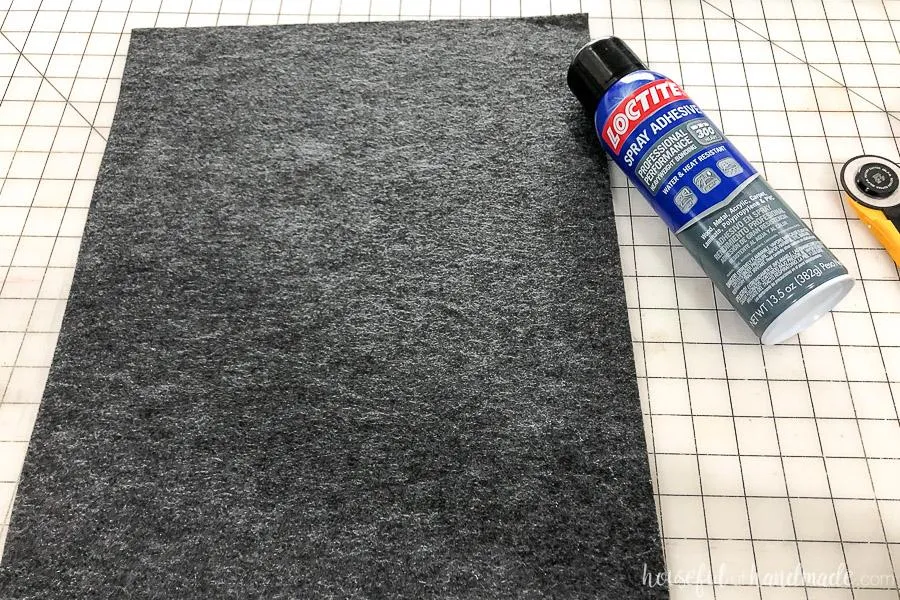
Sand and finish all the pieces for the jewelry cabinet. Including the pegs. For the back of the cabinet, I decided to add felt instead of just having it be wood to be softer on my jewelry. If you want to do that too, cut and attach the felt to the box back with spray glue. I also added a couple pieces of felt to the bottom of the ring compartments.
8. Attach bracelet rack
Attach the bracelet rack 9" below the top of the jewelry cabinet box with pocket hole screws and wood glue. Cut the pegs that will go in the shelf pin holes, but don't attach until after sanding and staining/painting (it is way easier that way).
9. Build earring rack
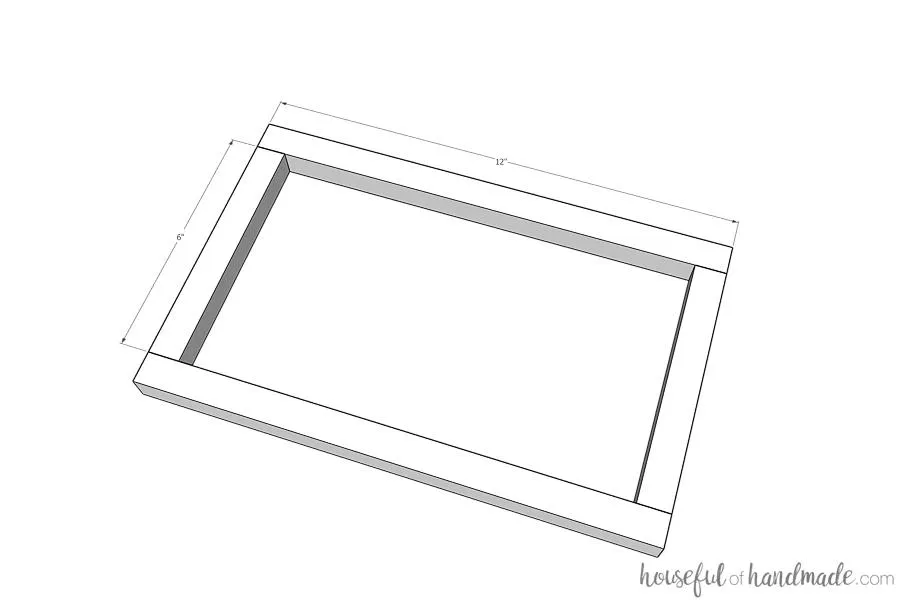
Attach the 1x1 boards cut for the earring rack sides and top/bottom by lining up the side pieces so they are flush with the edge of the top/bottom pieces and securing the wood glue and 1 1/4" finish nails.
10. Cut the wood sign plywood
- Cut the pieces for the wood sign and wood sign frame.
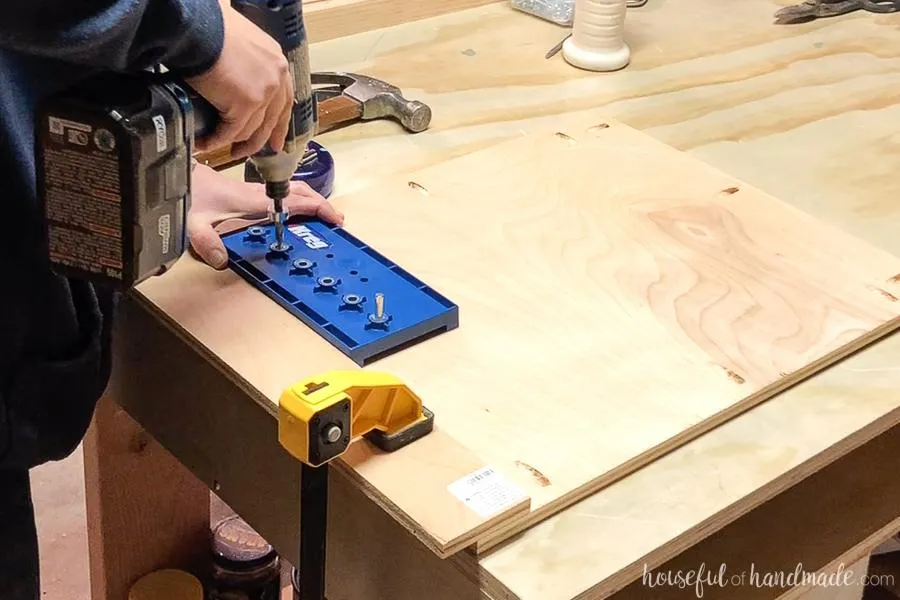
- Drill pocket holes set for 3/4" thick material along all 4 sides of the plywood back. Using the shelf pin jig, drill holes for the necklace pegs in the back of the plywood. Make sure the placement is low enough that it will clear the box frame when closed.
- Also, leave about 1 1/2" of clearance on either side of the plywood to allow for the box frame. I like to finish the pieces for my wood signs before assembling if I want the sign and frame different colors.
11. Add the back
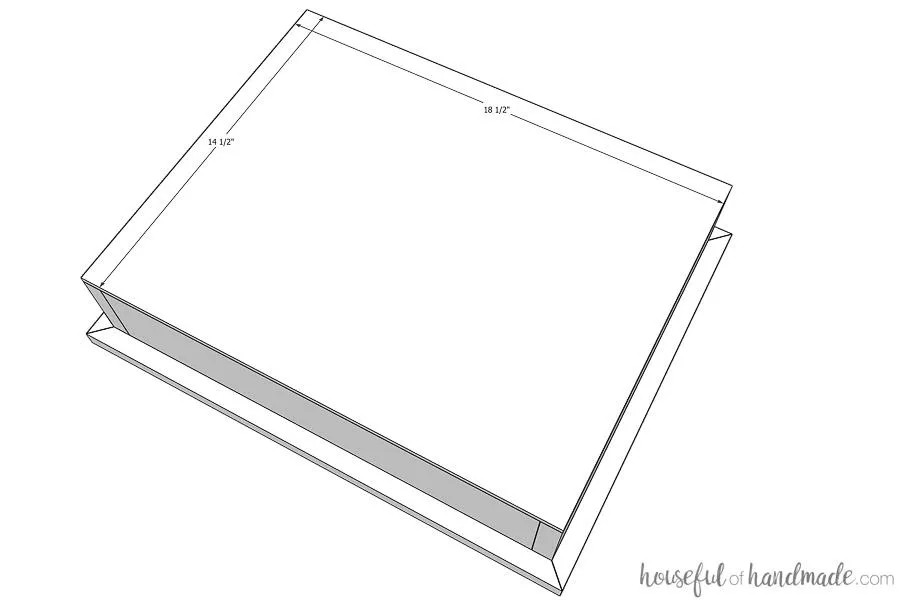
To add the back, line it up on the back of the jewelry cabinet box and attach with 1 1/4" finish nails.
12. Install the pegs
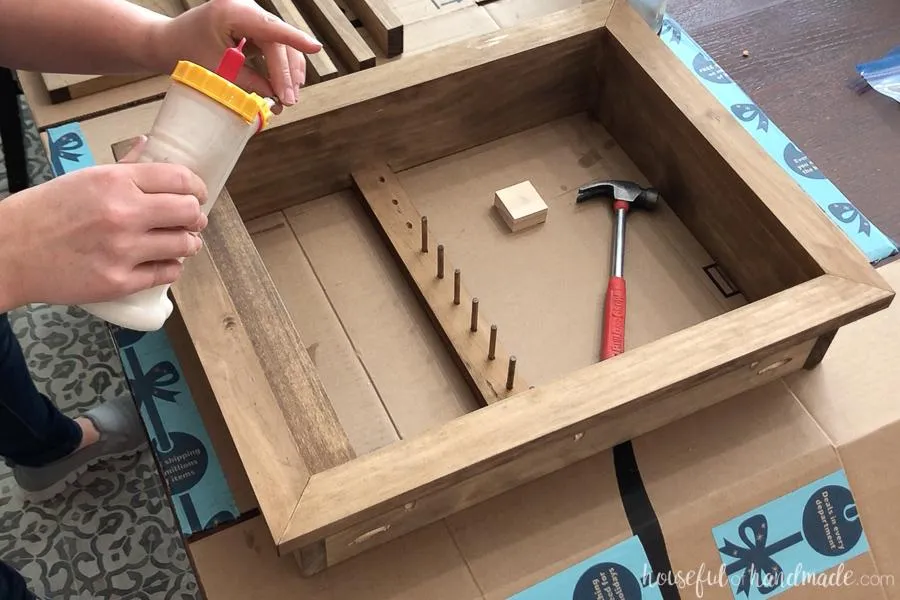
To install the pegs for the bracelets and necklaces, place a drop of wood glue on the back of the peg or in the shelf pin hole. Gently press the peg into the hole and lightly tap it with a small hammer to secure. If any of the pegs break, I discovered that you can glue them back together with a little wood glue and since they are only holding small piece of jewelry it holds up well.
13. Finish earring rack
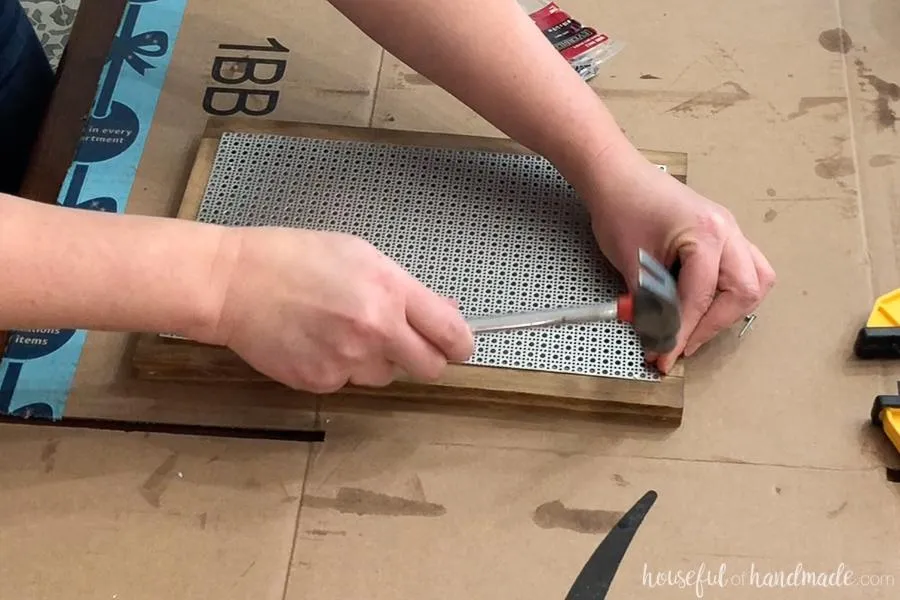
- Cut a piece of decorative sheet metal to 7" x 11 1/2".
- Lay it on top of the earring rack frame and secure it to the frame with the wire nails through some of the decorative holes.
- Add the 1" hinges to the side of the earring rack and secure it to the inside of the jewelry cabinet box about 1/2" from the top. Make sure the rack swings forward so you can access the back of your earrings.
14. Install the jewelry cabinet
You will install your hidden jewelry cabinet into your wall just as you would a medicine cabinet. Cut a hole in your wall to just fit the jewelry cabinet box (14 1/2" x 18 1/2"), the frame will cover up the cut drywall. Secure the jewelry cabinet to studs or blocking in the wall, making sure the frame sits flush with the wall.
15. Add the wood sign
- If you want, notch out grooves for the 2" hinges on the front of your box frame and the back of the wood sign frame. Secure the hinges to the box frame first.
- Then use a 24" bar clamp to hold the wood sign so it is flush with the top and bottom and secure the hinges to the sign frame.
- Also, I added a magnetic cabinet latch to the top right corner to help hold the wood sign closed when not in use.
16. Add felt to the back of the sign
If desired, add felt to the back of the wood sign (behind the necklace pegs). Cut the felt to size and the using small snips, cut little holes in the felt for the pegs to stick through. Secure the felt with spray adhesive or hot glue.