Notch
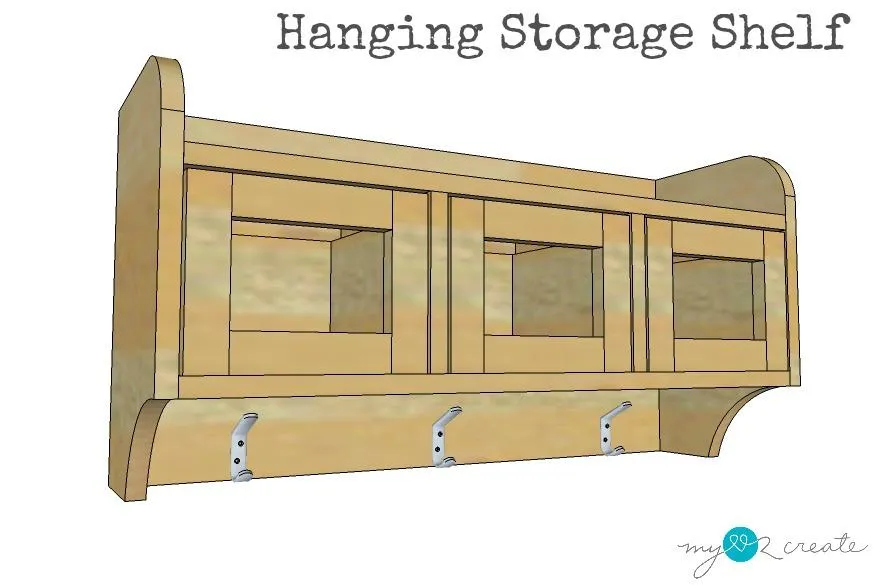
NotchHanging Storage Shelf
Step-by-step build — 11 steps. Also available as a print sheet.
1Cut the sides
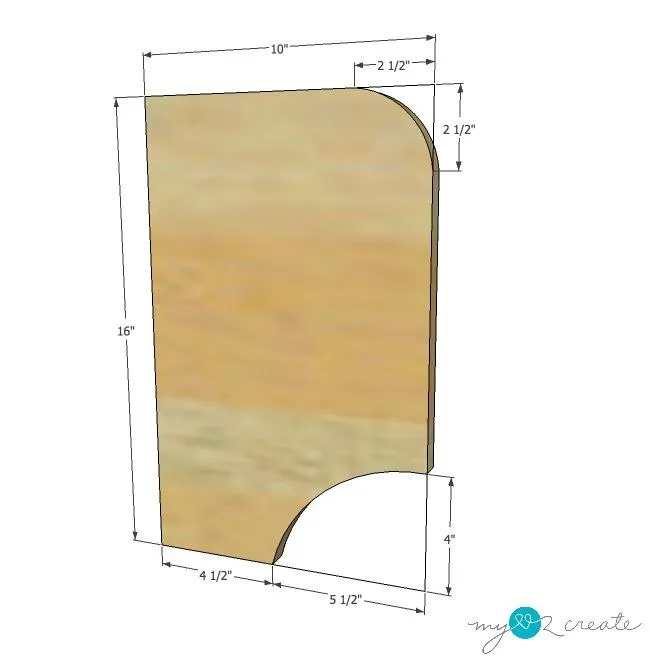
- For the two sides you will need to cut two 16'' long pieces from a 1x12 board.
- Then, using a Kreg Rip cut or table saw, rip the two boards to 10''. This will give you two 10''x16'' boards. Referring to the photo, measure and mark on your boards where the semi circles start by using the dimensions given. Using a circular object, like a bowl, trace a semi circle connecting the marks.
- Cut out semi circles with a jigsaw and then sand smooth.
2Attach back pieces
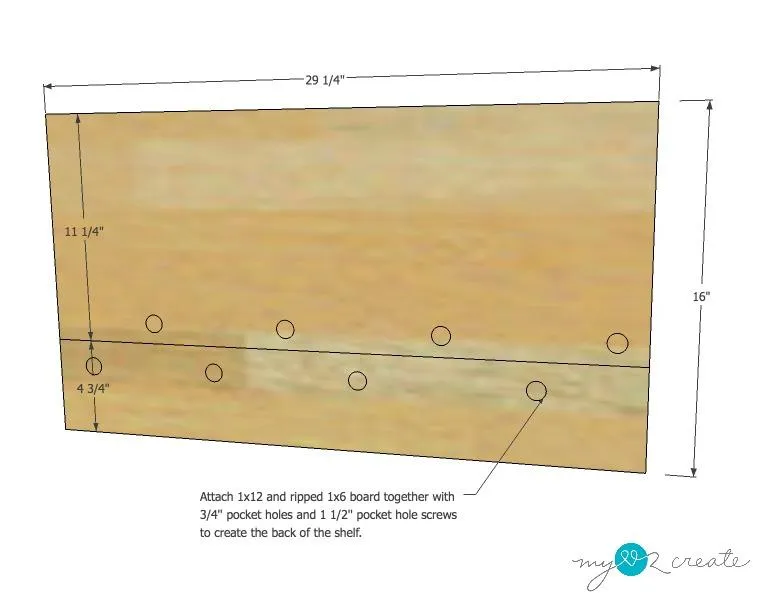
- For the back of the shelf you will need a 1x12 and a 1x6 board.
- Cut both boards to 29 1/4'' long.
- Rip your 1x6 board so that it is 4 3/4'' wide.
- Then using glue and pocket hole screws attach your 1x12 and ripped 1x6 board together to create the 29 1/4''x16'' back piece.
3Join back and sides together
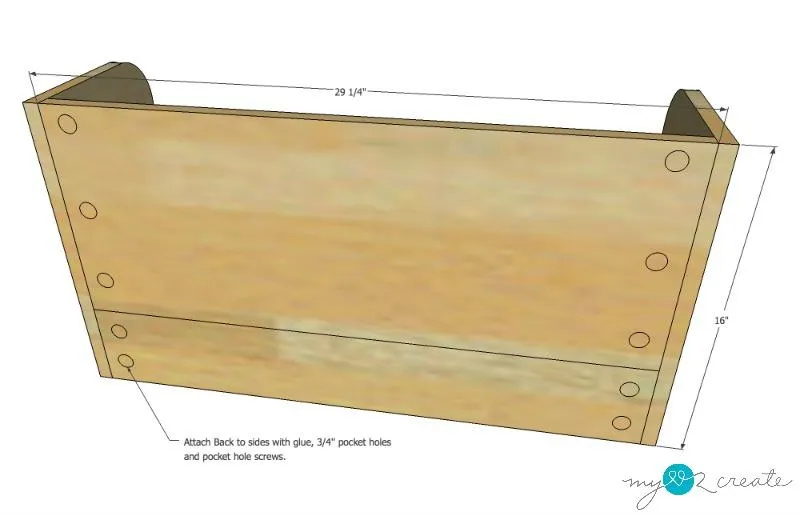
Using glue and pocket hole screws attach the back to the two side pieces.
4Add top shelf
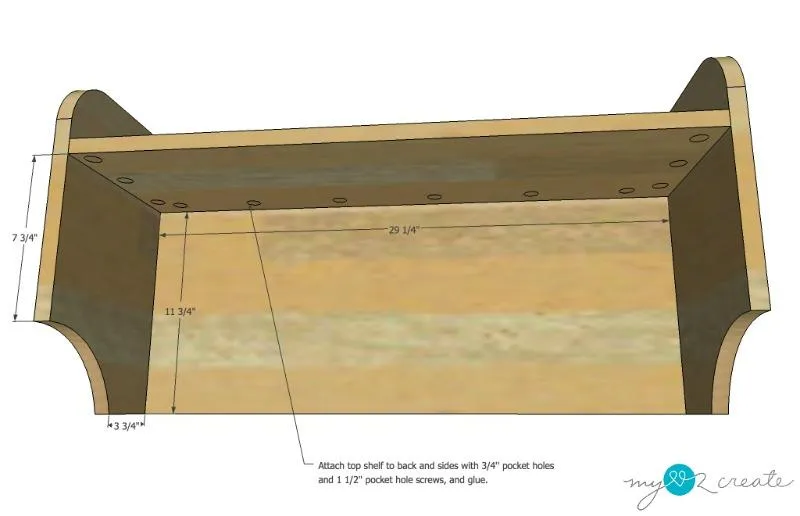
With glue and pocket hole screws attach the top shelf to the sides and back of the shelf.
5Connecting dividers
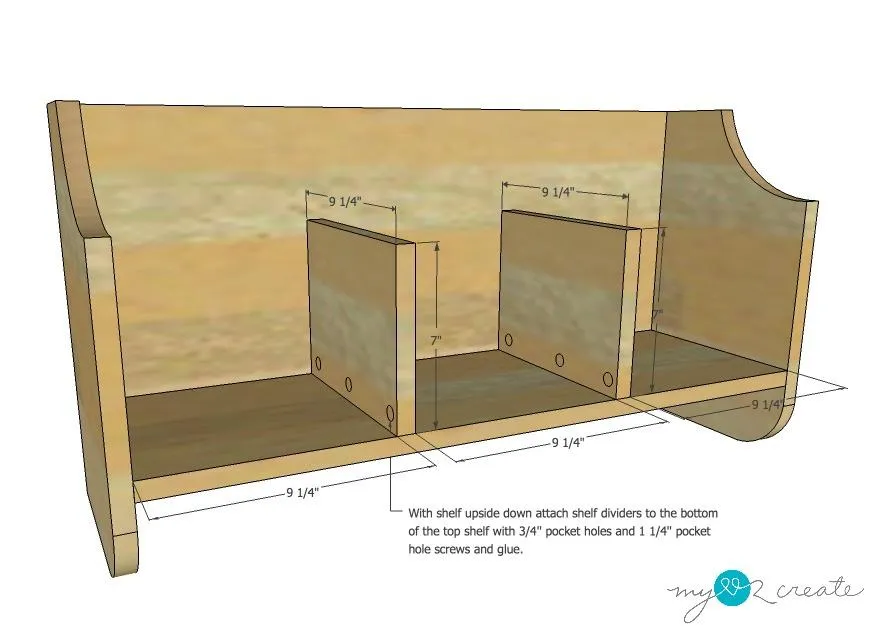
With the shelf upside down attach the shelf dividers with glue and pocket hole screws to the bottom of the top shelf.
6Add the bottom shelf
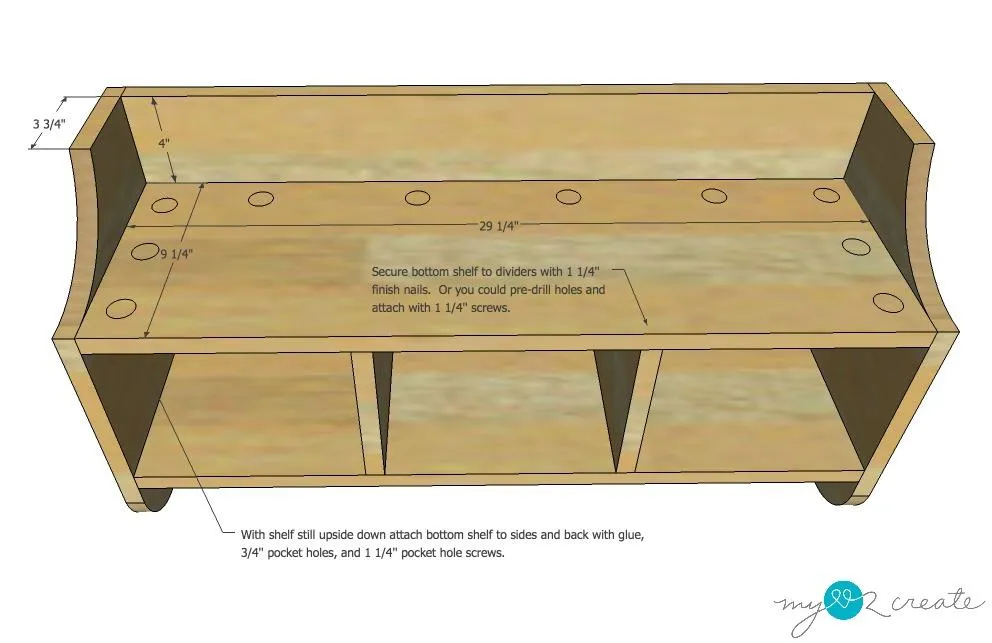
Glue and screw on the bottom shelf to the sides and back, and attach dividers with finish nails.
7Building storage bins
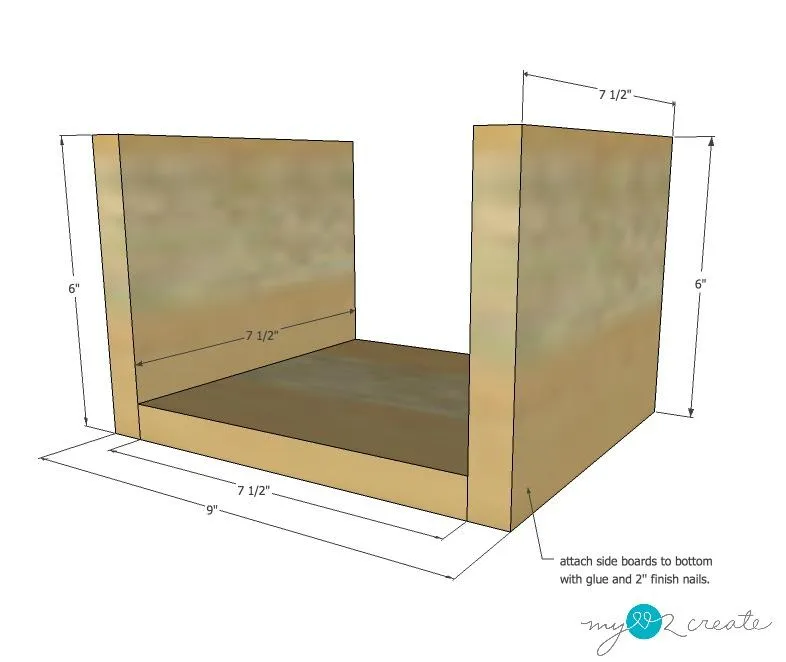
I used scrap 3/4'' plywood for my storage bins, because I needed to use it up. You can use 3/4''or 1/2'' plywood or any scrap wood to build these bins. Using glue and 2'' finish nails attach the two sides to the bottom.
8Attach back of bin
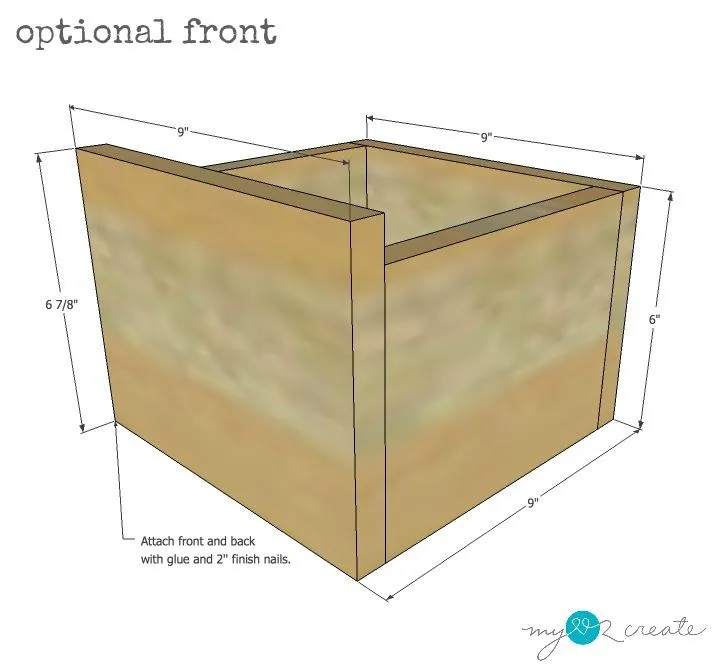
Attach the back of the bin with glue and finish nails to the sides and bottom. Pictured is an optional front piece if you do not want to do the front that is in the next step.
9Make open front for bins
- Using 1x2's and 3/4'' pocket holes and 1 1/4'' pocket hole screws and glue, create a face frame for the open front of the bin.
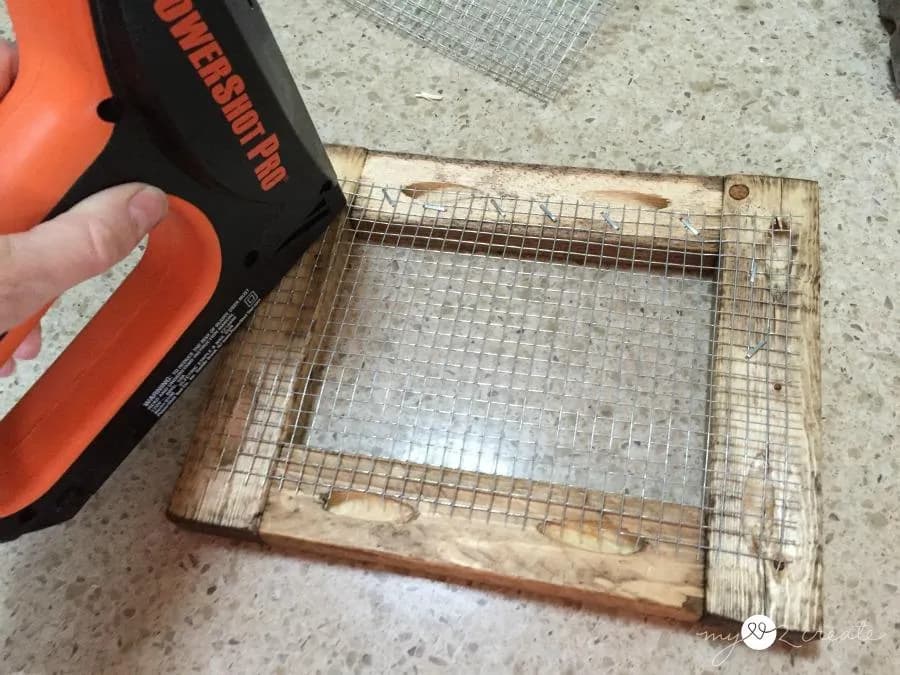
- Attach hardware cloth to the back of the frame with staples.
- Then glue and nail the open front with hardware cloth onto the sides and bottom of the bin.
- Add knobs to each bin.
10Finish as desired
I choose to stain my project with special walnut, and then finished with three coats of poly. Once you finish painting or staining, add your hooks at the bottom. I choose to use a french cleat to hang my storage shelf. Just make sure you are using studs and anchors in the walls to keep it secure.
11Visit www.MyLove2Create.com
For more great project tutorials and building plans visit www.mylove2create.com!