 Notch
- Difficulty
- Intermediate
- Time
- 3–5.5 hours
- Cost
- $
About this build
Easy to make stool utilizing one 12" wide board. Modified the Kreg Kids' Step Stool to reduce the number of pieces of wood that needed to be joined. Constructed three stools, one for each grandchild, and one for our home. Added grandkids' initials to each end to personalize.
Tools
Essential
- Drill / Driver
- Jigsaw
- Miter Saw
- Pocket Hole Jig
- Random Orbit Sander
- Router
- Table Saw
Optional / nice to have
- Tape Measure
Materials
| Item | Qty |
|---|---|
| Board, 1x12 48" | 1 board |
| 1 1/4" pocket hole screws | 18 each |
Overall cost: $. Lumber prices vary by region, species, and season, so we give a band rather than a figure we would only be pretending to know.
Cut list
| Part | Qty | T × W × L |
|---|---|---|
| Board | 1 | 3/4" × 12" × 48" |
What to buy
Buy 1 board at 8 ft.
3/4" × 12"
1 board
Assumes 8 ft stock, a 1/8" saw kerf, and buying each part at its own width. Change the board size or kerf on the full board plan →
Instructions
1Cut the side pieces
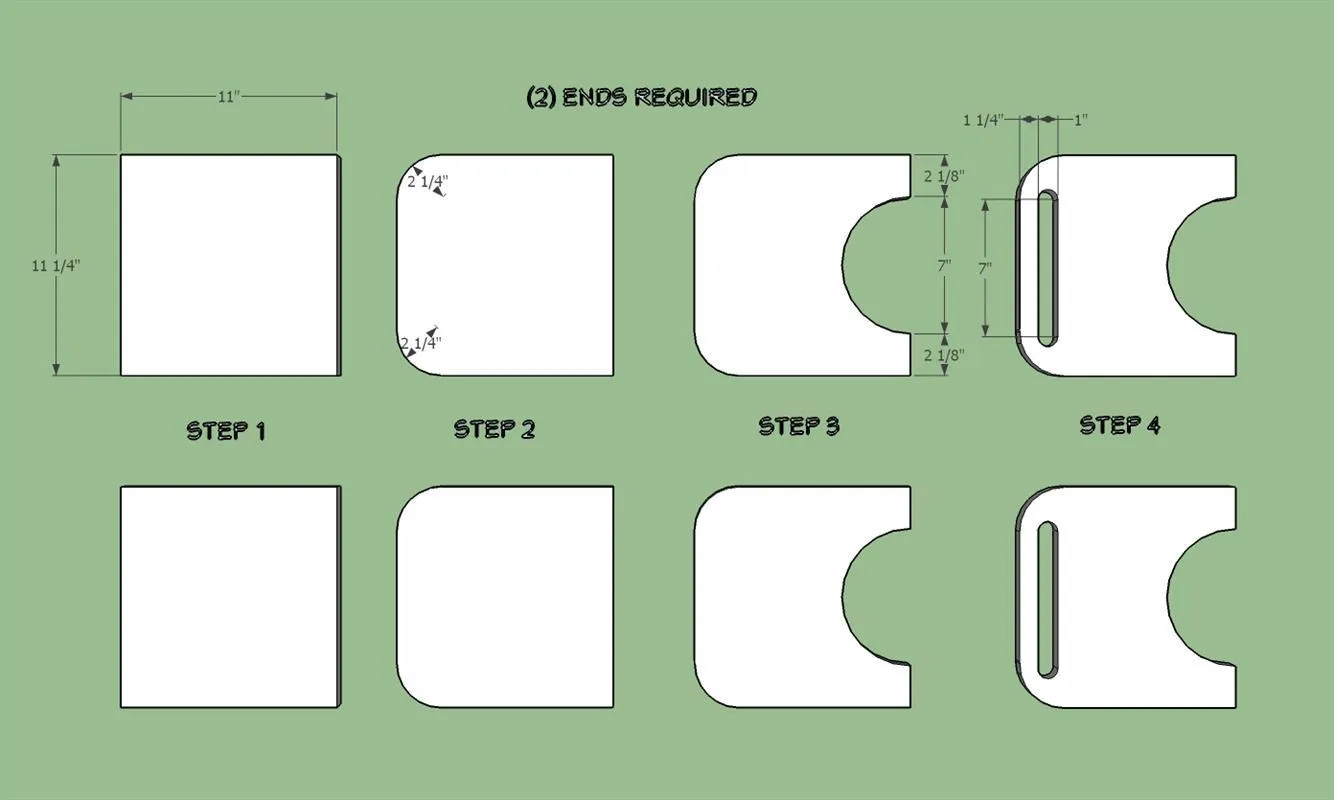
- Cut (2) side pieces - 11 1/4" x 11".
- Cut 2 1/4" radius' to the upper edges with a jig saw.
- Cut a 3 1/2" radius centered on the bottom edge with a jig saw. Use a router to create the hand holes. Use spindle sander to sand the radius' and the hand hold.
- Round over all edges except the bottom 'feet' with a router round over bit.
2Cut the seat/step
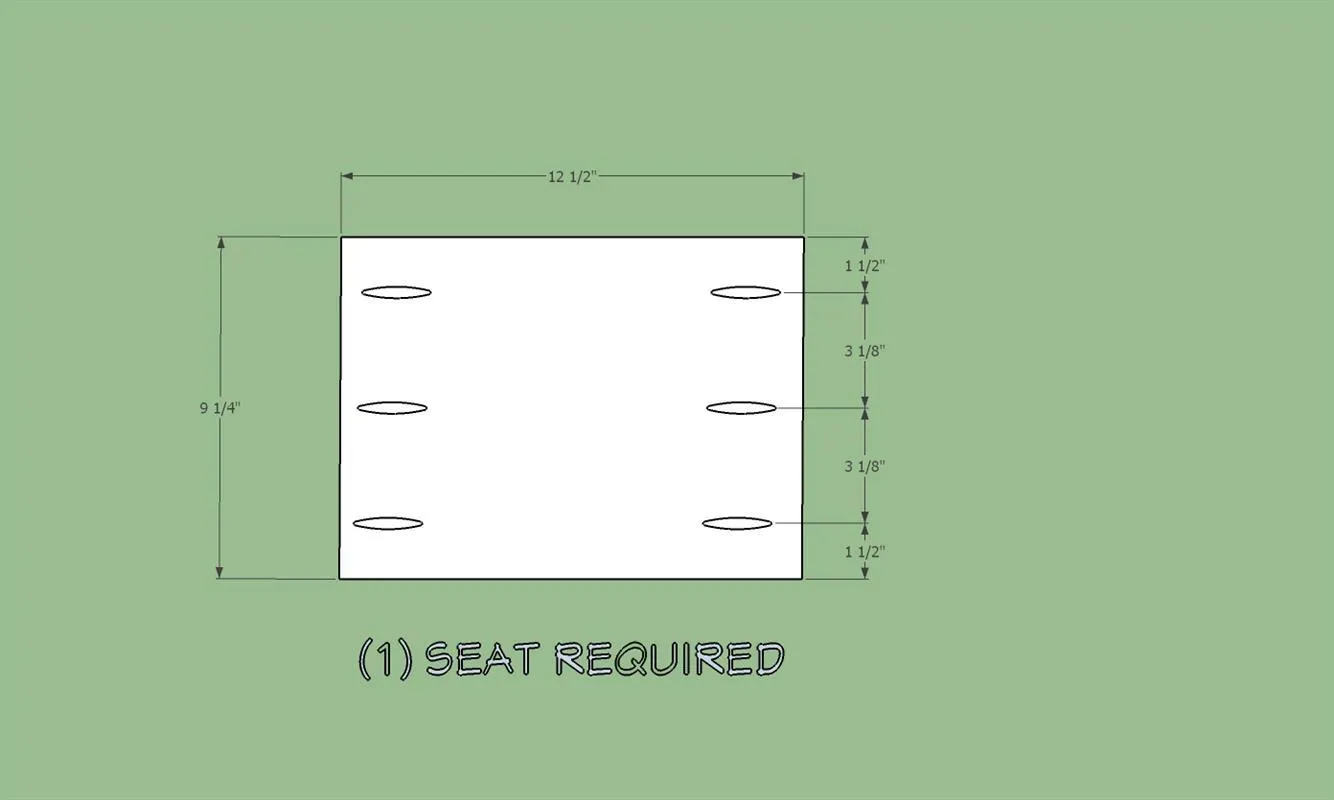
- Cut one seat/step piece - 9 1/4" x 12 1/2". Use a pocket hole jig to drill pocket holes as shown.
- Round over the 0utside edges with a router round over bit.
3Cut the seat/step supports
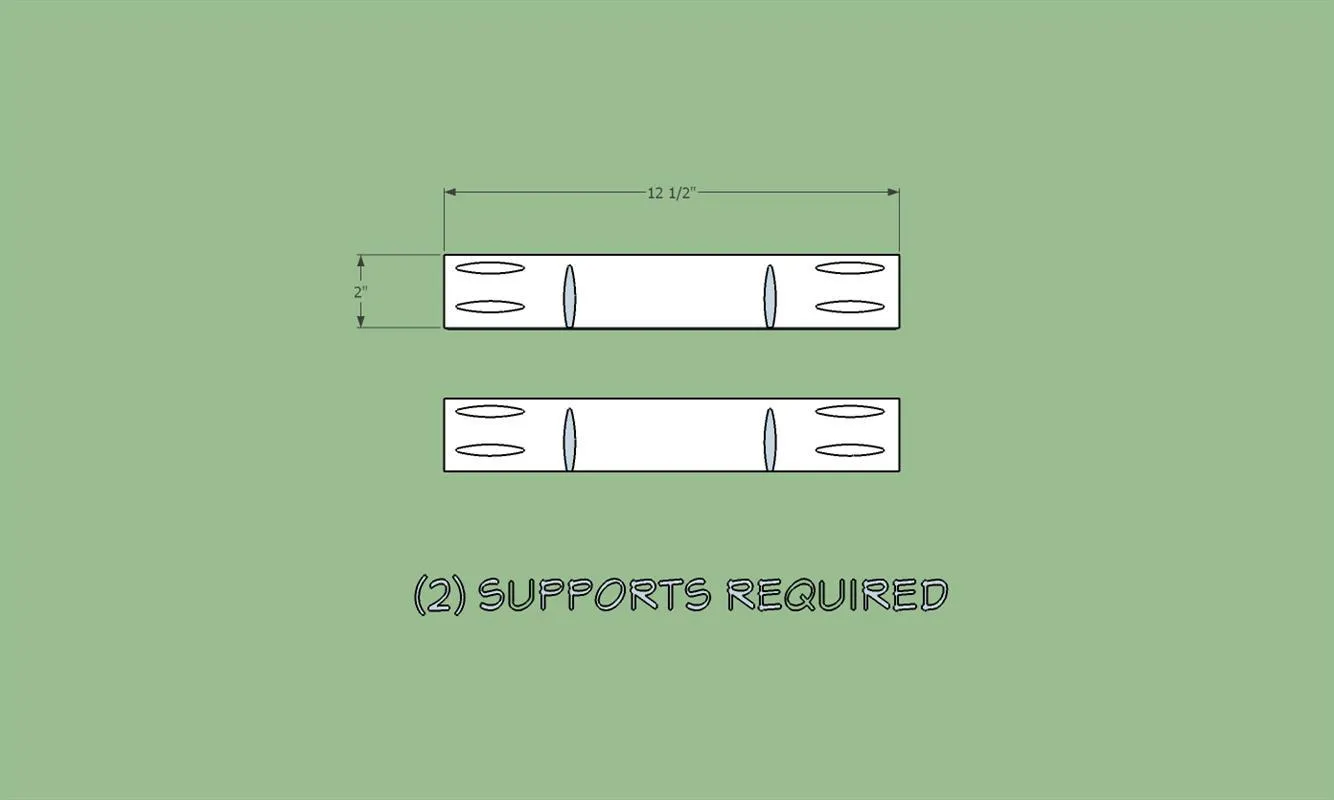
- Cut (2) 2" x 12 1/2" x 3/4" step/seat supports. Use a pocket hole jig to drill the holes as shown.
- Round over the bottom edge with a router round over bit.
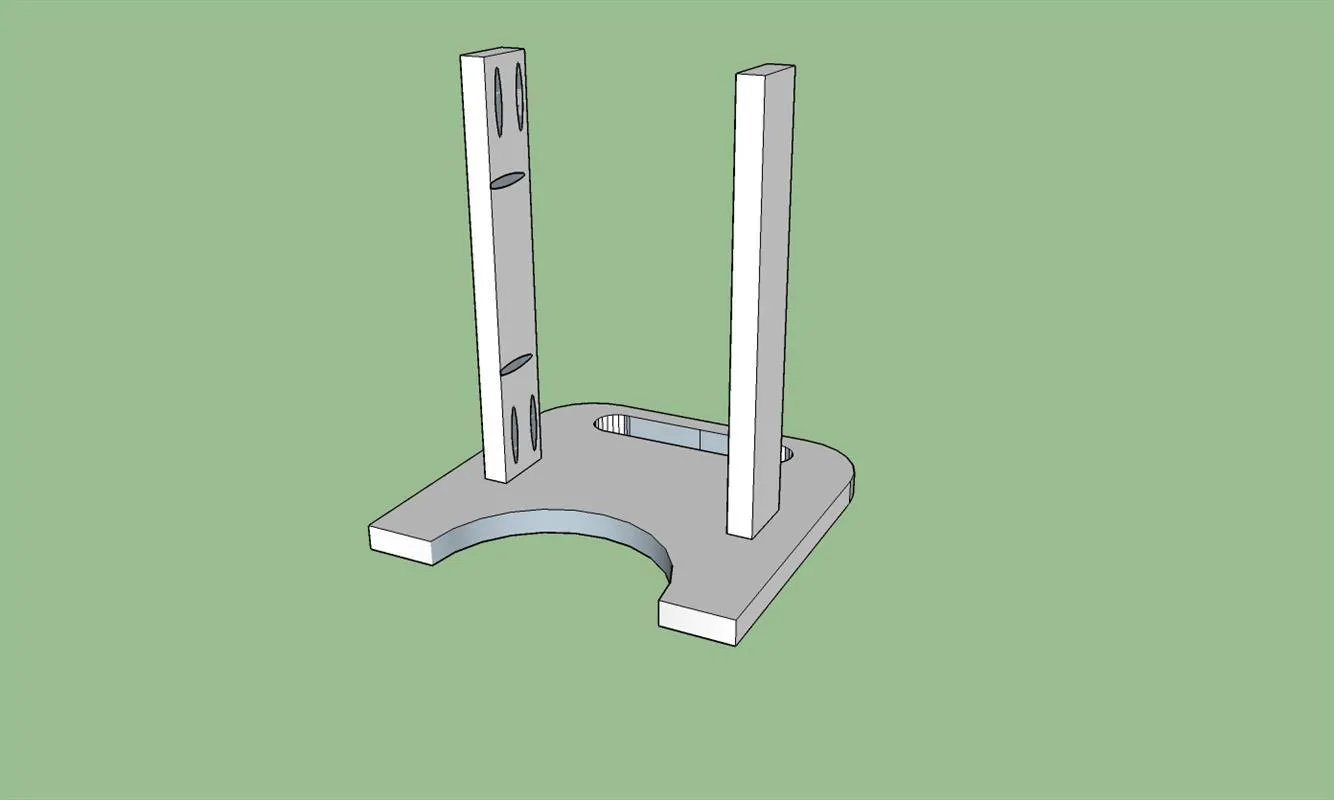
4Assemble the parts - support 1
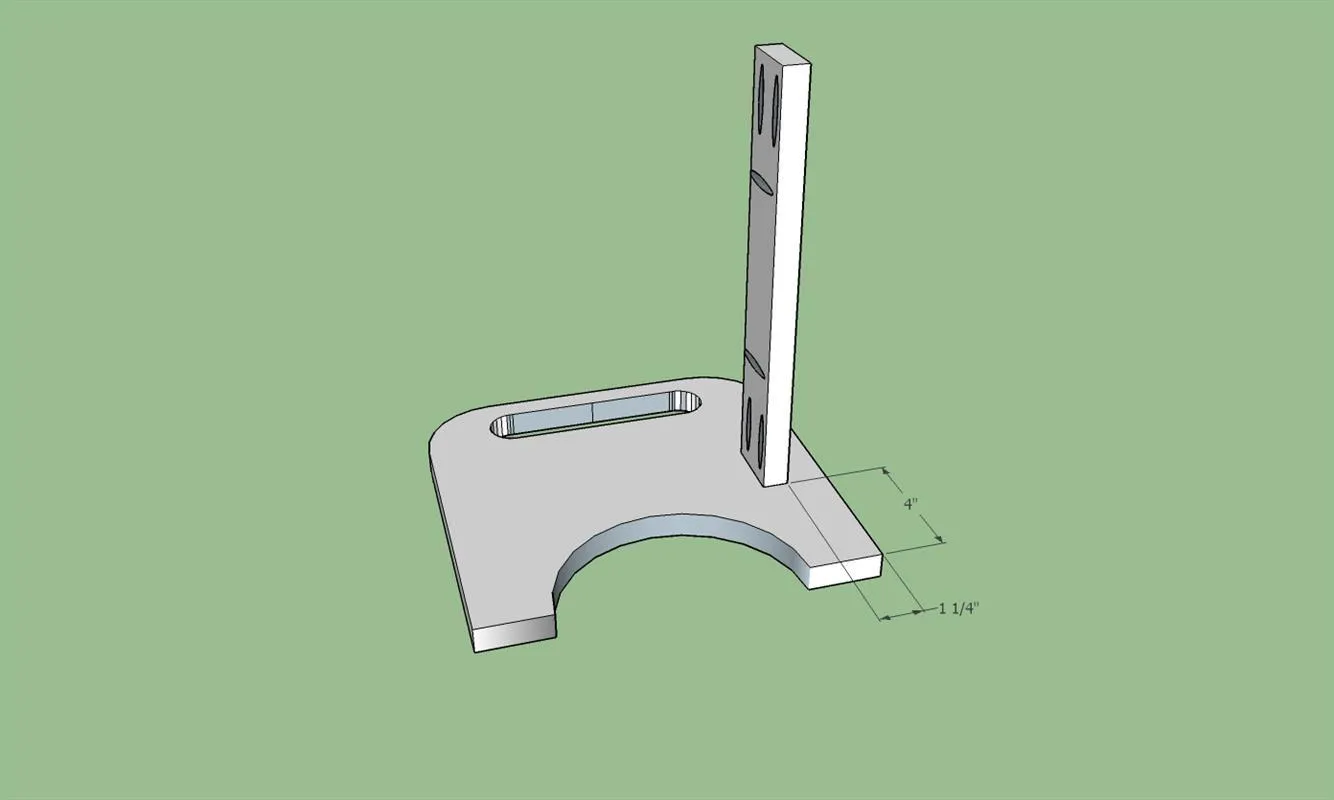
Secure one support as shown with 1/4" pocket hole screws.
5Assemble the parts - support 2
Secure one support as shown with 1/4" pocket hole screws.
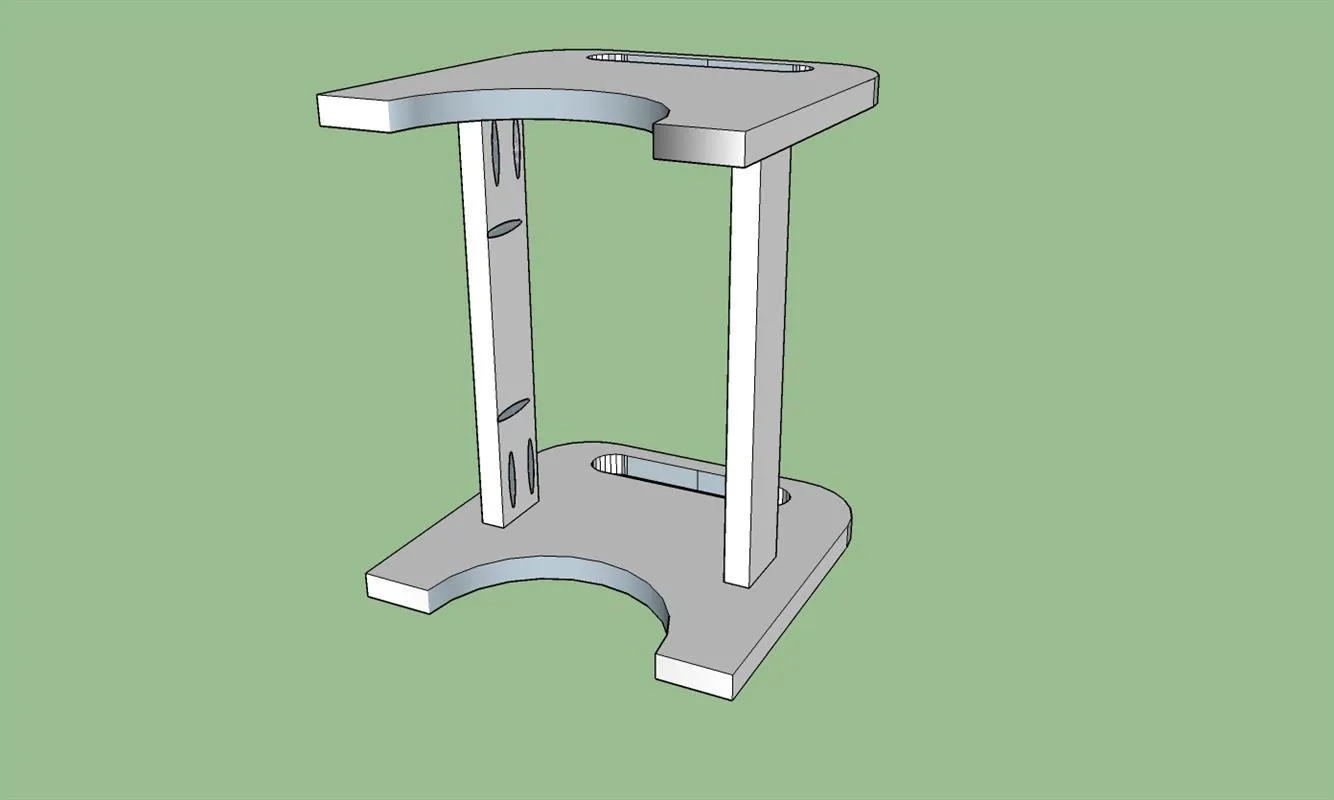
6Assemble the parts - end piece
Add the final side piece and secure with 1 1/4" pocket hole screws.
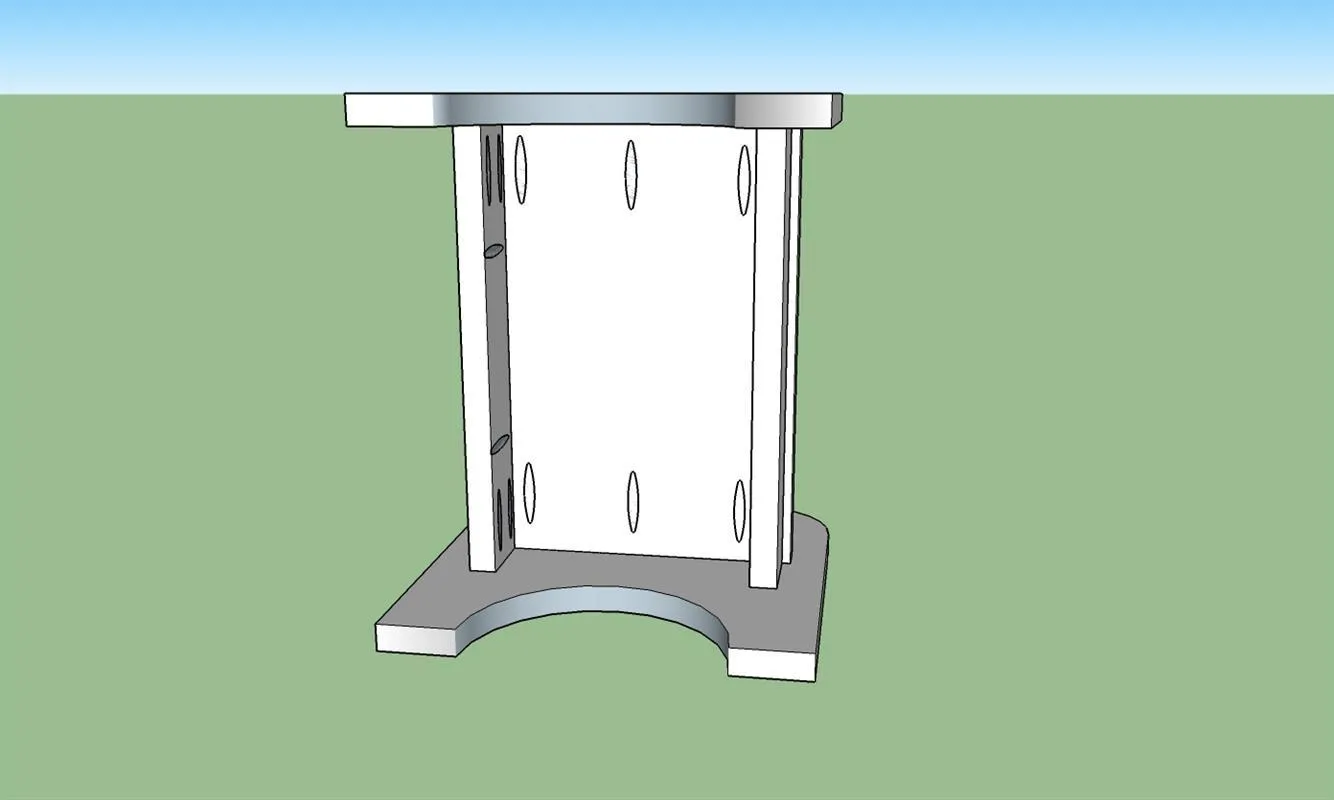
7Add the seat
Add the seat and secure to the side pieces with 1 1/4" pocket hole screws. Also screw the supports to the seat with 1 1/4" pocket hole screws.
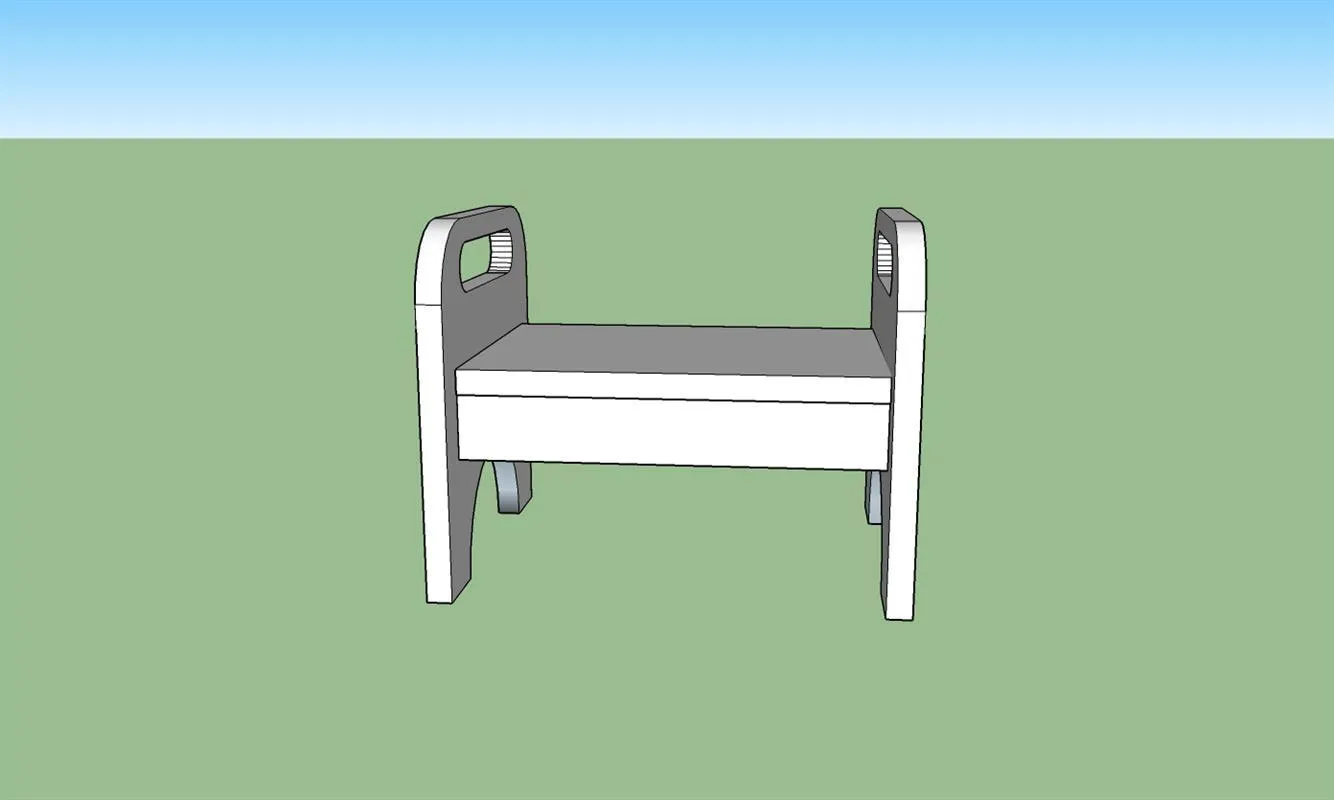
8Paint or Stain the step stool
With assembly complete, paint or stain as desired. Also add floor protection to the bottom of each foot. I used a 1/2" x 1 3/4" piece of 1/8" cork on each foot.
Tags
- Gifts
- Intermediate
Reviews & builds
No reviews yet
Sign in to review this plan or share your build.
No reviews yet. Be the first to build this.