Notch
Golf Ball Display Case
Step-by-step build — 7 steps. Also available as a print sheet.
1Build Frame
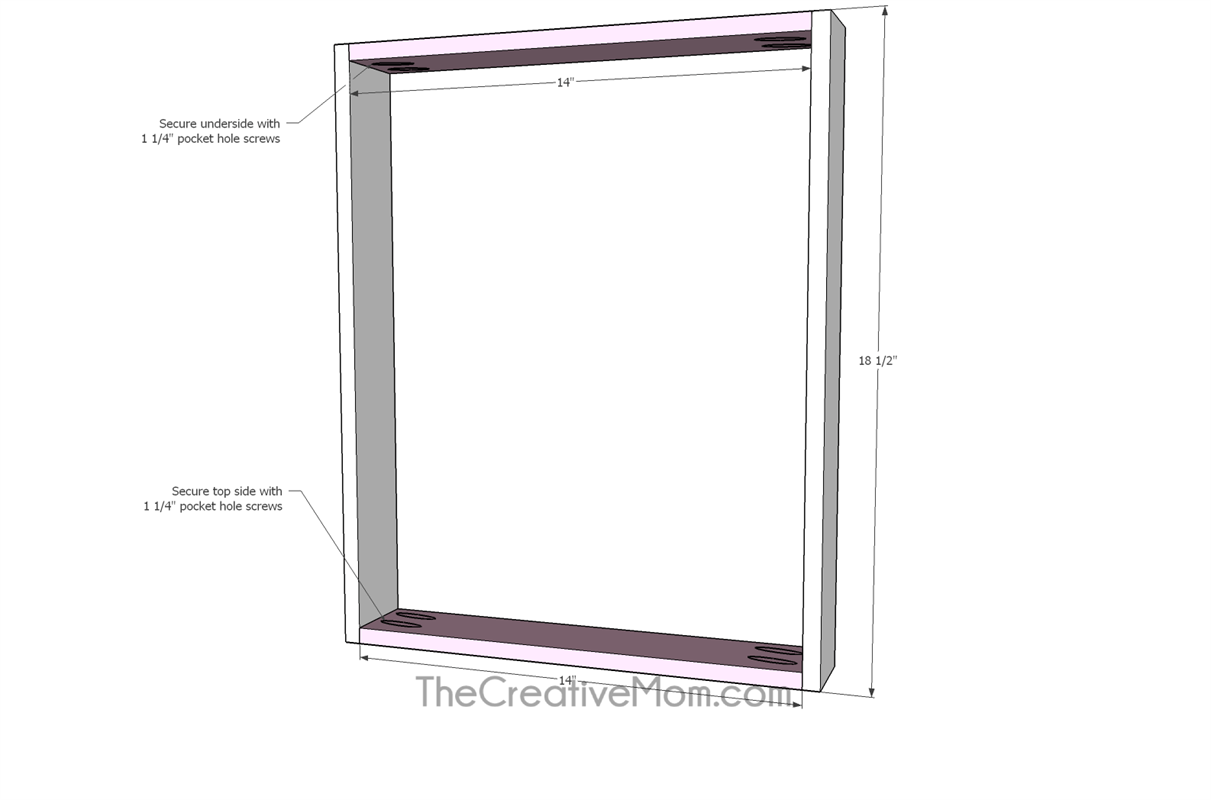
- Cut 2- 14" 1x3 boards.
- Drill pocket holes in each end of both boards.
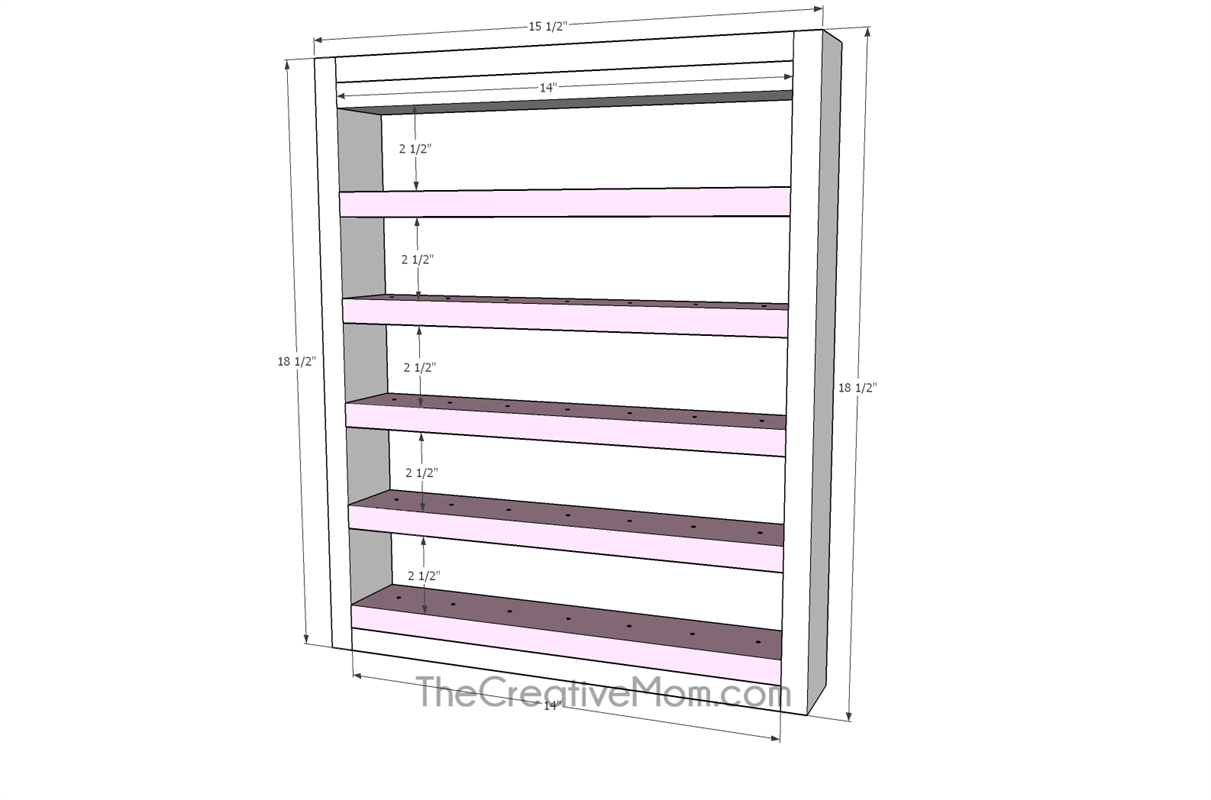
- Cut 2- 18 1/2" 1x3 boards. Secure the 14" boards to the 18 1/2" boards with 1 1/4" pocket hole screws and wood glue to make a frame.
2Add top board
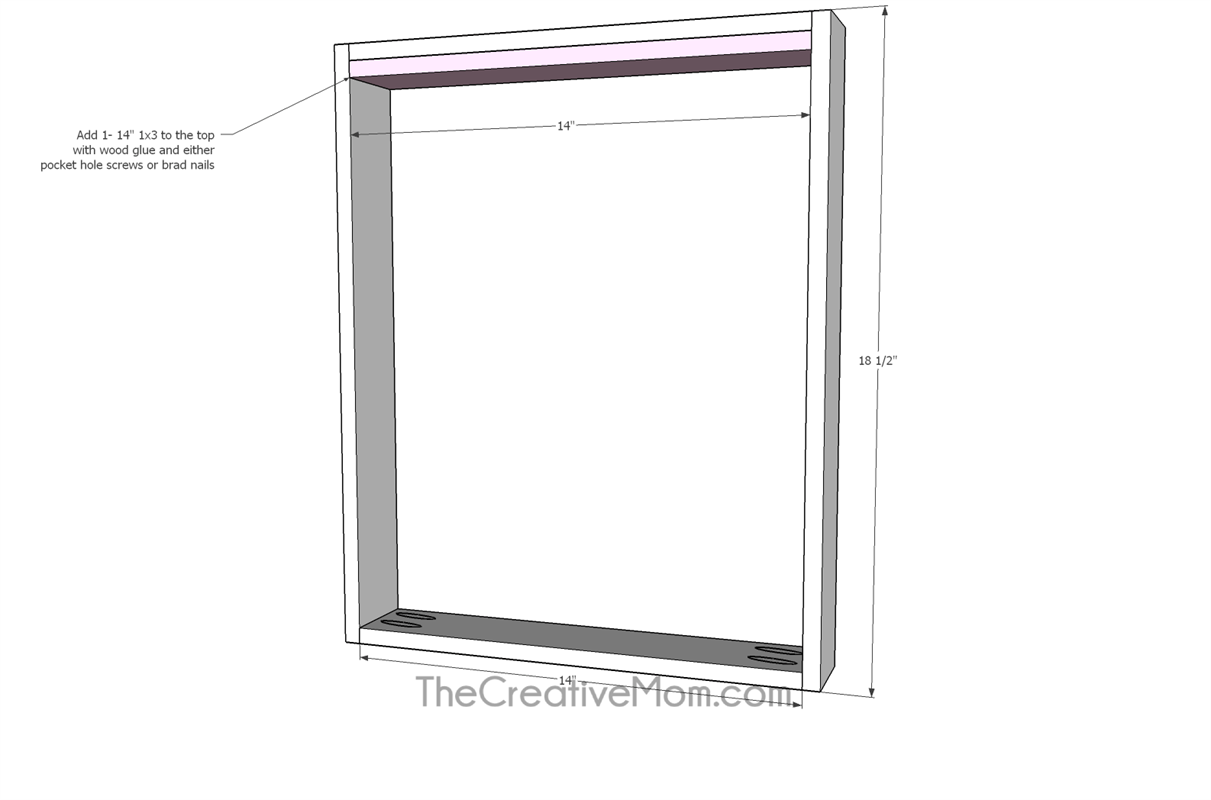
A 1- 14" 1x3 to the underside of the top board with wood glue and either 1 1/4" pocket hole screws or 1 1/2" brad nails.
3Drill tee holes in shelf boards
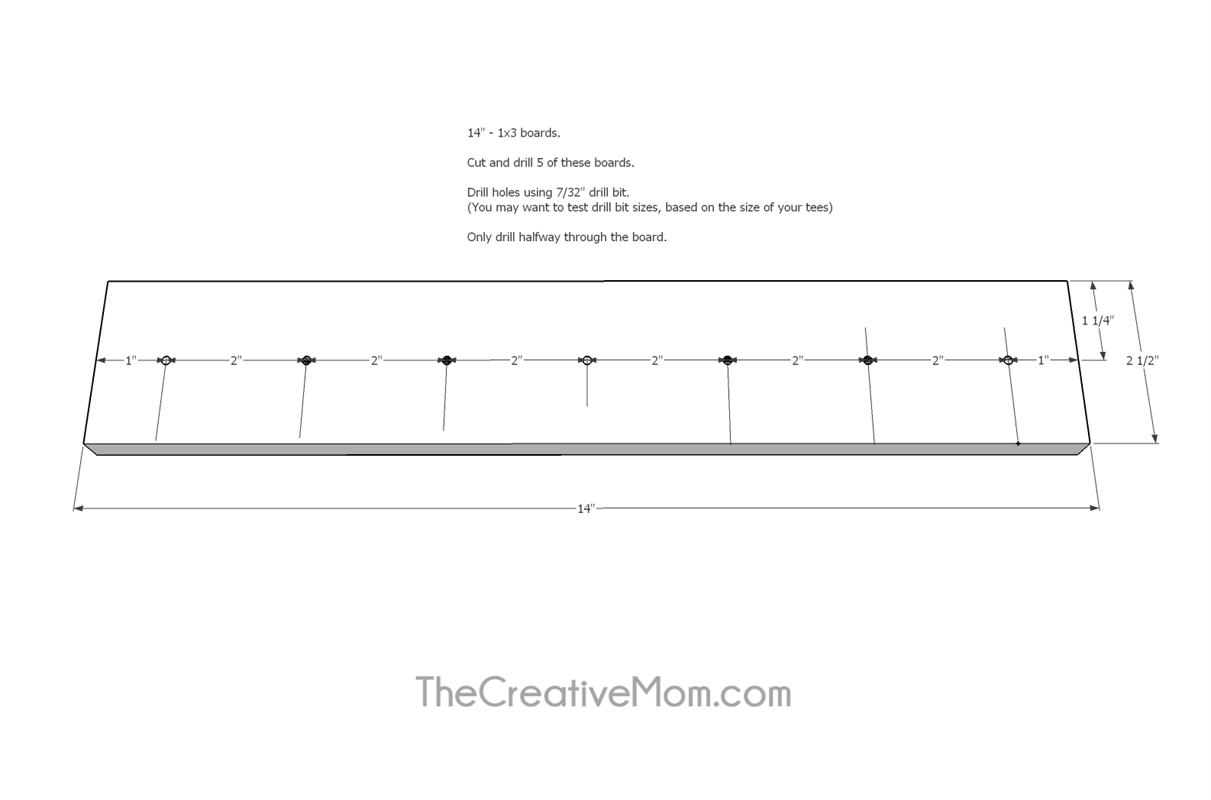
Cut 5- 14" 1x3's. Using a 7/32" drill bit, drill a hole in the center of the board, then drill every 2 inches, working your way outward toward the ends of the board. See diagram. Please note: You may want to test drill bit sizes, based on the size of your tees. We found that 7/32" worked well for a standard golf tee. The Kreg shelf pin jig would work to help you keep your spacing, and make sure you drilled straight holes.
4Attach Shelves
- Attach the horizontal shelves to the vertical frame pieces using wood glue and either 1 1/4" pocket hole screws or 1 1/2" brad nails.
- Leave 2 1/2" between each shelf. Hint: Use a scrap 1x3 piece as a jig to keep your shelves spaced evenly.
5Finish Shelf
Add decorative trim, if desired. Fill holes, sand, and either stain or paint your shelves.
6Add Golf Tees
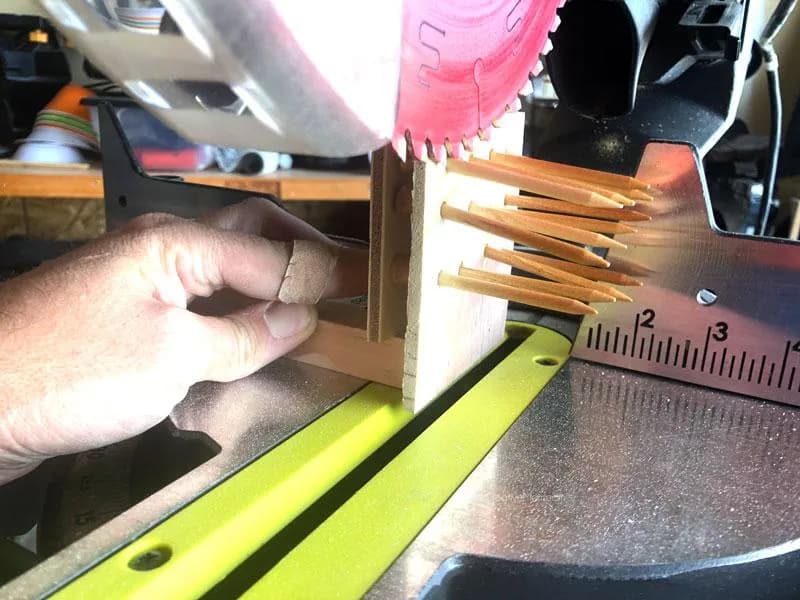
- Cut your tees down to 3/4". We built a little jig so we could cut a lot of tees at once, and make sure they were all cut evenly.
- Once the tees are cut, dip them in a little wood glue and secure them into the holes on your shelves.
7Add Backing
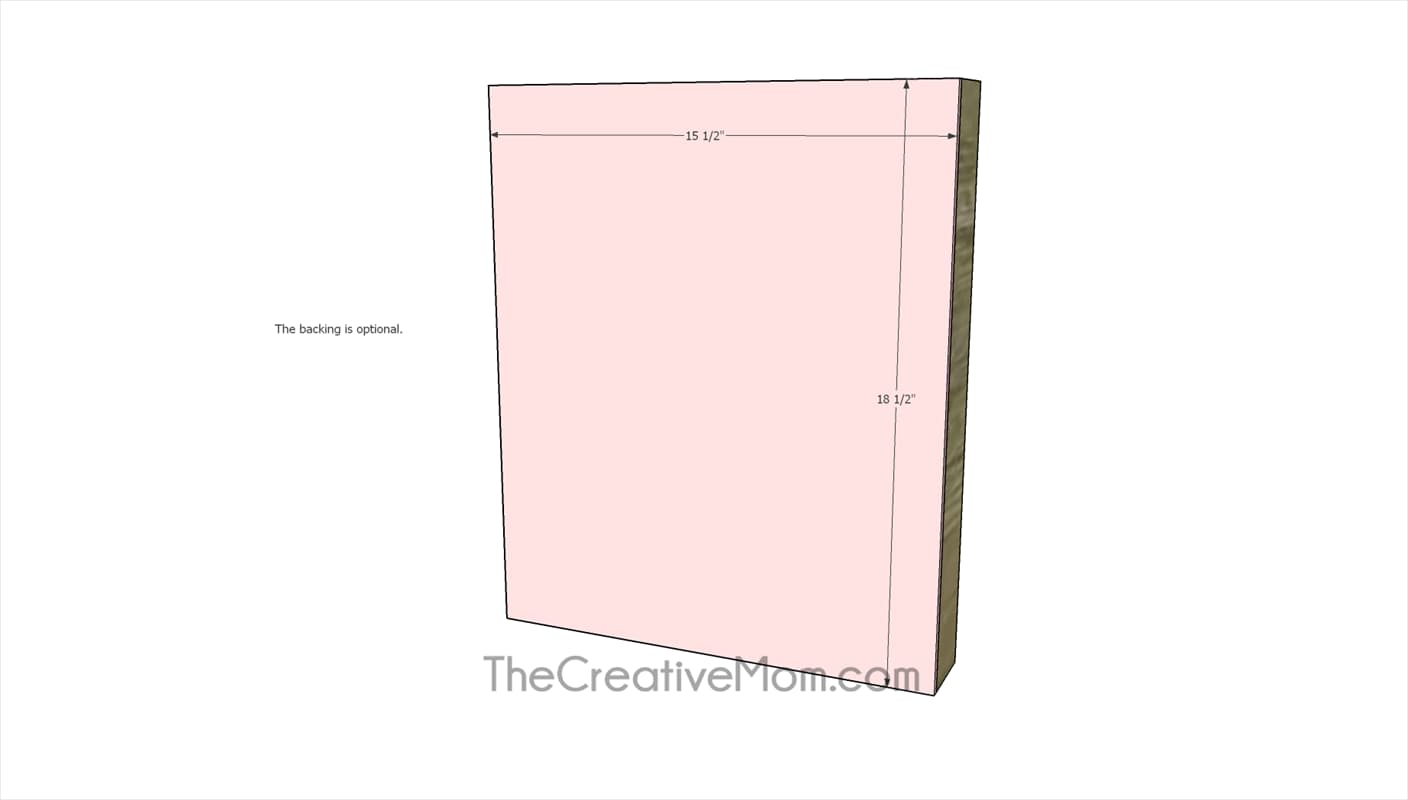
This step is optional. If you want backing on your shelf, cut a piece of 1/4" plywood, and secure it to the back with wood glue and brad nails.