 Notch
Notch- Difficulty
- Easy
- Time
- 2.5–4.5 hours
- Cost
- $$
About this build
This golf ball display case is the perfect handmade gift! It measures 18 1/2" x 15 1/2" and has room to display 35 golf balls. This is a beginner build, although it does require a little bit of precision. It is something you could easily tackle in a weekend.
Tools
Essential
- Brad Nailer
- Drill / Driver
- Miter Saw
- Pocket Hole Jig
- Random Orbit Sander
Optional / nice to have
- Tape Measure
Materials
| Item | Qty |
|---|---|
| Board, 1x3 96" | 2 board |
| Plywood, 1/4" Thick Quarter Sheet | 1 board |
| 1 1/4" pocket hole screws | 35 each |
| 1 1/2" brad nails | 50 each |
| Standard Golf Tees | 35 each |
Overall cost: $$. Lumber prices vary by region, species, and season, so we give a band rather than a figure we would only be pretending to know.
Cut list
| Part | Qty | T × W × L |
|---|---|---|
| Horizontal frame pieces | 3 | 3/4" × 2 1/2" × 14" |
| Horizontal shelves | 5 | 3/4" × 2 1/2" × 14" |
| Vertical frame pieces | 2 | 3/4" × 2 1/2" × 2" |
What to buy
Buy 2 boards at 8 ft.
3/4" × 2 1/2"
2 boards
Assumes 8 ft stock, a 1/8" saw kerf, and buying each part at its own width. Change the board size or kerf on the full board plan →
Instructions
1Build Frame
- Cut 2- 14" 1x3 boards.
- Drill pocket holes in each end of both boards.
- Cut 2- 18 1/2" 1x3 boards. Secure the 14" boards to the 18 1/2" boards with 1 1/4" pocket hole screws and wood glue to make a frame.
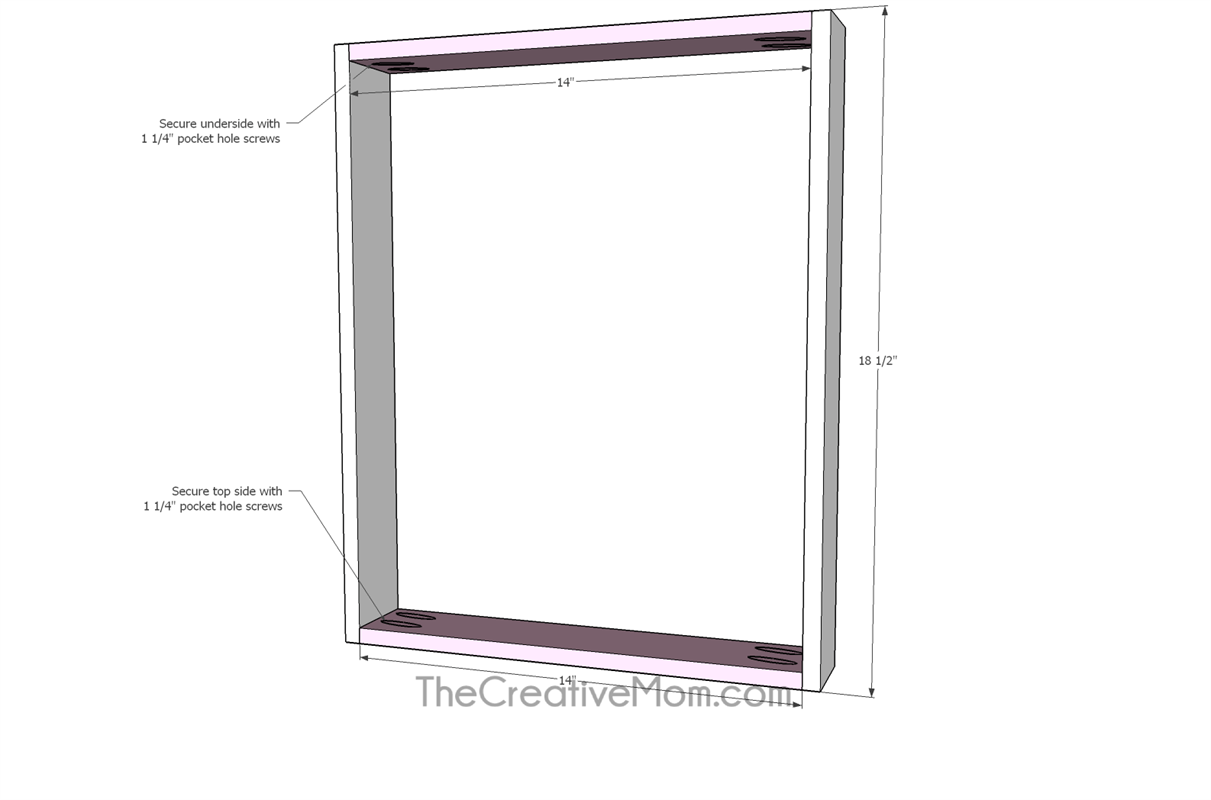
2Add top board
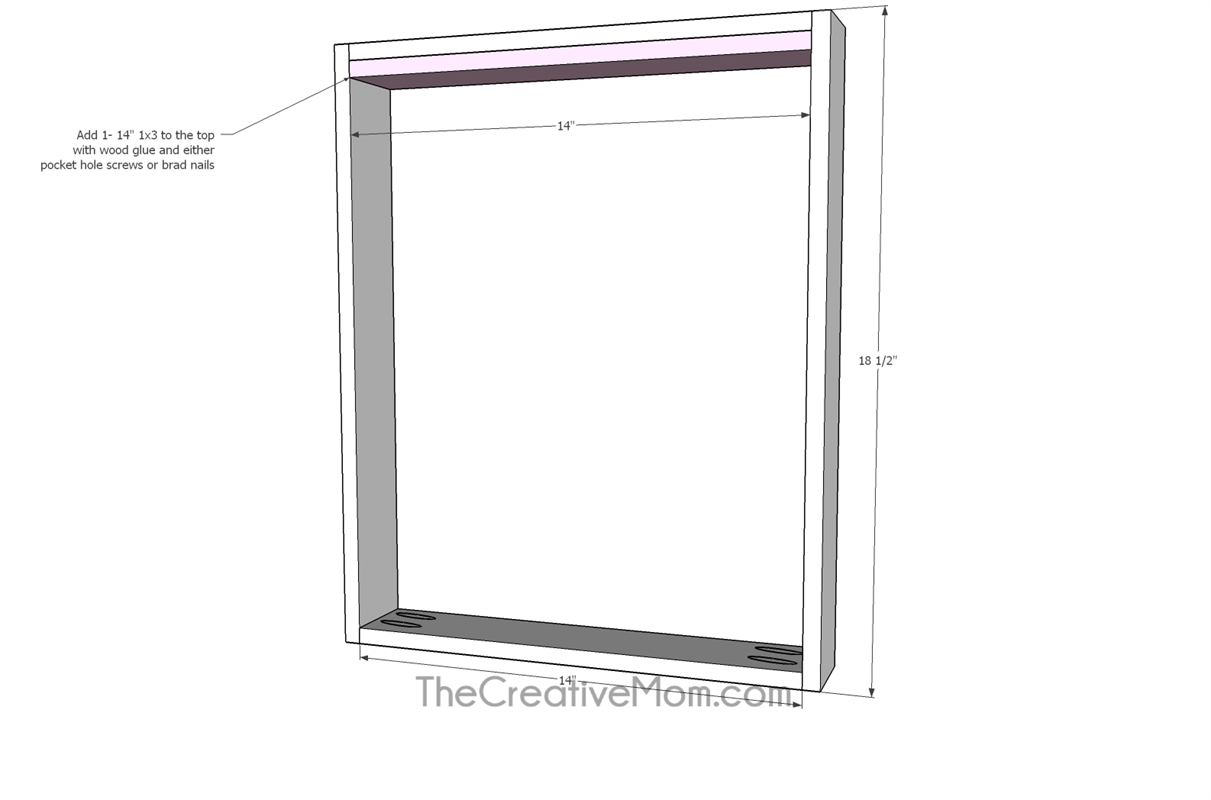
A 1- 14" 1x3 to the underside of the top board with wood glue and either 1 1/4" pocket hole screws or 1 1/2" brad nails.
3Drill tee holes in shelf boards
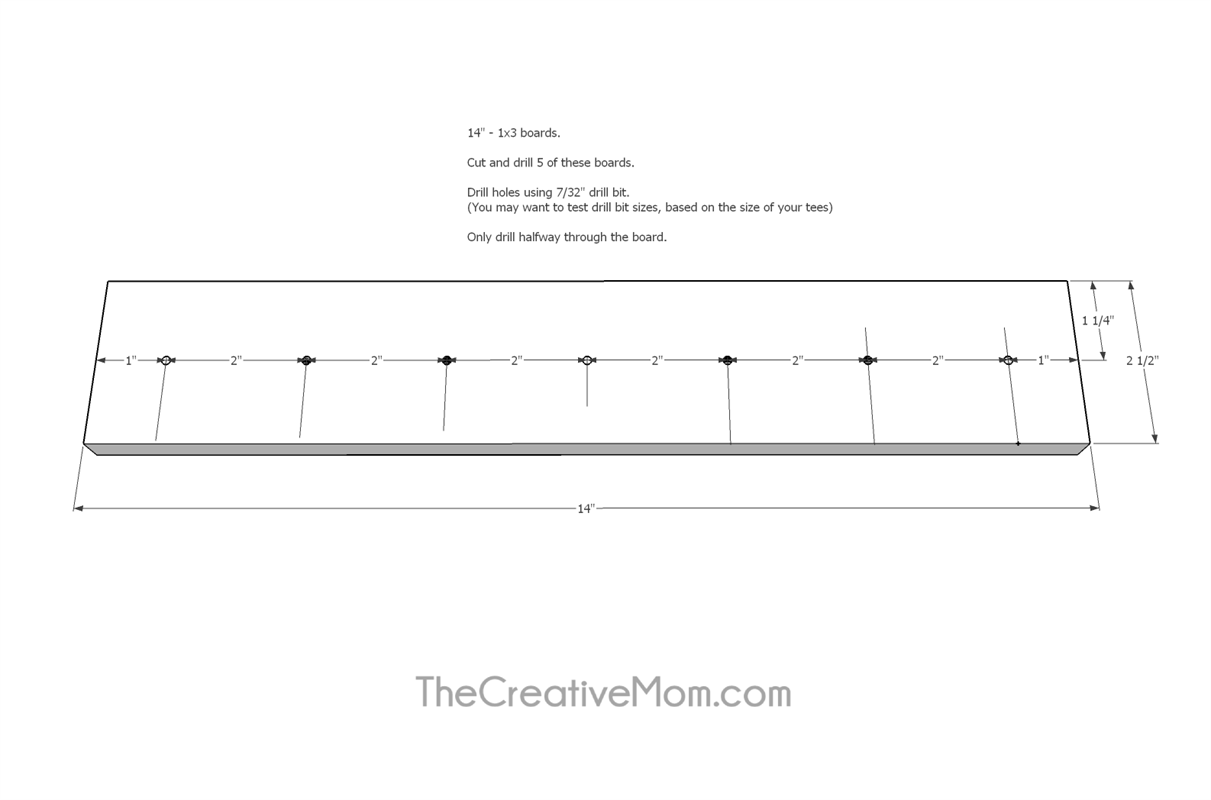
Cut 5- 14" 1x3's. Using a 7/32" drill bit, drill a hole in the center of the board, then drill every 2 inches, working your way outward toward the ends of the board. See diagram. Please note: You may want to test drill bit sizes, based on the size of your tees. We found that 7/32" worked well for a standard golf tee. The Kreg shelf pin jig would work to help you keep your spacing, and make sure you drilled straight holes.
4Attach Shelves
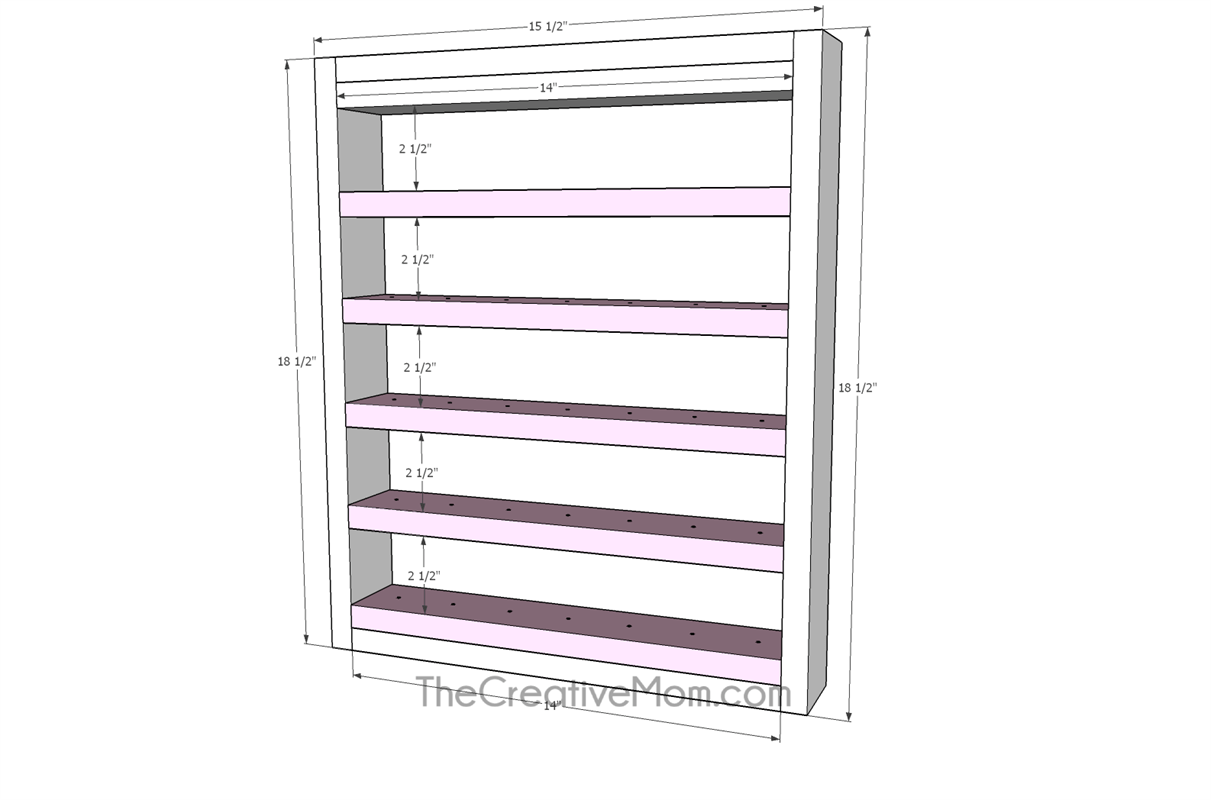
- Attach the horizontal shelves to the vertical frame pieces using wood glue and either 1 1/4" pocket hole screws or 1 1/2" brad nails.
- Leave 2 1/2" between each shelf. Hint: Use a scrap 1x3 piece as a jig to keep your shelves spaced evenly.
5Finish Shelf
Add decorative trim, if desired. Fill holes, sand, and either stain or paint your shelves.
6Add Golf Tees
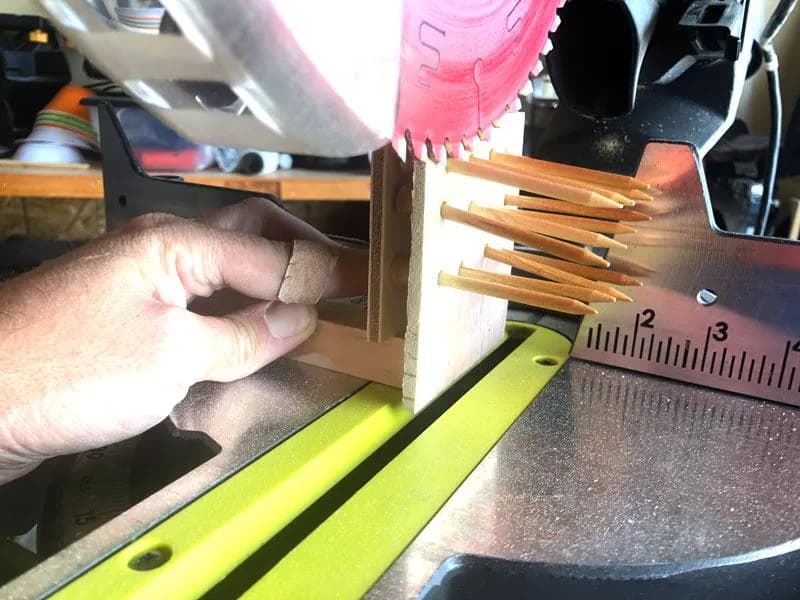
- Cut your tees down to 3/4". We built a little jig so we could cut a lot of tees at once, and make sure they were all cut evenly.
- Once the tees are cut, dip them in a little wood glue and secure them into the holes on your shelves.
7Add Backing
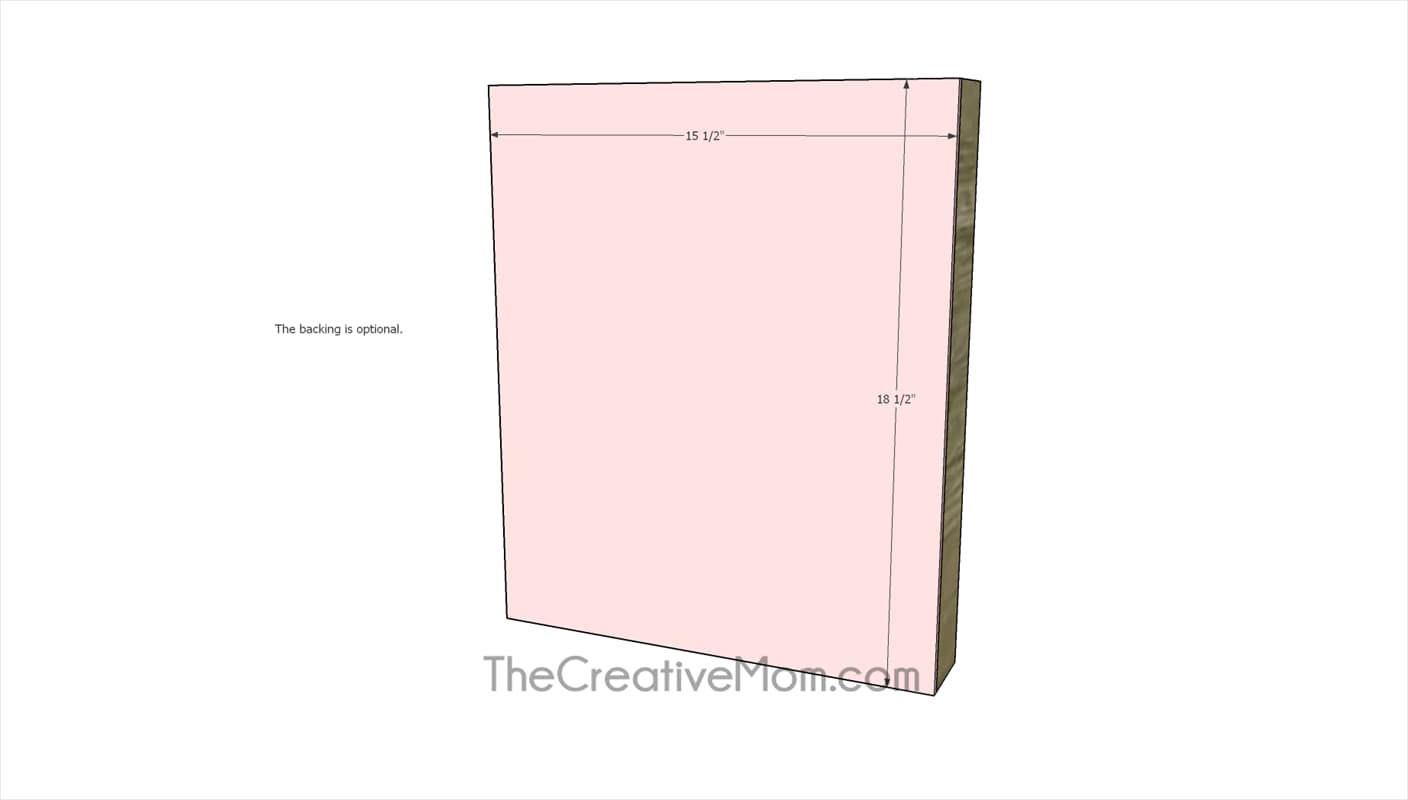
This step is optional. If you want backing on your shelf, cut a piece of 1/4" plywood, and secure it to the back with wood glue and brad nails.
Tags
- Father's Day Gifts
- Beginner
Reviews & builds
No reviews yet
Sign in to review this plan or share your build.
No reviews yet. Be the first to build this.