 Notch
Notch← Back to the plan
Use your browser's Print (Ctrl/Cmd + P) and choose Save as PDF. This page works offline once you've opened it with a signal.
Go-Anywhere Raised Garden
This clever planter makes it possible to get the advantages of raised-bed gardening anywhere.
- Difficulty
- Easy
- Time
- 2.5–4.5 hours
- Cost
- $$
Cut list
| Part | Qty | T × W × L | Material | ✓ |
|---|---|---|---|---|
| Leg | 4 | 1" × 5" × 23" | — | ☐ |
| Short Brace | 2 | 1" × 5" × 7" | — | ☐ |
| Long Brace | 1 | 1" × 5" × 16" | — | ☐ |
Materials
| Item | Qty | ✓ |
|---|---|---|
| Cedar board, 2x6 x 96" | 2 board | ☐ |
| Kreg XL Pocket-Hole Screws | 18 each | ☐ |
| 15-gallon round steel tub | 1 each | ☐ |
| Waterproof wood glue | 1 each | ☐ |
| Exterior wood finish | 1 each | ☐ |
Overall cost: $$. Lumber varies by region, species, and season, so we give a band rather than a figure.
Tools
- Drill / Driver
- Jigsaw
- Miter Saw
- Pocket Hole Jig
- Random Orbit Sander
- Bar / Pipe Clamps — optional
- Tape Measure — optional
Instructions
1. Make the Legs
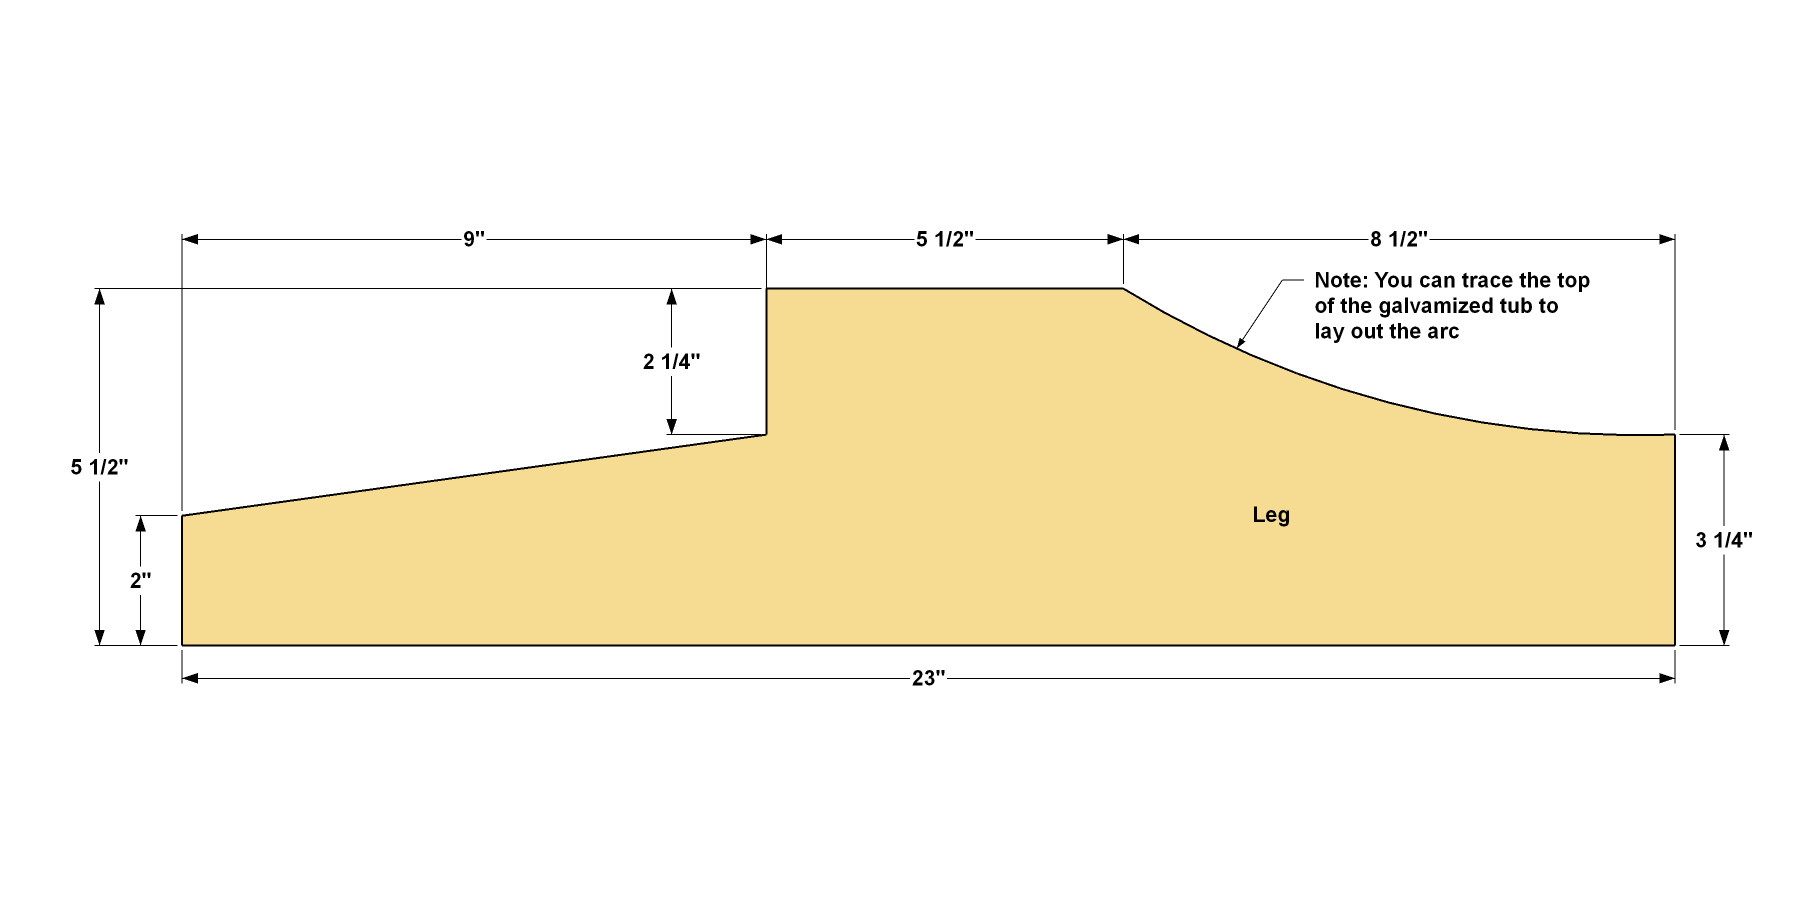
- Start by cutting four Legs to length, as shown in the cutting diagram.
- Next, you’ll create the upper notch (which provides clearance for the tub) and the lower decorative arc. To ensure your legs all match, make these cuts in one Leg, and then use it as a pattern for the other three. So, on one of the legs, lay out the upper notch.
- Next, mark where the lower decorative arch meets the side and the bottom of the leg.
- Now you can draw in the arc. We did this by tracing the outline of our tub.
- Once you have an arc shape you like, cut arc and the notch using a jigsaw.
- Sand the cut edges smooth.
- Now use this leg as a template to mark the other three Legs.
- Cut and sand cut them to shape.
- Now sand the faces, edges, and ends of the Legs smooth.
2. Make the Long Brace
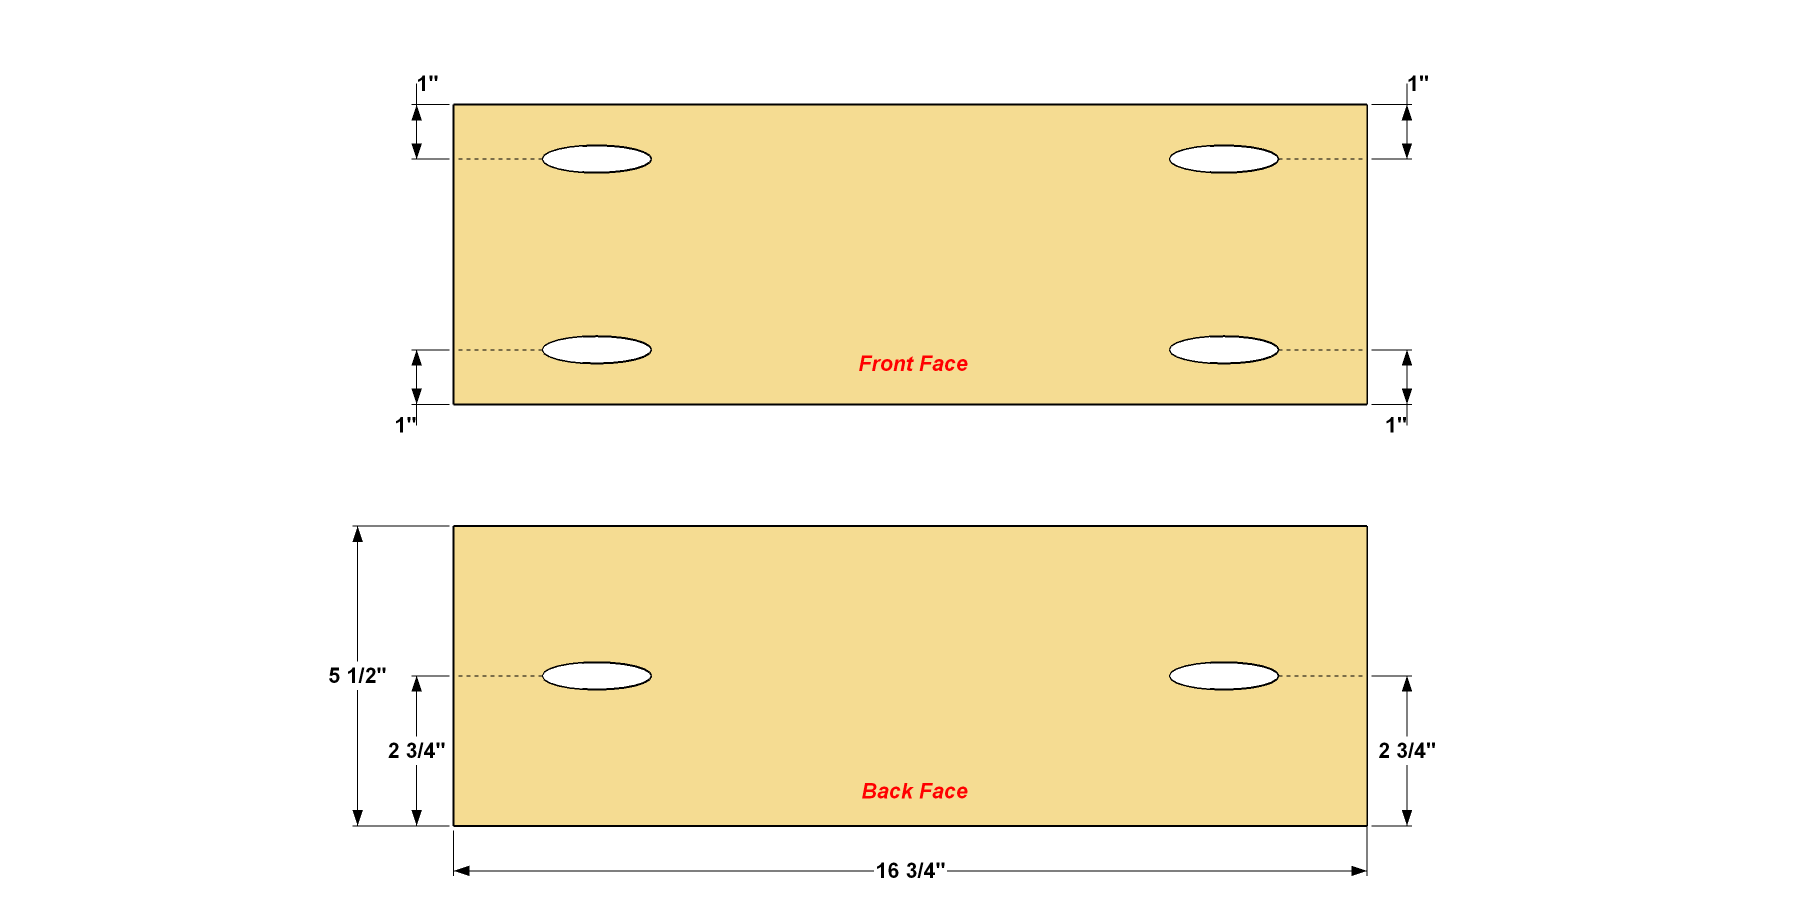
- Cut one Long Brace to length, as shown in the cutting diagram.
- Next, you’ll add pocket holes. We did this using the Kreg® Pocket-Hole Jig XL and XL Pocket-Hole Screws, which are 25% larger than standard Kreg Screws. This adds extra strength, which we think is a good idea because, when filled, the tub will be heavy. We also drilled pocket holes in both faces of the Long Brace, as shown. The pocket holes are positioned so the screws won’t hit each other when driven in.
- Mark the front and back face, lay out the pocket-holes in each face as shown, and then drill the holes using the HD Jig and drill bit.
- Sand the faces and edges smooth, but don’t sand the ends.
3. Attach the Long Brace to the Legs
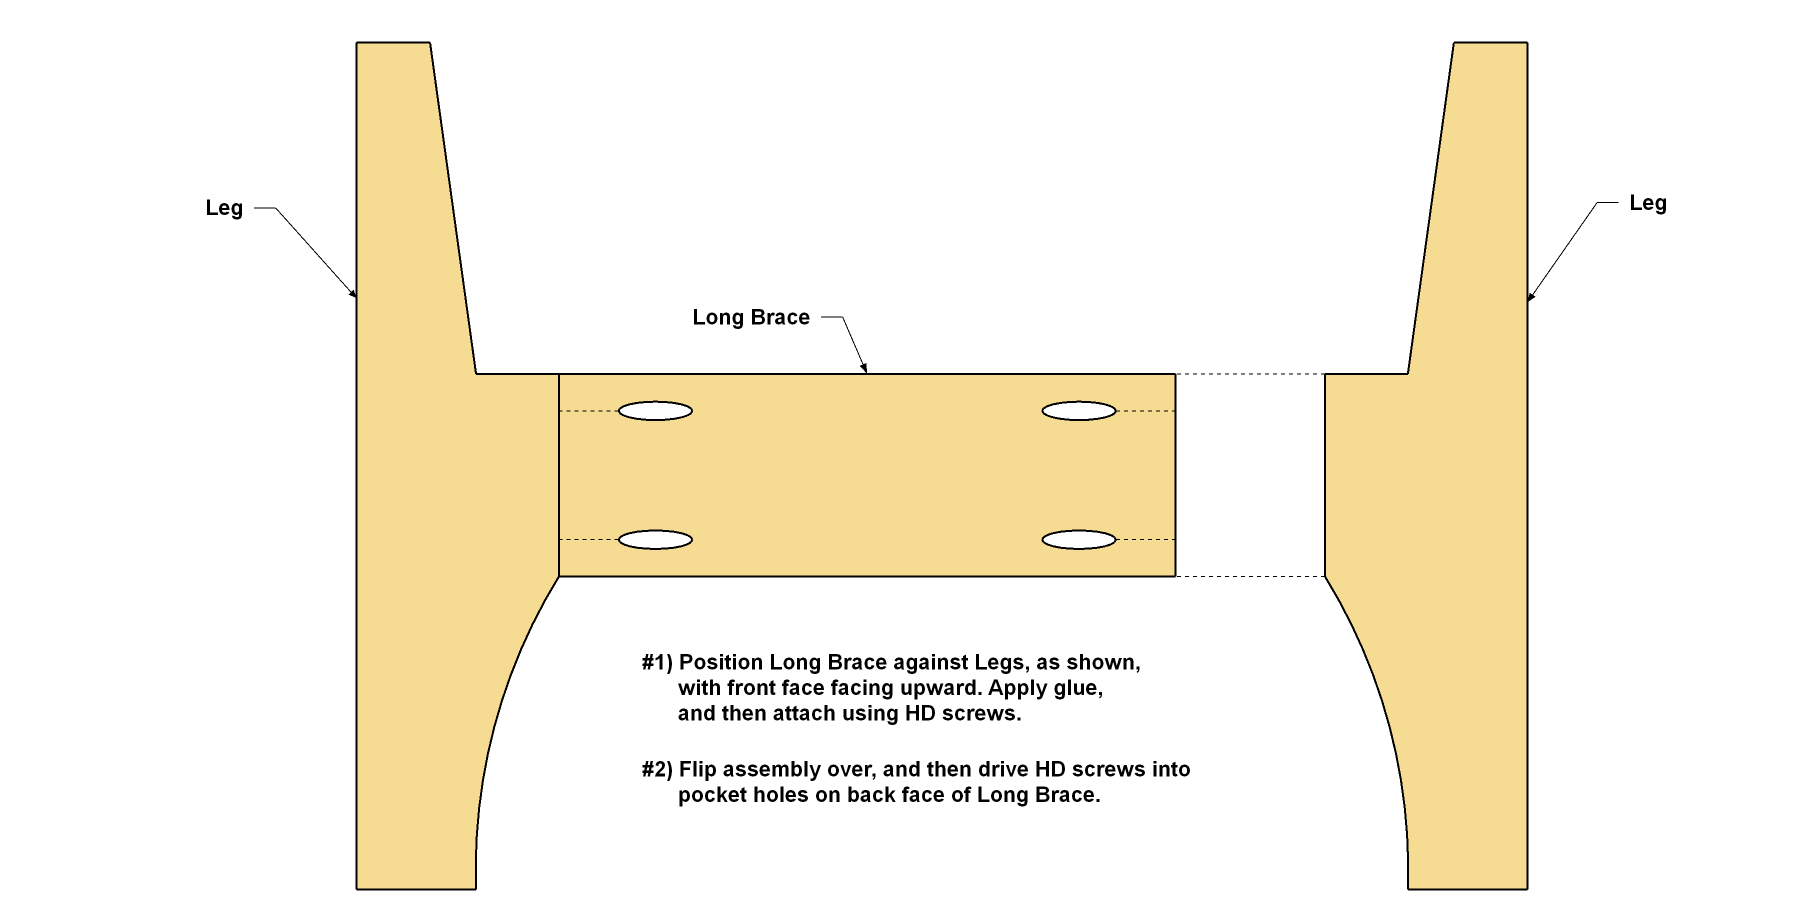
- Now you can attach the Long Brace to two of the Legs.
- First, spread waterproof wood glue on the ends of the Long Brace.
- Then position it—with the front face up—between two of the Legs, as shown, and clamp it in place. Drive the XL Pocket-Hole Screws in the pocket holes on front face.
- Flip the assembly over, and then drive screws into the pocket holes on the back face. You can remove the clamps while the glue dries.
4. Make the Short Braces
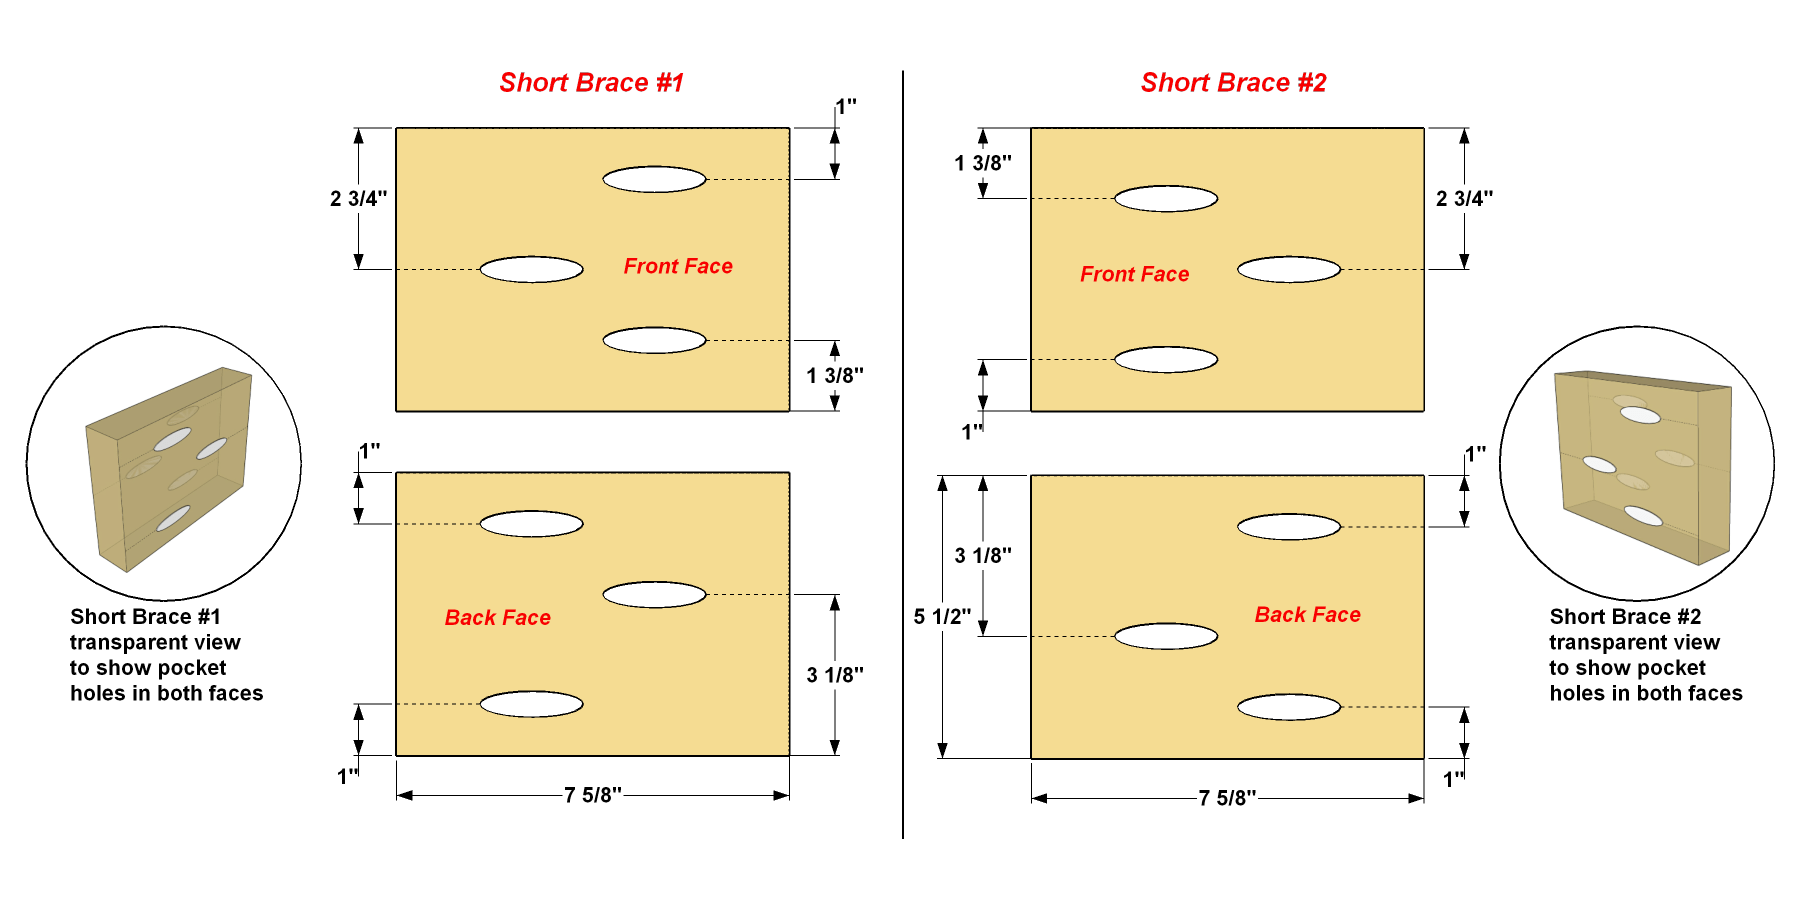
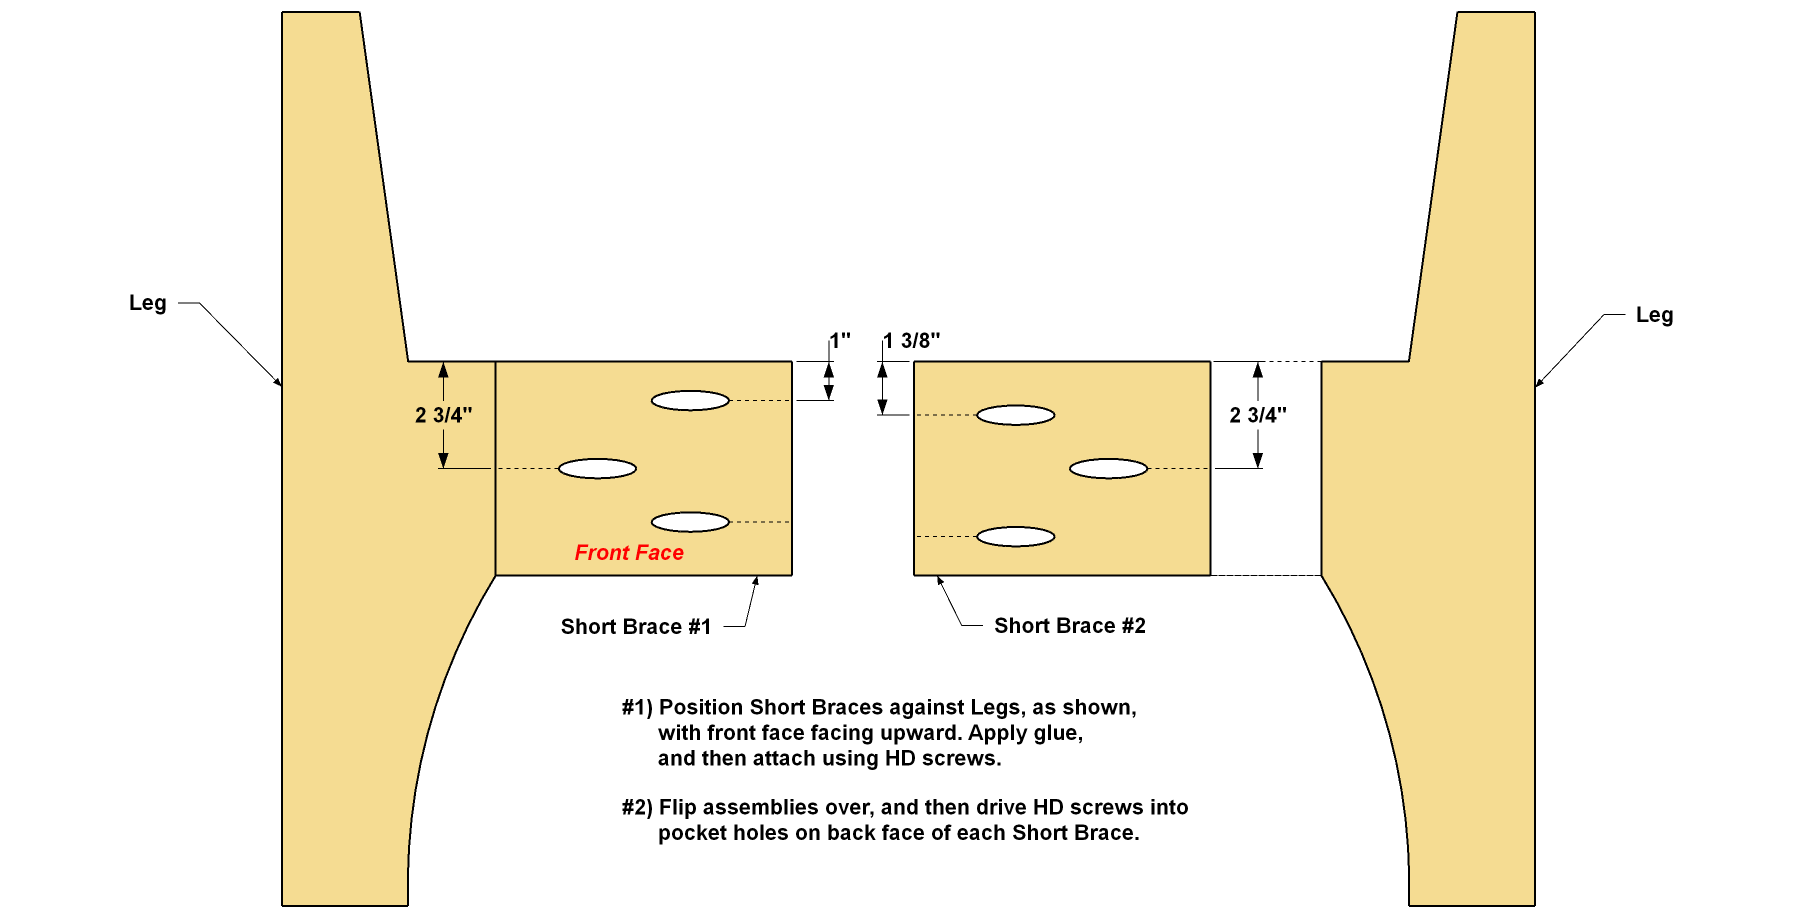
- Cut two Short Braces to length, as shown in the cutting diagram. These braces also get pocket holes in both faces, as shown. Because these braces are shorter, you need to position the holes carefully to ensure that the screws won’t run into one another during assembly.
- Mark one as Short Base #1, and the other as Short Base #2.
- Then mark a front face and back face on each one.
- Lay out the pocket-hole locations on each face, as shown. The transparent views of each Short Brace show more clearly how the end that has one pocket hole in the front face should have two pocket holes in the back face. After you lay out the all the pocket holes, drill them with the Pocket-Hole Jig XL and drill bit.
- Sand the faces and edges smooth, but don’t sand the ends.
5. Attach the Short Braces to the Legs
- Now you can attach the Short Braces to the remaining two Legs.
- First, position Short Brace #1 and Short Brace #2 between the Legs with the front faces up, making sure the pocket holes are in the positions shown. spread waterproof wood glue on the mating end of each short Brace.
- Clamp each Brace in place, and then drive the XL Pocket-Hole Screws in the pocket holes on front face.
- Flip each assembly over, and then drive screws into the pocket holes on the back face. You can remove the clamps while the glue dries.
6. Complete the Base
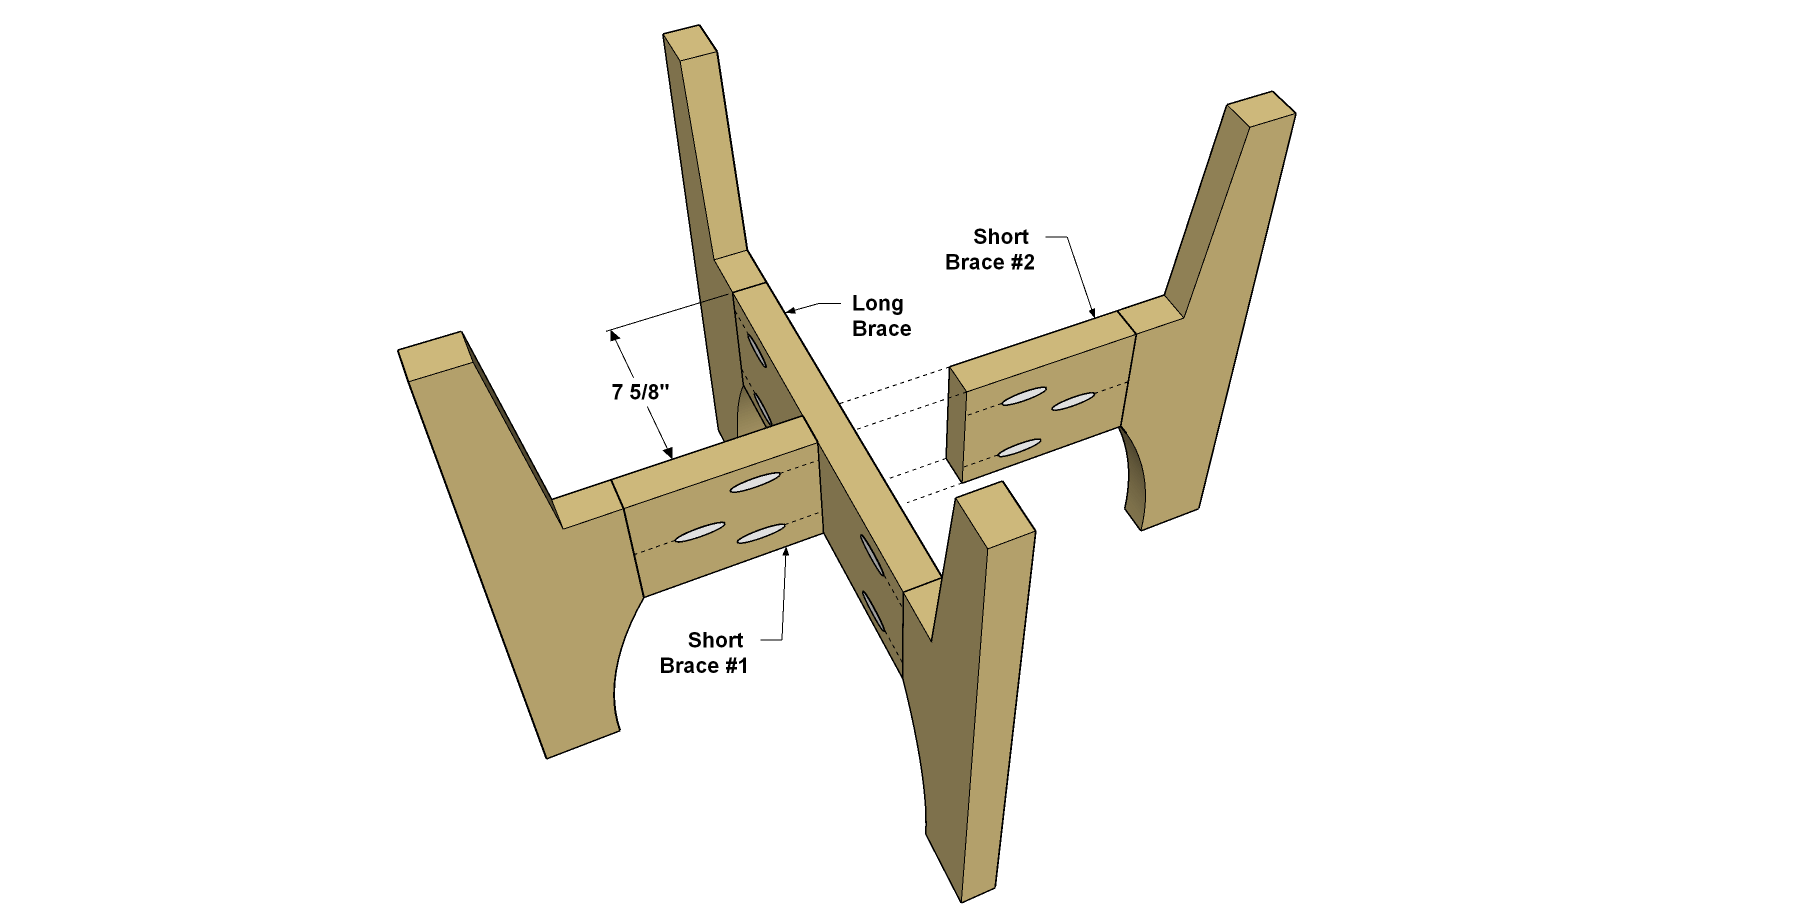
- Position the Short Brace/Leg assemblies, as shown, so that each will be centered on the length of the Long Brace.
- Spread glue on the end of each Short Brace, and then clamp the assemblies in place. Drive the XL Pocket-Hole Screws in the all the pocket holes on the Short Braces to secure these assemblies to the Long Brace. You can remove the clamps while the glue dries.
7. Sand, Apply Finish, then Plant
- With the assembly complete, remove any excess glue and do a final sanding, if needed.
- Then, apply a couple coats of finish. We used transparent exterior wood oil stain in a “natural” color. When the finish dries, you’re just about ready to plant. Before you do, though, it’s a good idea to drill a half dozen or so drain holes in the floor of the tub using a 1/8” drill bit.
- Then lay down a piece of landscape fabric, and fill the tub with dirt and plants!