 Notch
NotchUse your browser's Print (Ctrl/Cmd + P) and choose Save as PDF. This page works offline once you've opened it with a signal.
DIY Four Post Canopy Bed
After a long day of hard work, you want a place to retreat that you can be proud of.
- Difficulty
- Intermediate
- Time
- 4.5–8.8 hours
- Cost
- $$$$
Cut list
| Part | Qty | T × W × L | Material | ✓ |
|---|---|---|---|---|
| Posts (1x4 boards) | 12 | 3/4" × 3" × 84" | — | ☐ |
| Upper Side Beams (1x4 boards) | 2 | 3/4" × 3" × 80" | — | ☐ |
| Upper Front/ Back Beams (1x4 boards) | 2 | 3/4" × 3" × 73" | — | ☐ |
| Side Rails (1x6 board cuts) | 4 | 3/4" × 5" × 80" | — | ☐ |
| Front/Back/Footboard Rails (1x6 board cuts) | 6 | 3/4" × 5" × 73" | — | ☐ |
| Headboards (1x6 board cuts) | 5 | 3/4" × 5" × 73" | — | ☐ |
| Slats (1x4 pine board cuts) | 13 | 3/4" × 3" × 76" | — | ☐ |
| Side Inner Supports (2x4 board cuts) | 2 | 1" × 1" × 80" | — | ☐ |
| Front/Back Inner Supports (2x4 board cuts) | 2 | 1" × 1" × 73" | — | ☐ |
| Center Supports (2x4 board cuts) | 2 | 1" × 3" × 77" | — | ☐ |
| Legs (2x4 board cuts) | 6 | 1" × 3" × 9" | — | ☐ |
Materials
| Item | Qty | ✓ |
|---|---|---|
| Hardwood boards, 3/4" x 3 1/2" x 8' | 16 board | ☐ |
| Hardwood boards, 3/4" x 5 1/2" x 8' | 15 board | ☐ |
| Pine boards, 3/4" x 3 1/2" x 8' | 13 board | ☐ |
| 2x4 Boards, 1 1/2" x 3 1/2" x 8' | 4 board | ☐ |
| Box of 1 1/4" pocket hole screws (See tools list) | 1 each | ☐ |
| Box of 2 1/2" pocket hole screws (See tools list) | 1 each | ☐ |
| Wood glue | 1 each | ☐ |
| Wood stain of choice | 1 each | ☐ |
Overall cost: $$$$. Lumber varies by region, species, and season, so we give a band rather than a figure.
Tools
- Drill / Driver
- Miter Saw
- Pocket Hole Jig
- Random Orbit Sander
- Router Table
- Table Saw
- Tape Measure — optional
Instructions
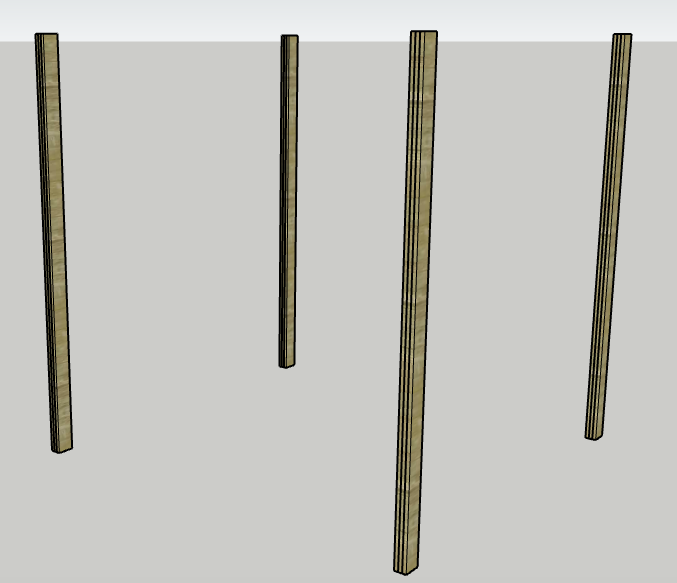
1. Glue posts together
- Start by gluing all your Posts together in groups of three.
- Start by coating one side of a Post board with wood glue and then place a second board on top of it. Coat the top side of the second Post board with wood glue and then place the third Post board on top of that.
- Clamp together and let dry.
- Repeat to create three more Posts.
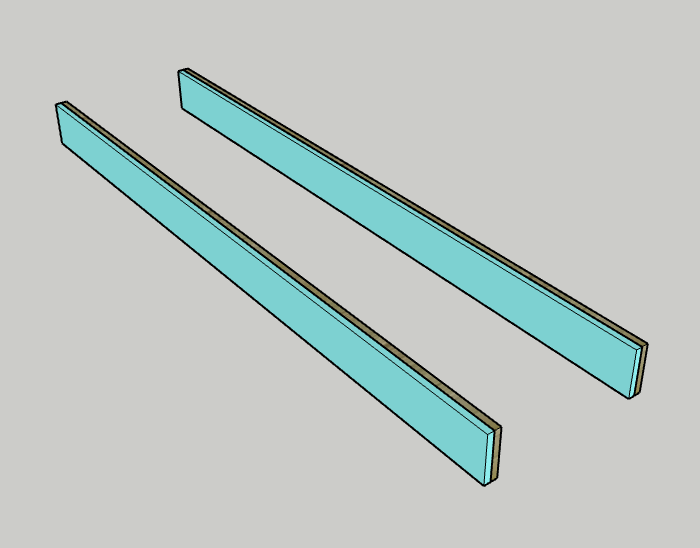
2. Glue sides together
- Start by gluing all your Side Rails together in groups of two.
- Start by coating one side of a Side Rail board with wood glue and then place a second Side Rail board on top of it.
- Clamp together and let dry.
- Repeat to create one more Side Rail.
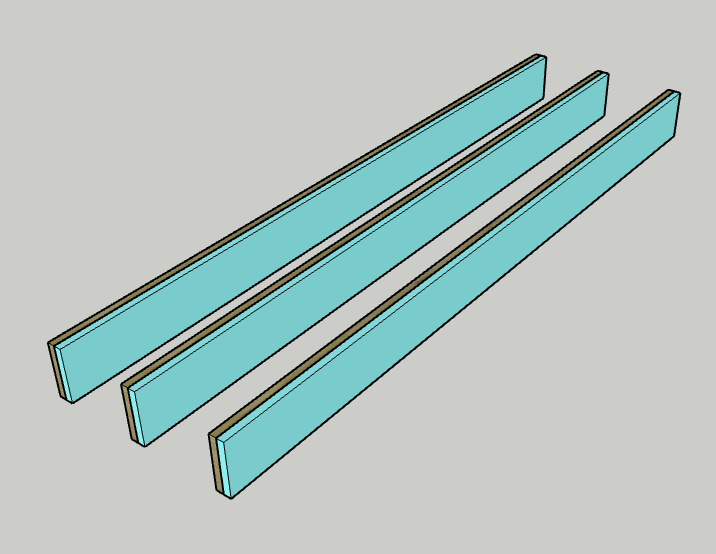
3. Glue front/back rails
- Start by gluing all your Front/Back/Footboard Rails together in groups of two.
- Start by coating one side of a Rail board with wood glue and then place a second Rail board on top of it.
- Clamp together and let dry.
- Repeat to create two more Front/Back/Footboard Rails.
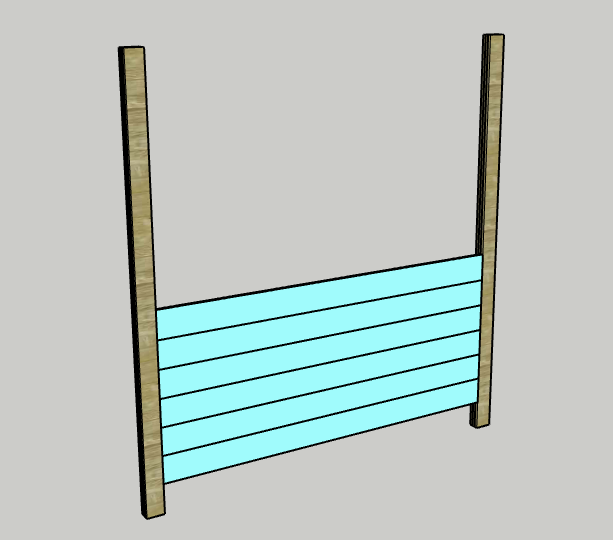
4. Create headboard
- Drill two pocket holes on each end of the Back Rails.
- Drill two pocket hole screws on each end of each Headboard piece and three holes along one long side of each. Using pocket hole screws, attach the Back Rail between two Posts, aligned flush with the front of the Posts and 6" from the bottom. Starting above the Back Rail, attach a Headboard between the two back Posts, flush with the front edge.
- Repeat for the remaining four Headboards.
5. Create footboard
Drill two pocket holes on each end of the Front and Footboard Rails. Using pocket hole screws, attach the Front Rail between the other two Posts, aligned flush with the back of the Posts and 6" from the bottom. Using pocket hole screws, attach the Footboard Rail directly above the Front Rail.
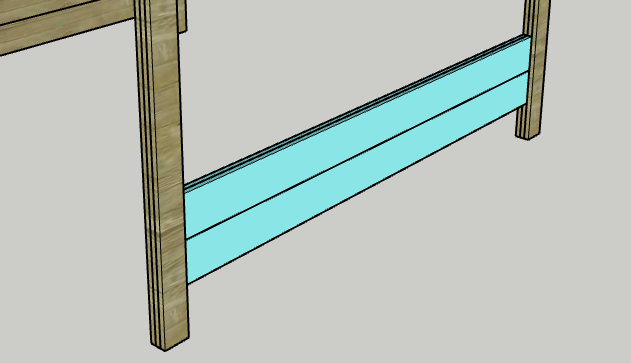
6. Attach side rails
- Drill two pocket holes on each end of the Side Rails. Using pocket hole screws, attach one Side Rail between a front and back Post, 6" from the bottom, 1 1/4" from the inside of the Posts and 3/4" from the outside of the Posts.
- Repeat on the other side.
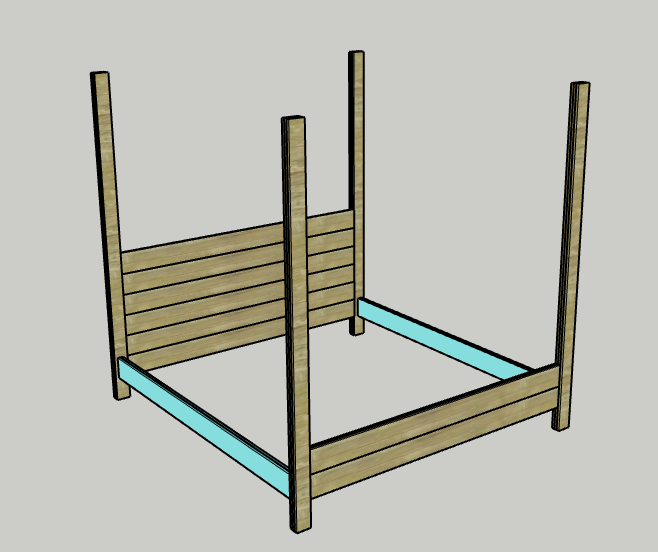
7. Attach upper beams
Drill two pocket holes in each end of the Upper Side Beams and Upper Front/Back Beams. Using pocket hole screws, attach the Upper Front/Back Beams between their respective posts, 1" down from the top. Using pocket hole screws, attach the Upper Side Beams between their respective posts, 1" down from the top.
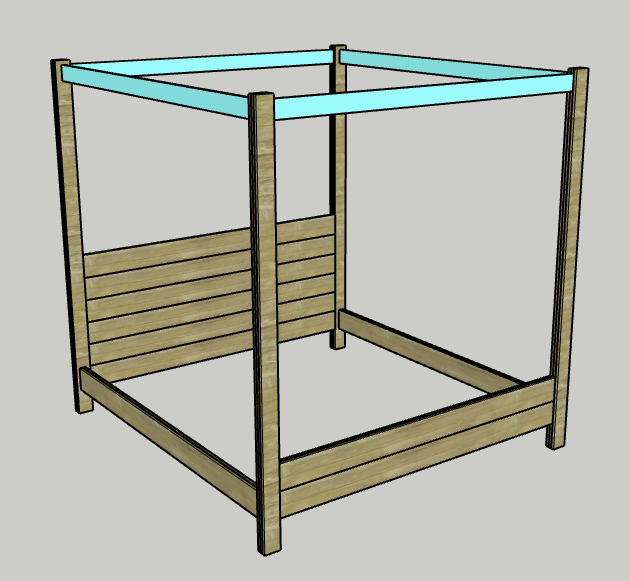
8. Attach supports/legs
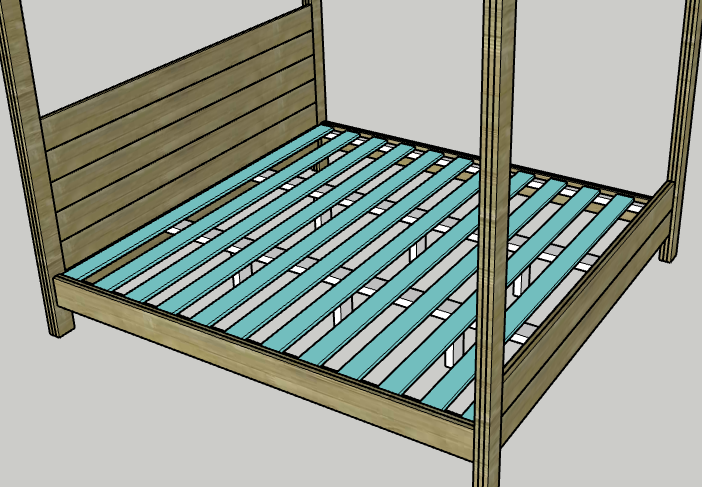
- Using wood glue and screws, attach the Side Inner Supports to the Side Rails 1" down from the top. Using wood glue and screws, attach the Front/Back Inner Supports to the Front/Back Rails 1"down from the top.
- Drill two pocket holes in one end of each Leg and both ends of each Center Support. Using pocket hole screws and wood glue, attach three Legs evenly spaced across one of the Center Supports.
- Repeat for the other. Using pocket hole screws, attach the Center Supports evenly spaced between the Front/Back Inner Supports.
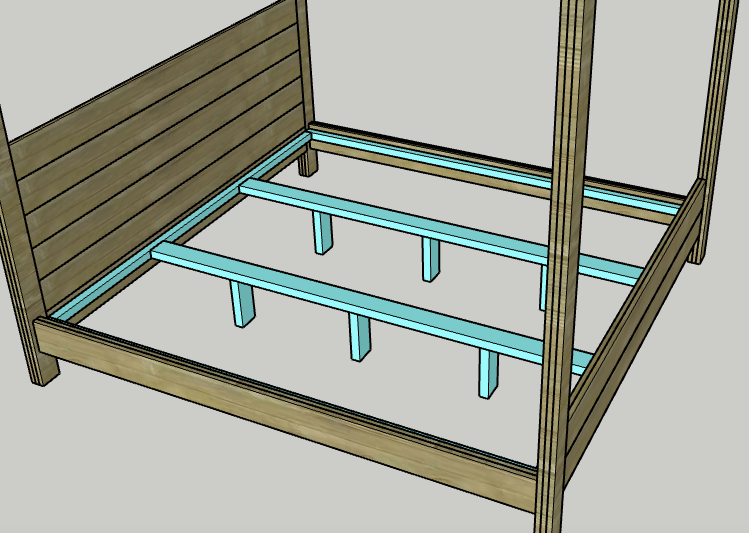
9. Attach Slats
Starting flush along the Back Rail, use screws to attach a Slat to the Side Inner Supports. Use the Kreg Quick Flip to drill a pilot hole in each spot before driving a screw into place. Using a 3 1/2" spacer, continue until all Slats are in place.
10. Add mattress
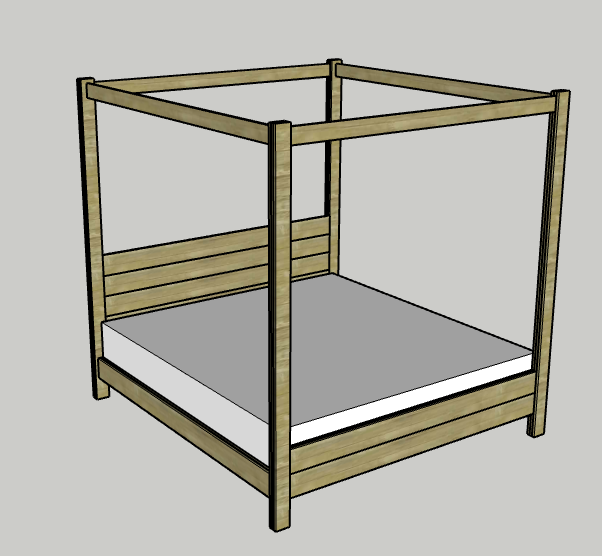
Slide the mattress into place on top of the Slats and between the Rails. Get a great night sleep!
11. Enjoy!
Enjoy your handiwork and tag @CharlestonCrafted on Instagram with a picture!