Notch
NotchFold-Out Coffee Table Bed
Step-by-step build — 15 steps. Also available as a print sheet.
1Cut Top and Bottom
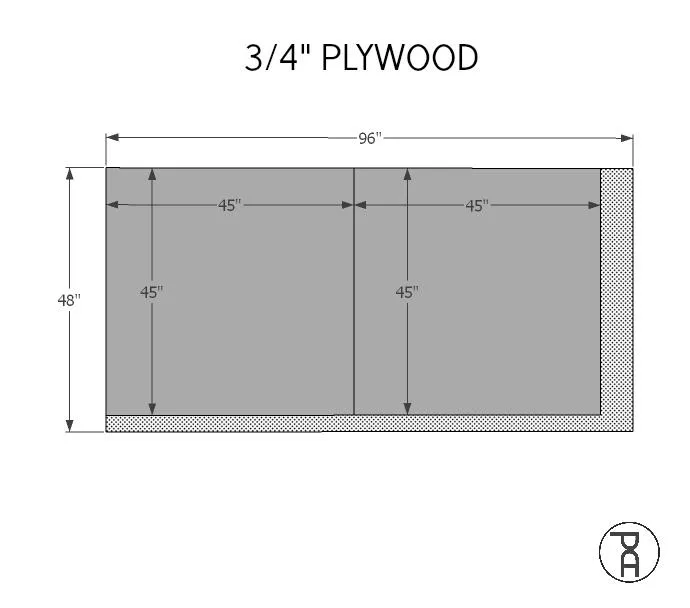
Cut two, 45" x 45" squares from 3/4" thick plywood or MDF
2Cut Sides and Faces
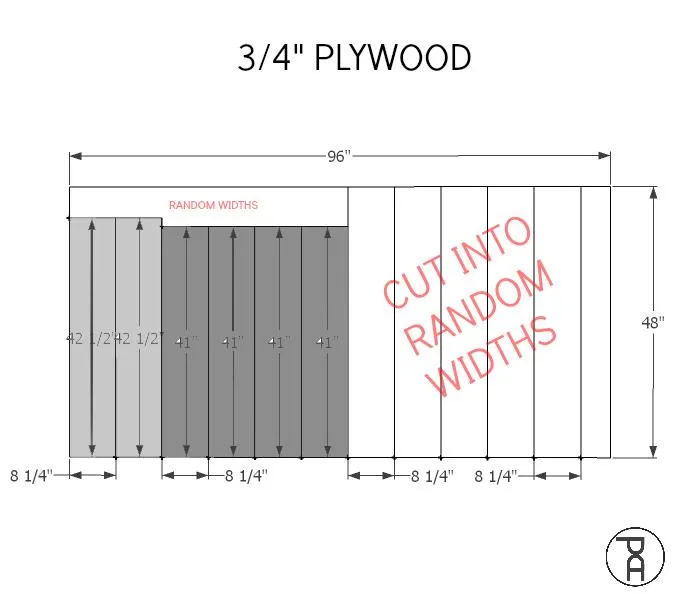
Cut two, 8-1/4" x 42-1/2" face panels and four, 8-1/4" x 41" sides panel from 3/4" thick plywood or MDF. Cut the remaining scrap into 8-1/4" lengths of material and various, random widths.
3Cut Veneer Pieces
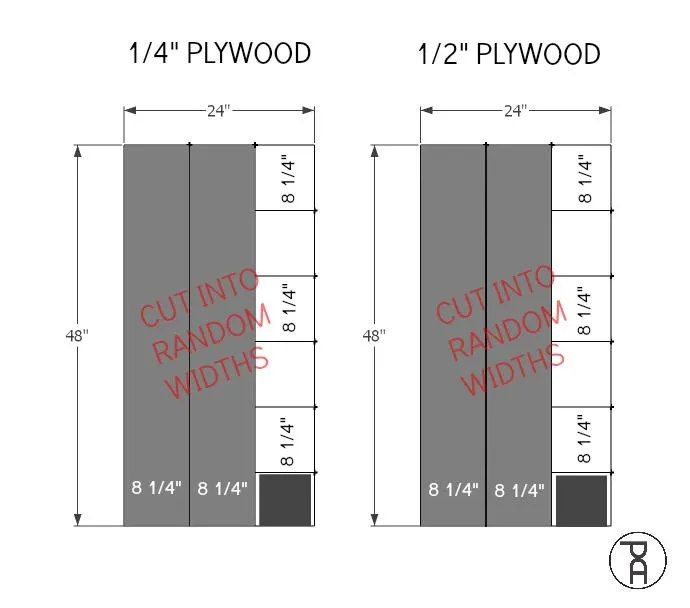
Cut an entire 2' x 4' x 1/4" plywood or MDF "hobby panel" AND an entire 2' x 4' x 1/2" plywood or MDF "hobby panel" into 8-1/4" lengths, at random widths.
4Lower Box Face
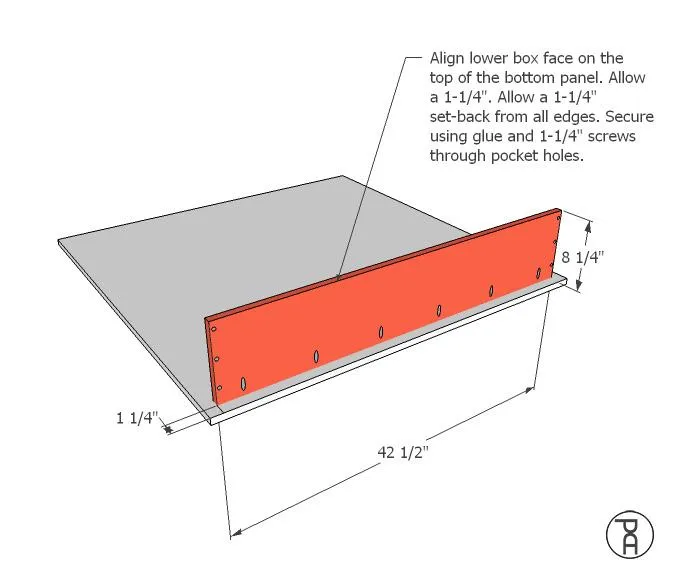
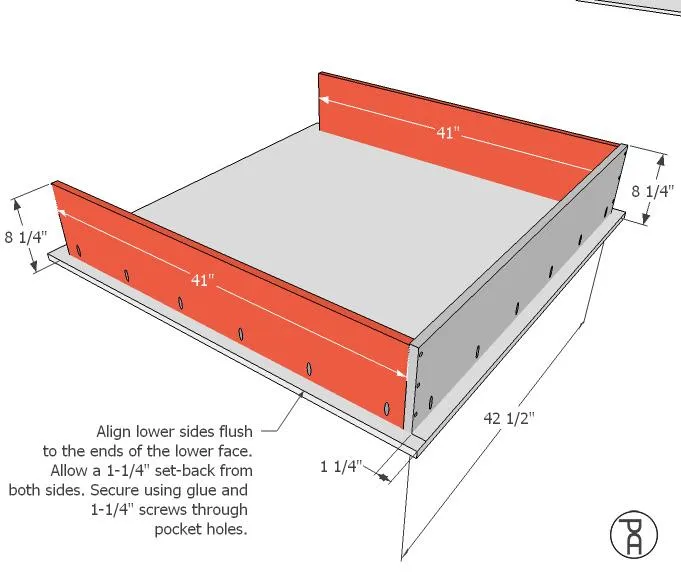
Align the lower box face on the top of the bottom panel. Allow a 1-1/4" set-back from all edges. Secure in place using glue and 1-1/4" screws through pocket holes.
5Lower Box Sides
Align the lower sides flush to the ends of the lower face. Allow a 1-1/4" set-back from both sides. Secure in place using glue and 1-1/4" screws through pocket holes.
6Upper Box Face
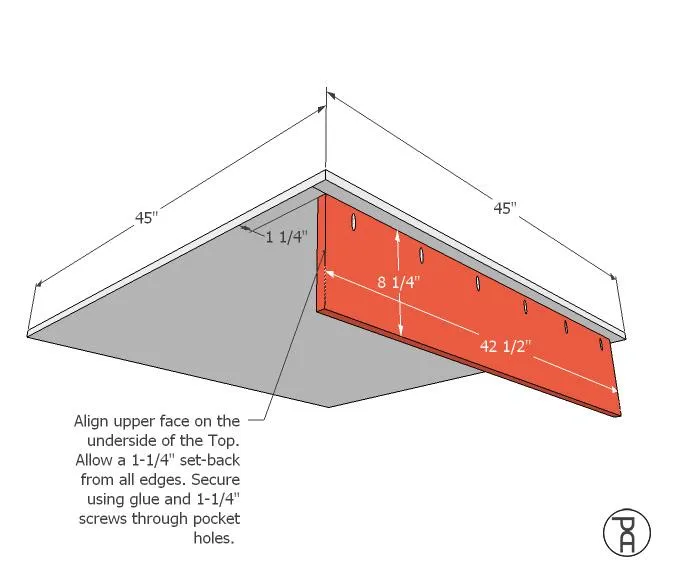
Align the upper face on the underside of the Top. Allow a 1-1/4" set-back from all edges. Secure in place using glue and 1-1/4" screws through pocket holes.
7Upper Box Sides
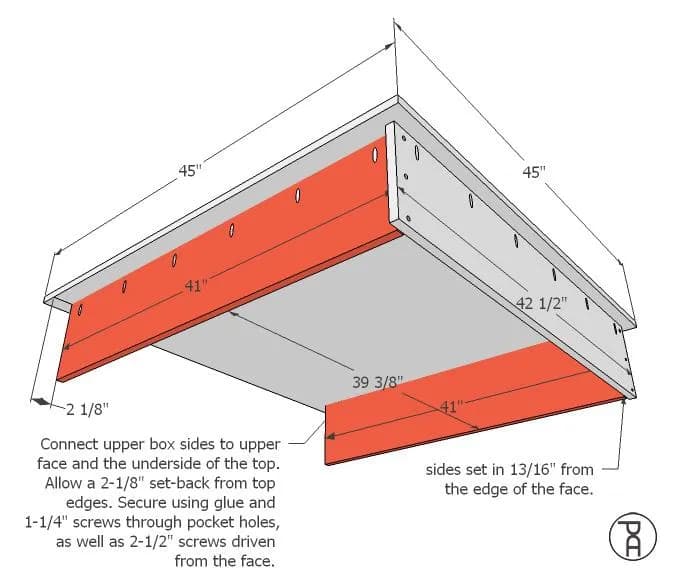
Connect the upper box sides to upper face and the underside of the top. Allow a 2-1/8" set-back from top edges. Secure in place using glue and 1-1/4" screws through pocket holes, as well as 2-1/2" screws driven from the face. The sides will be set in 13/16" from the ends of the face board.
8Build Legs
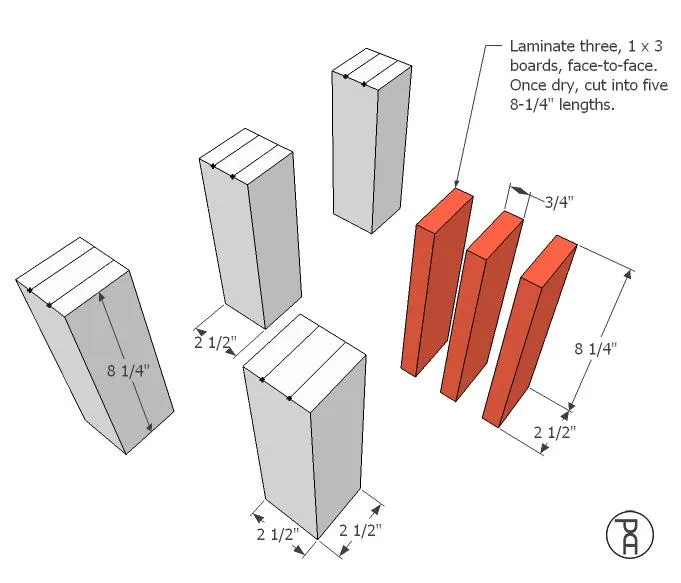
Laminate (glue together) three, 1 x 3 boards, face-to-face. Once dry, cut into five, 8-1/4" lengths. It is much easier to glue and clamp full-length boards together and allow to dry before cutting into shorter lengths.
9Connect Legs
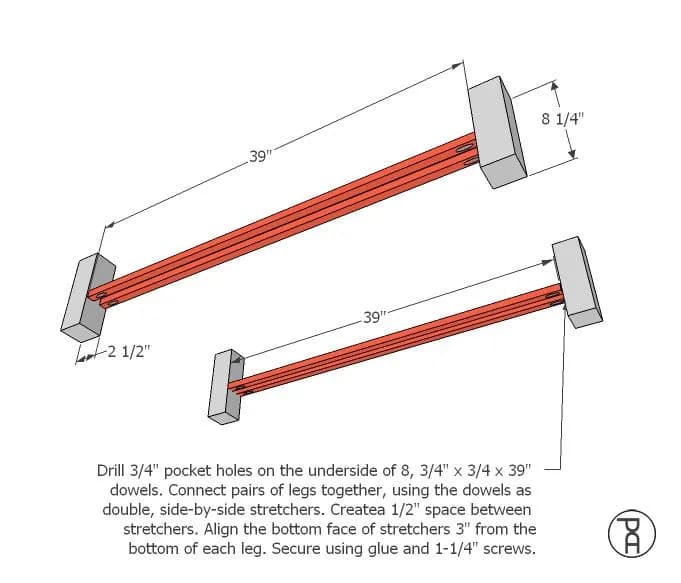
- Drill 3/4" pocket holes on the underside of 8, 3/4" x 3/4 x 39" dowels. Connect pairs of legs together, using the dowels as double, side-by-side stretchers. Create a 1/2" space between stretchers.
- Align the bottom face of stretchers 3" from the bottom of each leg. Secure in place using glue and 1-1/4" screws.
10Stretchers
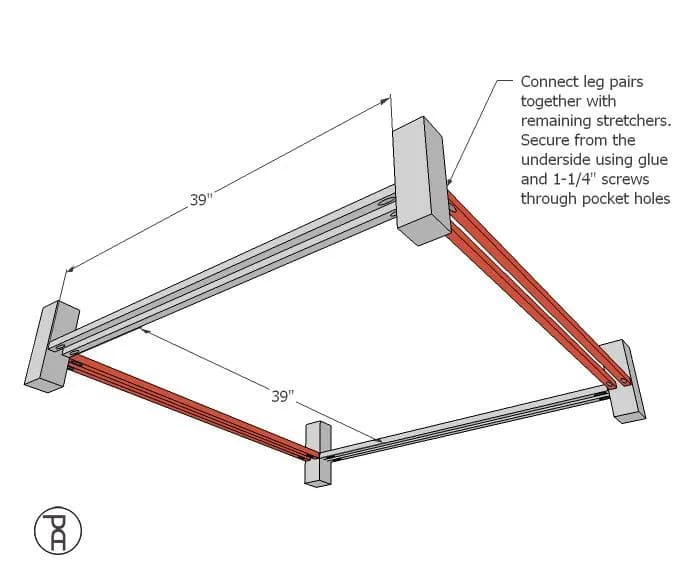
Connect leg pairs together with remaining stretchers. Secure in place from the underside using glue and 1-1/4" screws through 3/4" pocket holes
11Attach Base
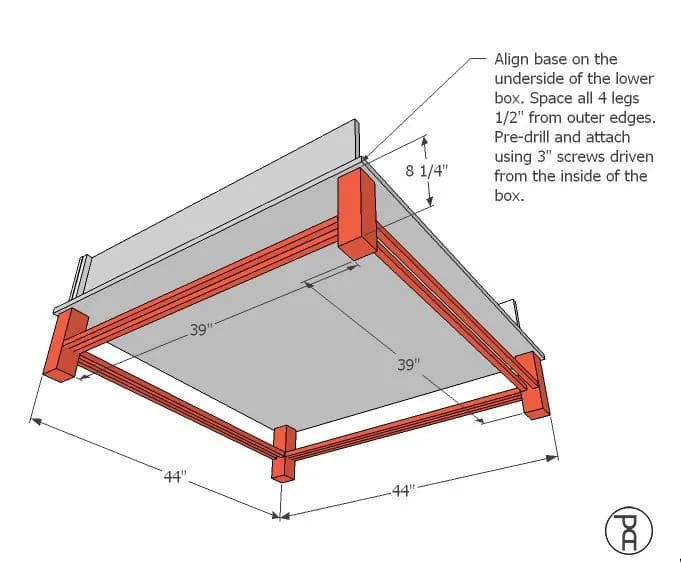
- Align the table base (legs and stretchers) on the underside of the lower box.
- Space all 4 legs 1/2" from outer edges. Pre-drill into the top of the legs and attach using 3" screws driven from the inside of the box.
12Center Leg
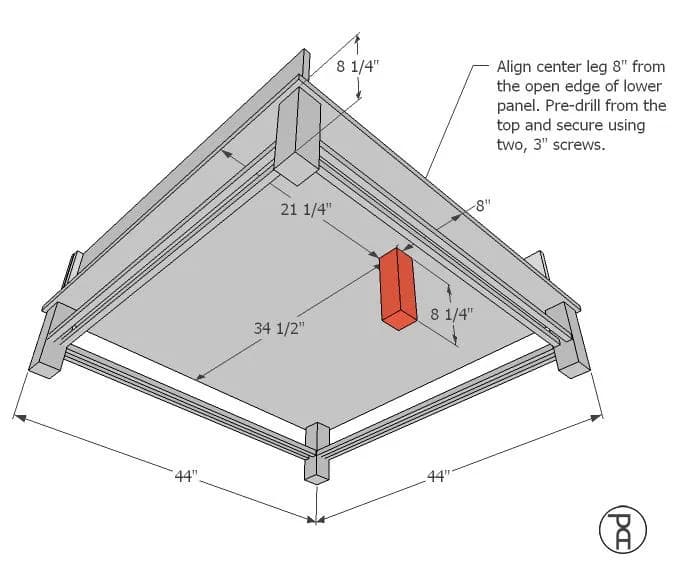
Align the center leg 8" from the open side of the lower box panel. Pre-drill into the top of the leg and secure using two, 3" screws.
13Add Veneer Pieces
- Place the upper portion of the box on top of the lower box.
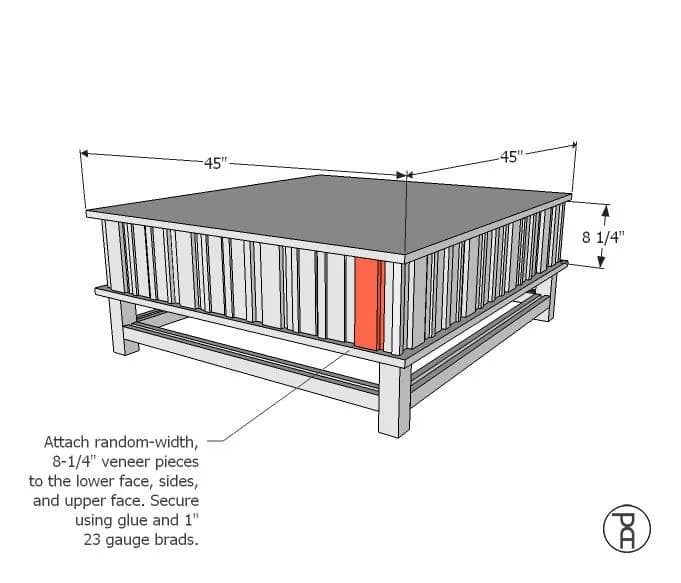
- Attach random-width, 8-1/4" long veneer pieces to the lower face, sides, and upper face. Alternate the pattern of widths and thicknesses to create a random look. Secure in place using glue and 1", 23 gauge brads.
14Finish and Add Mattress
- Sand the entire surface with 220-grit sand paper.
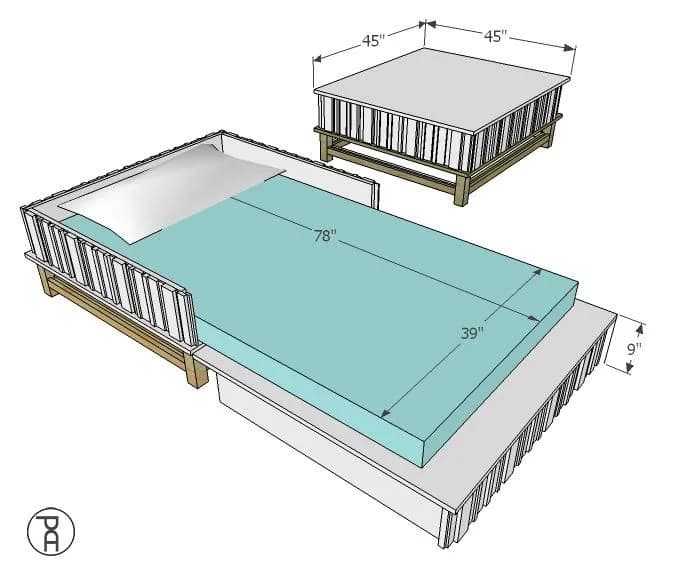
- Remove dust and paint or finish however you'd like. I recommend using an all-foam mattress. The inside of the box will accommodate a twin-XL mattress, folded in half.
15More Tips and Ideas
Head to PneumaticAddict.com or YouTube.com/pneumaticaddict for more plans, tips and DIY tricks.