Notch
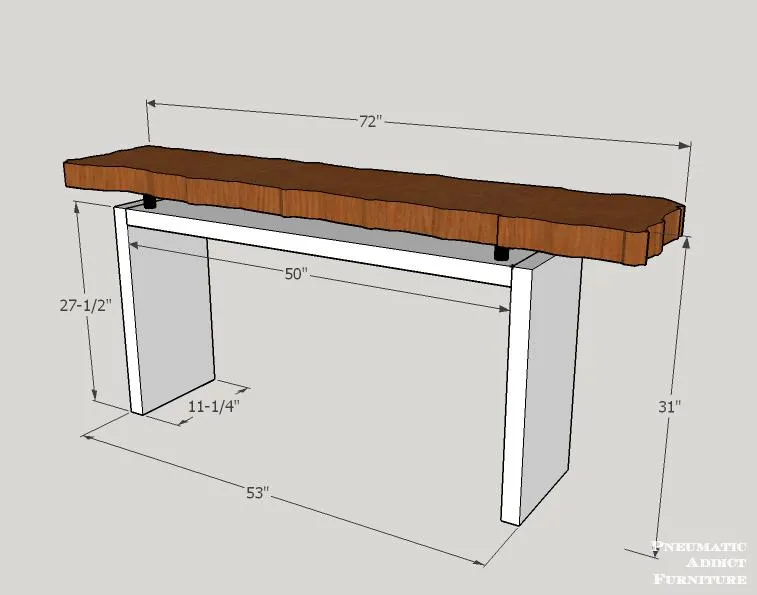
Floating Top Sofa Table
Step-by-step build — 5 steps. Also available as a print sheet.
1Cut Boards to Size
Join boards to create 11-1/4" wide panels, or use off-the-shelf 2 x 12 lumber. Cut one panel 50" in length and two 27-1/2" in length.
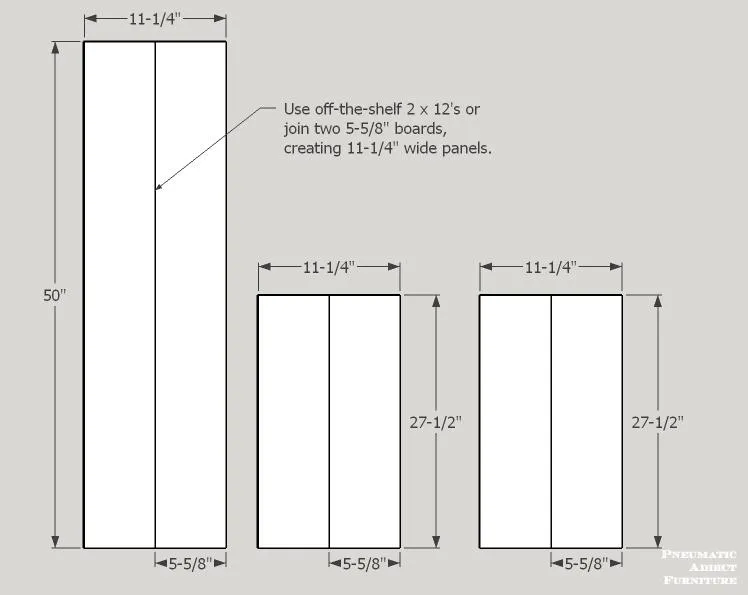
2Connect Panels
- Align the top of the longer panel with one edge of each shorter panel.
- Measure 3/4" from edge, pre-drill and countersink four holes.
- Add glue to connecting faces and drive 4" wood screws. Cover holes with plugs and cut flush.
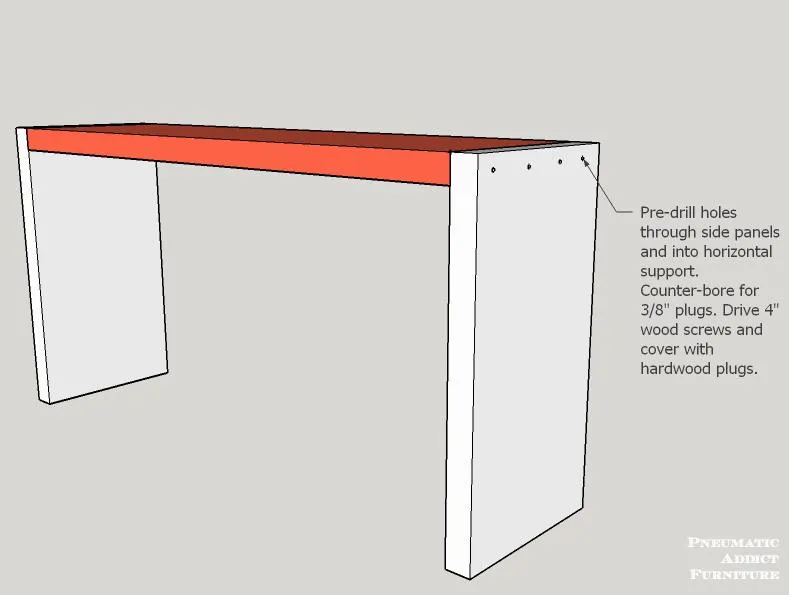
3Add Risers
- Cut four- 2" long, pieces of 1-3/8" wood dowel.
- Mark the center and drill a hole through each dowel piece using a 1/4" drill bit. On the top of the console base, measure 4" from the end and 2" from each long side and make a mark. Using a 1/4" drill bit, drill a hole through each mark. On the underside, countersink each hole 3/8" deep with a 3/4" forstner bit.
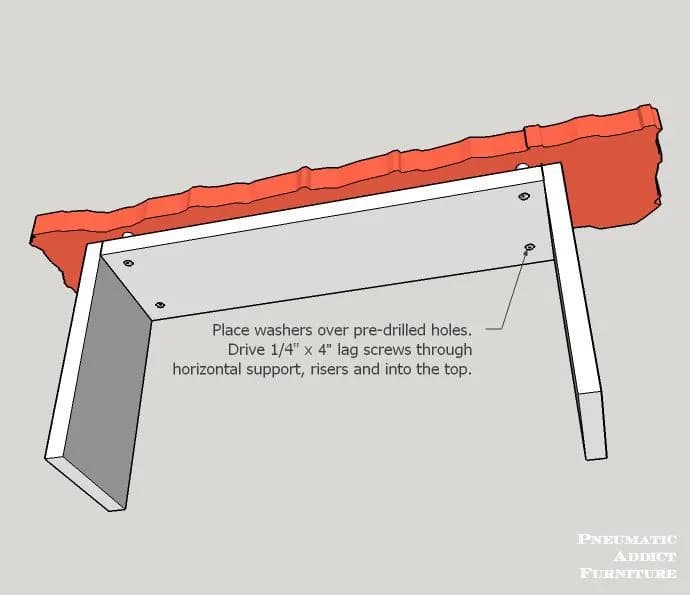
- Insert 4"- 1/4" lag screw with washer through each hole on underside of console and through a wood dowel riser.
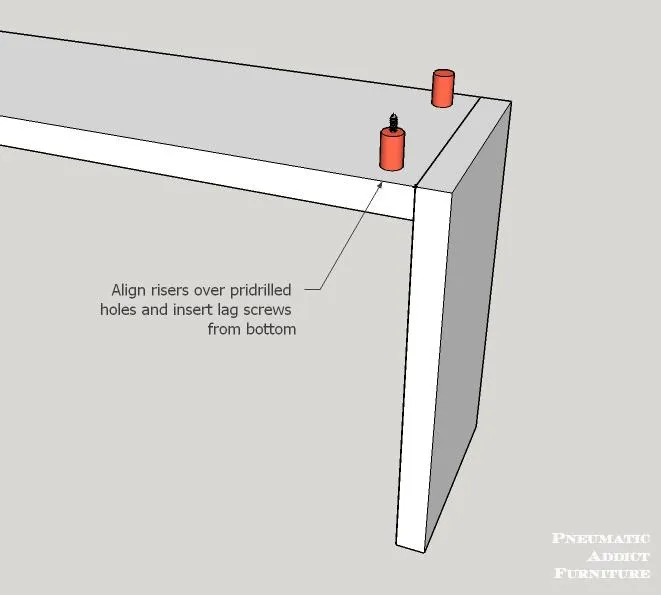
4Attach Top
- Cut a 1-1/2" x 14" x 72" floating top from desired material.
- Center the floating top on risers. Drive lag screws, securing the top to the base. Pre-drilling may be necessary to avoid splitting.
5Finish
Sand entire piece and finish however you desire. Visit PneumaticAddict.com for finishing tips and ideas