 Notch
NotchUse your browser's Print (Ctrl/Cmd + P) and choose Save as PDF. This page works offline once you've opened it with a signal.
Floating Display Shelves
Add a dramatic style statement in any room with these floating shelves.
- Difficulty
- Intermediate
- Time
- 3.3–6.3 hours
- Cost
- $$$
Cut list
| Part | Qty | T × W × L | Material | ✓ |
|---|---|---|---|---|
| Back Panel | 1 | 3" × 28" × 72" | — | ☐ |
| Top Shelf | 5 | 3" × 9" × 16" | — | ☐ |
| Bottom Shelf | 5 | 3" × 9" × 16" | — | ☐ |
| Filler Strips | 6 | 1" × 3" × 48" | — | ☐ |
| Hanger Cleat | 1 | 1/2" × 1" × 22" | — | ☐ |
Materials
| Item | Qty | ✓ |
|---|---|---|
| Plywood, 3/4" Thick Full Sheet | 1 board | ☐ |
| Board, 1/2" x 2" (1 1/2" actual) 36" | 1 board | ☐ |
| 1 1/4" coarse pocket hole screws | 20 each | ☐ |
| 2" x 8' rolls, iron-on edge banding | 4 each | ☐ |
| 1" flathead wood screws | 6 each | ☐ |
| 17-gauge 1 1/4" wire nails | 30 each | ☐ |
| Wood glue | 1 each | ☐ |
| 18" Hangman Picture Hanging System | 1 each | ☐ |
Overall cost: $$$. Lumber varies by region, species, and season, so we give a band rather than a figure.
Tools
- Circular Saw
- Drill / Driver
- Hammer
- Pocket Hole Jig
- Random Orbit Sander
- Bar / Pipe Clamps — optional
- Combination Square — optional
- Tape Measure — optional
Instructions
1. Cut Filler Strips and a Cleat
- Start by cutting six Filler Strips off the end of a sheet of 3/4" plywood, as shown in the cutting diagram. Use an edge guide to ensure that you get straight cuts with smooth edges. Later, you’ll cut these strips to final length and apply them to the back face of the Back Panel.
- Cut a Hanger Cleat to length from a 1/2"-thick board, as well.
Tip: Tricks for Clean Plywood Cuts When the cutting plywood for this project, it’s important to get cuts that are clean, straight, and free from tearout on the face. Here are a few tricks for doing that with a circular saw: First, buy a saw blade that’s made for cutting plywood. You’ll get a much smoother cut. Second, use a saw guide to ensure that you get straight cuts. Third, when you cut, lay the plywood with the best-looking face (the one that will show) facing DOWN. That way, the blade will be cutting into this face, rather than exiting it, so you won’t have problems with tearout of the fragile face veneer layer.
2. Cut the Back Panel
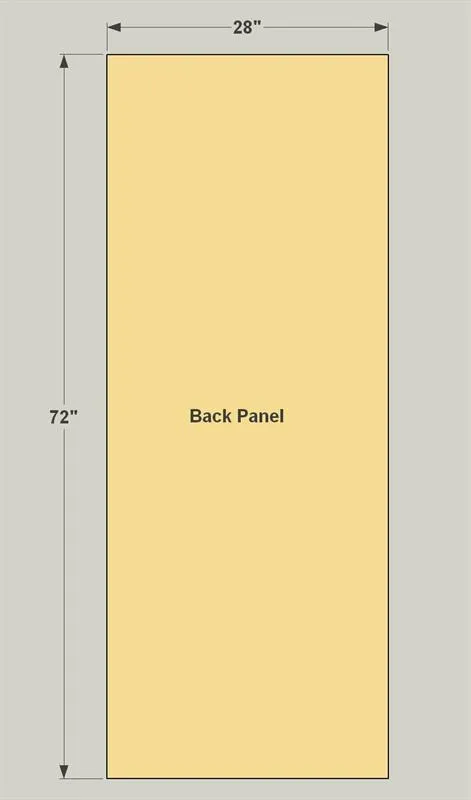
Now cut the Back Panel to size from a sheet of 3/4" plywood, as shown in the cutting diagram. Again, it’s important to make smooth, straight cuts by using an edge guide for your circular saw.
3. Make the Shelf Parts
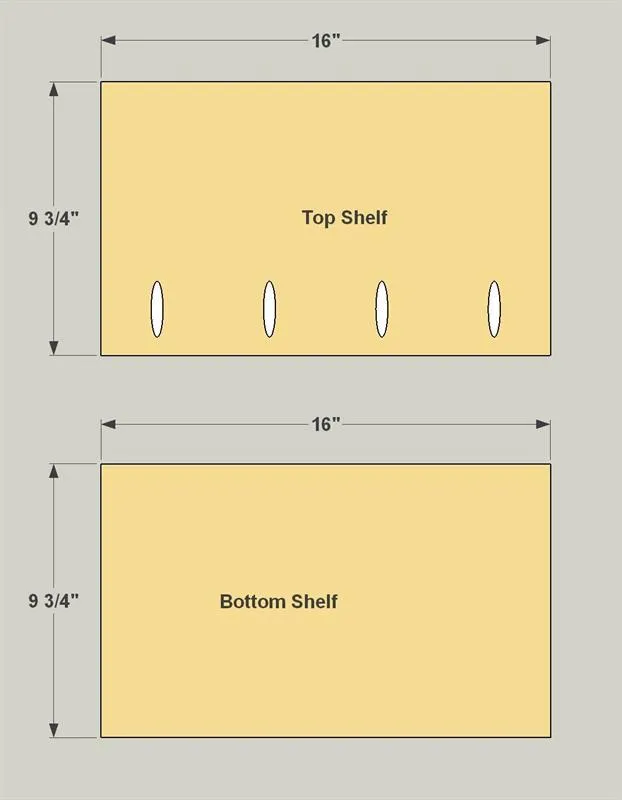
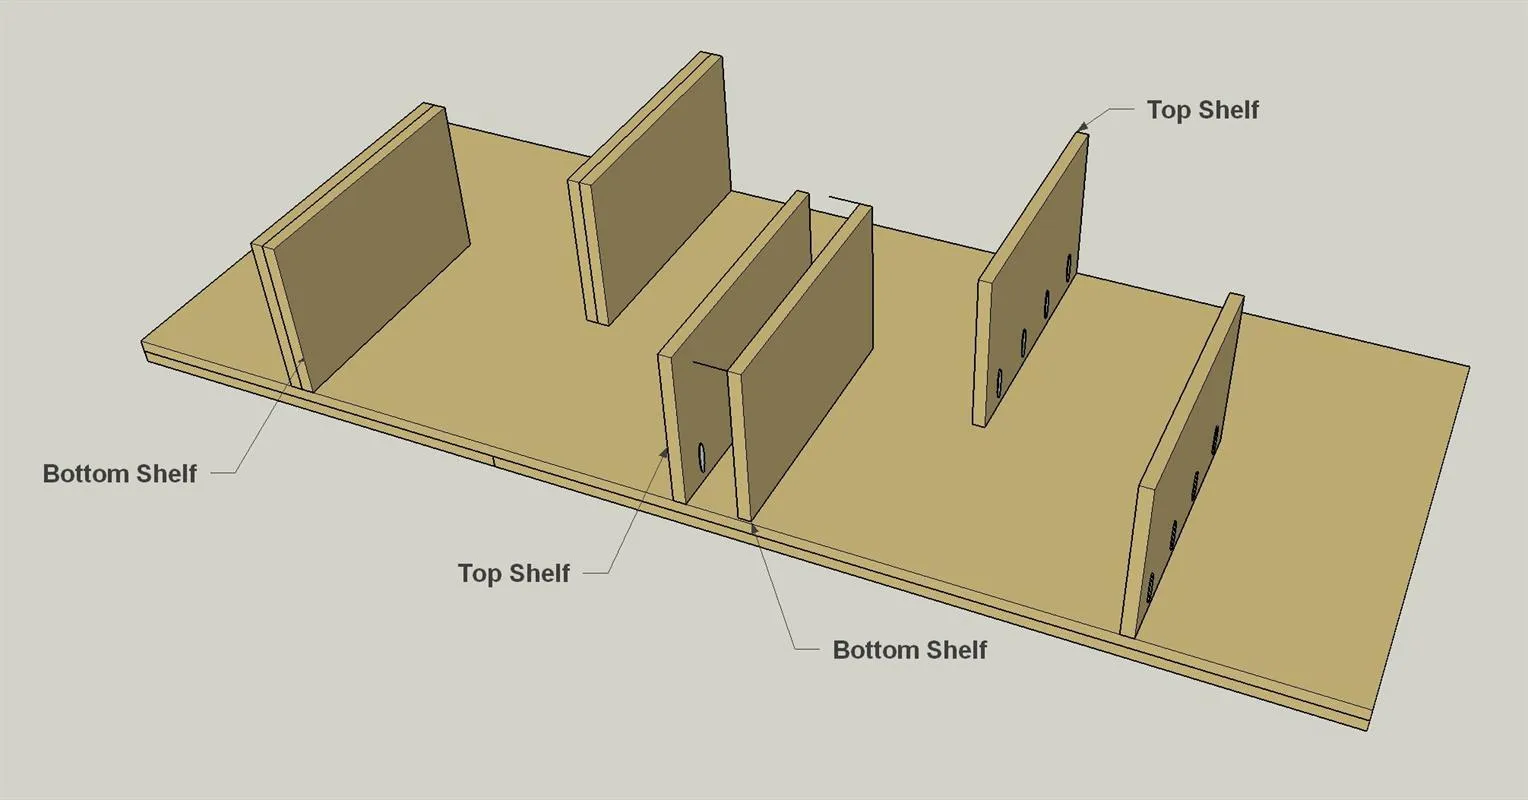
- The shelves are made in two pieces—a top layer and a bottom layer that get sandwiched together. The Top layer gets attached with pocket screws, then the bottom layer glued on.
- Cut five Shelf Tops and five Shelf Bottoms to size from a sheet of 3/4" plywood, as shown in the cutting diagram.
- Take extra care to ensure that all of these parts are sized equally.
- Then, with your pocket hole jig set up for 3/4" material, drill pocket holes in the Top Shelves, as shown.
4. Attach the Fillers and Cleat
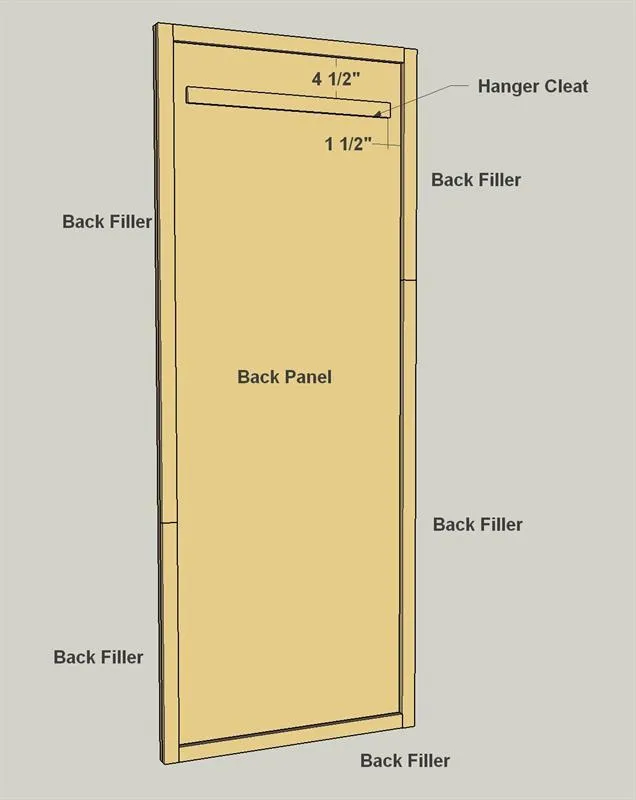
- Now you can attach the Filler Strips to the back face of the Back Panel using glue and 1 1/4" brad nails. Make sure the edges are flush as you add the Filler Strips, and cut the pieces to length as needed.
- Also add the Hanger Cleat.
- Position it, and then use a countersink bit to drill through the Cleat and into the Back Panel. Just make sure you don’t drill all the way through the Back Panel.
- Then attach the cleat using glue and 1" flathead wood screws.
5. Iron On the Edge Banding
With the Back assembly together, you can apply iron-on edge banding to cover the exposed plywood edges. The banding is wider than the thickness of the Back assembly, so you can let it overhang, and then trim it using a veneer trimmer and/or a sharp utility knife. Sand the cut edges lightly by hand after the edge banding is on.
6. Attach the Top Shelves
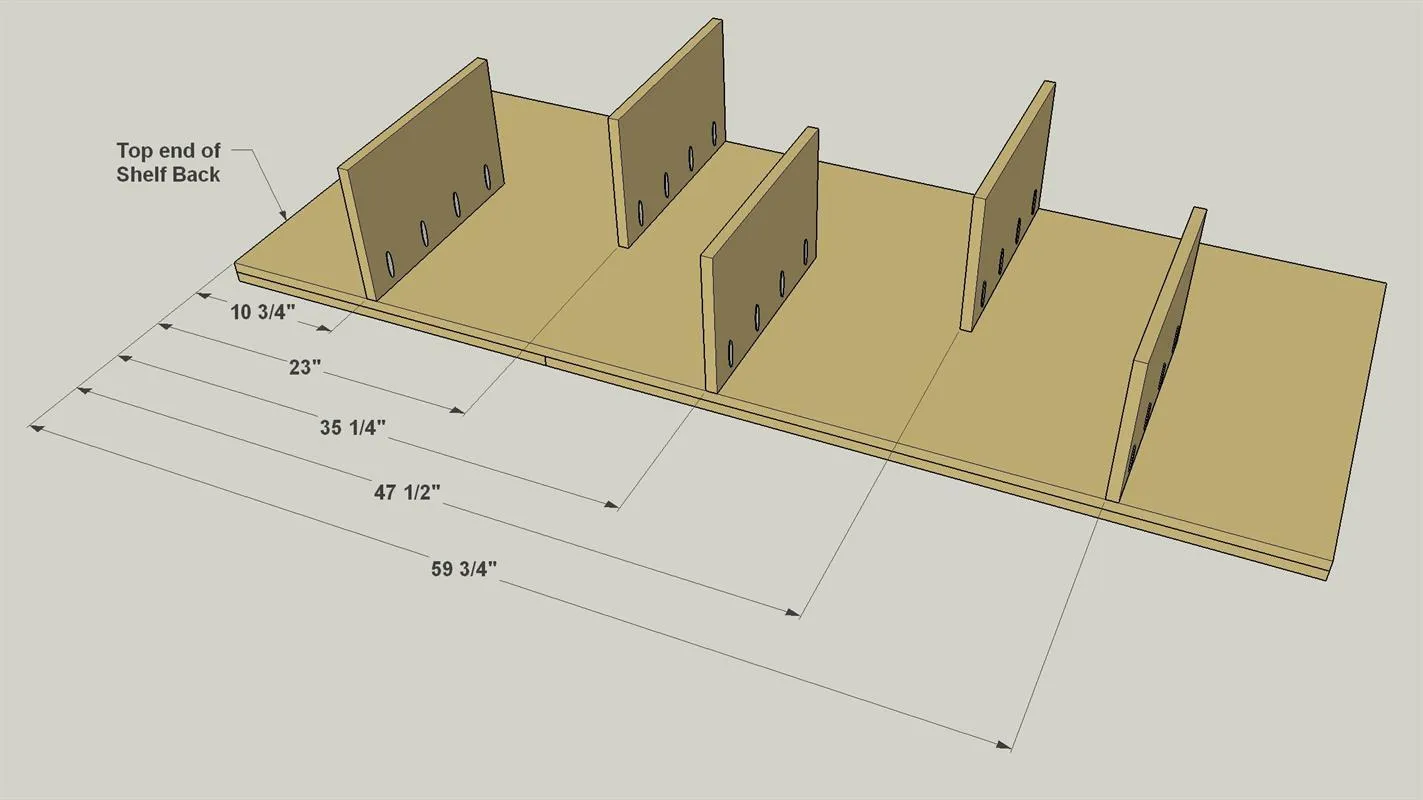
Next, attach each Top Shelf to the Back Panel using glue and 1 1/4" coarse-thread pocket hole screws, as shown. To ensure that the shelves will sit level on your wall, use a square to make sure that each shelf is perpendicular to the edge of the Back Panel.
7. Attach the Bottom Shelves
- Now you can glue the Bottom Shelves onto the Top Shelves. Make sure all of the edges are aligned, and use clamps or masking tape to hold the Shelves in place while the glue dries.
- Once the glue sets, you can apply iron-on veneer to all of the shelves. You’ll need to cut and fit the pieces carefully where they contact the Back Panel to ensure that you don’t have visible gaps.
8. Finish, add the Hanger, and Install
- With your display shelves together, you can now add the stain or finish of your choice.
- Then install a hanger on the Hanger Cleat. We recommend an 18" “Hangman” hanger. This is a sturdy two-piece system.
- Attach one piece to the cleat with screws, making sure that it’s parallel to the top edge of the Back Panel.
- Then, mount the other piece of the hanger to your wall as recommended by the manufacturer. After that, you’ll just slip the display shelf assembly onto the hanger, and you’re ready to decorate.