 Notch
NotchUse your browser's Print (Ctrl/Cmd + P) and choose Save as PDF. This page works offline once you've opened it with a signal.
Flexible Shelving For Your Home Office or Library
Build two shelving units, combine the units to make one wide unit or modify the design to build a whole wall of shelving.
- Difficulty
- Intermediate
- Time
- 4–8 hours
- Cost
- $$$
Cut list
| Part | Qty | T × W × L | Material | ✓ |
|---|---|---|---|---|
| Sides - plywood | 3 | 3/4" × 10" × 90" | — | ☐ |
| Shelves - 3/4" plywood | 14 | 3/4" × 10" × 36" | — | ☐ |
| Front and back aprons - plywood | 4 | 3/4" × 2" × 36" | — | ☐ |
| Upper back - plywood | 2 | 3/4" × 6" × 36" | — | ☐ |
| Lower back - plywood | 2 | 3/4" × 14" × 36" | — | ☐ |
| Optional side (for 2 units) - plywood | 1 | 3/4" × 10" × 90" | — | ☐ |
| Front side edging - wood | 3 | 3/4" × 3/4" × 90" | — | ☐ |
| Front shelf edging - wood | 14 | 3/4" × 3/4" × 36" | — | ☐ |
| Optional side edging (for 2 units) - wood | 1 | 3/4" × 3/4" × 90" | — | ☐ |
Materials
| Item | Qty | ✓ |
|---|---|---|
| Plywood, 3/4" Thick 96" | 3 board | ☐ |
| Board, 1x8 96" | 1 board | ☐ |
| Board, 1x4 96" | 1 board | ☐ |
| Kreg 1 1/1/4" coarse pocket screws | 90 each | ☐ |
| Titebond I Woodglue | 1 each | ☐ |
| 1/4" shelf pins or brackets | 32 each | ☐ |
| 1 1/4" brad nails | 100 each | ☐ |
| Minwax Golden Oak Stain | 1 each | ☐ |
| Minwax Tung Oil | 1 each | ☐ |
Overall cost: $$$. Lumber varies by region, species, and season, so we give a band rather than a figure.
Tools
- Circular Saw
- Drill / Driver
- Miter Saw
- Pocket Hole Jig
- Random Orbit Sander
- Table Saw
- Bar / Pipe Clamps — optional
- Tape Measure — optional
Instructions
1. Introduction
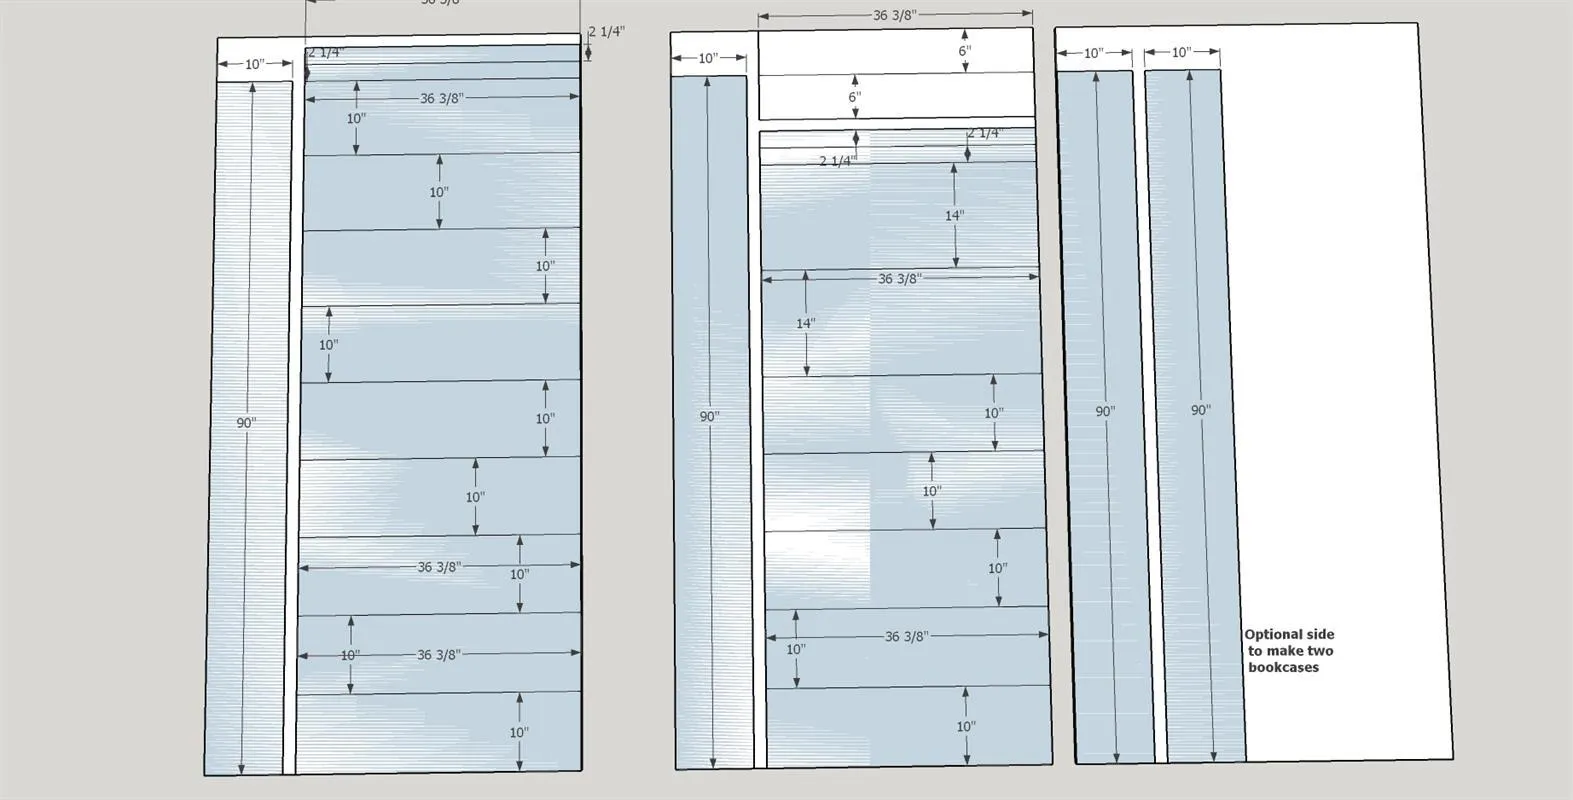
Please be sure to read through complete instructions before you begin any work on this project. This plan is designed to build a 75" wide shelving unit. By cutting an additional plywood side and wood edging you can make two 37 7/8" wide bookshelves. The plan can also be modified to add a third or fourth shelving unit if you have a big wall to fill.
2. Cut the plywood
For the 75" wide shelving unit cut the sides, shelves, front/back aprons, lower backs and upper backs from the three 3/4" plywood sheets. If you want to make two smaller units cut the optional side from the third sheet of plywood.I used oak plywood.
3. Cut the boards
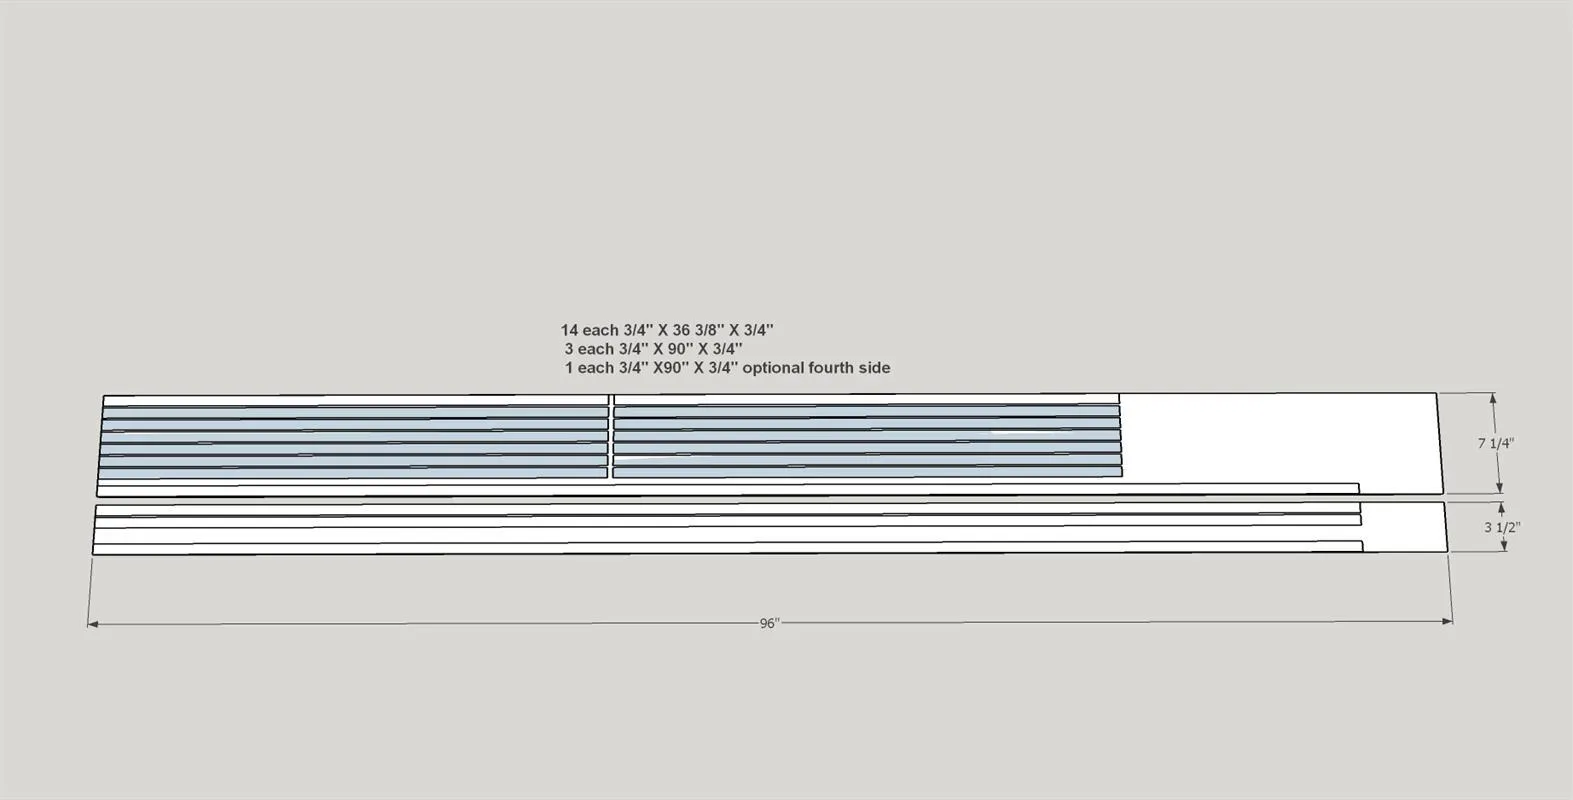
Cut the 14 shelf edges and the 3 side edges. If you decide to make the two smaller units please cut one additional side edge. I made my unit out of oak.
4. Drill the pocket holes.
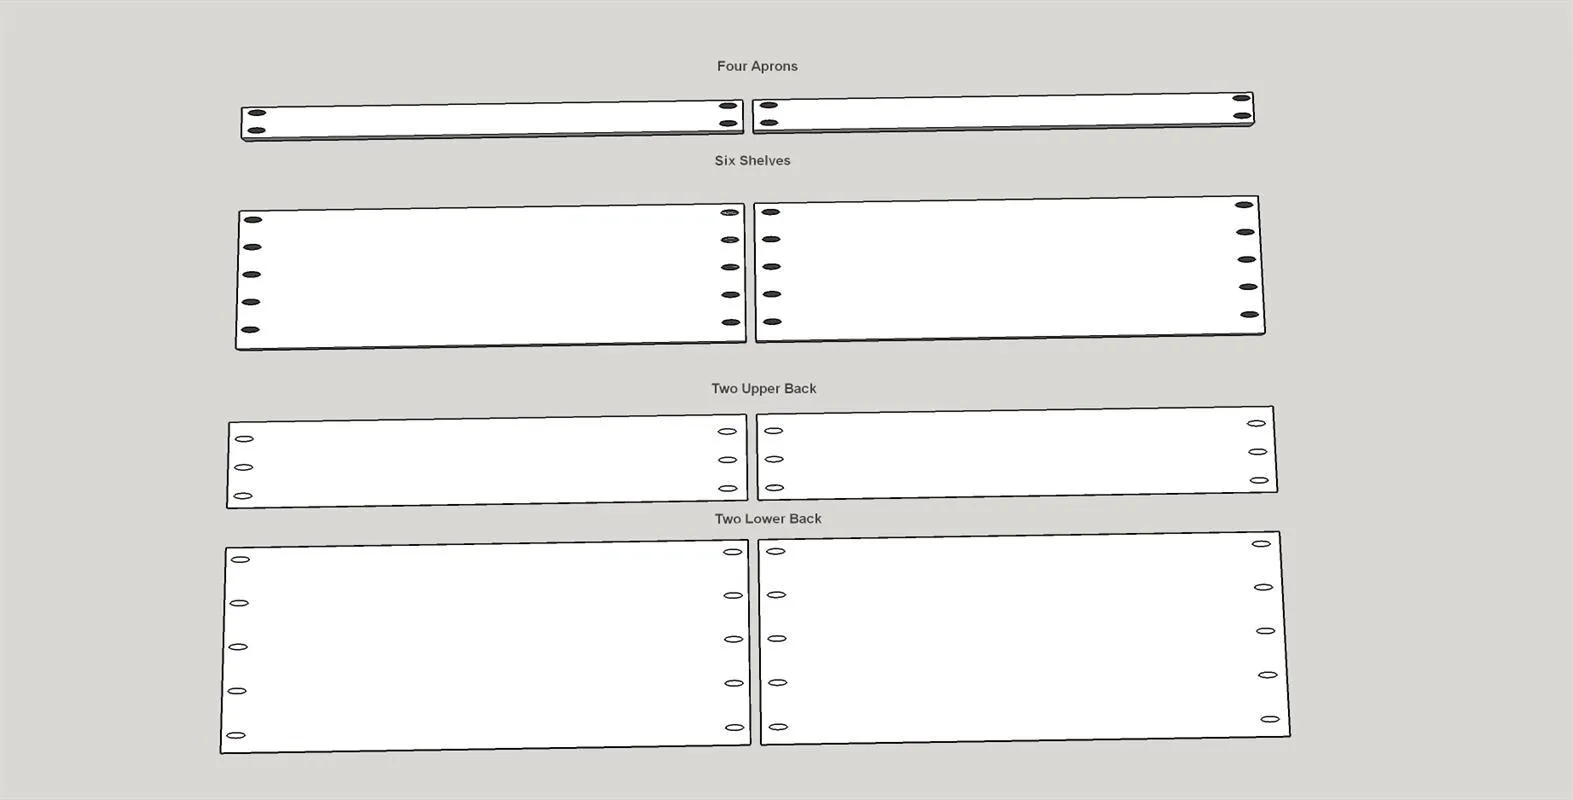
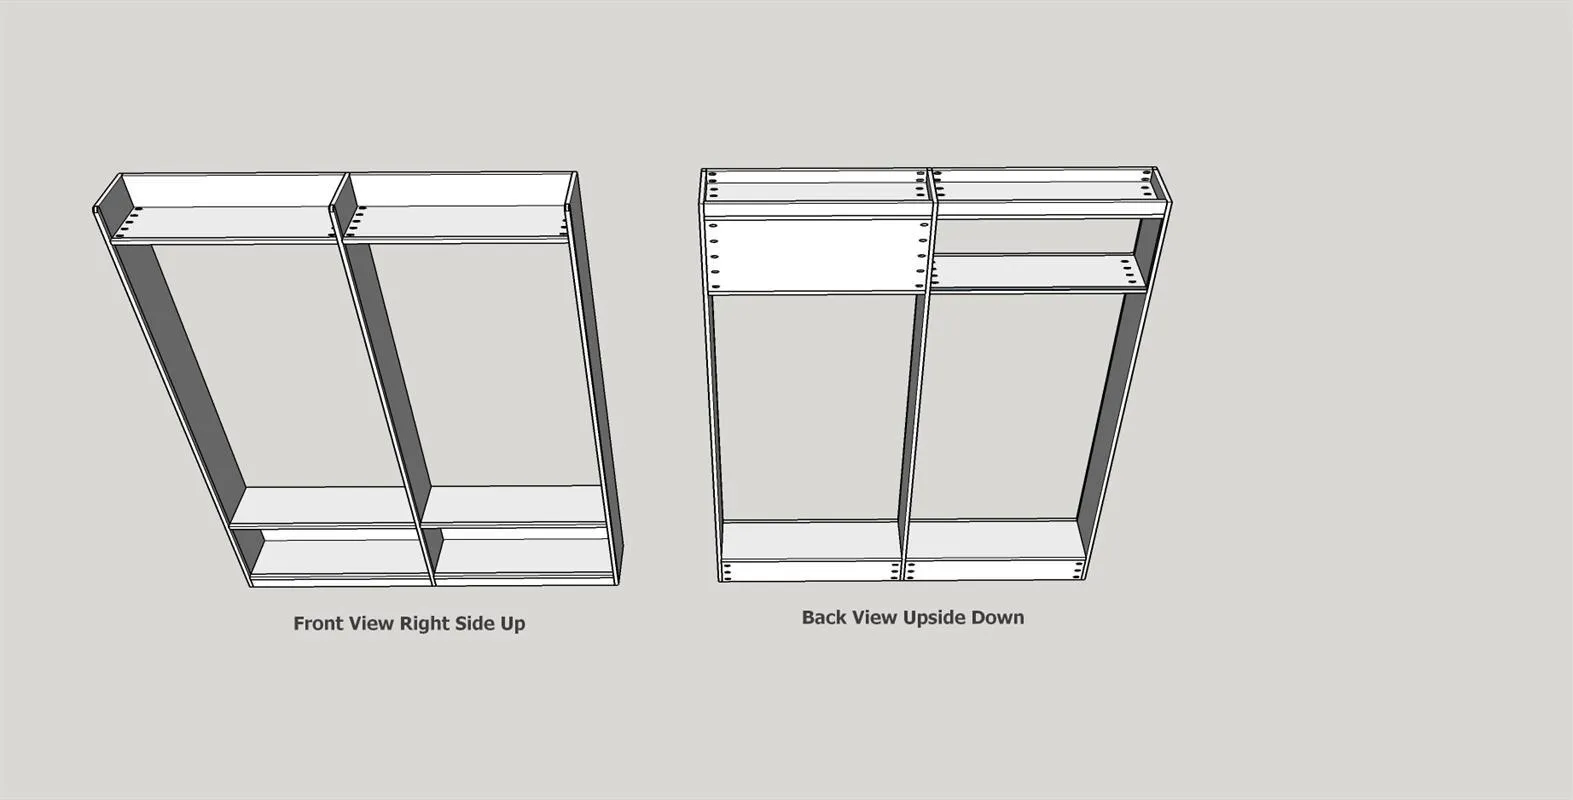
The shelving unit(s) are held together with pocket screws and wood glue. Of the fourteen shelves, six are fixed (held in place with pocket screws), two upper backs, two lower backs and four aprons also need pocket holes. Please see attached diagram.
5. Add front edging
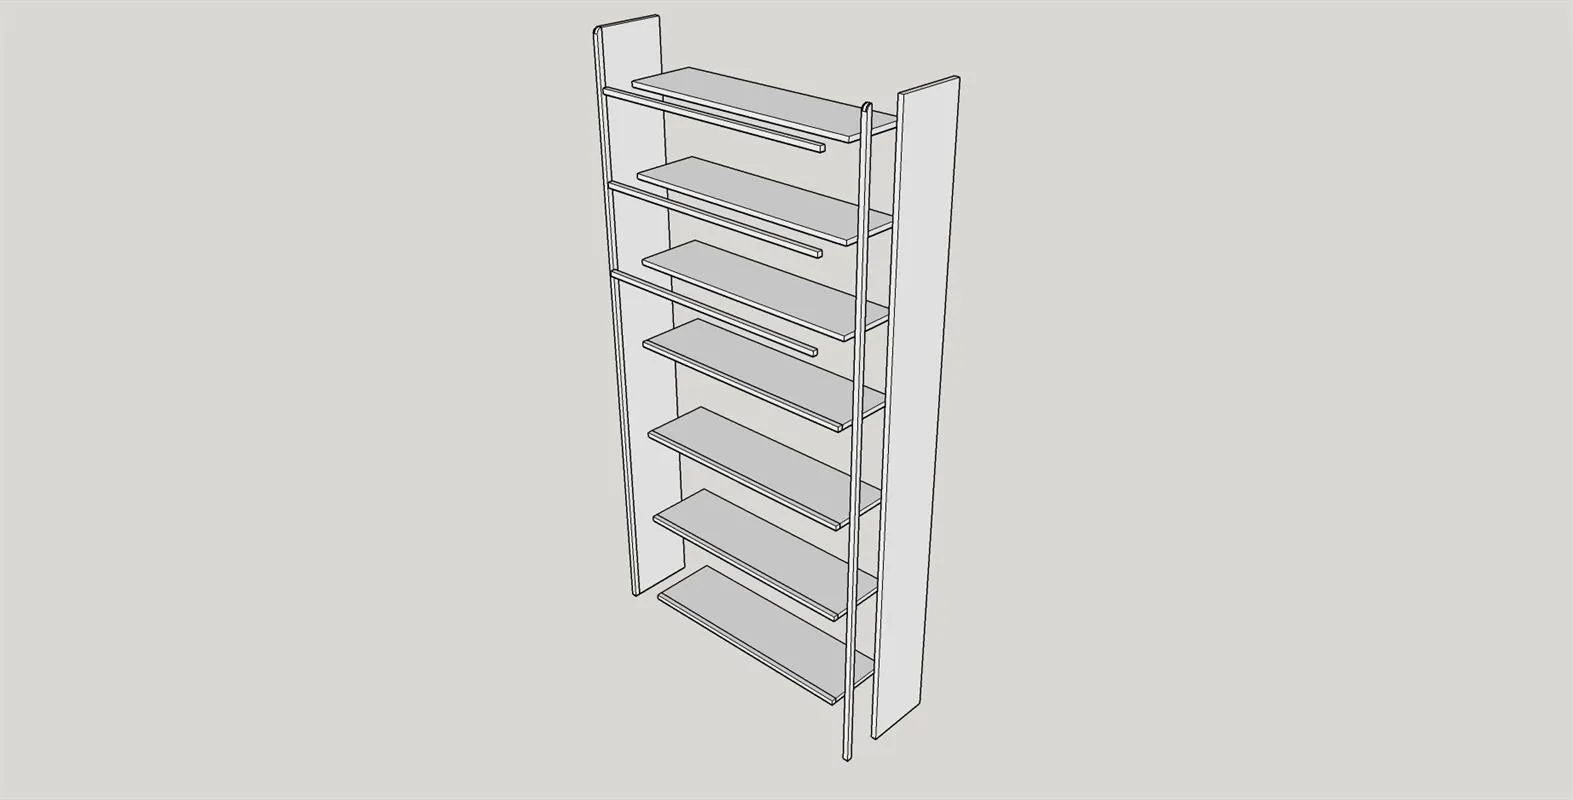
The front wood edging needs to be attached to the front of the shelves and sides. Use Titebond I wood glue and 1 1/4" brad nails to do this. Please note that 3/4" plywood is often slightly narrower than the stated size, so the attached edging might be slightly wider than the plywood. If that is the case you can remove the excess using a hand plane or a router with a piloted flush trim bit. (See Extras section for explanations/demo)
6. Drill shelf pin holes
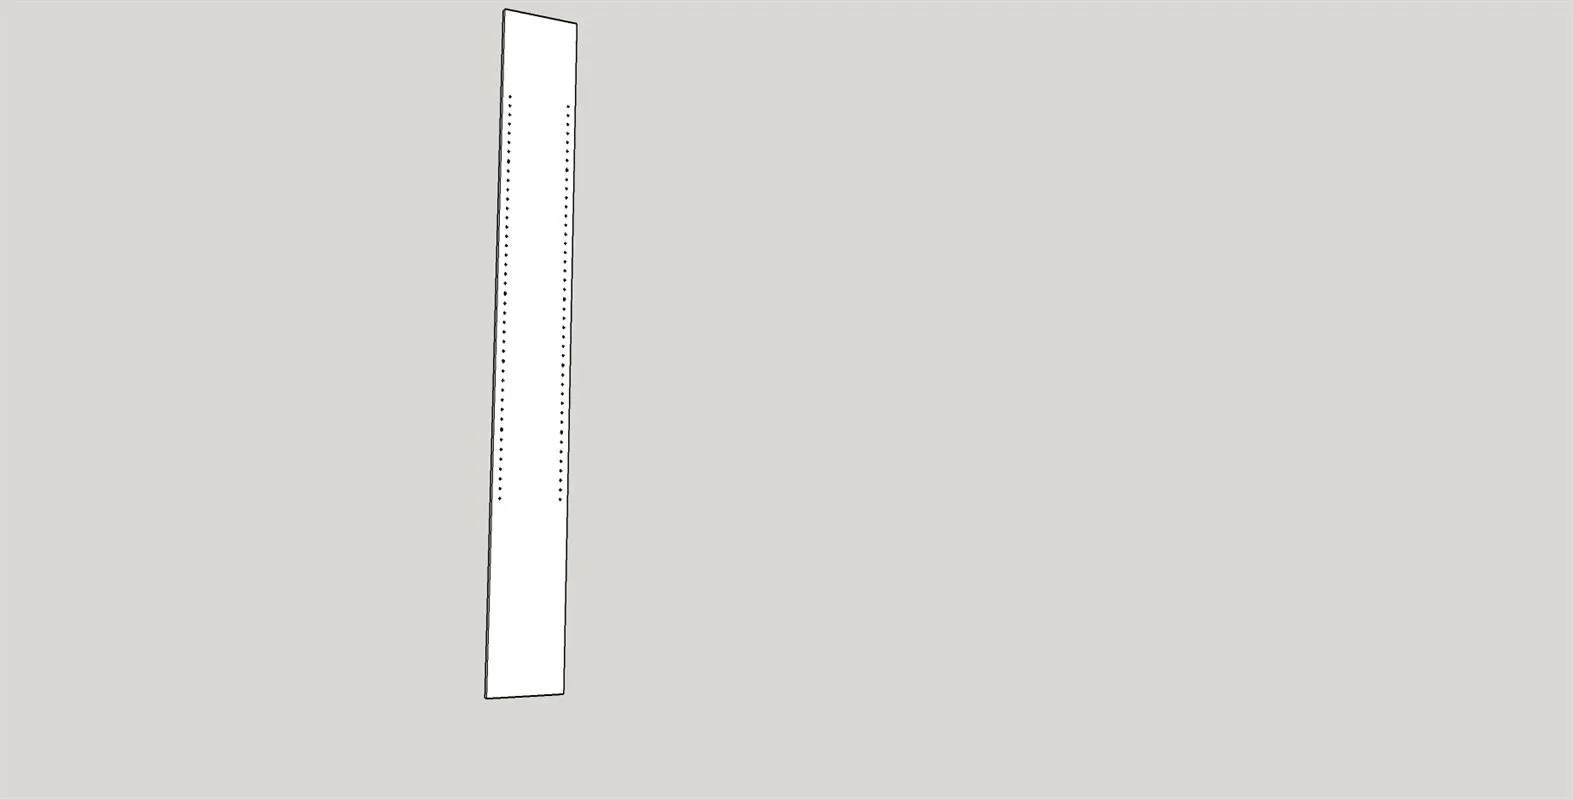
Using a Kreg Shelf Pin Jig, drill holes on the inside faces of the outer sides and on both faces of the center. Please be careful to insure that the holes align properly across the sides so the shelves set square in the unit(s).
7. Assemble the shelving unit(s)
Sand all of the components using 100 then 150 grit sandpaper. Layout the shelving components making sure that all will fit properly. Using wood glue and Kreg 1 1/4" coarse pocket screws attach the aprons, backs and fixed shelves. Please arrange the components so the pocket holes are hidden from view as much as possible
8. Radius the tops of the side edging
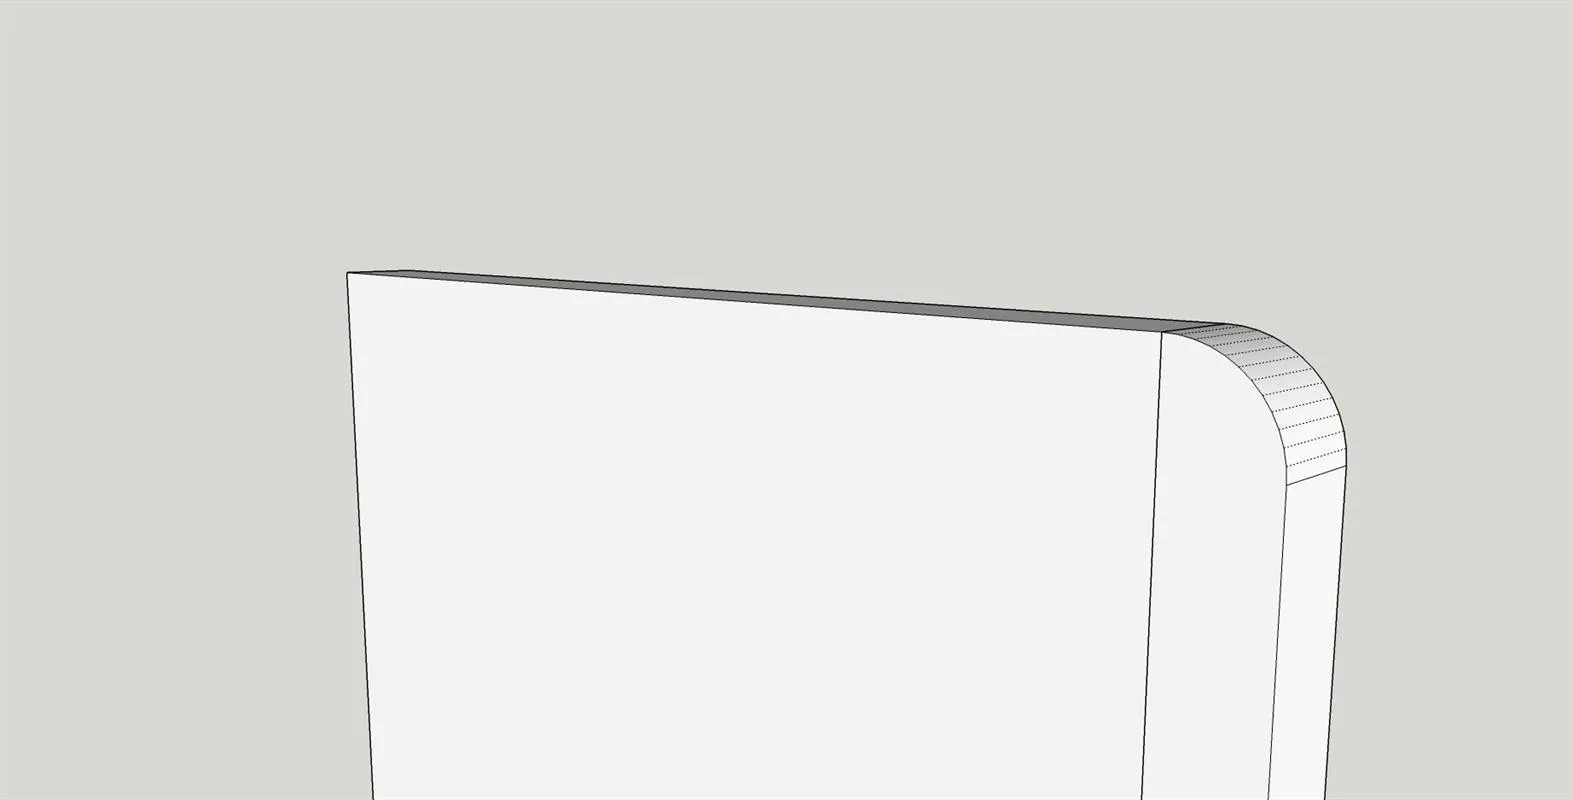
Mark a 3/4" radius on edging at the top of the sides. Using a band saw or a jig saw cut the radius.
9. Add adjustable shelves
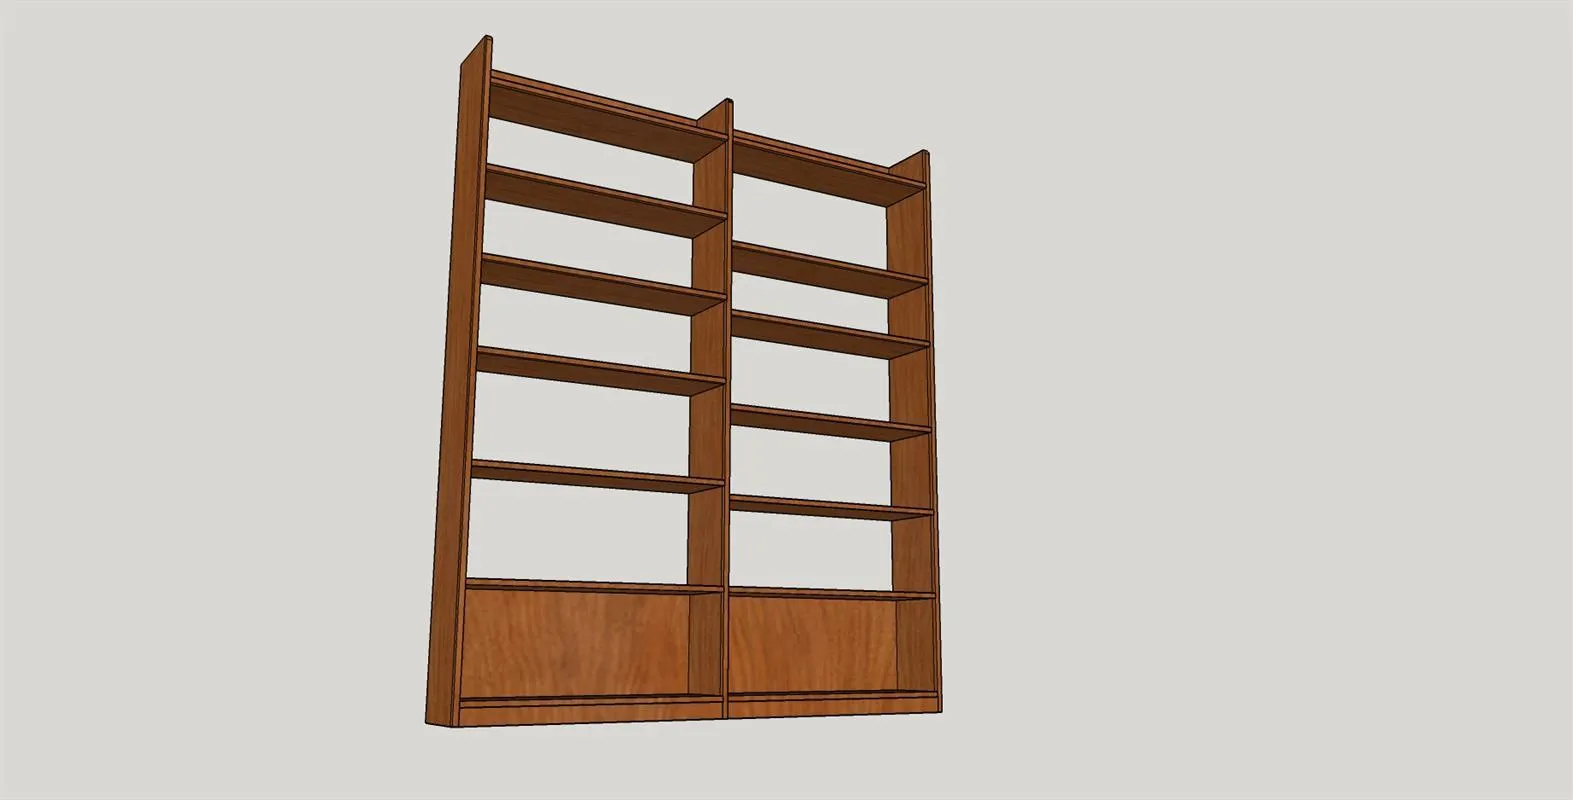
The remaining eight adjustable shelves are placed in the unit(s) using shelf pins or shelf brackets to hold them in place. You can adjust their spacing to your needs.
10. Finishing
- Now that the build is complete use 220 sandpaper to do a once over on all surfaces in preparation for the finish. Do not forget the adjustable shelves.
- Clean well to remove all dust. (I use compressed air and clean dry rags). The shelving unit was stained with Minwax Golden Oak Stain. After the stain was dry I used Minwax Tung Oil finish. I gave the shelving three coats following manufacturers instructions.