 Notch
NotchUse your browser's Print (Ctrl/Cmd + P) and choose Save as PDF. This page works offline once you've opened it with a signal.
Farmhouse Top X-Accent Console Table
This was my first plan to be put together using Sketchup before assembling it–We needed a table for my son’s nursery, and I wanted it to be something that fit below his window and ran the length of it
- Difficulty
- Intermediate
- Time
- 2.8–5.5 hours
- Cost
- $$
Cut list
| Part | Qty | T × W × L | Material | ✓ |
|---|---|---|---|---|
| Legs | 4 | 2" × 3" × 29" | — | ☐ |
| Upper end | 2 | 2" × 3" × 6" | — | ☐ |
| Upper stretcher | 2 | 2" × 3" × 42" | — | ☐ |
| Lower end | 2 | 2" × 4" × 6" | — | ☐ |
| Lower stretcher | 2 | 2" × 4" × 42" | — | ☐ |
| Lower Shelf | 11 | 1" × 4" × 11" | — | ☐ |
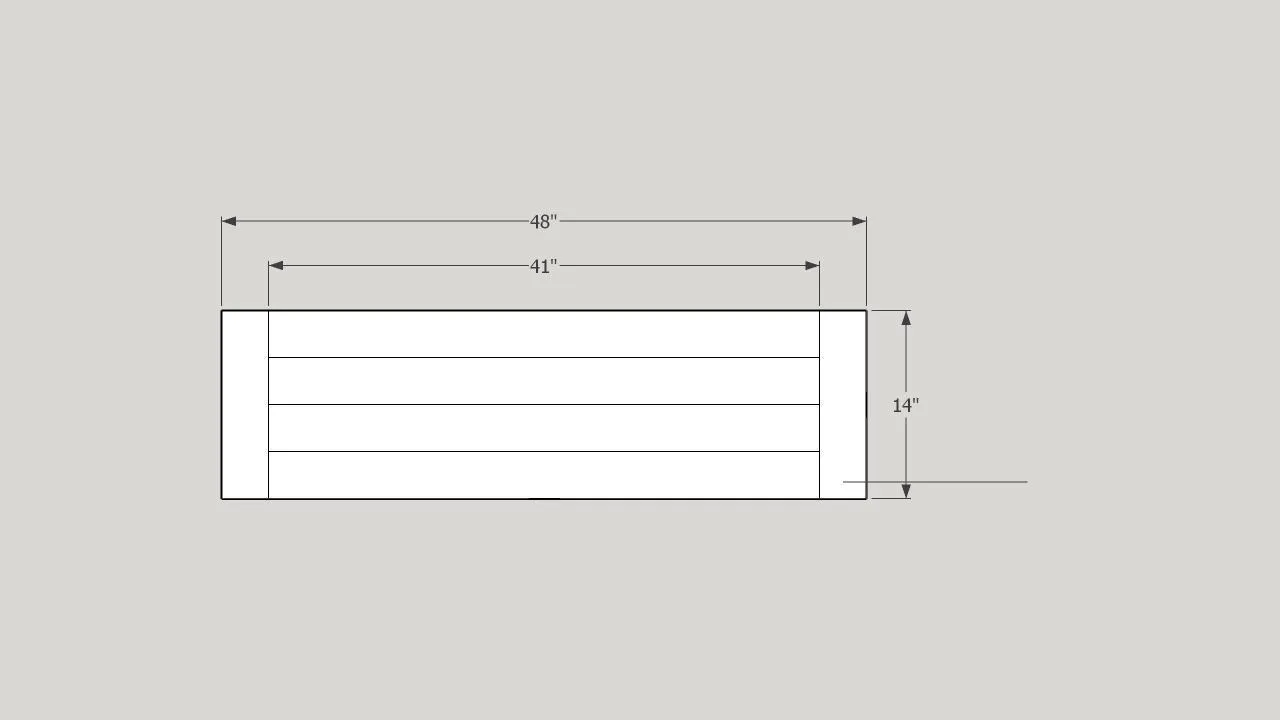
| Table top end | 2 | 1" × 4" × 14" | — | ☐ |
| Table Top Middle | 4 | 1" × 4" × 41" | — | ☐ |
Materials
| Item | Qty | ✓ |
|---|---|---|
| Board, 2x3 96" | 3 board | ☐ |
| Board, 1x4 96" | 4 board | ☐ |
| Board, 2x4 120" | 1 board | ☐ |
| Board, 2x2 96" | 1 board | ☐ |
| Pocket hole screws | 32 each | ☐ |
| Brad nails | 50 each | ☐ |
| Wood glue | 1 each | ☐ |
| Stain and/or paint | 1 each | ☐ |
Overall cost: $$. Lumber varies by region, species, and season, so we give a band rather than a figure.
Tools
- Drill / Driver
- Miter Saw
- Pocket Hole Jig
Instructions
1. Assemble the base
·Start by creating the two sides of the table using two pocket hole screws in either end of the end pieces (a total of four screws in each end piece. Complete the base by attaching the stretchers at the top and bottom in like manner.
2. Create the X Accent
- There’s a lot of ways to do this part. The easiest method was to clamp the 2x2 across the back of the base and mark a line for the angles to guide the cuts. If you cut one piece and lay it in place, you can then clamp the perpendicular piece to the back and trace your cut marks on the other piece. You can also mark where you notch out the middle of the X.
- Once the second part of the X is cut, you can notch out the middle of the X pieces. This can be done with a table saw or circular saw.
- Glue the notches, then clamp and allow the glue to dry.
- Attach the X accent to the base (I used 18 guage brad nails and glue, but there are probably other techniques that will hold more securely)
3. Assemble the Top
Assemble the table top pieces as shown—four long boards bracketed at either end by the short boards. Put two pocket holes into each end of the long boards on what will be the bottom of your table top. Use pocket hole screws to attach the long boards square to the short boards.
4. Attach the top to the base
Center the top on the base. Clamp it down, then attach the top to the base using the L-brackets.
5. Attach the lower shelf slats
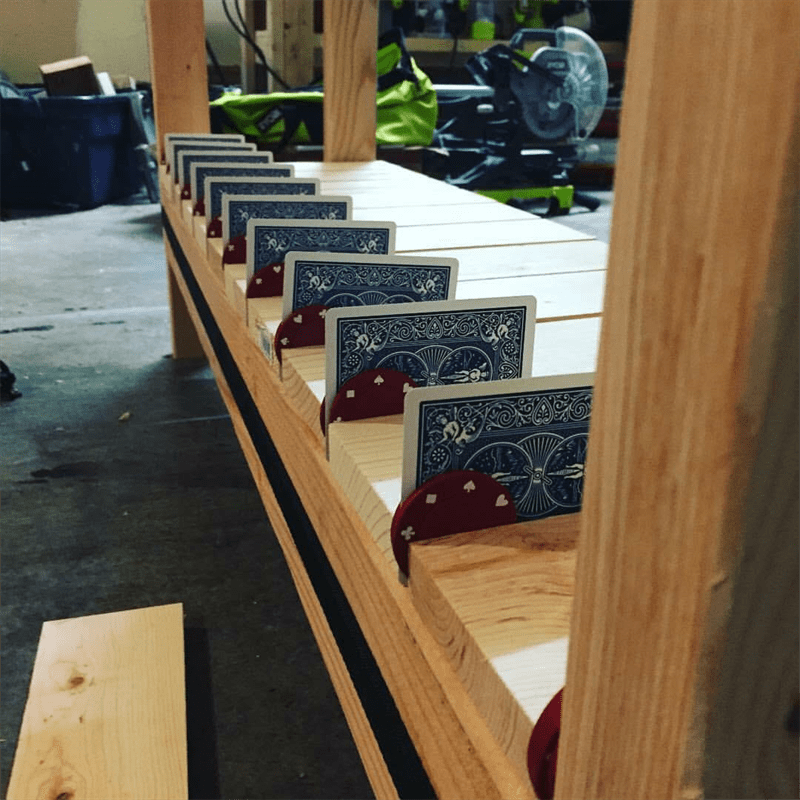
There will be some spacing between the slats for the bottom shelf. There’s also a lot of ways that this can be done. I used what I call the “Hesitant Handyman Texas Hold ‘Em” spacing method. Required: Poker set (chips and cards) Step one: Take all of your slats and put them flush against each other towards one side of the base. Step two: Place a stack of poker chips that take as much of the space as possible. It’s likely there will still be a little gap. Step three: Stack playing cards in the remaining gap. Step five: Determine how to equally distribute the cards/chips to space the slats equally (Mine worked out to be 3 chips on either end and 2 chips and a card between the remaining gaps
6. Finish as desired
This is totally up to you--paint, stain, a combination of the two--whatever fits your personal style.