Notch
NotchFarmhouse Night Stand
Step-by-step build — 11 steps. Also available as a print sheet.
1Build Sides
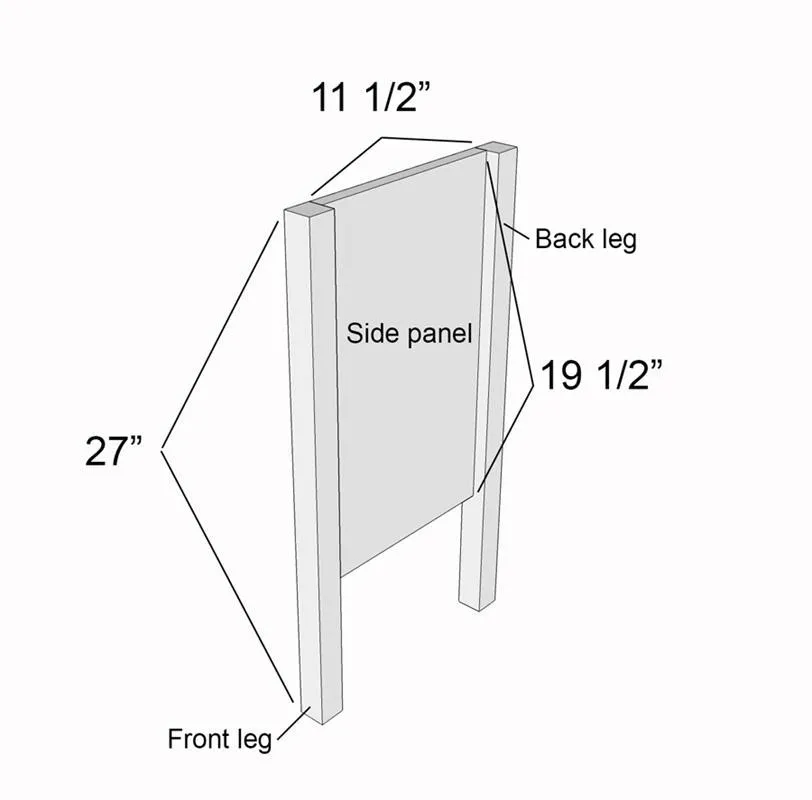
- Drill 3- 3/4" pocket holes in both long sides of one of the side panels.
- Place 3/4" thick spacer piece of wood underneath the side panel and line up two of the legs on either side. Make sure one end of the legs are flush with the panel.
- Attach the legs with the side panel using 1 1/4" pocket hole screws and wood glue.
- Repeat the same for the other side panel and remaining 2 legs.
2Attach Drawer Dividers
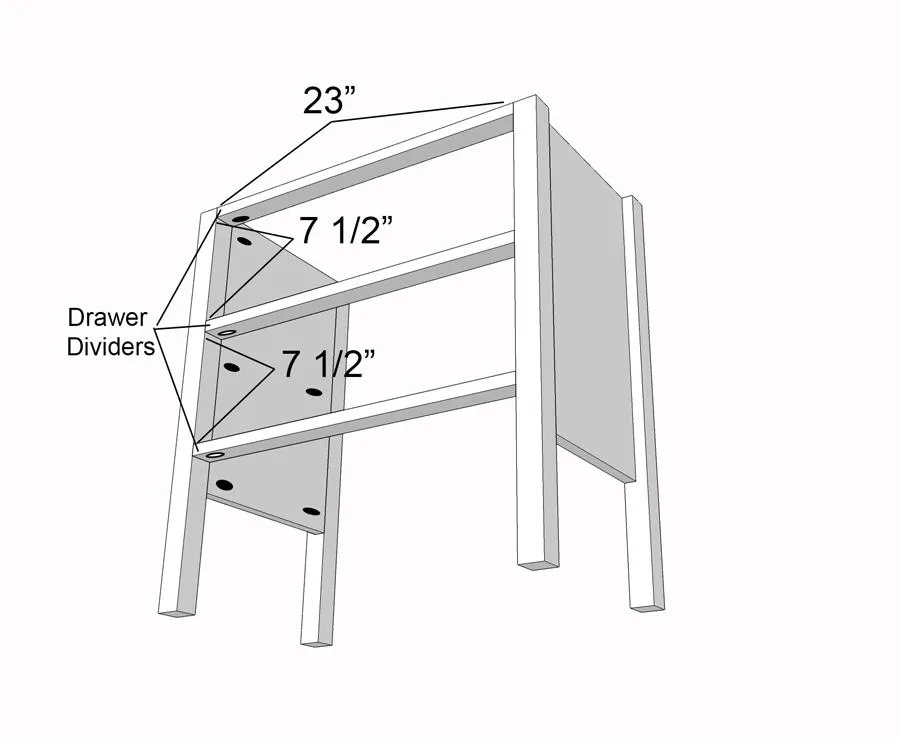
- Drill a single 3/4" pocket hole on either end of all three drawer dividers.
- Attach the dividers between the two front legs using 1 1/4" pocket hole screws and wood glue. Make sure the top divider is flush with the top of the legs, the middle is 7 1/2" from the bottom of the top divider, and the bottom divider has the same 7 1/2" spacing. A good way to ensure the spacing is adequate is to put the drawer face between the dividers as you attach them. The pocket holes should be facing down.
3Attach Back Panel
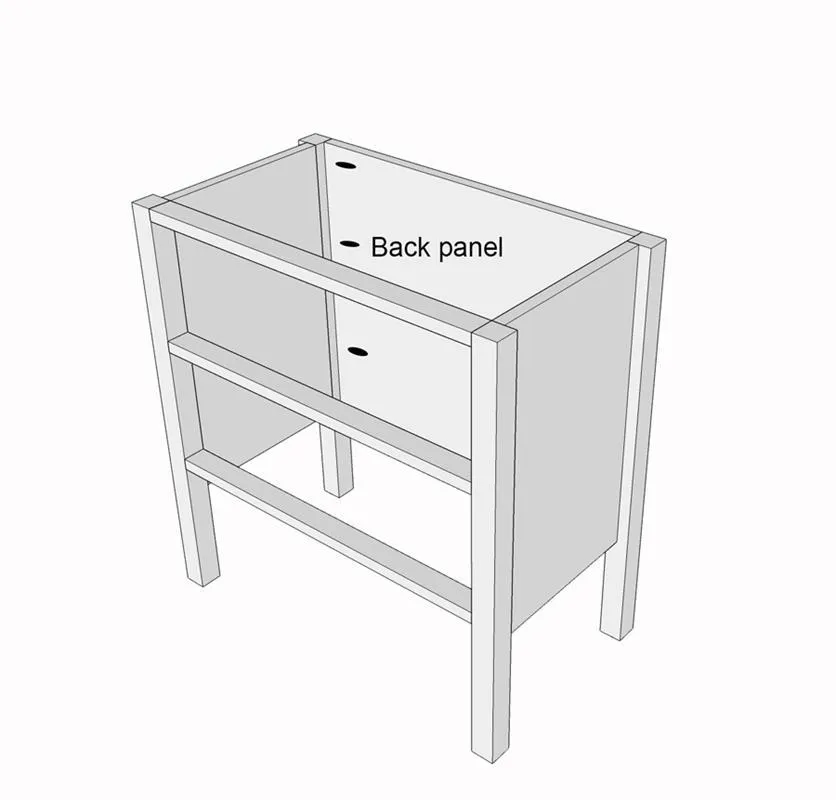
Drill 4- 3/4" pocket holes on both 19 1/2" sides of the back panel. Attach the back legs flush to the back panel using 1 1/4" pocket hole screws and wood glue.
4Attach Arch Apron
- Measure and mark center point of 1x3 apron.
- Measure 3/4" up from the center mark and draw an arch from either end of the apron with the high point at the marked center.
- Clamp the board down on one end to a secure surface and cut along the arched line with a jigsaw until the half-way point is reached.
- Remove the clamp, rotate the board around, reclamp, and cut the other side along the line.
- Drill 2- 3/4" pocket holes on both ends of the 1x3 apron and attach it right below the bottom drawer divider using 1 1/4" pocket hole screws and wood glue.
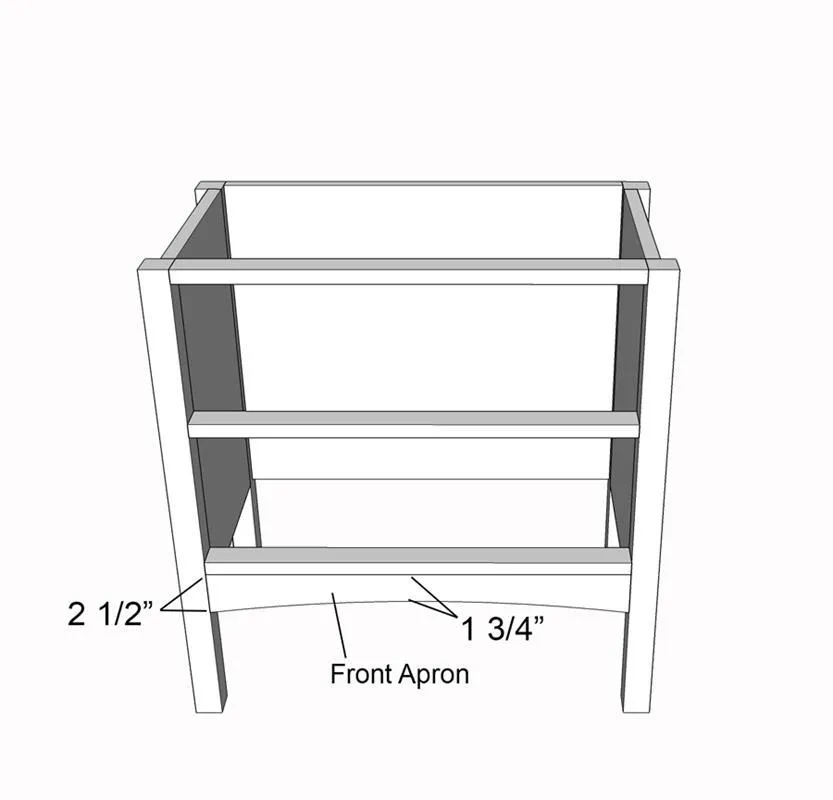
5Attach Side Trim Pieces
Position the side trim 1x3s pieces flush with the top and bottom of the side panels and attach them using wood glue and 1 1/4" nails with a nail gun.
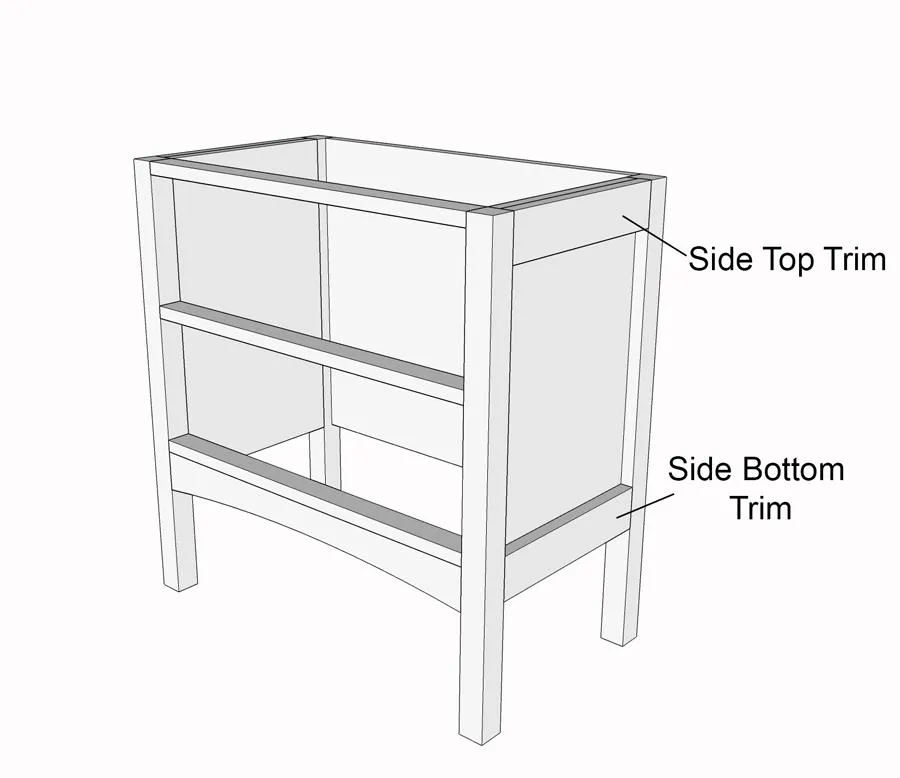
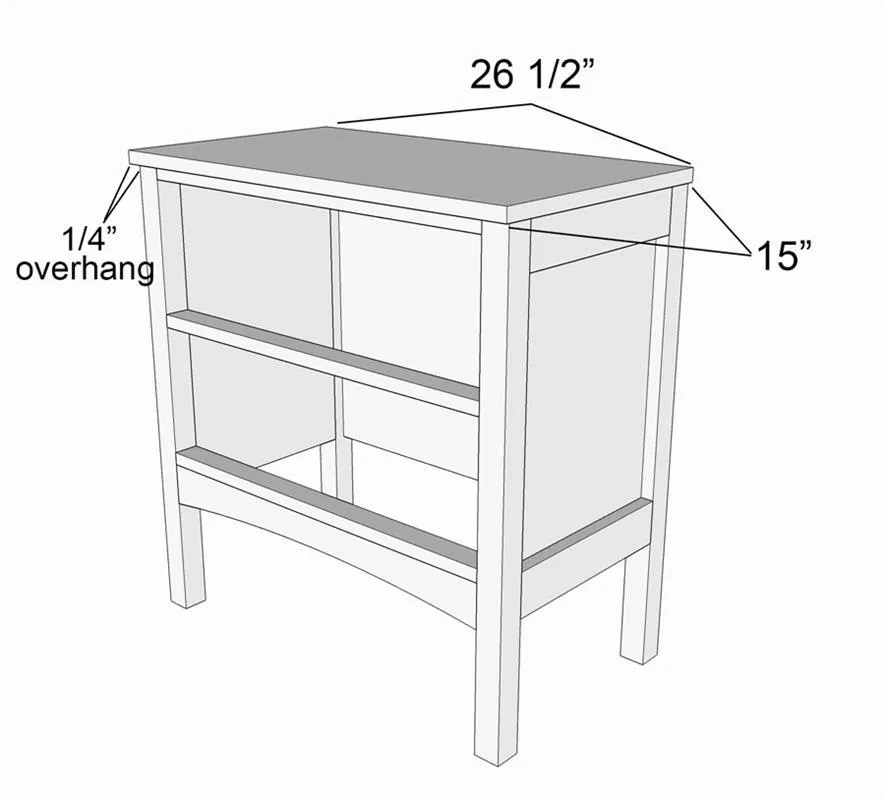
6Attach Top
Using a 5/8" chamfer bit, route both sides of the top piece on 3 edges. Make sure the router fence is set 1/4" back from 0. Position the top on the dresser so that there is a 1/4" lip on both sides and 1/2" lip on the front. Pre-drill holes on all 4 corners into the legs. Using wood glue and 2" wood screws attach the top to all 4 legs.
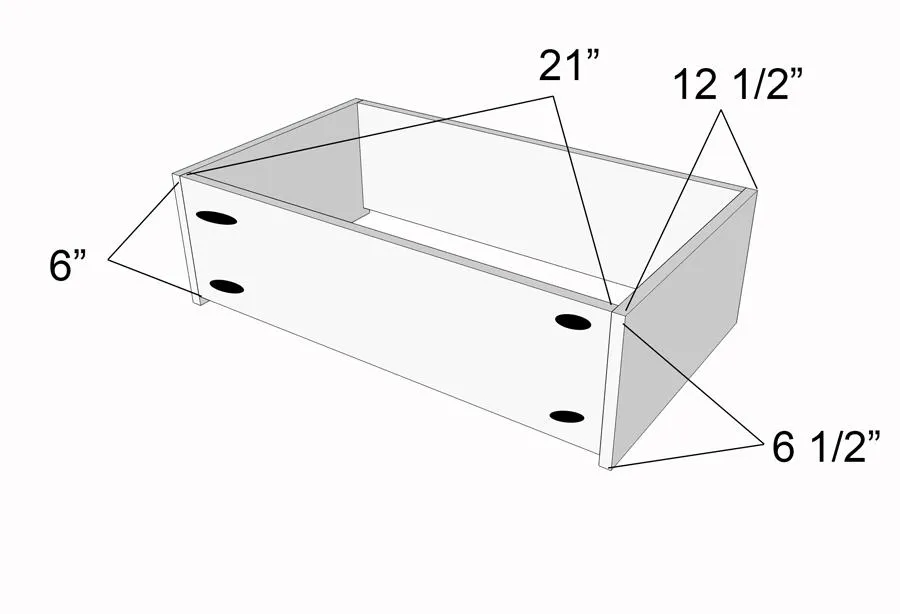
7Build Drawer Carcass
Drill 2- 1/2" pocket holes on both ends of the 6" wide drawer fronts and backs. Attach them flush with the ends of both drawer sides so the pocket holes are facing out, using 1" pocket hole screws and wood glue.
8Attach Drawer Bottom
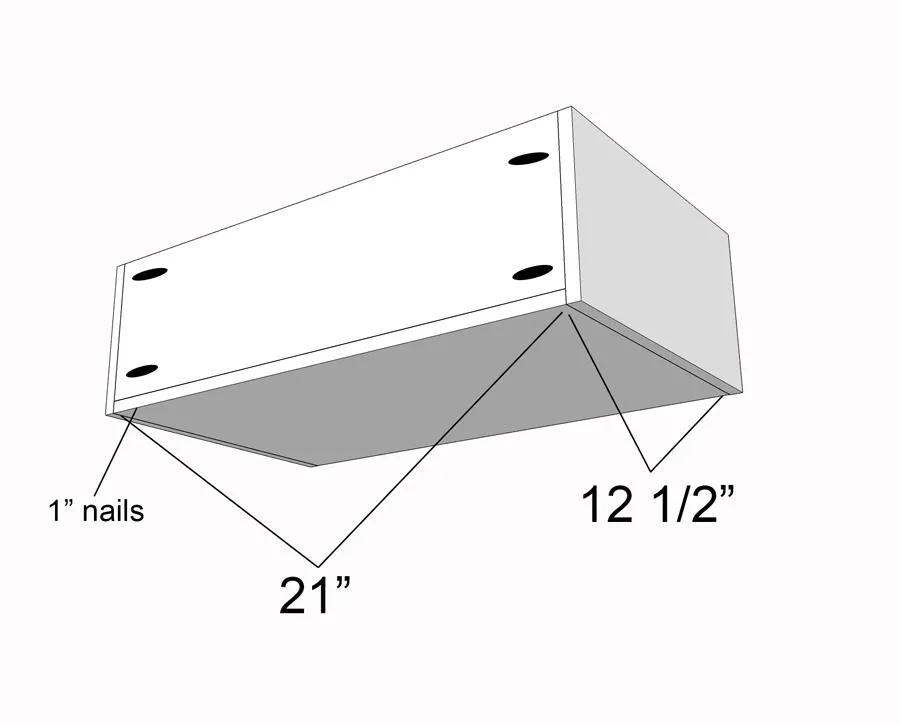
Using 1" nails and wood glue, attach drawer bottom to both drawer carcasses.
9Attach Drawer Face
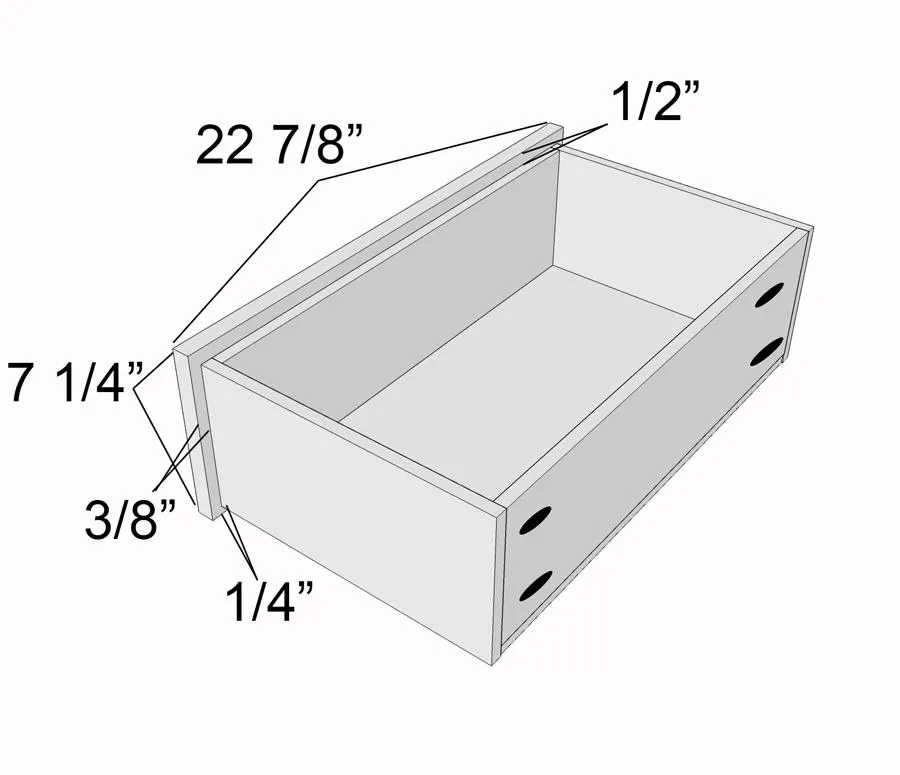
- Measure, mark and position the drawer face so that there is approximately 1/2" space on all 4 sides of the drawer face from the edge of the drawer sides. The sides should have a little less than 1/2" space.
- Glue and attach with 1 1/4" nails driven into where the edges of the drawer sides meet the drawer face. *Optional: Attach drawer face after drawer slides are installed onto drawer carcass and side panels so that it is positioned properly and then the face can be positioned and nailed into place.*
10Install Drawer Slides
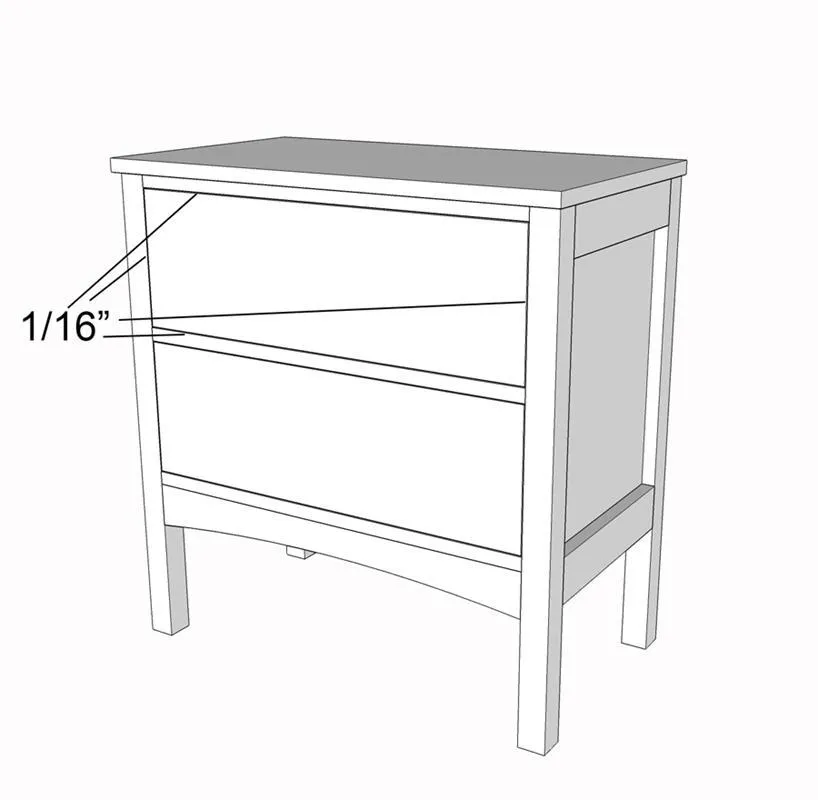
Following the instructions, install bottom drawer slides by attaching them to the sides of the drawer carcass first then measuring and attaching the inside track to the side panel with the screws provided and a level. Make sure there is 1/16" space on all 4 sides of the drawer space from the legs and drawer dividers.
11Fill Holes, Paint, Attach Hardware
- Fill nail holes and seams with wood filler, let dry, and sand entire thing smooth with 220 grit sandpaper.
- Paint with 2 coats of white latex paint in a satin finish or apply your choice of stain and topcoat.
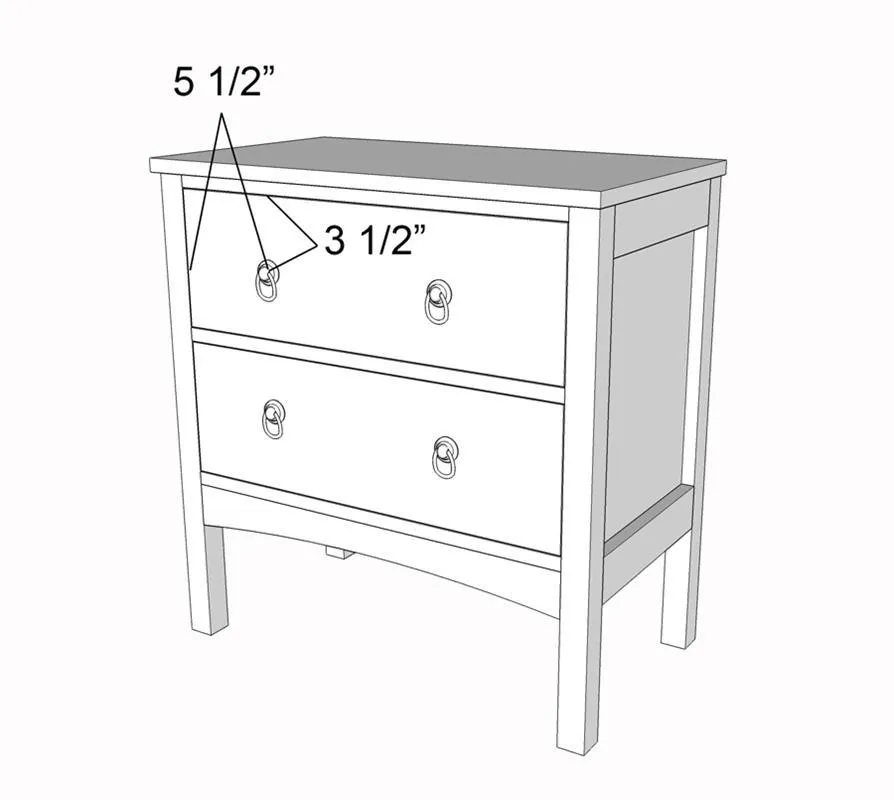
- Measure 5 1/2" from either side of the drawer face and exactly half-way from the top and bottom (about 3 1/2").
- Drill holes for the drawer pulls or knobs and attach drawer hardware.