Notch
NotchUse your browser's Print (Ctrl/Cmd + P) and choose Save as PDF. This page works offline once you've opened it with a signal.
Farmhouse Coffee Table with Iron Accents
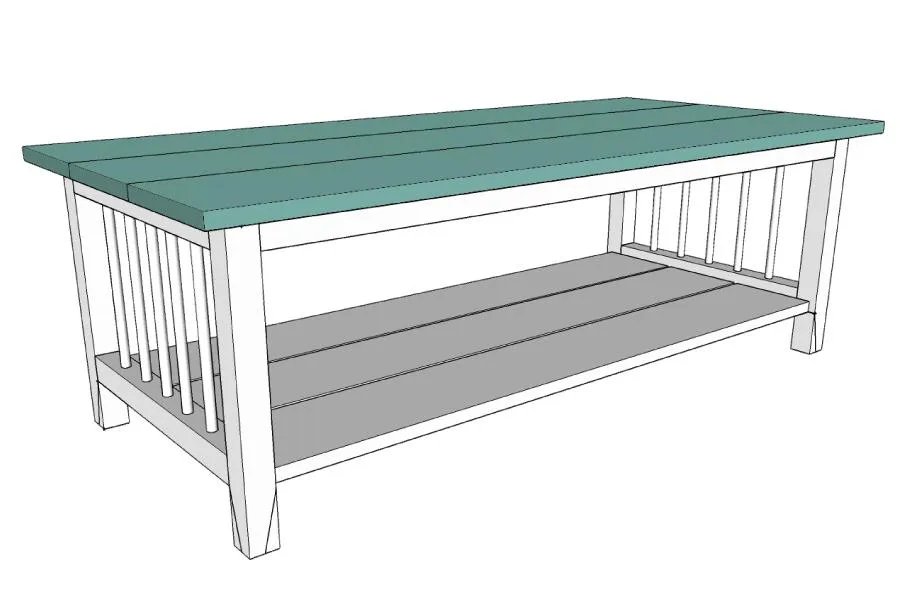
Add a little farmhouse style to your living space with this beautiful coffee table.
- Difficulty
- Easy
- Time
- 3.5–6.8 hours
- Cost
- $$
Cut list
| Part | Qty | T × W × L | Material | ✓ |
|---|---|---|---|---|
| Legs | 4 | 1" × 1" × 15" | — | ☐ |
| Sides | 4 | 1" × 1" × 16" | — | ☐ |
| Front/back | 2 | 1" × 1" × 42" | — | ☐ |
| Shelf | 3 | 3/4" × 6" × 42" | — | ☐ |
| Top | 3 | 3/4" × 7" × 48" | — | ☐ |
Materials
| Item | Qty | ✓ |
|---|---|---|
| Board, 2x2 96" | 3 board | ☐ |
| Board, 1x8 96" | 3 board | ☐ |
| 2 1/4" kreg screws | 25 each | ☐ |
| 1 1/4" kreg screws | 35 each | ☐ |
| Plain iron balusters | 2 each | ☐ |
| Double twist iron balusters | 2 each | ☐ |
| White latex caulk | 1 each | ☐ |
| White paint | 1 each | ☐ |
| Wood stain | 1 each | ☐ |
| Sandpaper | 1 each | ☐ |
Overall cost: $$. Lumber varies by region, species, and season, so we give a band rather than a figure.
Tools
- Drill / Driver
- Impact Driver
- Jigsaw
- Miter Saw
- Pocket Hole Jig
- Random Orbit Sander
- Table Saw
- Bar / Pipe Clamps — optional
- Tape Measure — optional
Instructions
1. Dimensions
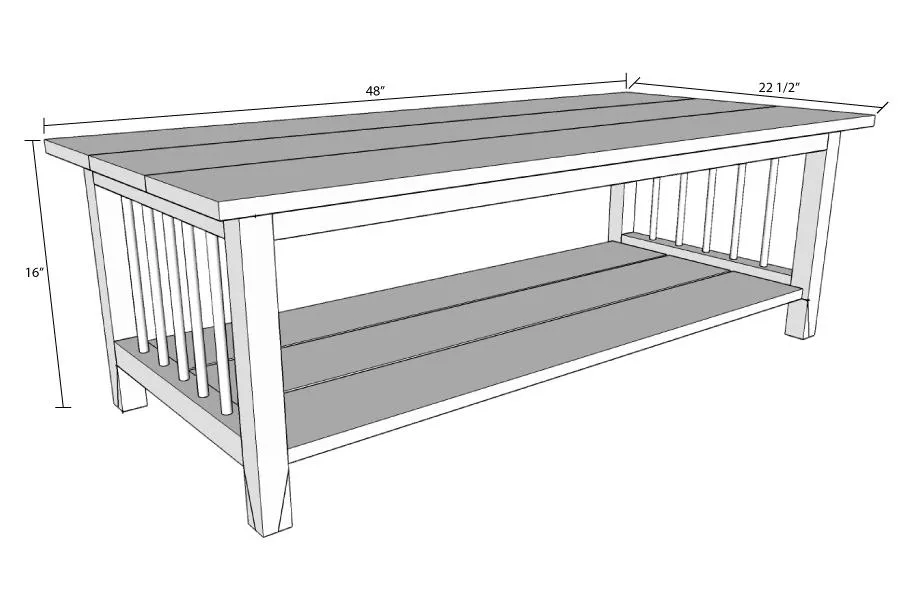
The completed coffee table will be 16" tall, 48" long and 22 1/2" wide.
2. Cut legs
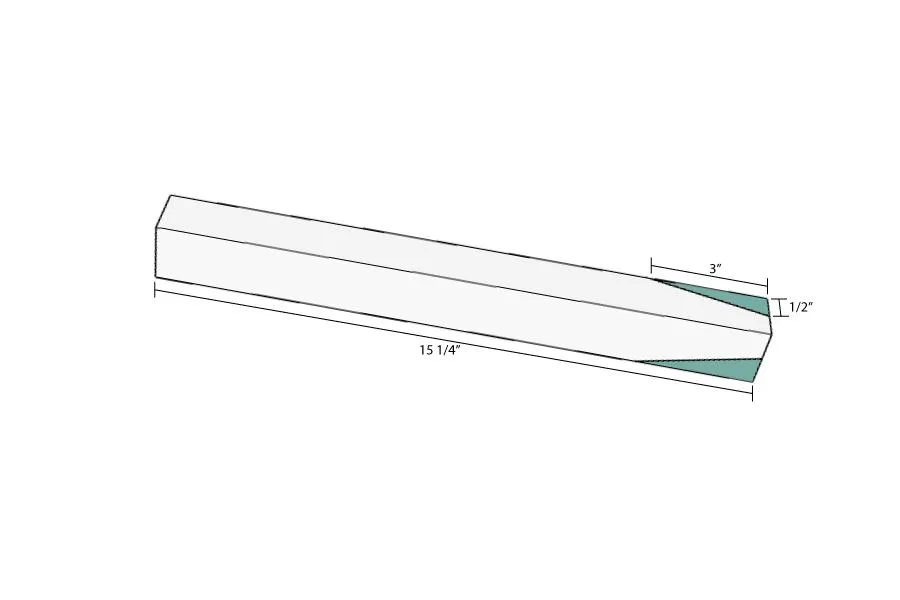
- Cut 4 2x2 boards to 15 1/4" in length. Shape the bottom of each leg by measuring up 3" from the bottom and in 1/2" and draw a line.
- Cut it on a miter saw.
- Repeat on the adjacent corner of the leg so the two sides are angled.
3. Build the sides
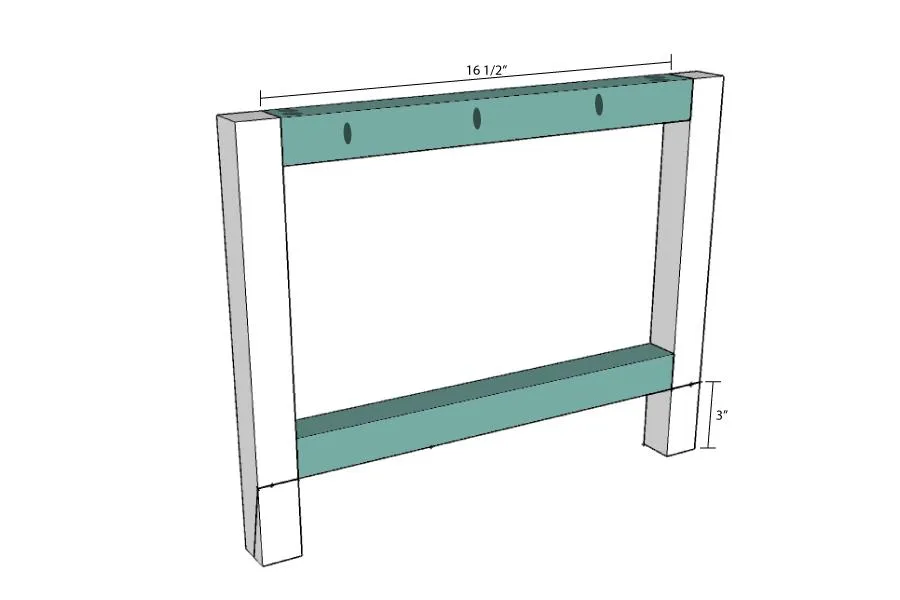
- Add pocket holes to the side pieces. On the top side pieces, also add pocket holes on the top of the board so you can secure the table top later.
- Attach the side pieces to the legs so the top piece is flush with the top of the legs and the bottom piece is flush with the top of the angled section on the bottom of the legs.
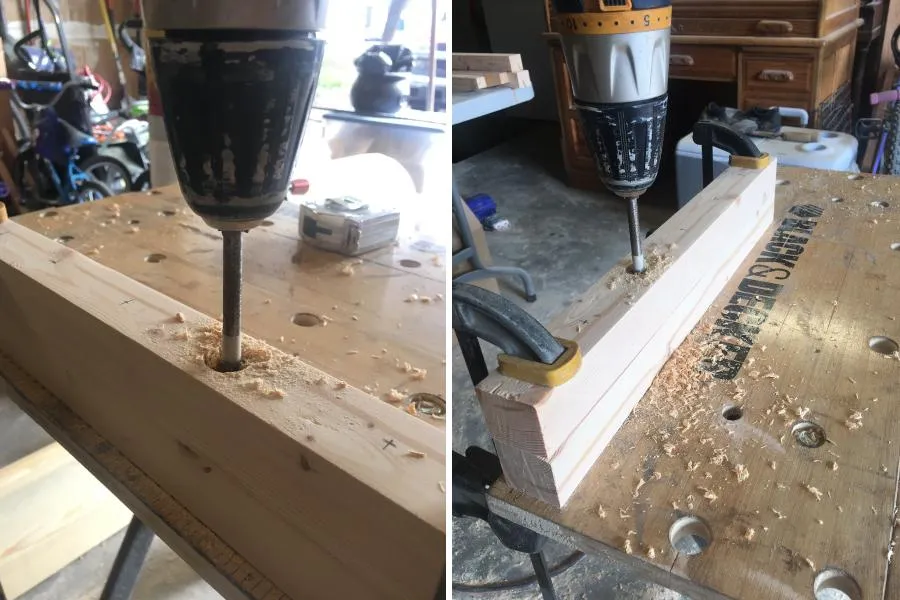
4. Drill holes for the iron balusters
- Cut the 4 side pieces to 16 1/2" long.
- Clamp two of the side pieces together.
- Mark the center of the holes so they are 2 3/4" apart on center and centered on the board.
- Drill 3/4" holes through the top board and 1/2" into the bottom board.
- Place a piece of masking tape on the drill bit so you can make sure all the holes are the same depth.
- Repeat for the other side pieces. The top side pieces will be the boards with the holes completely through the board.
5. Connect the sides
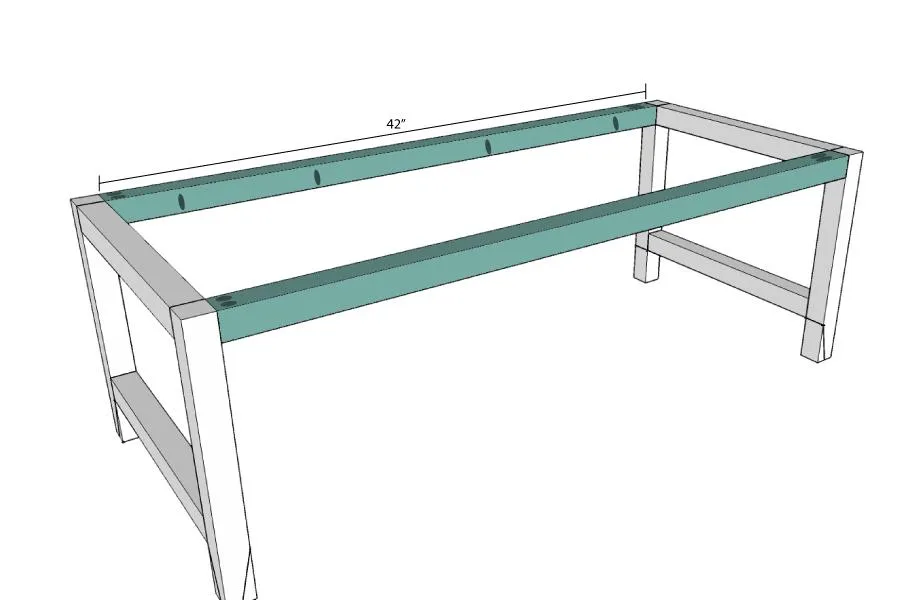
- Add pocket holes to the top edges of the front/back pieces so they will be hidden under the table top.
- Also add pocket holes to the inside tops of the boards so you can attach the table top later.
- Attach the front/back pieces to the sides so they are flush at the top.
6. Add the bottom shelf
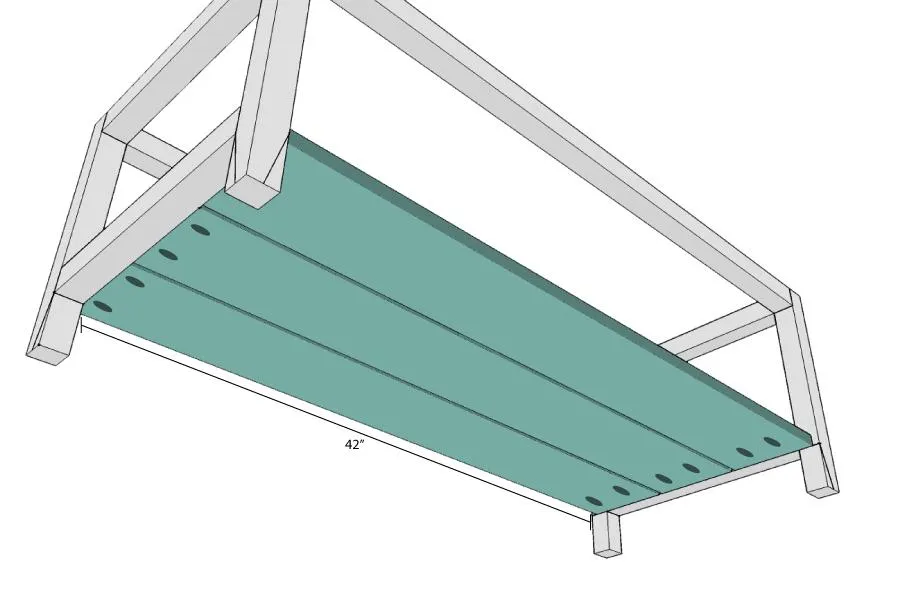
- Using a table saw, rip down 3 42" long pieces of the 1x8 boards to 6" wide. If you do not have a table saw you can use 1x6 boards (which are actually 5 1/2" wide) and either have a narrower shelf or larger spaces between the boards).
- Add pocket holes to the edges of the shelf boards and attach them to the sides so they are flush with the bottom of the bottom side pieces.
- Center the middle shelf board, then secure the side shelf boards leaving 1/4" gap between them.
7. Build the table top
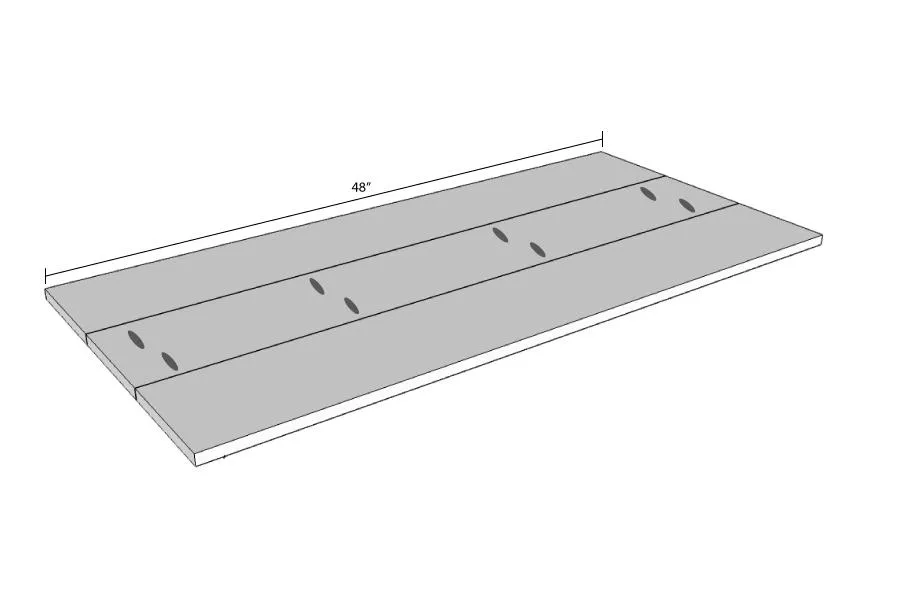
- Cut the 3 boards for the top.
- Add pocket holes to either side of the middle board.
- Attach the other boards to the sides so they are flush on all ends creating a single board that is 22 1/2" x 48".
8. Paint/stain the table
- Sand all the pieces well.
- Paint or stain the pieces. I chose to paint the frame white and stain the top piece with a natural wood-aging stain.
- Seal the pieces as desired.
9. Cut the iron balusters
- Measure the opening for the iron balusters by putting a small measuring tape into the hole on the bottom of the sides and measuring to the top of the table.
- Cut the iron balusters so they are 1/4" smaller that the opening with a jig saw fitted with a metal blade.
- Cut the twisted balusters so the twist is centered in the opening between the two side boards.
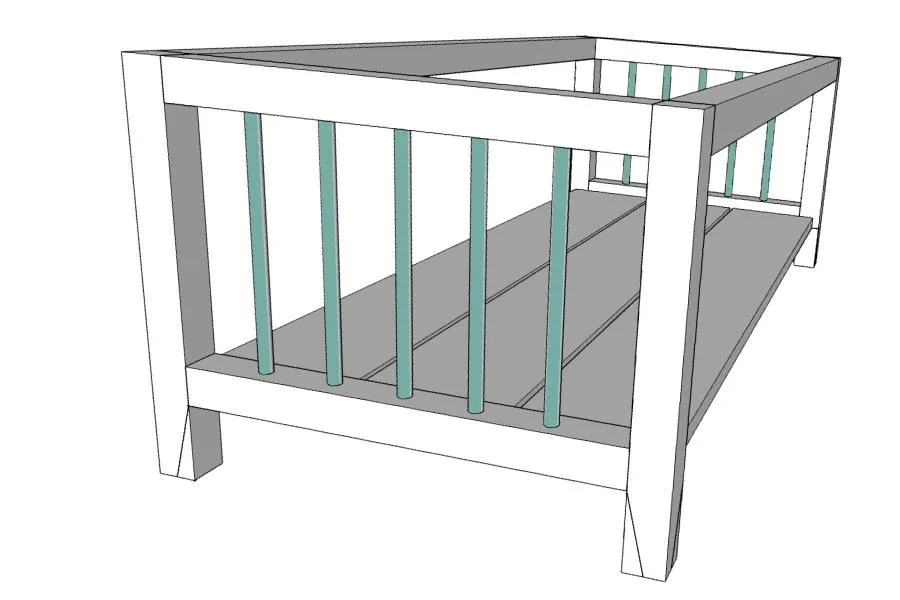
10. Install the iron balusters
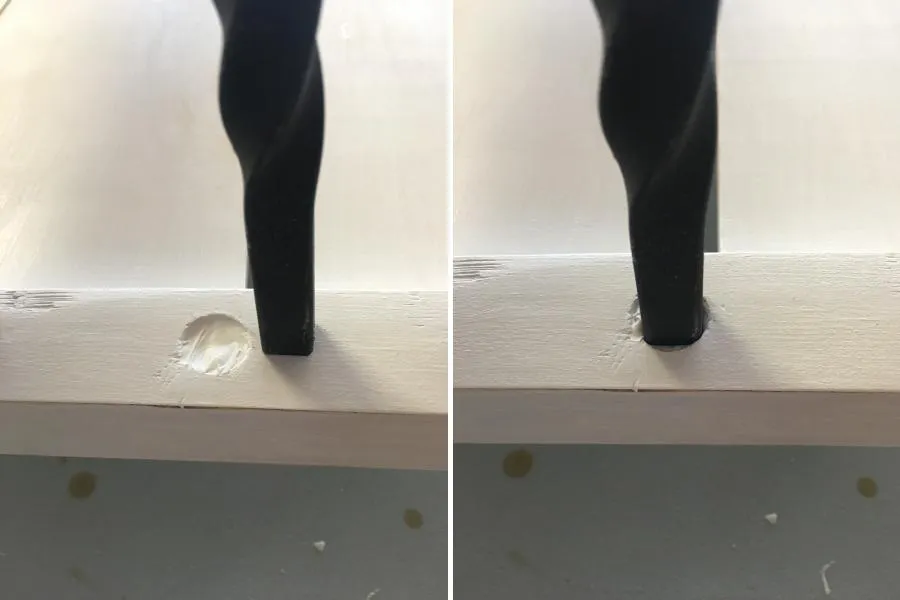
To secure the iron balusters so they will not spin in the holes, fill the hole in the bottom side boards with white caulk. Put the cut iron baluster through the hole in the top side piece and press it firmly into the caulk in the bottom side piece. Repeat for the remaining balusters.
11. Attach the table top
Center the table top on the frame. Secure using screws in the pocket holes on the top side boards and the front/back boards.