Notch
NotchUse your browser's Print (Ctrl/Cmd + P) and choose Save as PDF. This page works offline once you've opened it with a signal.
DIY Garage Workshop Cabinets – Garage Workshop Cabinet Plan || Part 1- Lowers
Learn how to build lower cabinets for your shop!
- Difficulty
- Intermediate
- Time
- 4.8–9 hours
- Cost
- $$
Cut list
| Part | Qty | T × W × L | Material | ✓ |
|---|---|---|---|---|
| Sides | 2 | 3/4" × 23" × 34" | — | ☐ |
Materials
| Item | Qty | ✓ |
|---|---|---|
| Plywood, 3/4" Thick Half Sheet | 1 board | ☐ |
| 1 1/4" pocket screws | 1 each | ☐ |
Overall cost: $$. Lumber varies by region, species, and season, so we give a band rather than a figure.
Tools
- Miter Saw
- Table Saw
Instructions
1. Review the Entire Plan
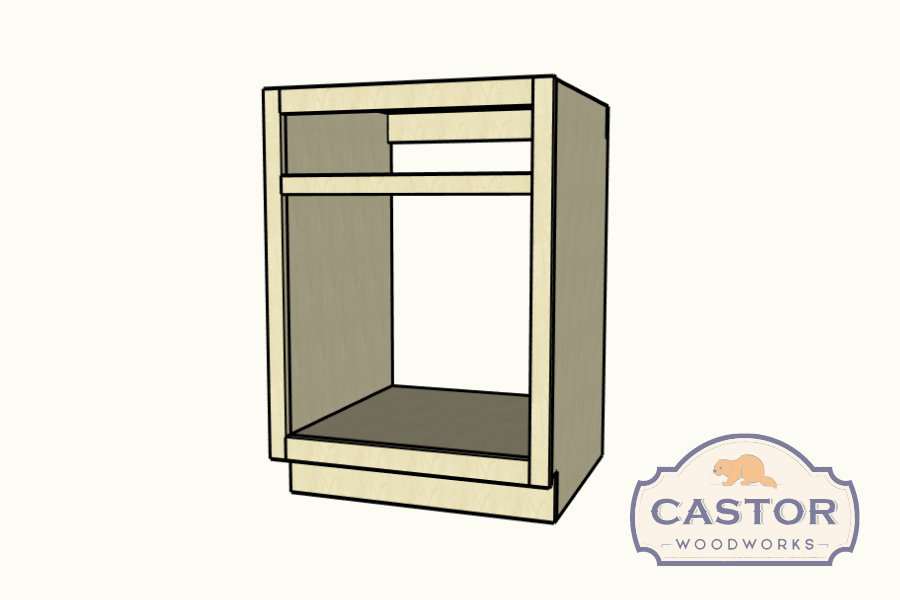
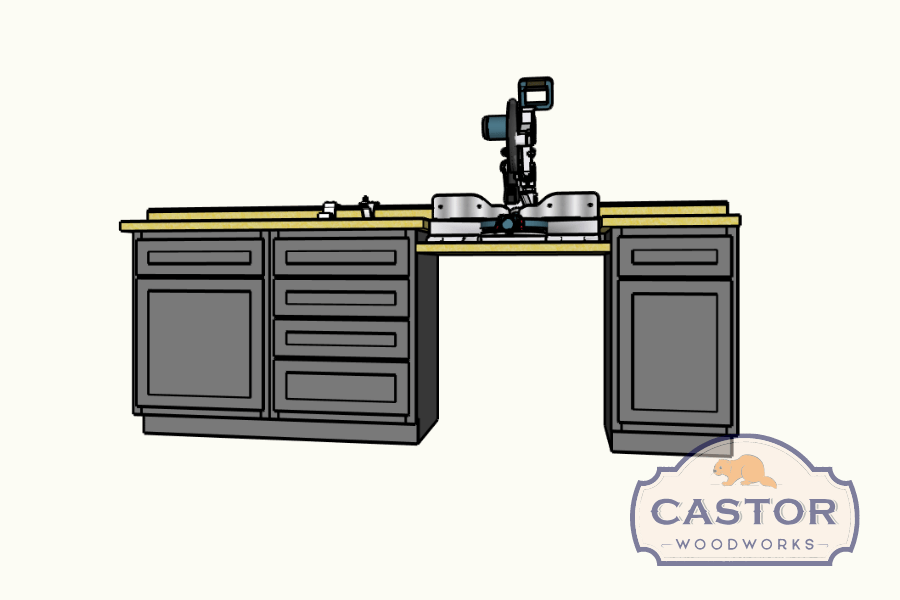
I'd like to start out with the concept of building cabinets this way. the standard sizing for kitchen cabinets is 34 1/2" Tall by 24" wide by 24" deep. You can easily modify your cabinets by simply changing the width. And you can place them side by side to make a continuous wall of cabinets. The idea is you can place them in any configuration to suit your needs. In my case I'll be adding a miter saw in between two 24" cabinets and one 18" cabinet like the picture.
2. Complete Cut List
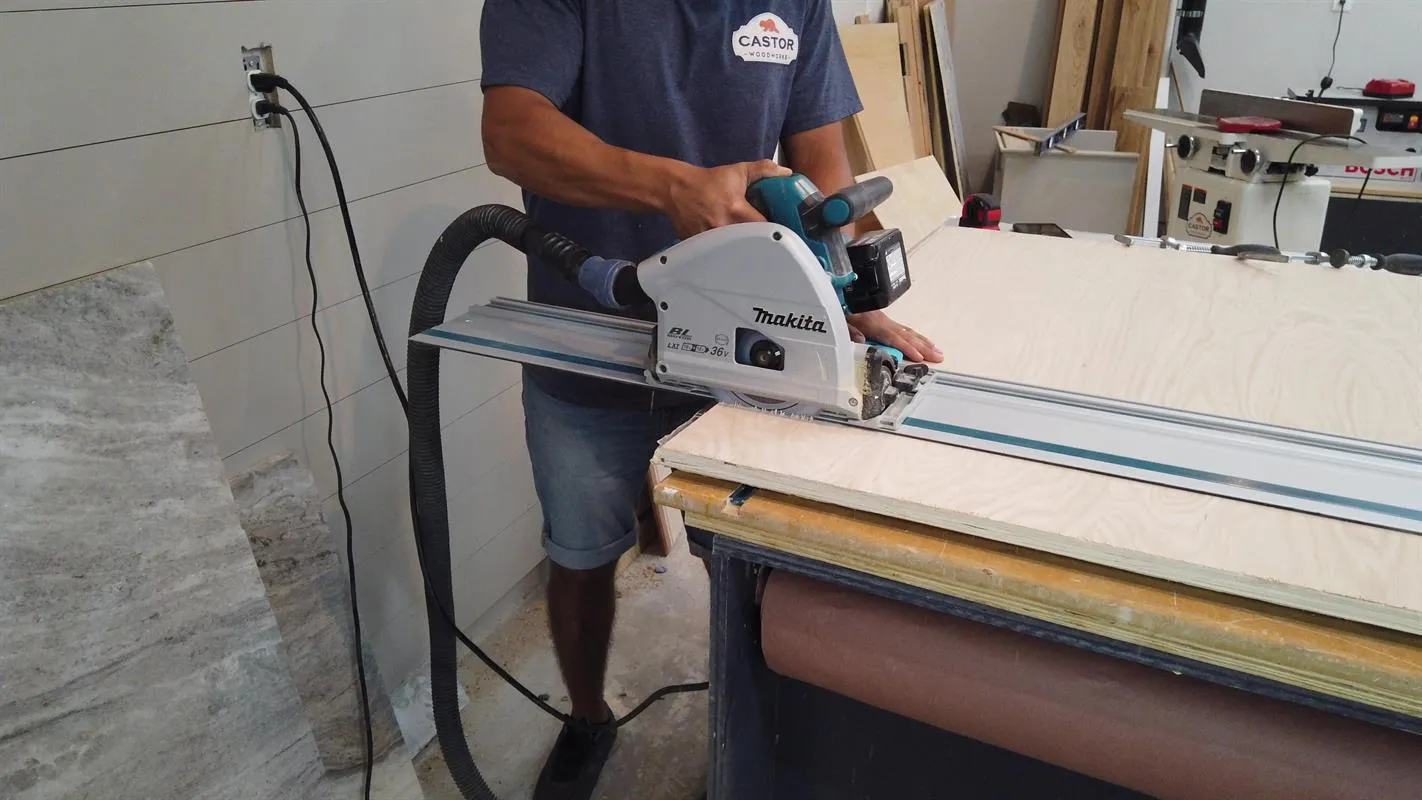
Use the cut-list to break down 3/4" plywood to the specified dimensions. You could also use MDF just make sure you the stock you use is nice and flat.
3. Add Toe kick to sides
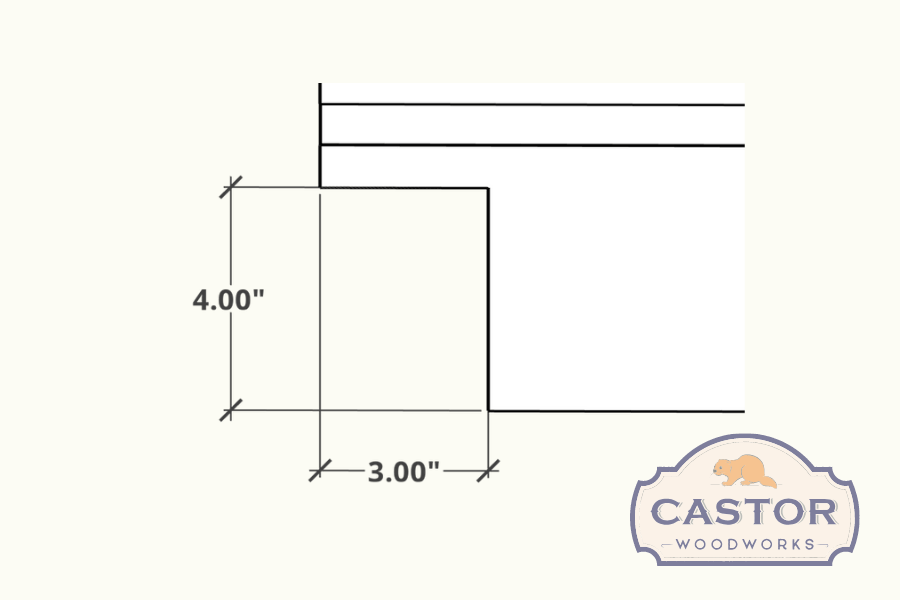
Once you have your sides cut, use a jig saw to cut your Toe kicks.
4. Cut Groves in Sides
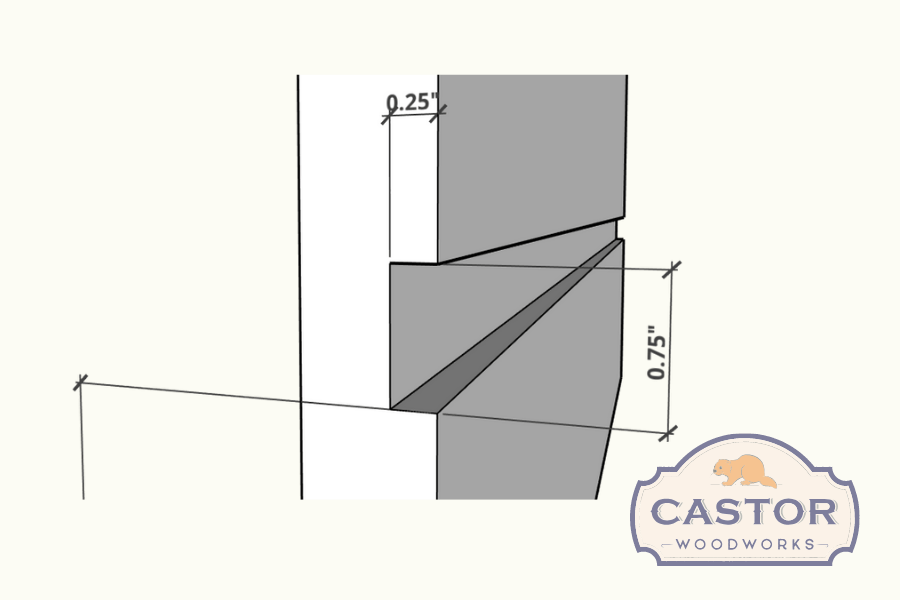
Once your sides are cut, use your router to make a 3/4" groove 1/4" deep and 4 3/4" up from the base of the cabinet.
5. Assemble Cabinet
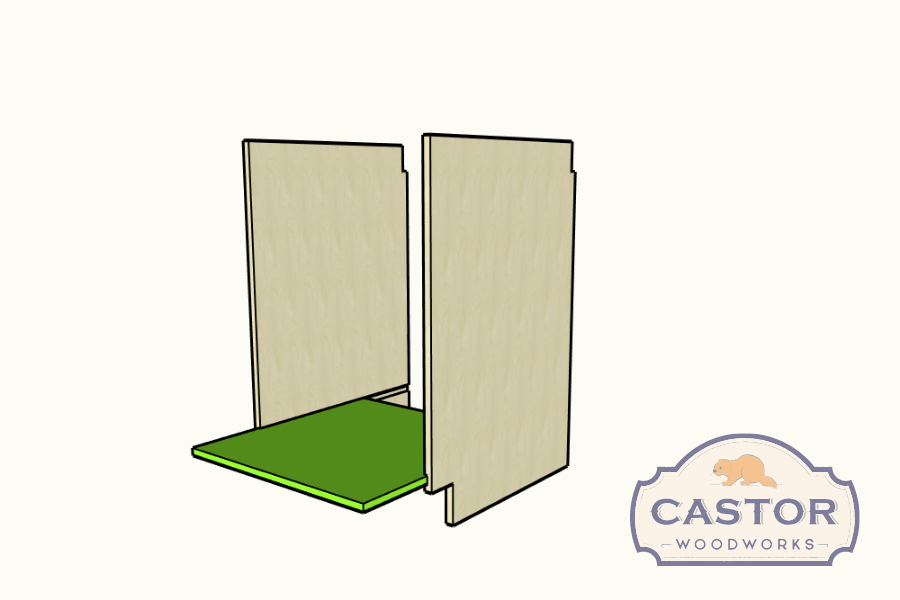
Start assembly of the cabinet by sliding the Bottom Shelf into the grove on your Sides. Secure the shelf by countersinking 3-4 drywall screws on the outside of the sides along the line where the shelf will sit. This will hold the shelf in place and start to square it up.
6. Attach Front Stretcher
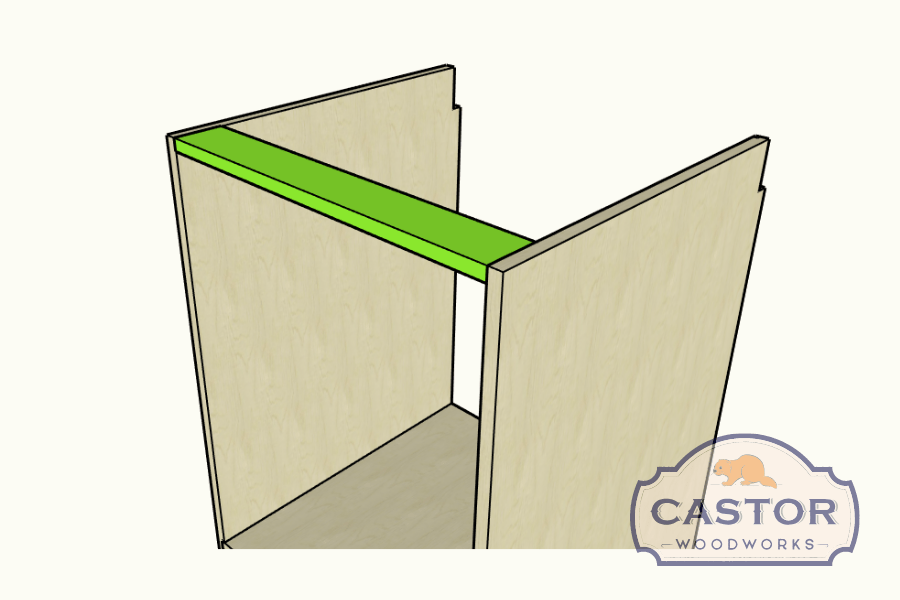
Attach the front Stretcher with either 1 1/4" pocket screws or from the outside with drywall screws.
7. Create Notch for Back Stretcher
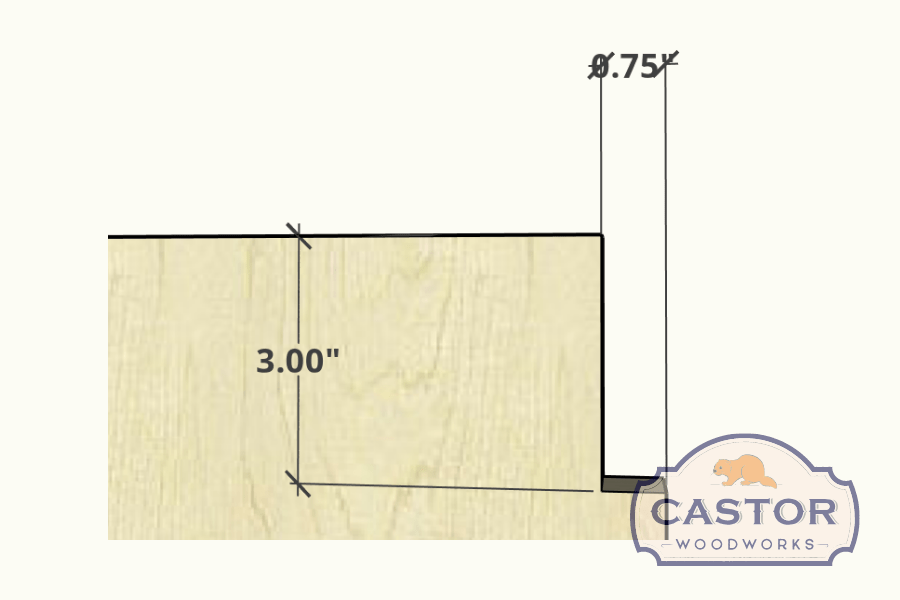
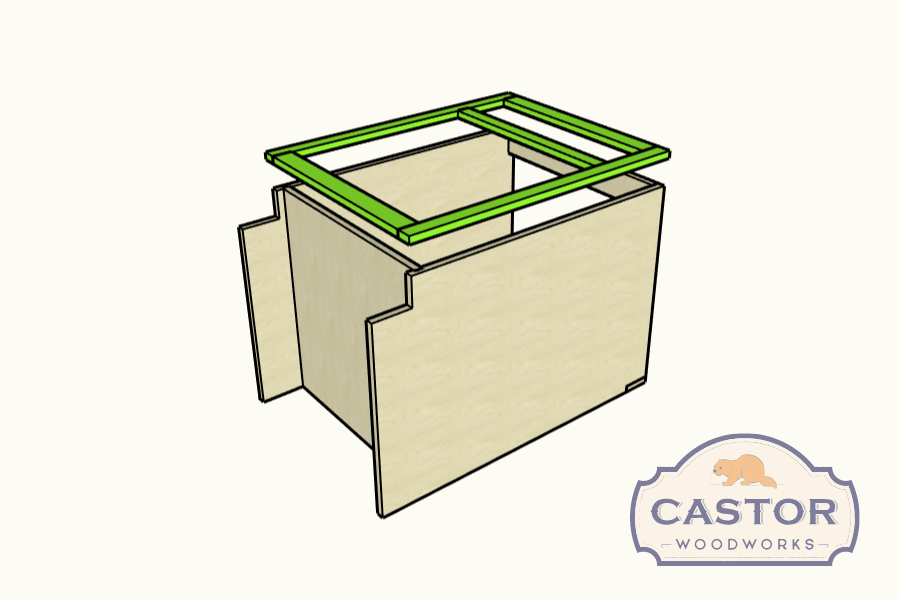
Use a jig saw to cut out a notch for your back stretcher. This will help in case you ever need to assemble two or three cabinets together. You can make one long stretcher and use make one solid unit.
8. Attach Back Stretcher
Attach the back stretcher to the sides using drywall screws. This will help lock your cabinet in to squareness and also allow for joining multiple cabinets together if necessary.
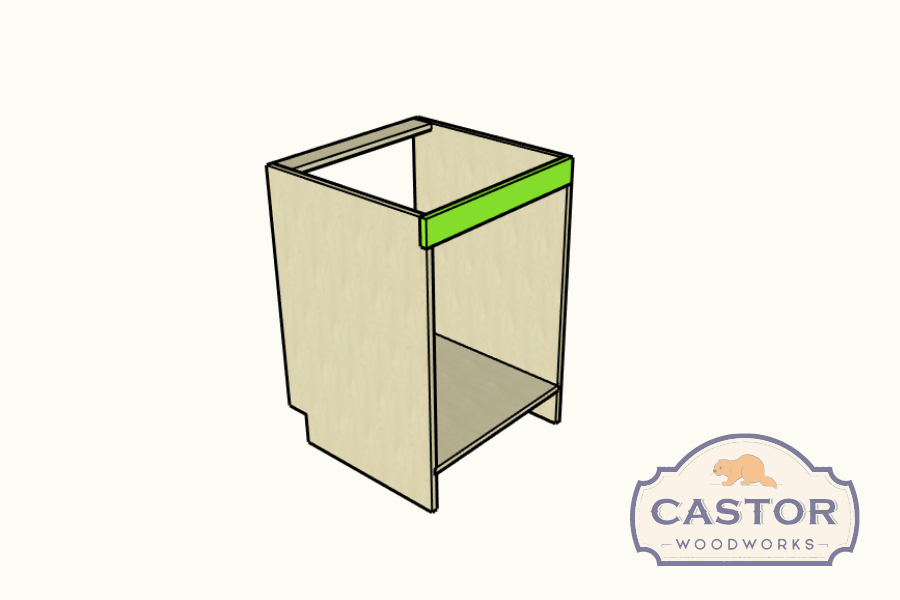
9. Cabinet assembly is done!
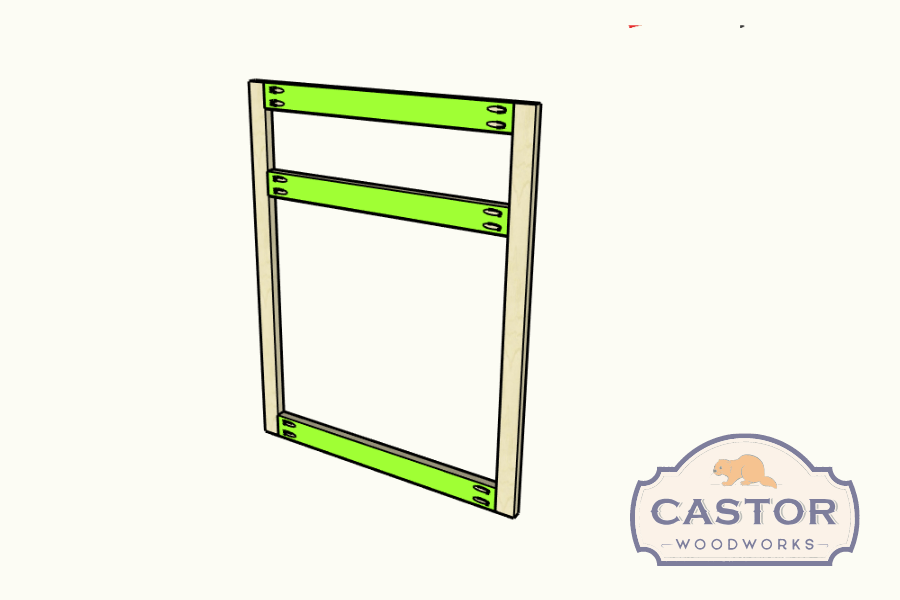
At this point you have a strong base cabinet that is ready for the face frame! The face frame is what will dictate the style of cabinets you want. In my case I want one drawer and a door so I need have to stiles (vertical pieces) and three rails (short pieces).
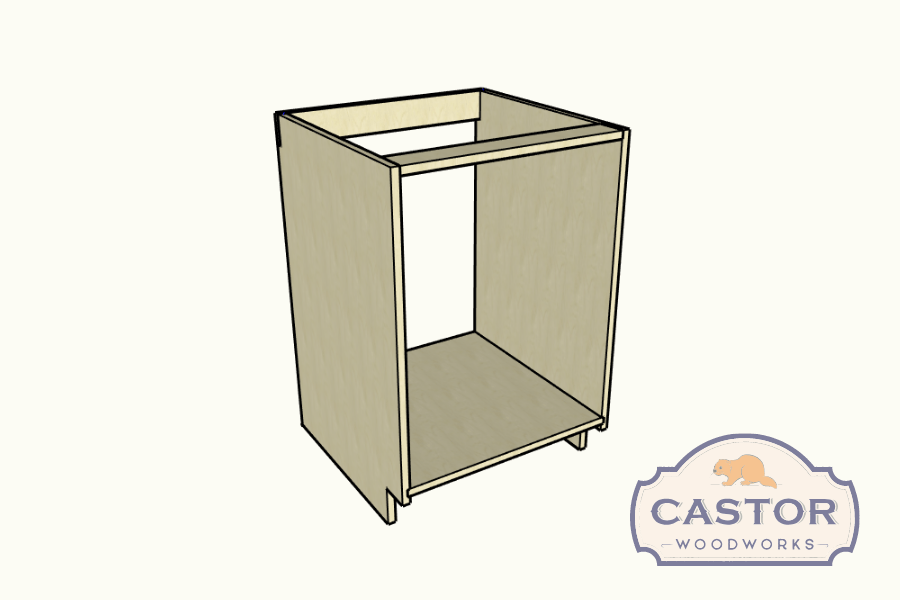
10. Assembly Face Frames
Attach your rails to your stiles using 1 1/4" pocket hole screws and a dab of glue. Be sure to check for squareness throughout the process.
11. Note the Spacing
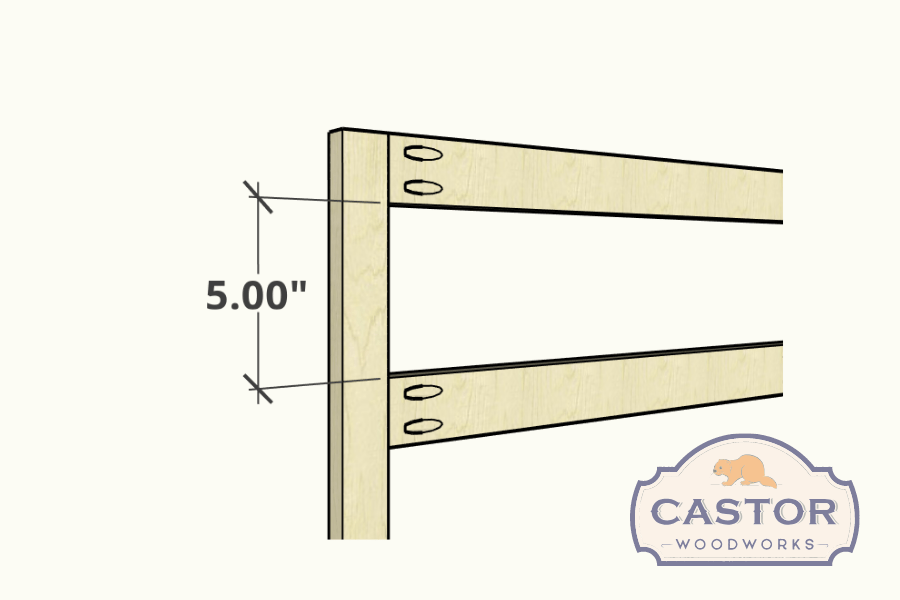
Note that the spacing between the Top and Middle Rails will be 5".
12. Attach Face Frame to Cabinet
Flip the cabinet on its back and add a bead of glue to the Sides, Shelf and Front Stretcher and drop the Face Frame onto the cabinet. You can use a few pin nails to secure it in place. You can also add pocket holes to the inside of the sides and screw the face frame in for added stability.
13. Add the Toe Kick
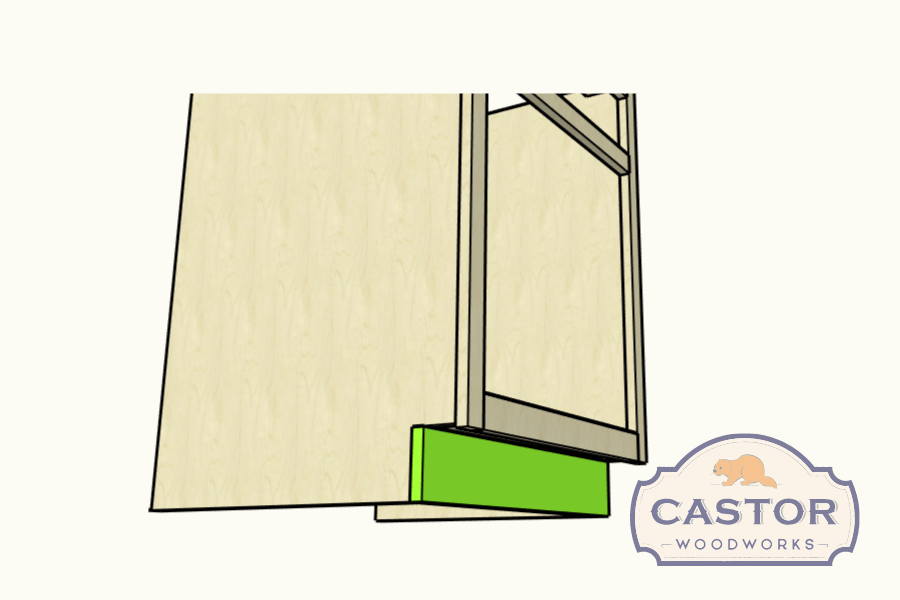
Add the toe kick to the front of the cabinet. If you are lining up multiple cabinets together, now is a good time trim the toe kick to length. This will give the cabinets a clean finished look!
14. The Cabinet is Complete!
Now the cabinet is complete! you can line up multiple cabinets side by side at this point. I will be covering the drawers, drawer front and doors in subsequent plans!