Notch
NotchDresser Vanity
Step-by-step build — 15 steps. Also available as a print sheet.
1Step 1
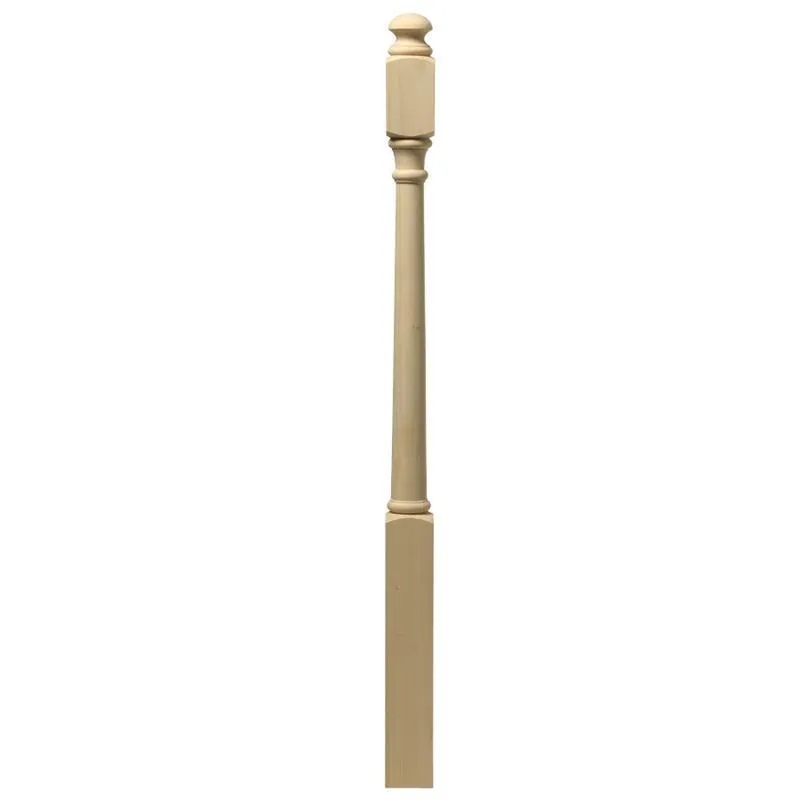
Cut your legs to size! The stair case newel posts that I used started out at 48" and I trimmed the bottom down to the 31 1/2" and then flipped it over to use it upside down!!
2Step 2
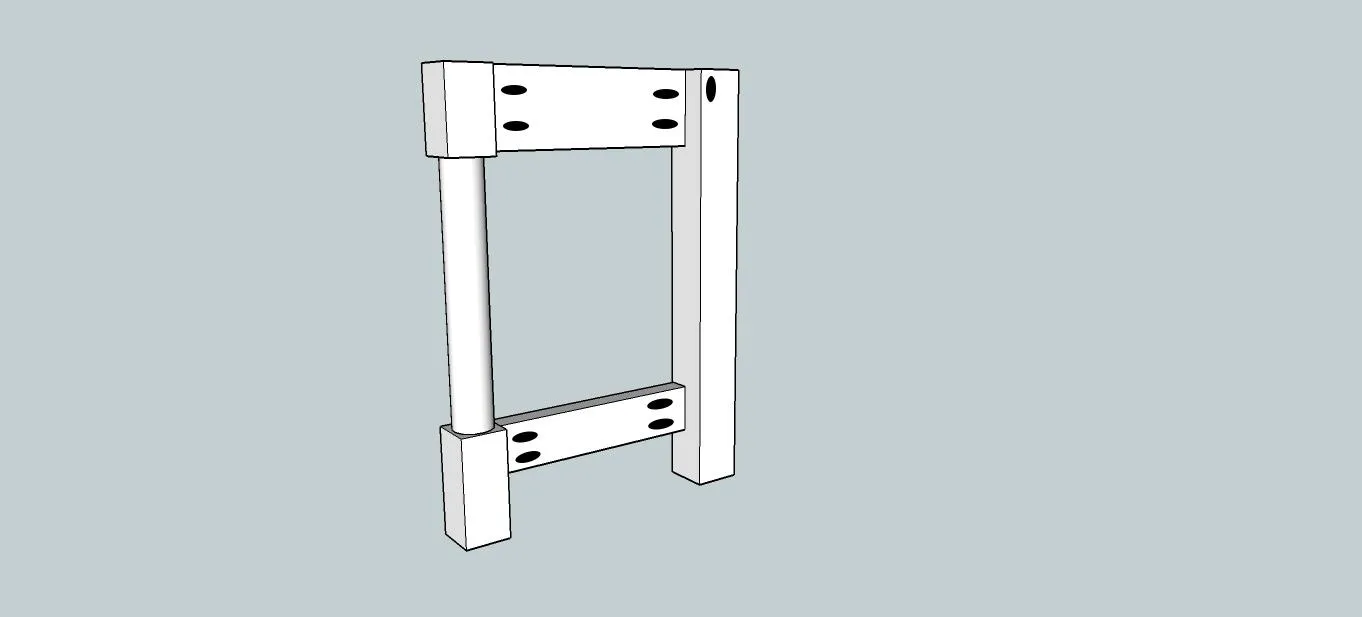
I started building by attaching the front and back legs! Using the top and bottom side rails I drilled 1 1/2" pocket holes and secured with wood glue, and 2 1/2" pocket hole screws!! What you can't see in this pic is that I set the rails back by an 1/8" in the front, it is just a preference and doesn't have to be done! I used paint sticks to make sure all the boards stayed at an even 1/8"! NOTE: All the black ovals in the pics are pocket hole location!
3Step 3
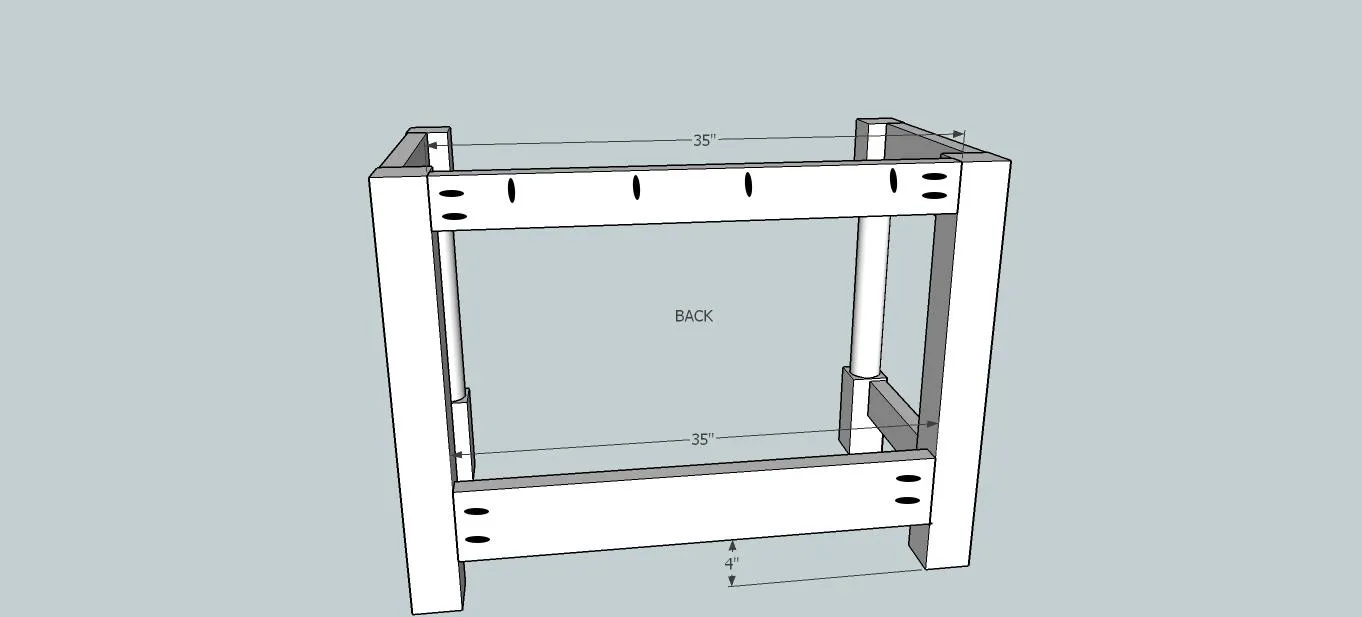
Next I attached the back (top and bottom) rails! I switched the 2x6 and the 2x4 if you notice on the back simply because I knew the plumbing would need more space at the top than the bottom! Again, I used 1 1/2" pocket holes, glue and 2 1/2" screws! NOTE: If you are building a wooden top and would like to attach it with pocket hole screws, I would drill the holes right now before everything starts getting in your way! I did not do this and then wasn't able to drill them on the front board! In the pic, the pocket hole ovals you see going up and down denote the holes for attaching the top! They are drilled at the same 1 1/2"!
4Step 4
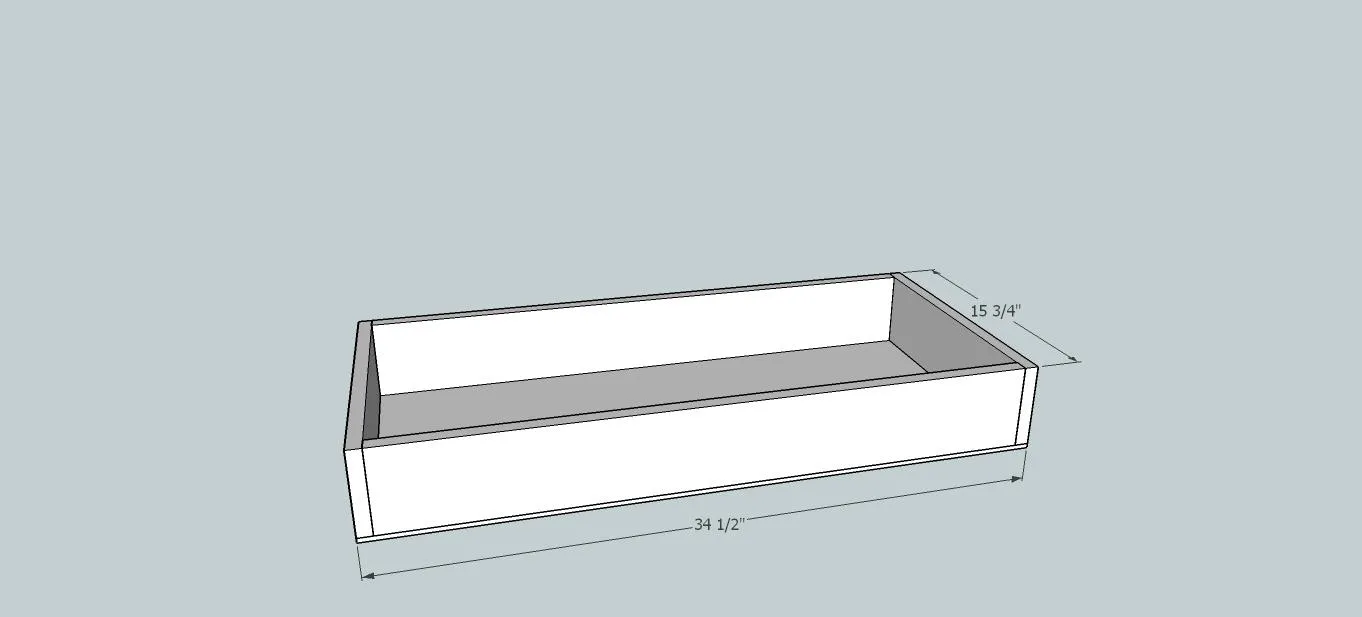
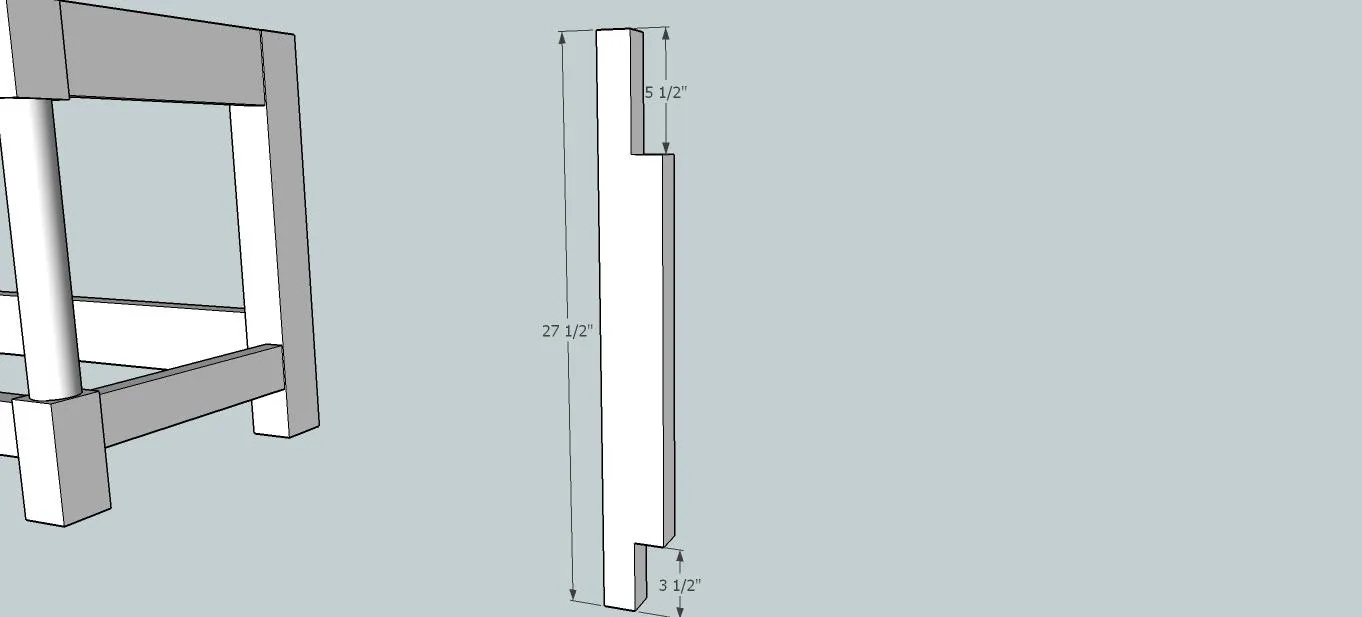
Next you will need to notch out your Face frame board! I just marked it and used the jig saw to cut the pieces off! It will fit snugly up against the side rails!
5Step 5
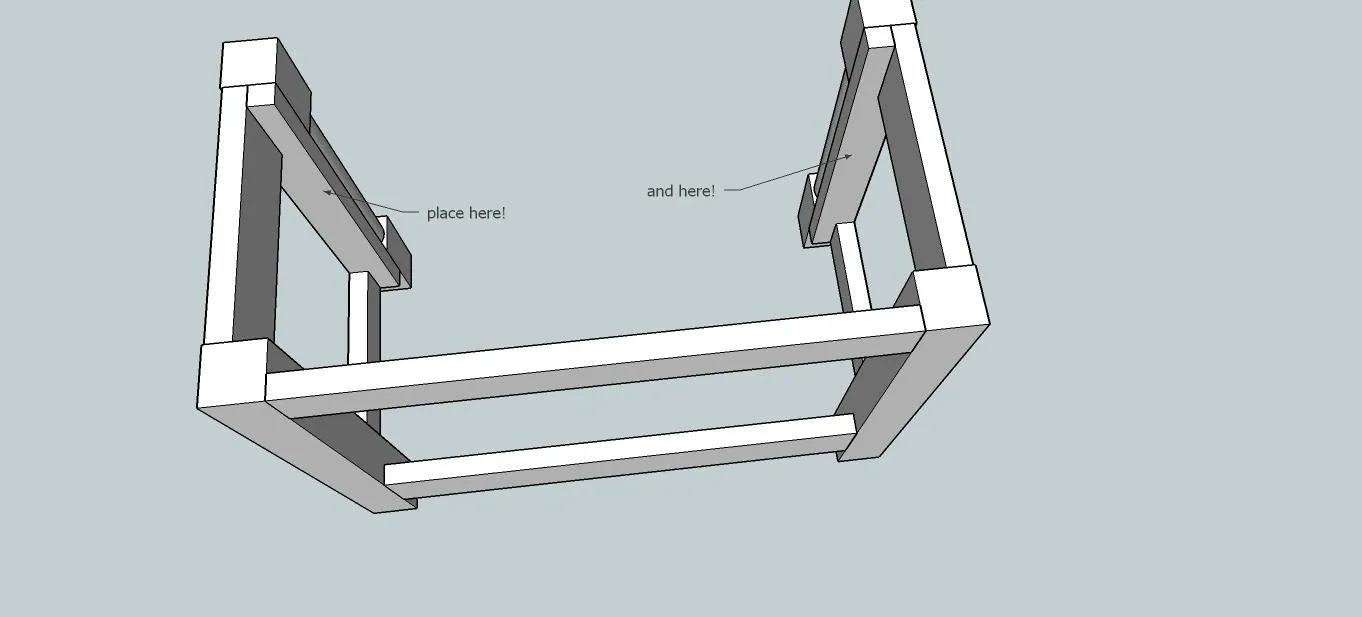
Screw the notched face frame boards into the front legs! I used 2 1/2" pocket holes screws but no pocket holes, I just glued them and screwed them from behind onto the block part of the front legs... if that makes sense!
6Step 6
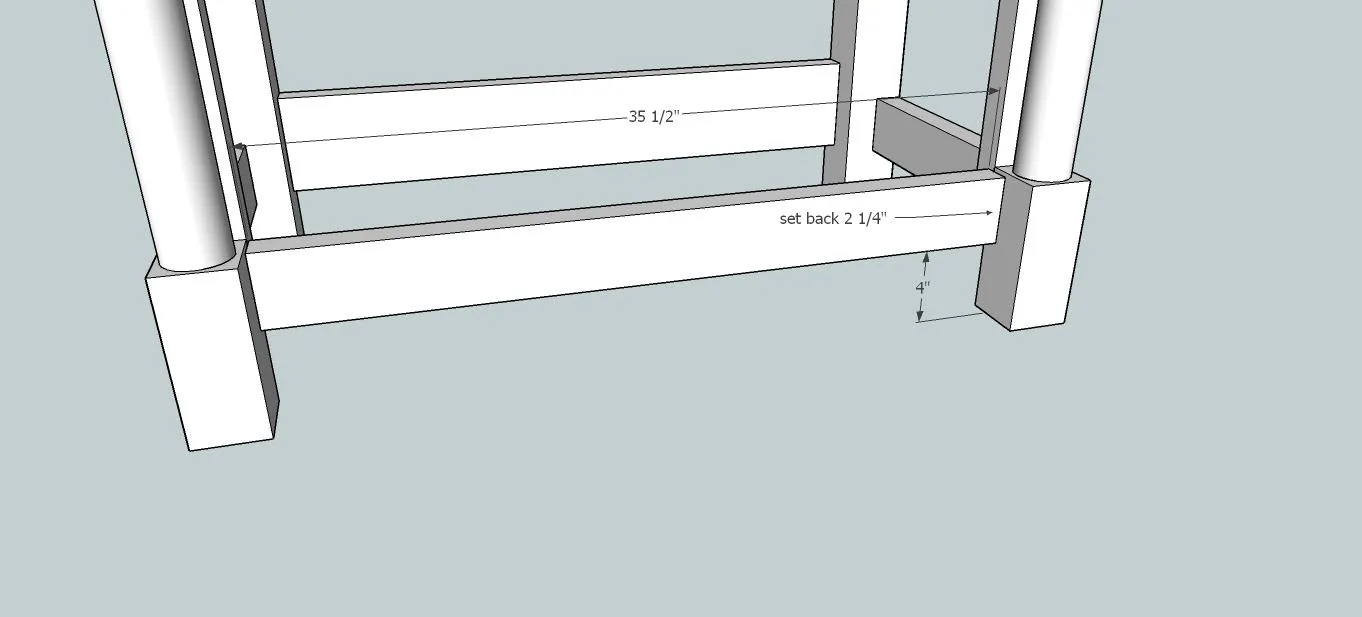
Moving right along, attach the front (bottom) rail, this board is set back 2 1/4" from the front of the legs. It is also 4" up from the bottom of the leg just as the side and back rails were! (Pocket hole location is shown in next step)
7Step 7
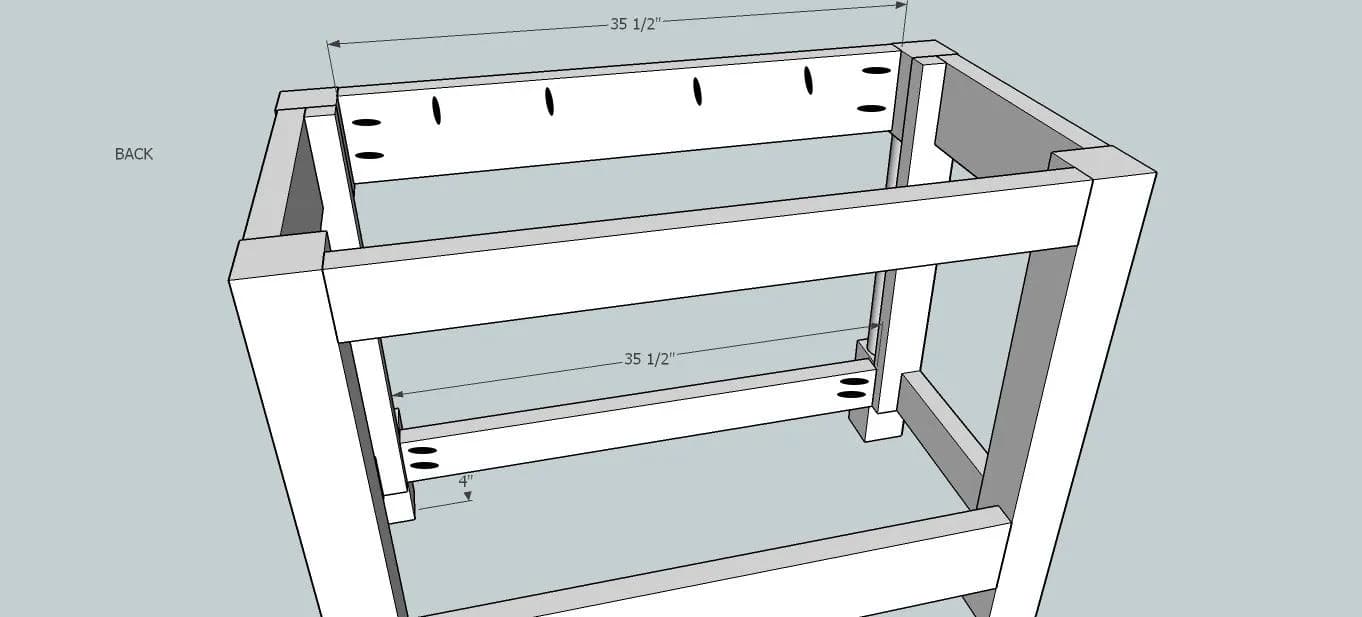
Attach front (top) rail, this is set back 1/8" and is attached with the same 1 1/2" pocket holes, glue and 2 1/2" screws! Again, if you would like to attach your top with pocket holes, make sure and drill them now!
8Step 8
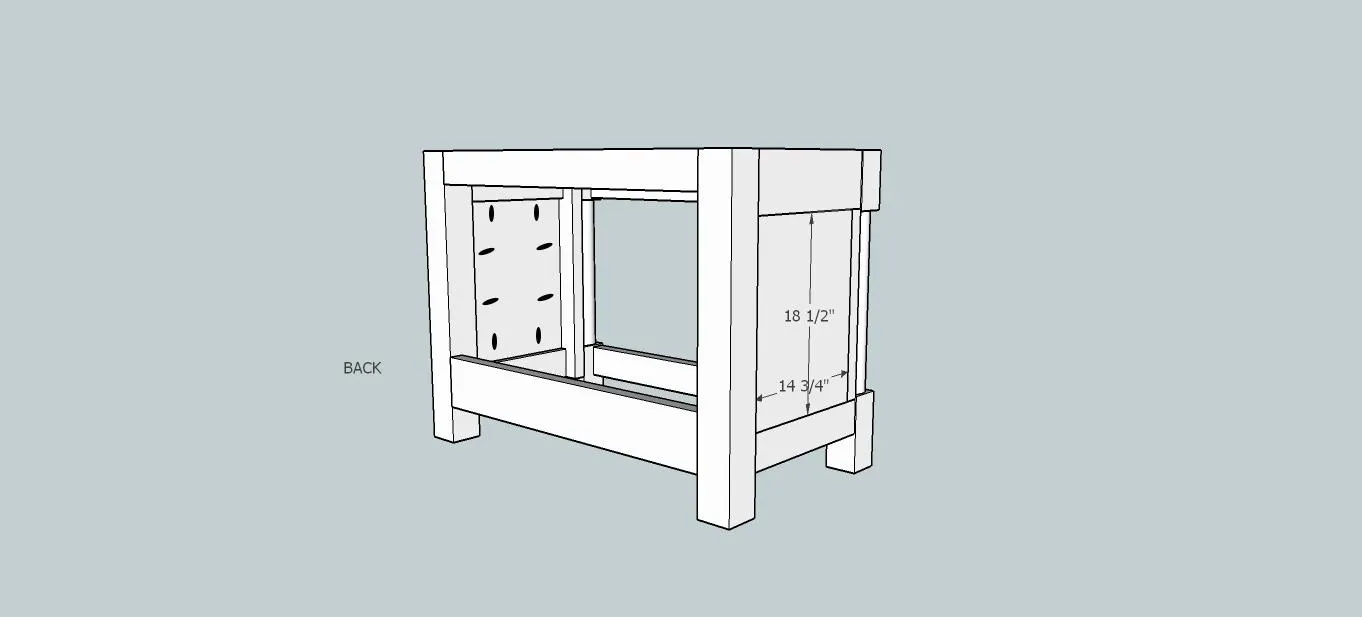
Next cut and insert the side plywood panels! Pocket holes are drilled at 3/4" and 1 1/4" screws are used to attach, along with glue of course!!
9Step 9
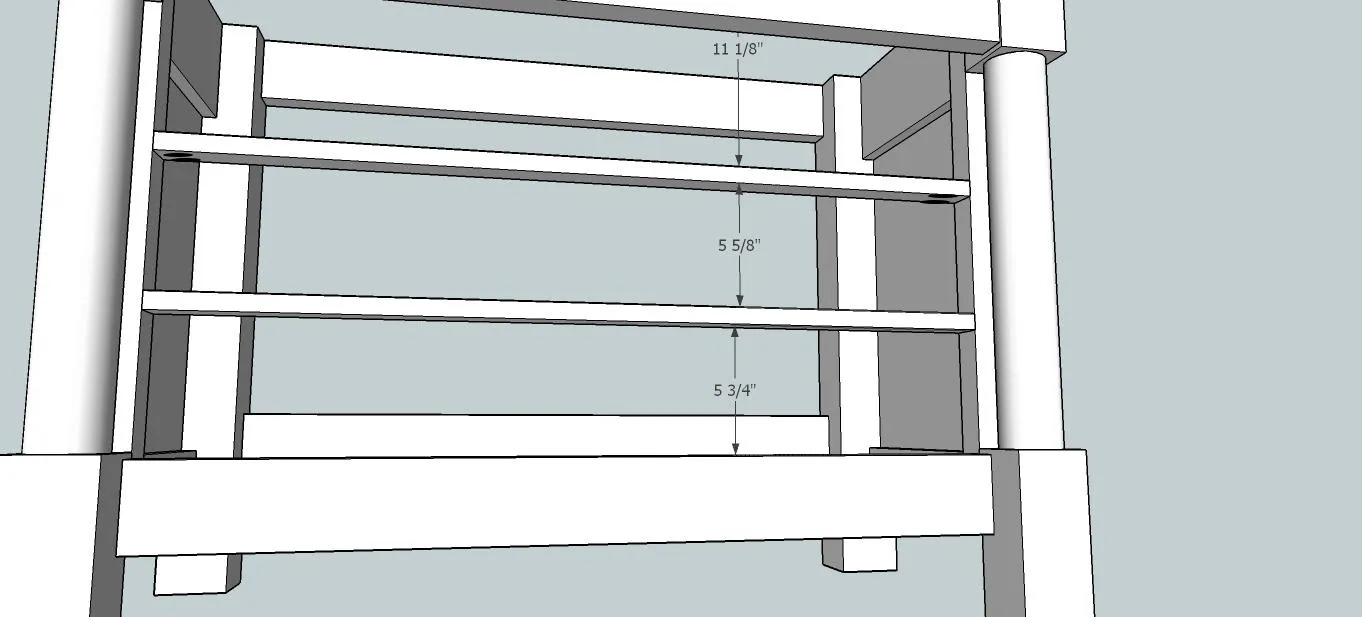
On deck next is the front drawer dividers! The spacing is tricky on this part...I will admit, mine are not perfect!! Lol!! If only it were as easy as Sketchup makes it!! Ha!! Using 3/4" pocket holes and 1 1/4" screws attach the dividers! The pocket holes can't be seen very well in the pic but they are on the bottom side of the boards!
10Step 10
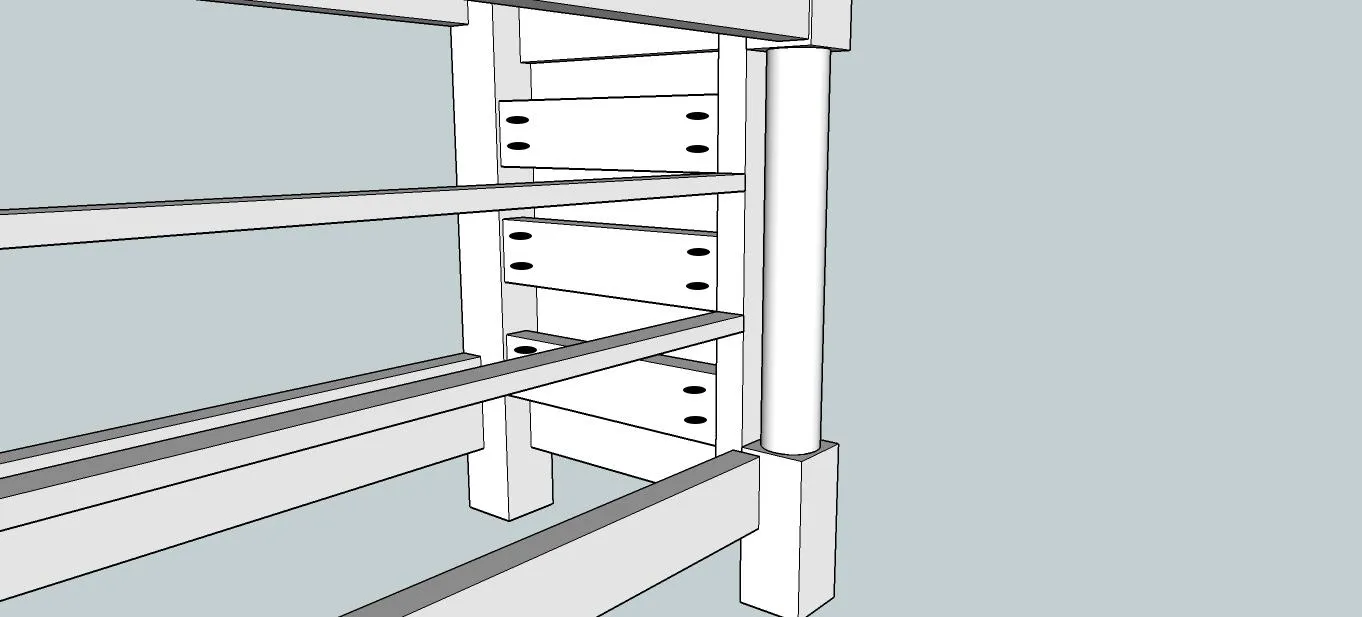
Next, I had to add some drawer slide rails since the legs are so big! Since the legs are not the same width, there are a multitude of ways you could complete this next step, it's a preference thing again...I did it just as the picture shows, but this is not the only way it can be done! Using 1 1/2" pocket holes, glue and 2 1/2" pocket hole screws I lined the boards up with the front face frame and that made them sit 1/4" inside the back leg!
11Step 11
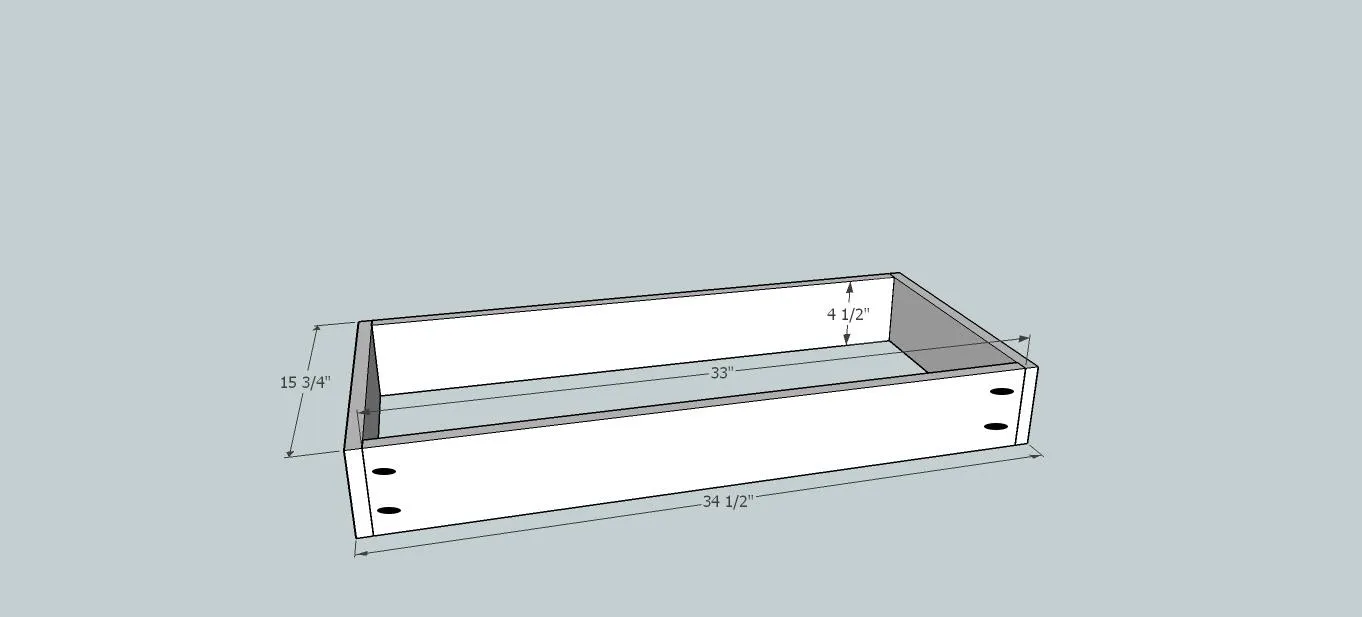
After attaching the drawer slides...which was a PAIN IN THE BUTT because I could not use my Kreg Drawer Slide jig...I didn't have a clamp big enough!! I survived but it took me way longer than it needed to!! Lol! Once the drawer slides are installed make sure and measure before making your drawer boxes! The plan calls for 1x6s ripped down to 4 1/2" to make your drawer boxes but you can use 1x4s if you would prefer not to rip, I just wanted the drawers as big as possible (only an inch difference)! Pocket holes on the front and back, as in the pic, keep you from seeing any pocket holes once the drawer face is on!! Use 3/4" pocket holes and 1 1/4" screws along with some glue and build three of these bad boys!!
12Step 13
- Attach the drawer front (faces) to the drawer boxes! I do this by attaching the drawer boxes to the drawer slides and then I prop the drawer front up on the bottom and sides with cds or playing cards...whatever I have laying around that is about the size gap I'm going for!!
- Then just squeeze some glue on it and stick a few brad nails in from the inside of the drawer!! All set!
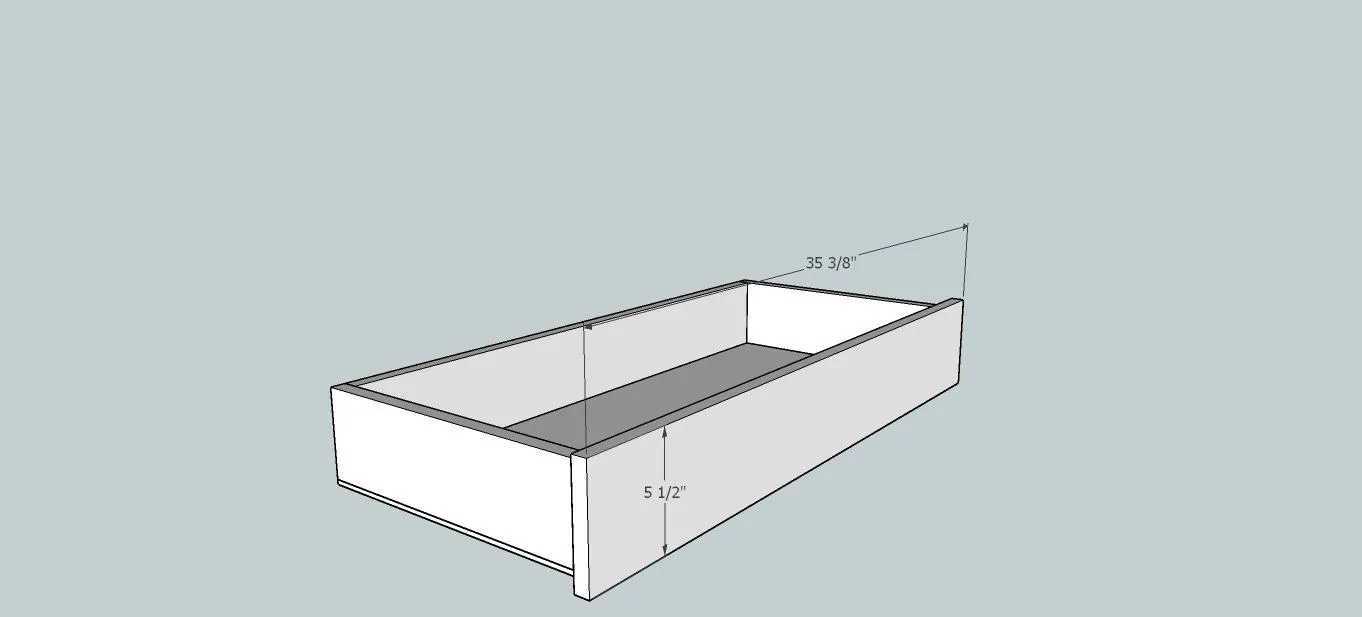
13Step 14
All your drawers are snug in there homes and the last part to finish up is building the top to the vanity! I ran the 2x6 boards through the table saw to rip them down...I wanted a 24" top and there isn't a standard, off the shelf board that could get me 24", so I had to rip them down! I took 11/16" off each board...I still had a slightly larger than 24" by 1/16"...I'll take it!! Then I pocket holed them together using 1 1/2" pocket holes, glue and 2 1/2" screws!
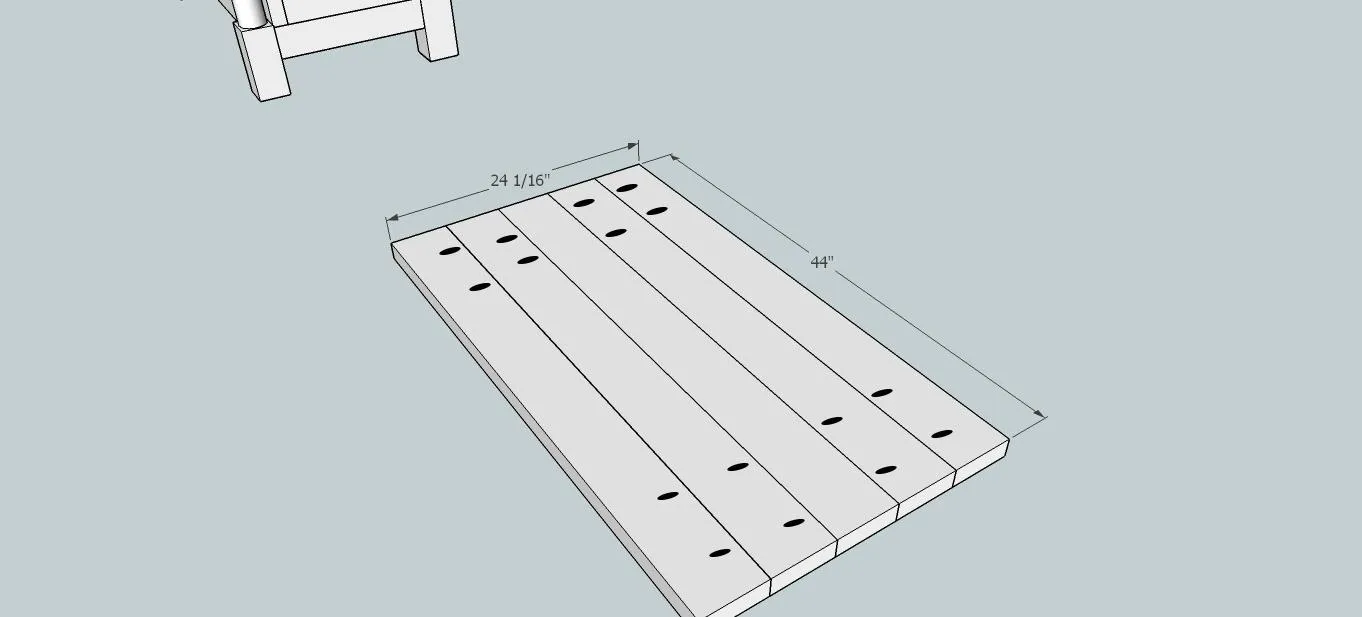
14Step 15
- Flip that top over and center it on the vanity!! I cut the ends off perfectly even with a straight edge and circular saw, then you can attach it to the vanity using your pocket holes you drilled earlier...or if you forgot like I did, you can countersink your screws on top and fill them in with wood filler!!
- Cut the template for the sink!! And, after a ton of sanding, staining and painting...It is done!! Hook up all the plumbing and extras!! NOTE: Some boards may need to be cut on the backs of the drawers to accommodate plumbing!! Woohoo!! There you have it!! If you would prefer two doors instead of drawers on this vanity check out my blog (link listed in extras) and also get all the direct links to the products I used on this vanity!
15Step 12
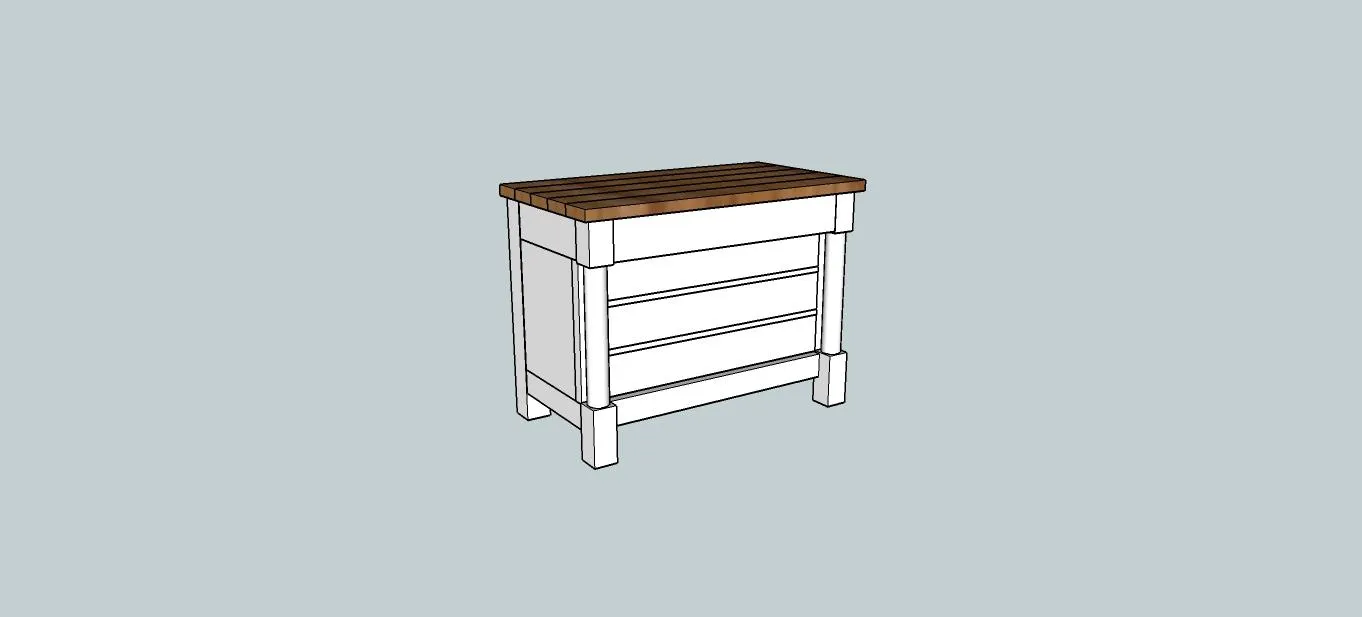
Glue and staple the 1/4" plywood to the bottom of your drawer boxes!! Or be all fancy smansy pants and route a grove for it to sit in...I do it the easy smeasy way!! Lol!!