 Notch
NotchUse your browser's Print (Ctrl/Cmd + P) and choose Save as PDF. This page works offline once you've opened it with a signal.
Double-Decker Shoe Organizer
Shoes can quickly pile up, causing unnecessary clutter in the closet.
- Difficulty
- Beginner
- Time
- 1.8–3.5 hours
- Cost
- $$
Cut list
| Part | Qty | T × W × L | Material | ✓ |
|---|---|---|---|---|
| Ends | 2 | 3/4" × 12" × 12" | — | ☐ |
| Shelves | 2 | 3/4" × 10" × 23" | — | ☐ |
| Rails | 4 | 3/4" × 1" × 23" | — | ☐ |
Materials
| Item | Qty | ✓ |
|---|---|---|
| Plywood, 3/4" Thick Quarter Sheet | 1 board | ☐ |
| Board, 1x2 96" | 1 board | ☐ |
| 1 1/4" coarse-thread pocket-hole screws | 24 each | ☐ |
Overall cost: $$. Lumber varies by region, species, and season, so we give a band rather than a figure.
Tools
- Circular Saw
- Drill / Driver
- Miter Saw
- Pocket Hole Jig
- Random Orbit Sander
Instructions
1. Cut the Parts to Size
Cut two Ends and two Shelves to size from a quarter sheet of 3/4" plywood, as shown in the cutting diagram. Also cut four Rails to length from a 1x2 board.
2. Drill Pocket Holes
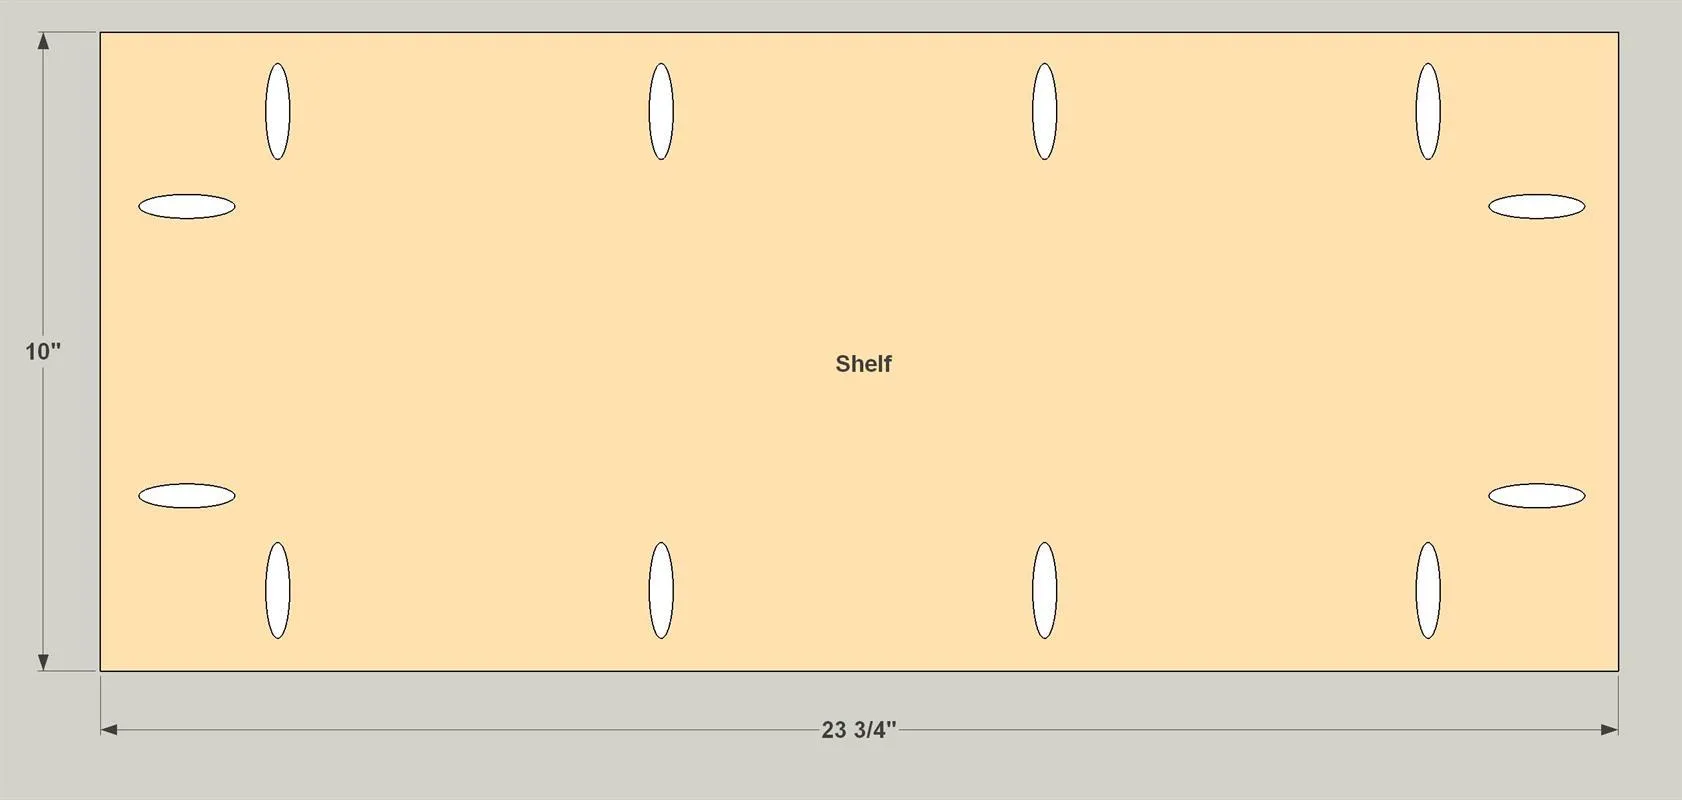
With your jig set up for 3/4" stock, drill pocket holes in the underside of the Shelves, as shown.
3. Assemble the Shelves
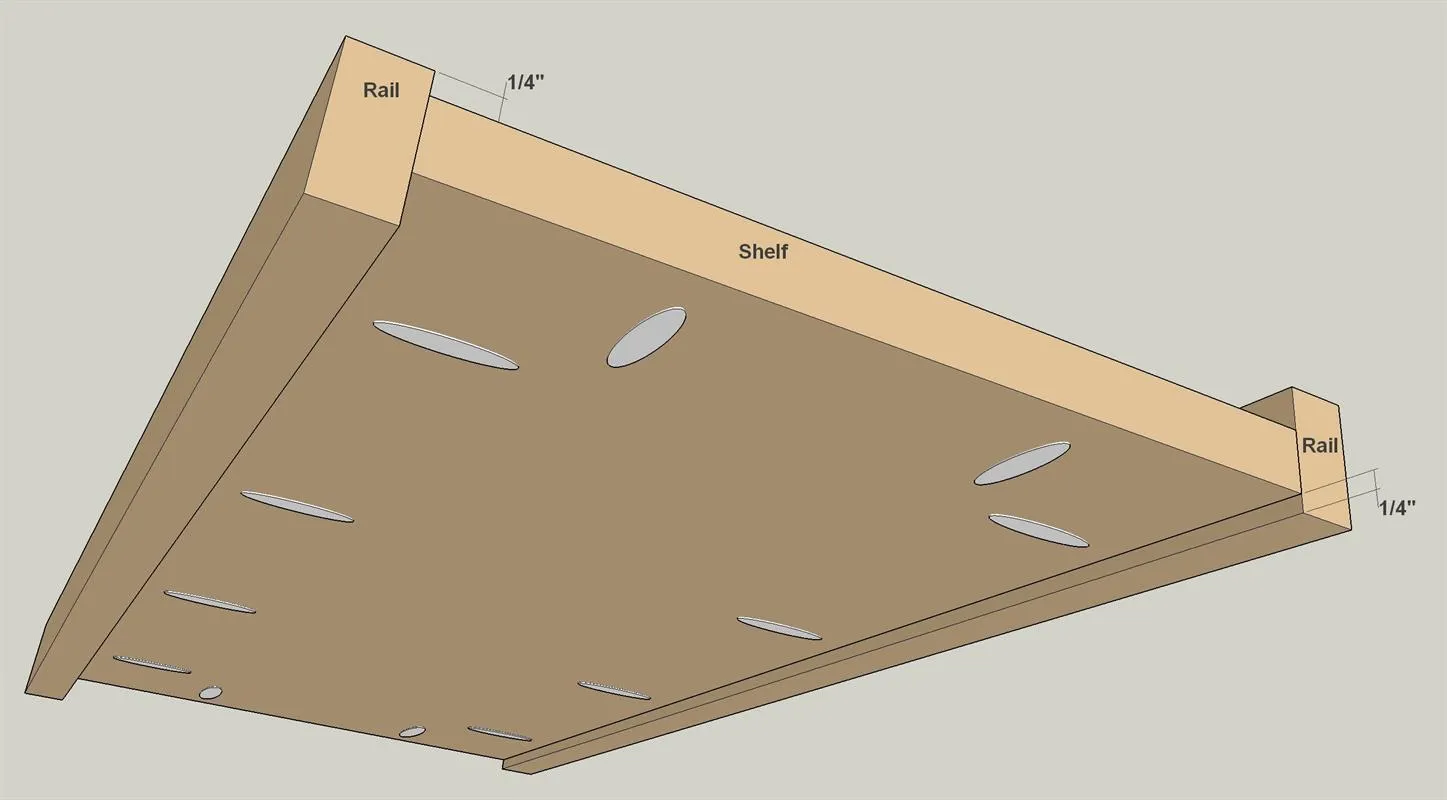
After sanding the Shelves and Rails, attach two Rails to each Shelf using 1 1/4" coarse-thread pocket-hole screws. Note that the rails are offset: One Rail sits 1/4" below the Shelf, the other sits 1/4" above.
4. Join the Shelves and Ends
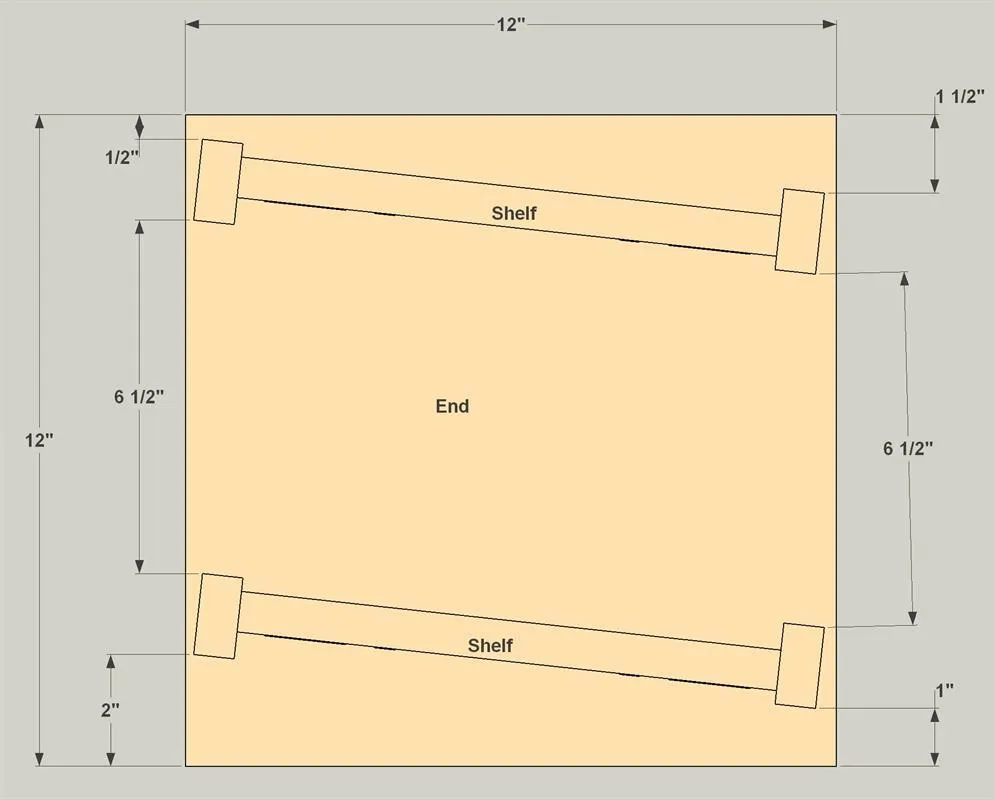
After sanding the Ends, position the shelf/rail assemblies as shown. Make sure that the Rail protruding above each shelf is positioned at the front—on the downward sloping side. Then attach the assemblies to the Ends using 1 1/4" coarse-thread pocket-hole screws.
5. Paint and Put It to Use
After assembly, do any touch up sanding needed, and then paint the Shoe Organizer. Latex makes a great choice, because it’s easy to scrub should your shoes leave any dirt behind.
Tip: An Easy Route to Smooth Edges The exposed edges of plywood are tough to get smooth, no matter how much you sand, and can have voids that will show. A quick, easy way to smooth these edges is to smear on ordinary spackling compound. Let it dry, sand lightly, and you’re ready to paint.