 Notch
NotchDouble-Decker Shoe Organizer
Step-by-step build — 5 steps. Also available as a print sheet.
1Cut the Parts to Size
Cut two Ends and two Shelves to size from a quarter sheet of 3/4" plywood, as shown in the cutting diagram. Also cut four Rails to length from a 1x2 board.
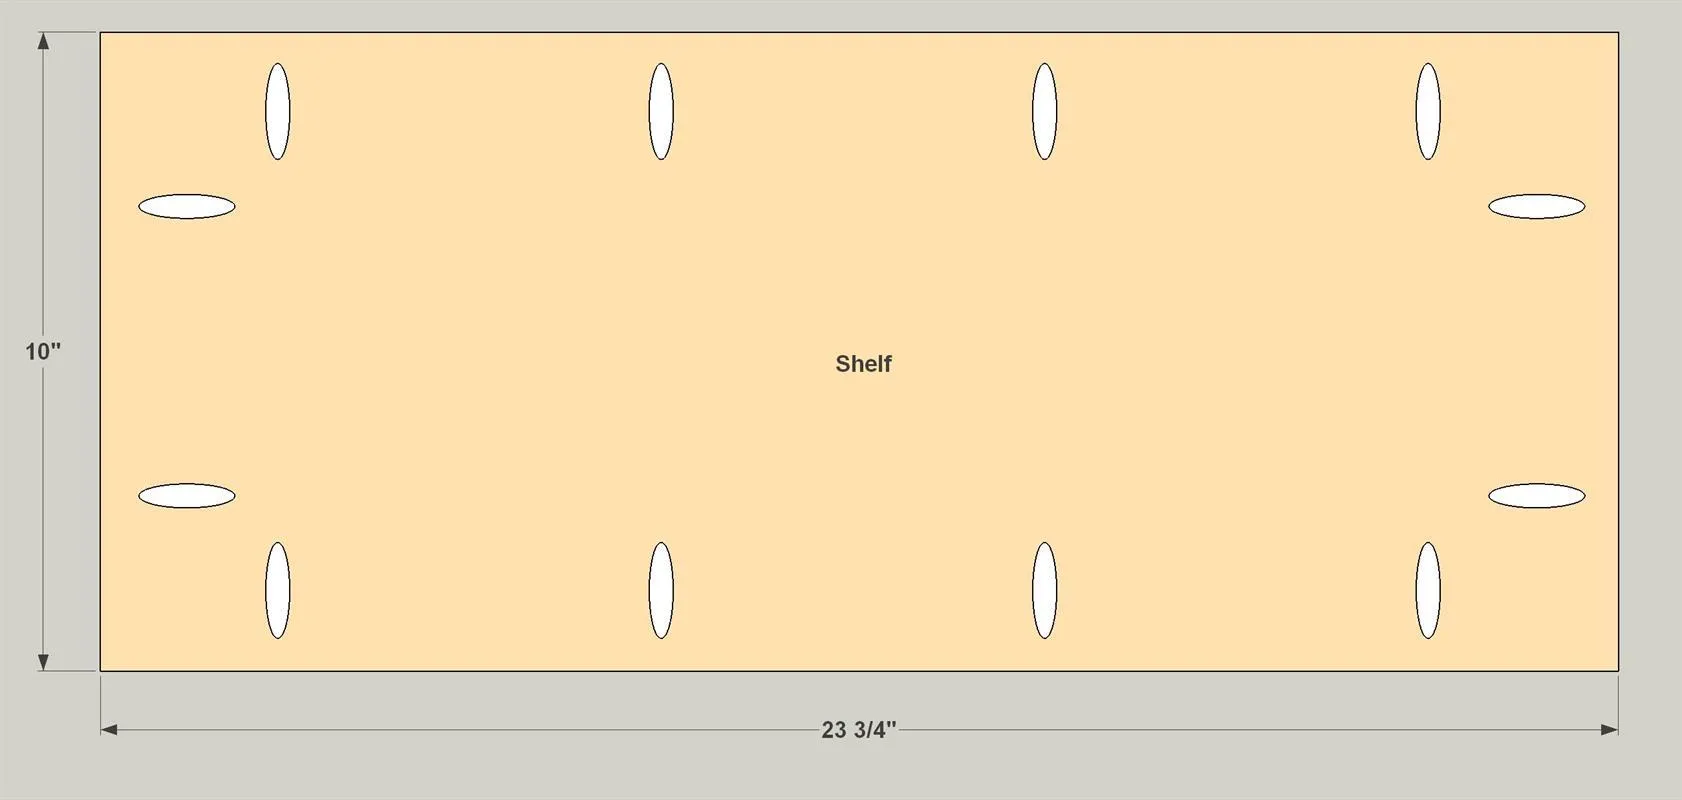
2Drill Pocket Holes
With your jig set up for 3/4" stock, drill pocket holes in the underside of the Shelves, as shown.
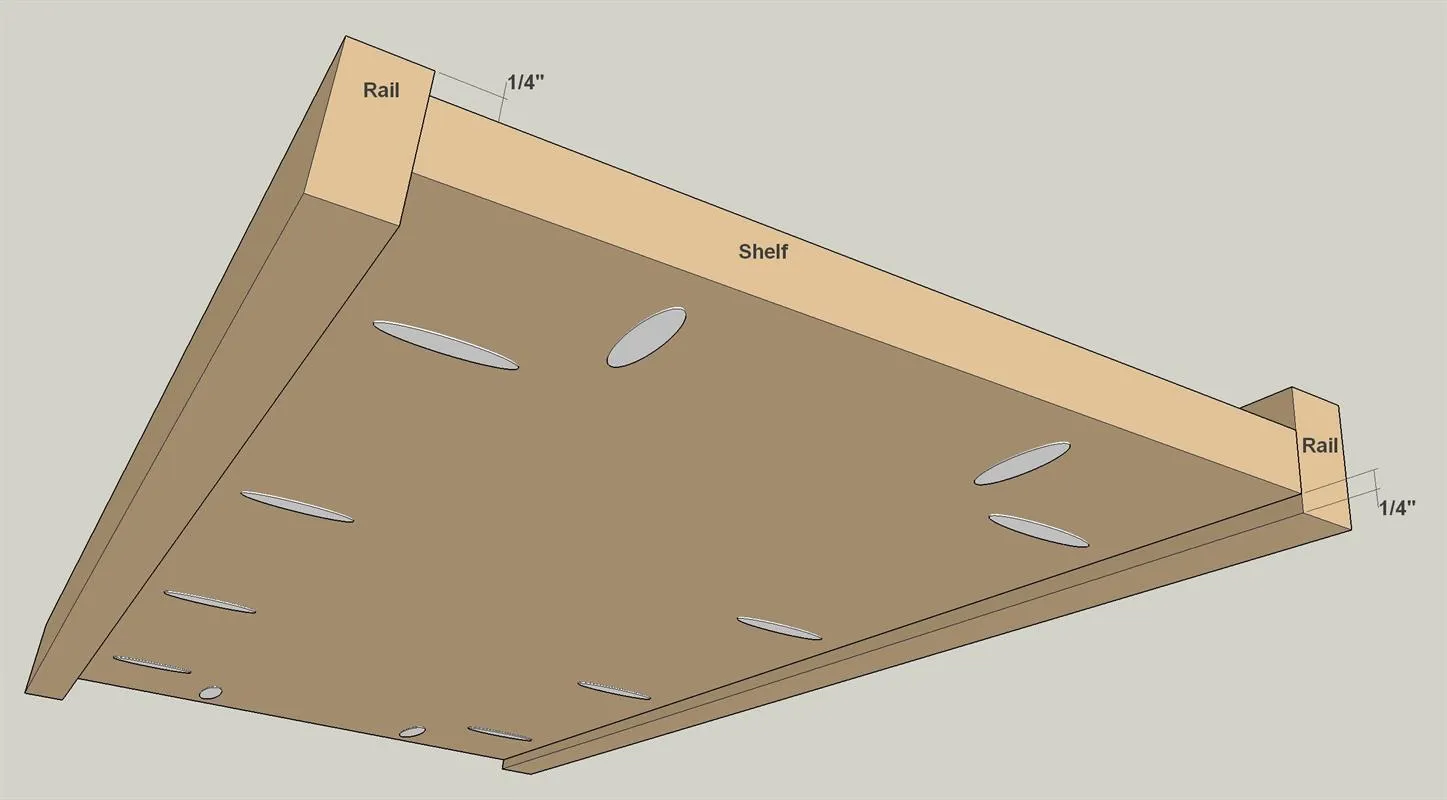
3Assemble the Shelves
After sanding the Shelves and Rails, attach two Rails to each Shelf using 1 1/4" coarse-thread pocket-hole screws. Note that the rails are offset: One Rail sits 1/4" below the Shelf, the other sits 1/4" above.
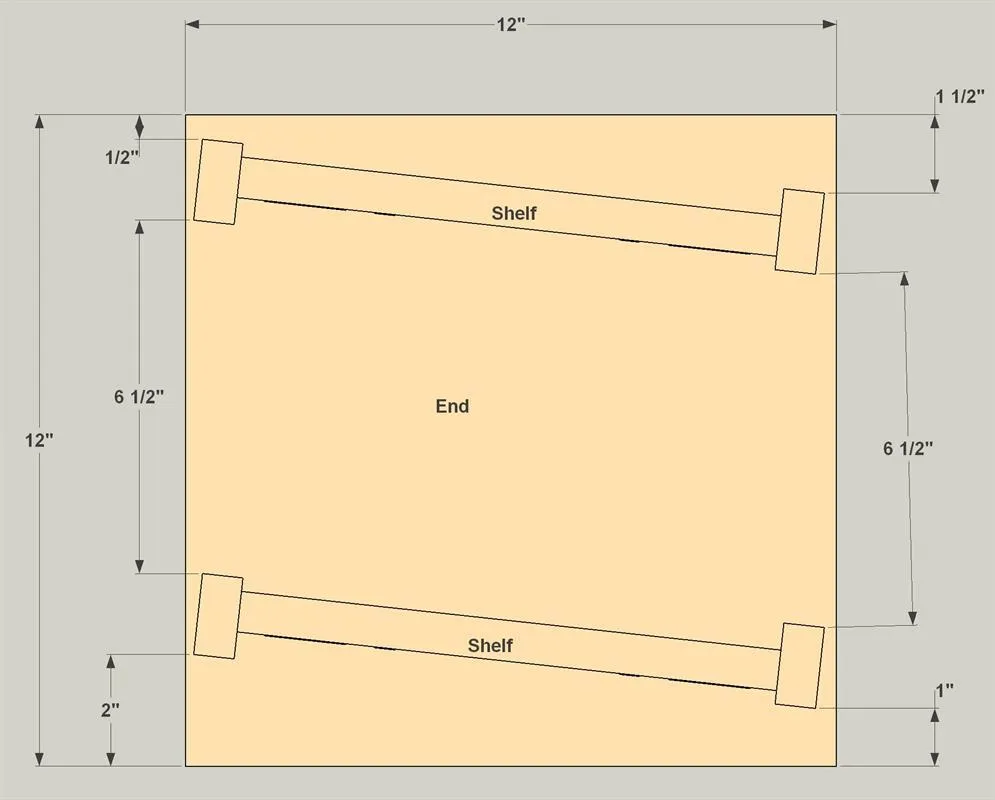
4Join the Shelves and Ends
After sanding the Ends, position the shelf/rail assemblies as shown. Make sure that the Rail protruding above each shelf is positioned at the front—on the downward sloping side. Then attach the assemblies to the Ends using 1 1/4" coarse-thread pocket-hole screws.
5Paint and Put It to Use
After assembly, do any touch up sanding needed, and then paint the Shoe Organizer. Latex makes a great choice, because it’s easy to scrub should your shoes leave any dirt behind.
Tip: An Easy Route to Smooth Edges The exposed edges of plywood are tough to get smooth, no matter how much you sand, and can have voids that will show. A quick, easy way to smooth these edges is to smear on ordinary spackling compound. Let it dry, sand lightly, and you’re ready to paint.