Notch
NotchUse your browser's Print (Ctrl/Cmd + P) and choose Save as PDF. This page works offline once you've opened it with a signal.
DIY Storage Chest
One thing I've learned after having my own house is that you can never have too much storage space.
- Difficulty
- Intermediate
- Time
- 3.5–6.8 hours
- Cost
- $$
Cut list
| Part | Qty | T × W × L | Material | ✓ |
|---|---|---|---|---|
| Base | 1 | 3/4" × 17" × 36" | — | ☐ |
| Sides | 2 | 3/4" × 15" × 17" | — | ☐ |
| Front & Back | 2 | 3/4" × 15" × 34" | — | ☐ |
| Upright Trim | 4 | 1/4" × 2" × 10" | — | ☐ |
| Top & Bottom Trim | 2 | 1/4" × 2" × 36" | — | ☐ |
| Upright Trim | 4 | 1/4" × 2" × 17" | — | ☐ |
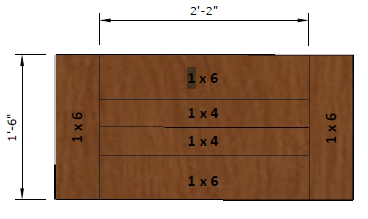
| Lid | 2 | 1" × 4" × 26" | — | ☐ |
| Lid | 2 | 1" × 6" × 26" | — | ☐ |
| Lid | 2 | 1" × 6" × 18" | — | ☐ |
Materials
| Item | Qty | ✓ |
|---|---|---|
| Plywood, 3/4" Thick Full Sheet | 1 board | ☐ |
| Board, 1x4 72" | 1 board | ☐ |
| Board, 1x6 96" | 1 board | ☐ |
| Premium Aspen Board Trim, 1/4" Thick 48" | 4 board | ☐ |
| Hinge | 2 each | ☐ |
Overall cost: $$. Lumber varies by region, species, and season, so we give a band rather than a figure.
Tools
- Brad Nailer
- Circular Saw
- Drill / Driver
- Miter Saw
- Pocket Hole Jig
- Random Orbit Sander
- Bar / Pipe Clamps — optional
- Tape Measure — optional
Instructions
1. STEP 1
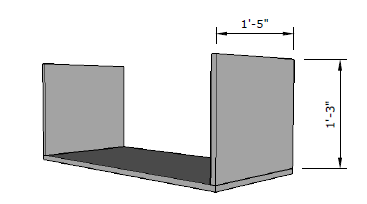
Start by attaching the sides of the bench to the base with 1-1/4" pocket hole screws and wood glue. The sides should sit flush with the outside edges of the base.
2. STEP 2
Start by attaching the sides of the bench to the base with 1-1/4" pocket hole screws and wood glue. The sides should sit flush with the outside edges of the base.
3. STEP 3
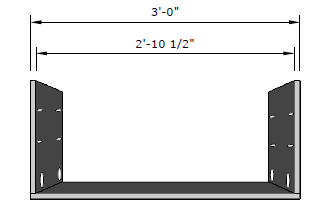
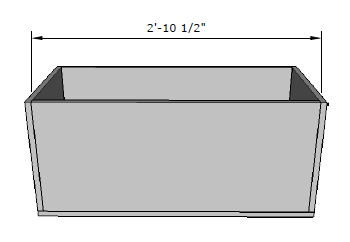
Attach the front and back of the bench to the base and sides with 1-1/4" pocket hole screws and wood glue. The front and back should sit flush with the outer edges of the base and line up flush with the inside of the side pieces.
4. STEP 4
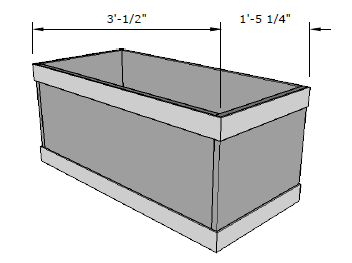
- Attach the top and bottom trim to the bench with finish nails and wood glue.
- Position the trim so that it is flush with the top and bottom of the chest in order to cover up the plywood edges. Ensure the 45° trim miters are flush for a nice corner edge.
5. STEP 5
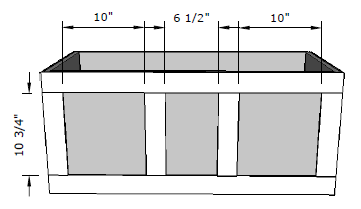
- Attach the front upright trim according to the dimensions shown with finish nails and wood glue.
- Position the trim so that it is flush with the top and bottom trim. Looking from the back, it should overhang the sides 1/4" when it is flush with the top and bottom trim pieces.
6. STEP 6
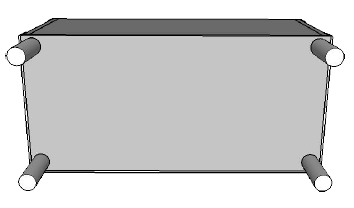
Add the furniture feet. Most feet come with bolts in them for easy attachment. Pre-drill a hole according to the size of the bolts and screw into place. Use wood glue for extra strength.
7. STEP 7
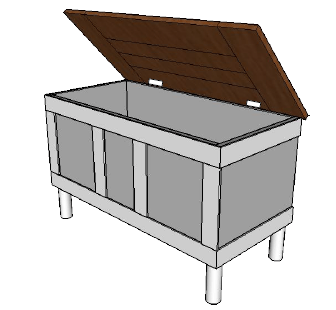
Attach the storage chest lid with hinges at the back of the chest.
8. CHEST LID
To make the lid of the storage chest, attach the boards as shown on the right with wood glue and 1-1/4" pocket holes and screws. Attach at the bottom side of the lid to best hide the pocket holes.