Notch
NotchUse your browser's Print (Ctrl/Cmd + P) and choose Save as PDF. This page works offline once you've opened it with a signal.
DIY Storage Bench (IKEA Nornas Look-alike)
This bench is perfect for a bedroom or entryway.
- Difficulty
- Easy
- Time
- 2.3–4.3 hours
- Cost
- $$
Cut list
| Part | Qty | T × W × L | Material | ✓ |
|---|---|---|---|---|
| Top and Bottom pieces | 2 | 3/4" × 11 1/4" × 4" | — | ☐ |
| Vertical Pieces and Shelf | 5 | 3/4" × 11 1/4" × 15" | — | ☐ |
| Long Frame Pieces | 2 | 1 1/2" × 1 1/2" × 44 1/2" | — | ☐ |
| Short Frame Pieces | 2 | 1 1/2" × 1 1/2" × 4" | — | ☐ |
| Feet | 4 | 1 1/2" × 1 1/2" × 2" | — | ☐ |
Materials
| Item | Qty | ✓ |
|---|---|---|
| Board, 1x12 96" | 2 board | ☐ |
| Board, 2x2 96" | 2 board | ☐ |
| 1" Pocket Screws | 38 each | ☐ |
| 2-1/2" pocket screws | 8 each | ☐ |
Overall cost: $$. Lumber varies by region, species, and season, so we give a band rather than a figure.
Tools
- Impact Driver
- Miter Saw
- Pocket Hole Jig
Instructions
1. Step 1: Drill Pocket Holes
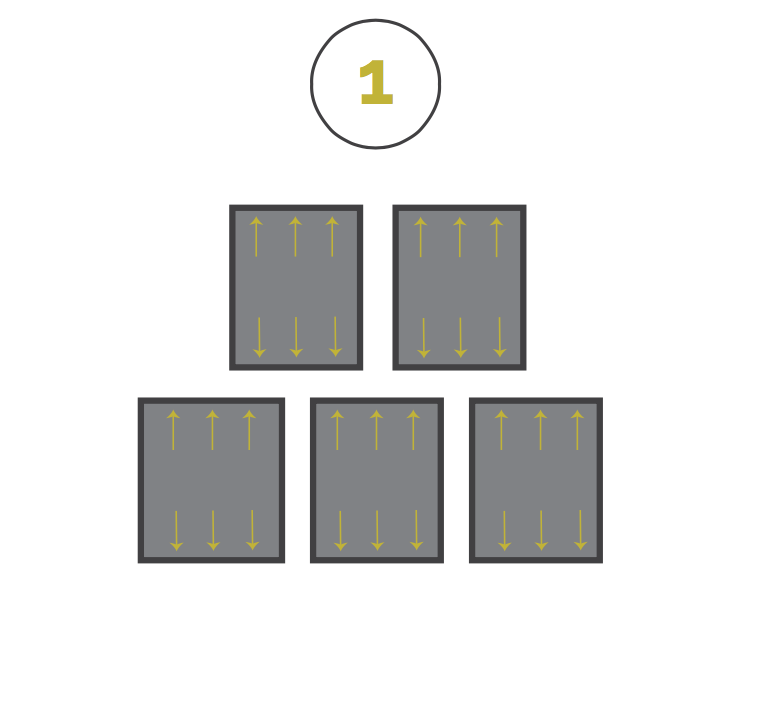
For this plan you will need 2- 1x12x8' and 2- 2x2x8' The 1x12s will be cut at 15". You will need 5 pieces. See cut list for specific cuts on the 2x2s. Once your cuts are made, drill pocket holes on the 1x12's as shown on the diagram.
2. Step 2: More Pocket Holes
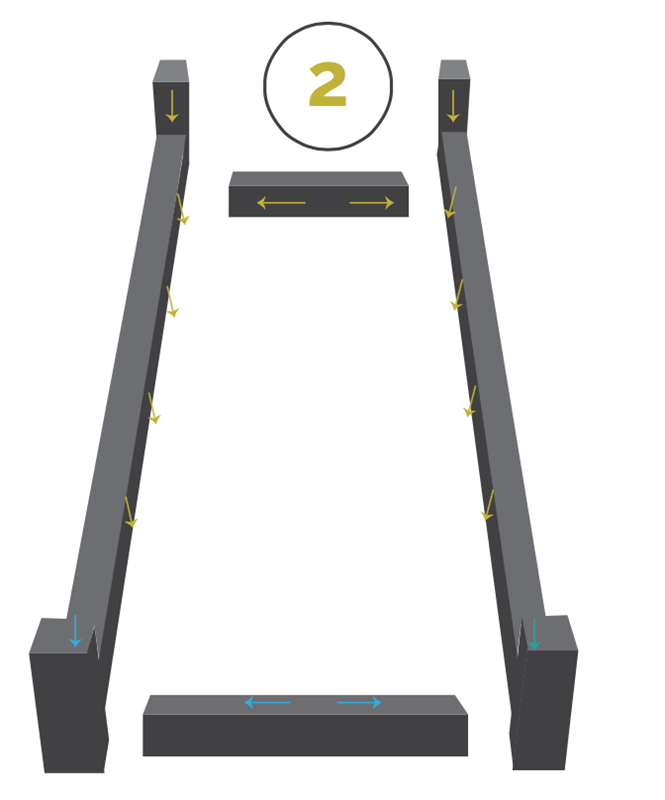
Drill pocket holes on the inside of all the 2x2's as shown by the arrows.
3. Step 3: Build the legs
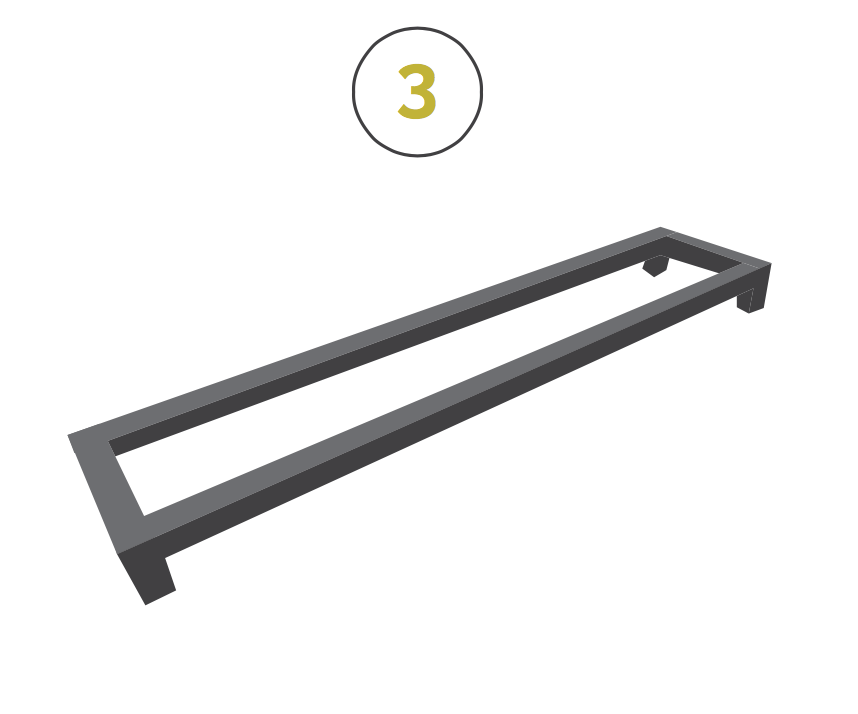
Using 2 1/2 inch pocket screws, put the legs together as shown in the diagram. Once the legs are put together, spray paint them with metallic spray paint and let them dry, to give them a metallic look.
4. Step 4: Make an "H"
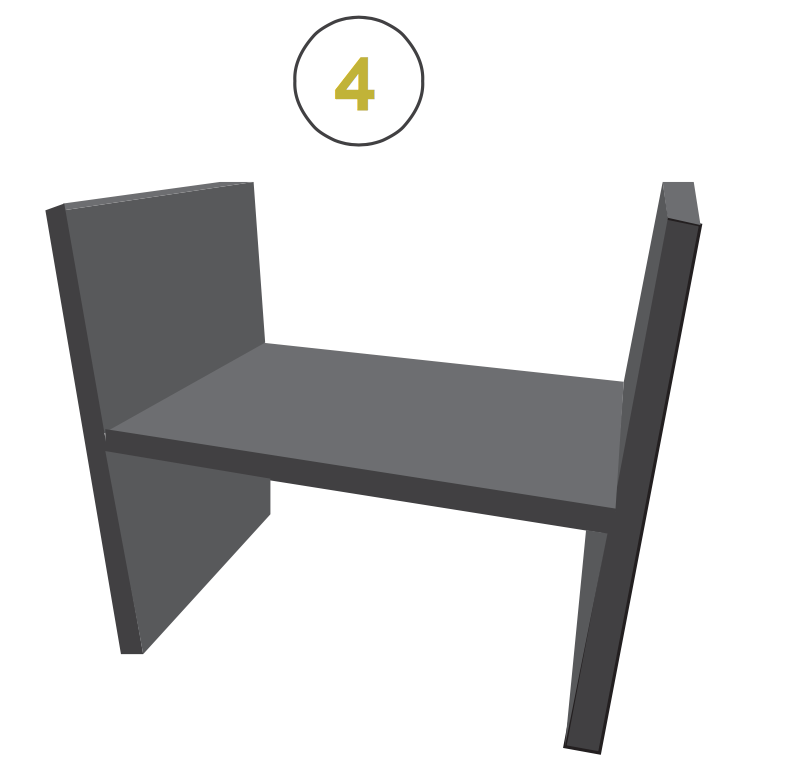
Using 3 of the 15” pieces, make an H shape. Be sure that the pocket holes face OUT on the vertical pieces. Mark the middle really well so that the shelf is level. Use 1” pocket screws and wood glue on all of the seams.
5. Assemble the rest of the bench
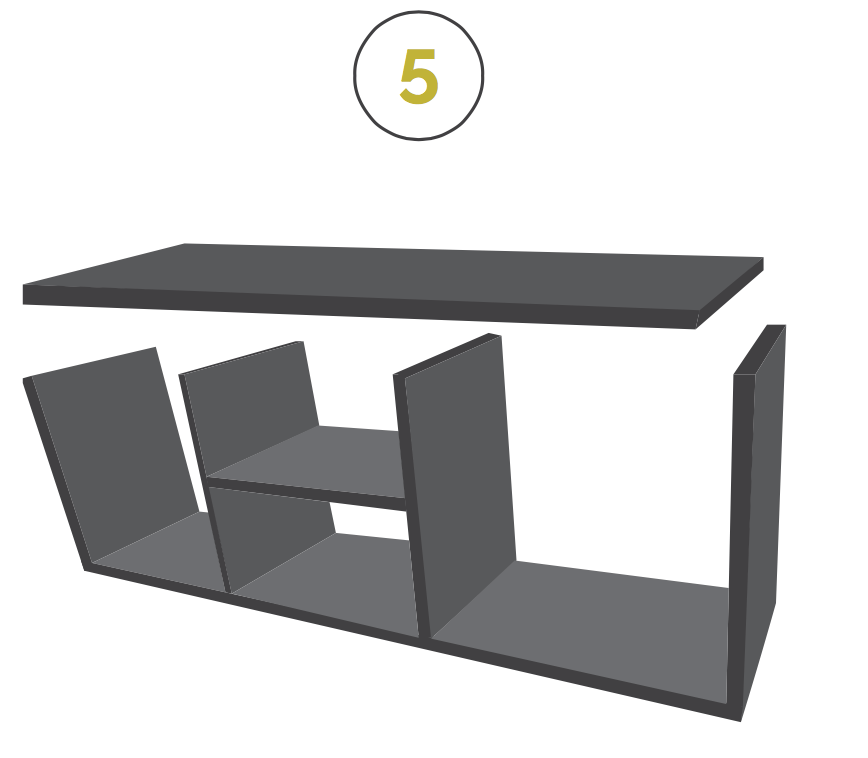
- Attach the “H” to the 4’ Piece, then attach the end pieces.
- Attach the top 4’ piece in the same manner.
- Now is a good time to stain or paint your desired color.
6. Step 6: Attach the Legs
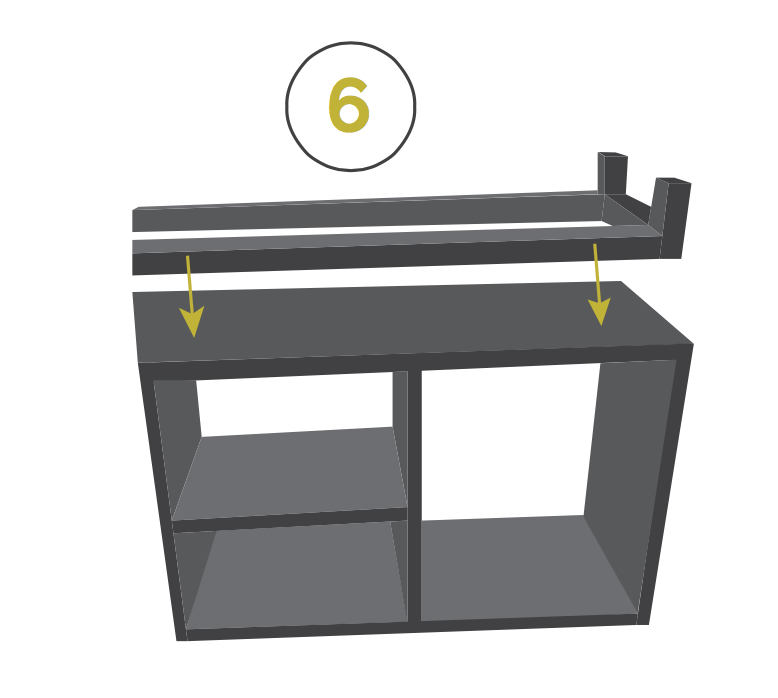
Decide which end you will want as the top of your bench, then attach the legs to the opposite end using 1” pocket screws. For more pictures and detailed tutorial, see the link under the "Extras" tab. Enjoy!