 Notch
- Difficulty
- Intermediate
- Time
- 3.5–6.5 hours
- Cost
- $$
About this build
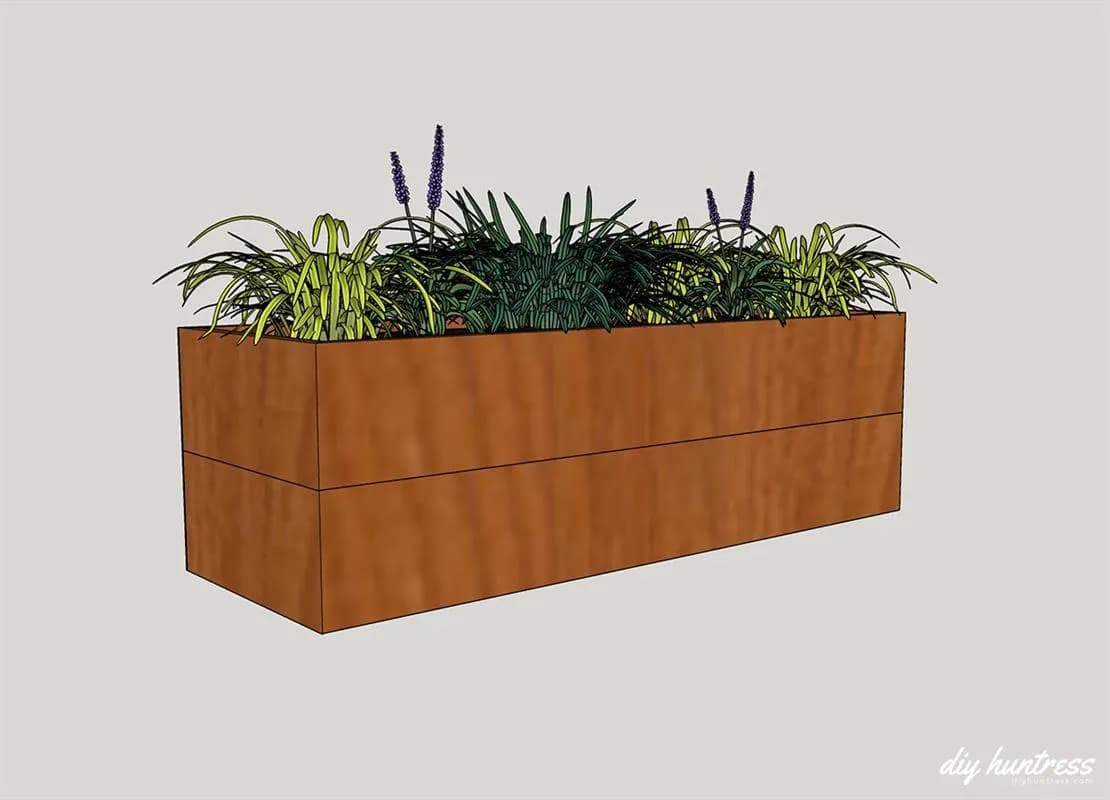
Building a spot for your very own Garden of Eden shouldn't feel like a hard task. Learn how to build this easy Modern Cedar Planter in just a few steps!
Tools
Essential
- Brad Nailer
- Drill / Driver
- Miter Saw
- Pocket Hole Jig
- Random Orbit Sander
- Table Saw
Materials
| Item | Qty |
|---|---|
| Board, 1x6 96" | 4 board |
| Board, 1" Square Dowel 36" | 1 board |
| 1 1/4" Brad Nails | 20 each |
| 1 1/4" Pocket Hole Screws | 50 each |
| Can Waterproofing/Outdoor Wood Sealer | 1 each |
| Sandpaper | 1 each |
Overall cost: $$. Lumber prices vary by region, species, and season, so we give a band rather than a figure we would only be pretending to know.
Cut list
| Part | Qty | T × W × L |
|---|---|---|
| Long Sides | 4 | 3/4" × 5" × 36" |
| Short Sides | 4 | 3/4" × 5" × 12" |
| Bottom Panels | 2 | 3/4" × 5" × 34" |
| Corner Supports | 4 | 3/4" × 3/4" × 8" |
What to buy
Buy 4 boards at 8 ft.
3/4" × 5"
3 boards
3/4" × 3/4"
1 board
Assumes 8 ft stock, a 1/8" saw kerf, and buying each part at its own width. Change the board size or kerf on the full board plan →
Instructions
1Check the Dimensions
Make sure to check the dimensions and make any necessary adjustments before starting.
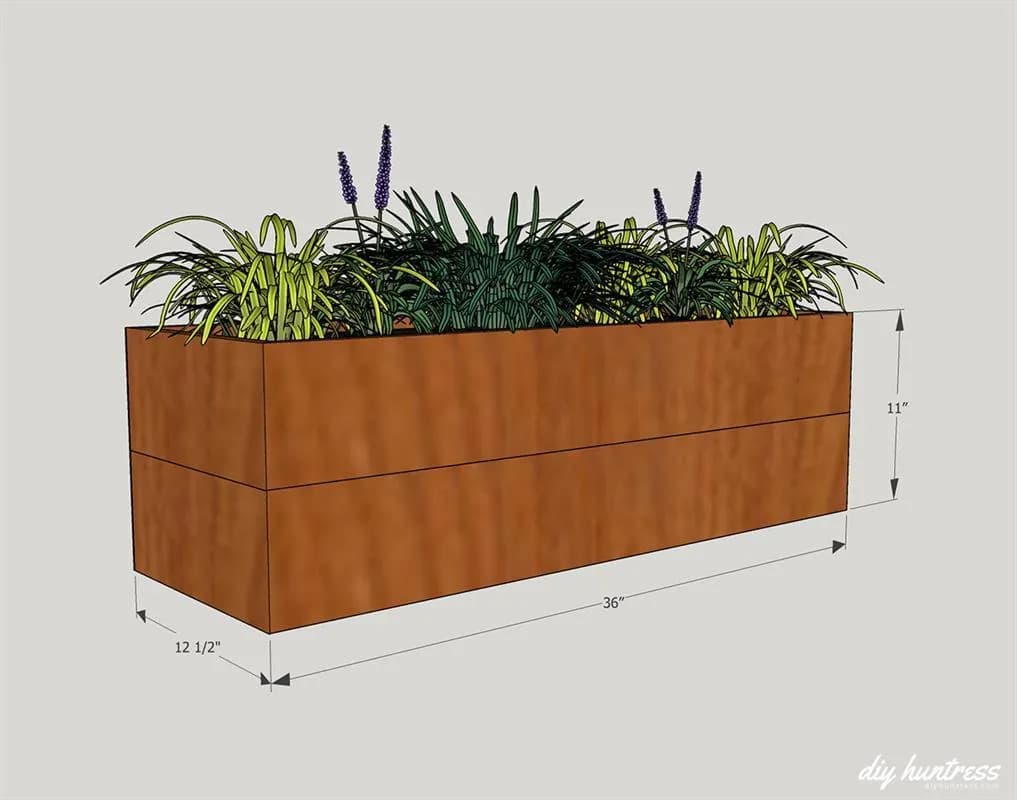
2Cut Your Pieces
All of the pieces used for the sides of this planter have 45 degree beveled ends. Make sure to double check the dimensions required prior to cutting your ends.
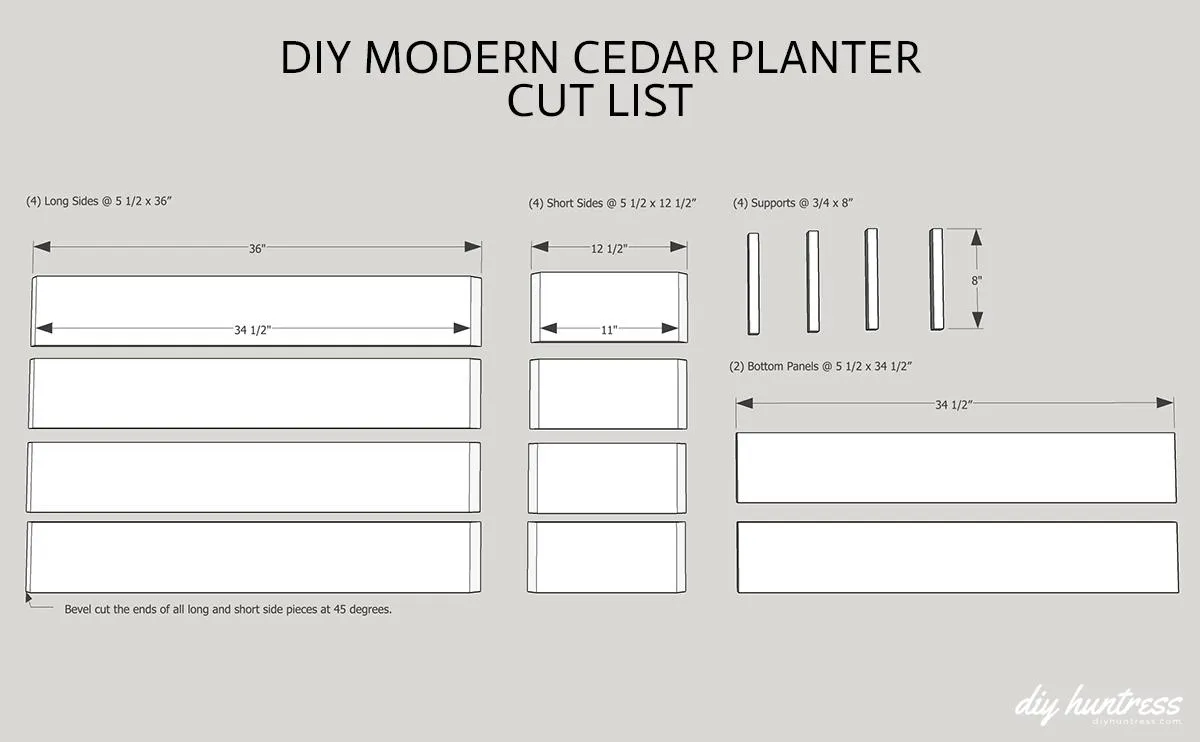
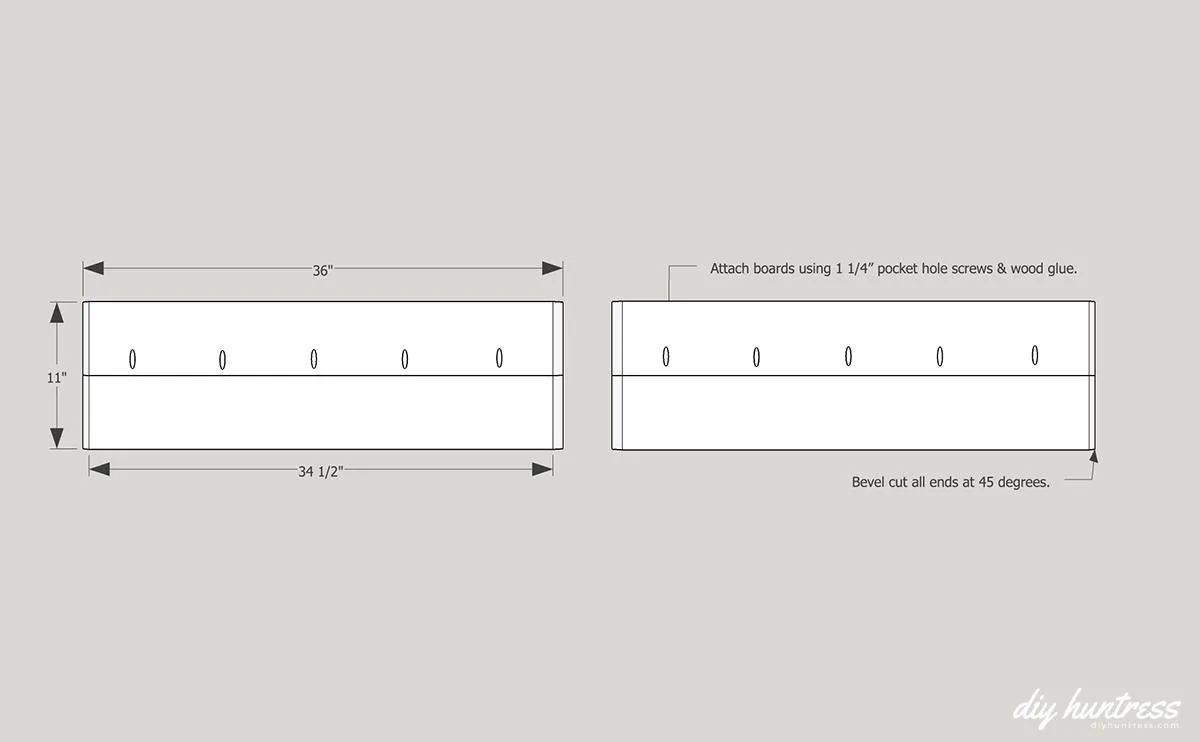
3Attach the Long Side Pieces
Attach the large side pieces in sets of two with wood glue, pocket holes, and screws.
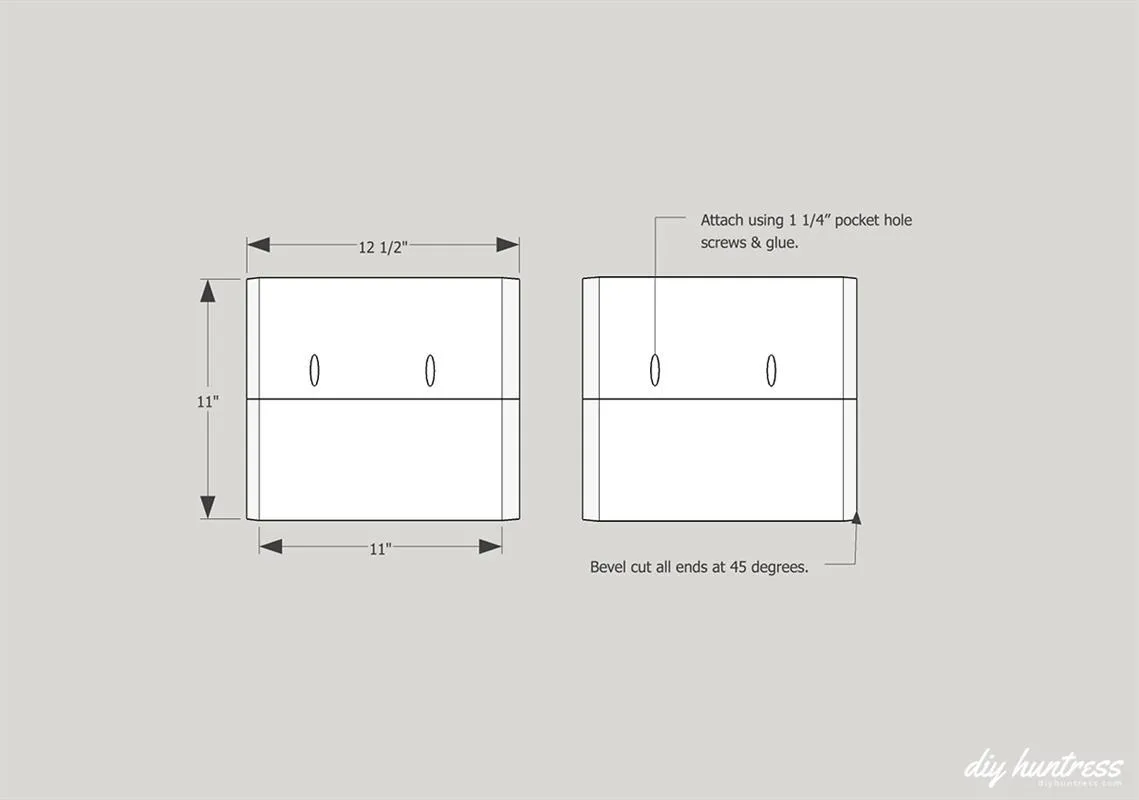
4Attach the Short Side Pieces
Attach the short sides the same way.
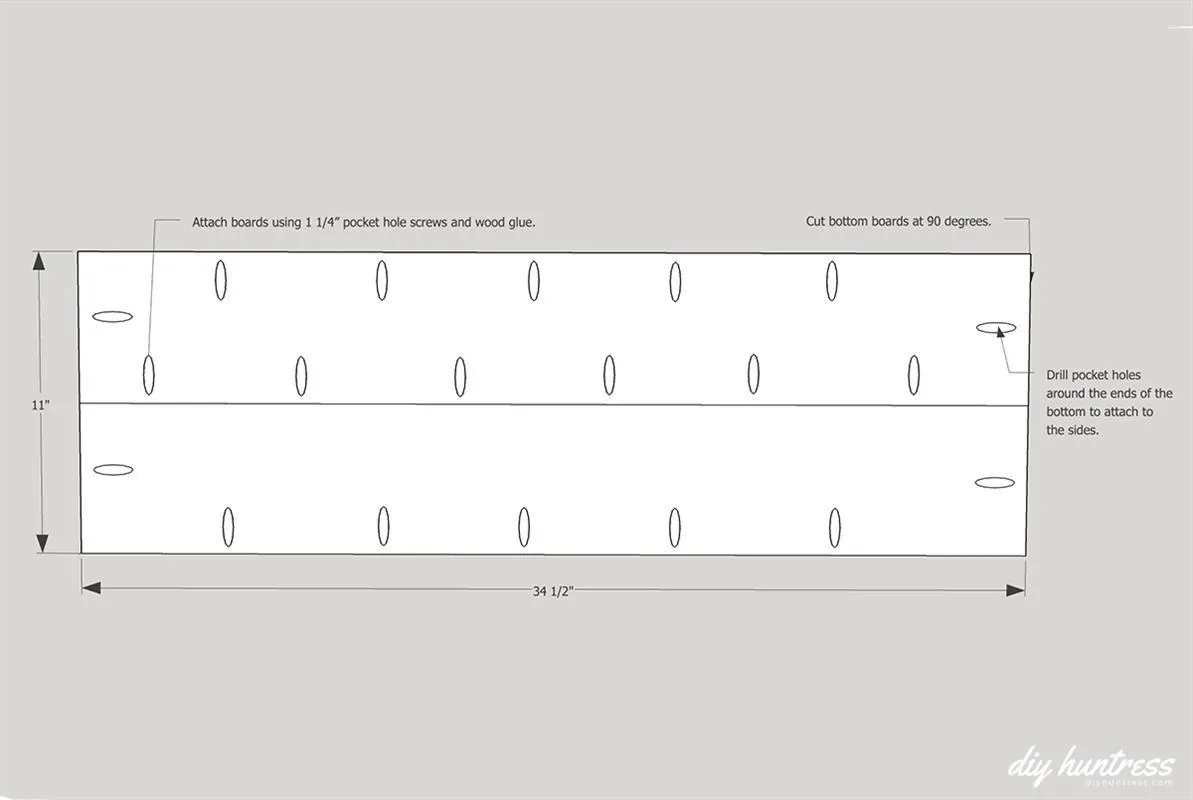
5Build Bottom Piece
Build the bottom piece with pocket holes and wood glue. Make sure there are pocket holes along the outside of the piece for attaching to the sides.
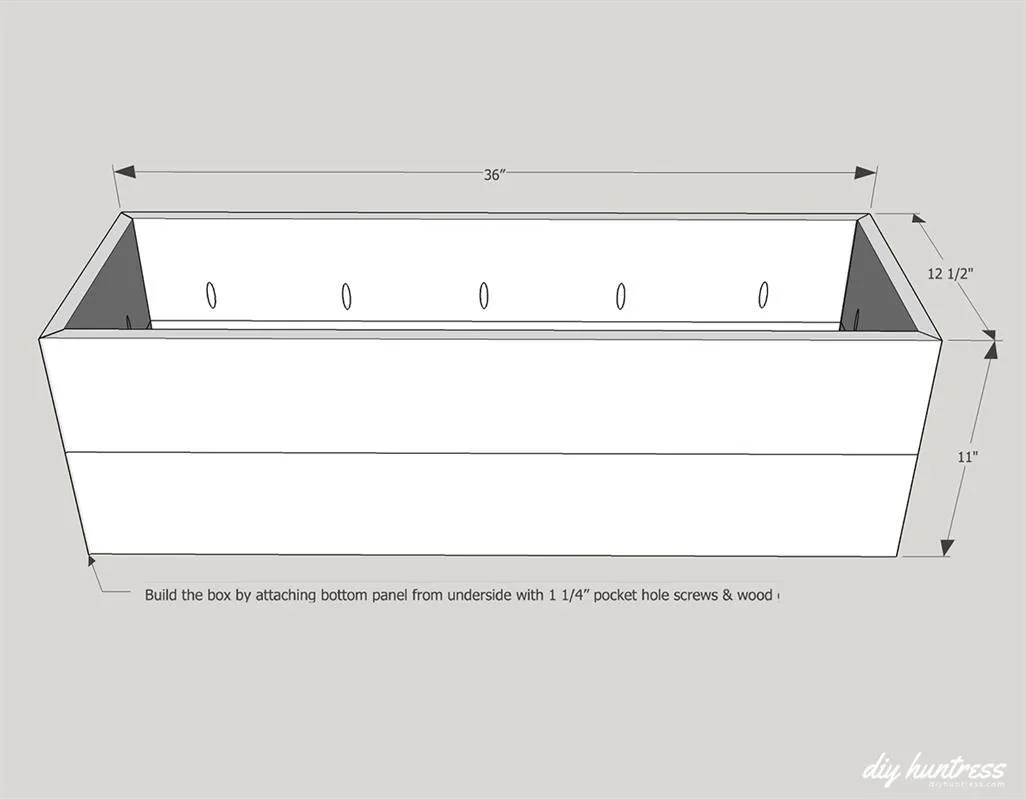
6Attach Bottom Piece
Attach the bottom piece to all four sides with wood glue and pocket hole screws. You may want to drill small holes in the bottom for drainage.
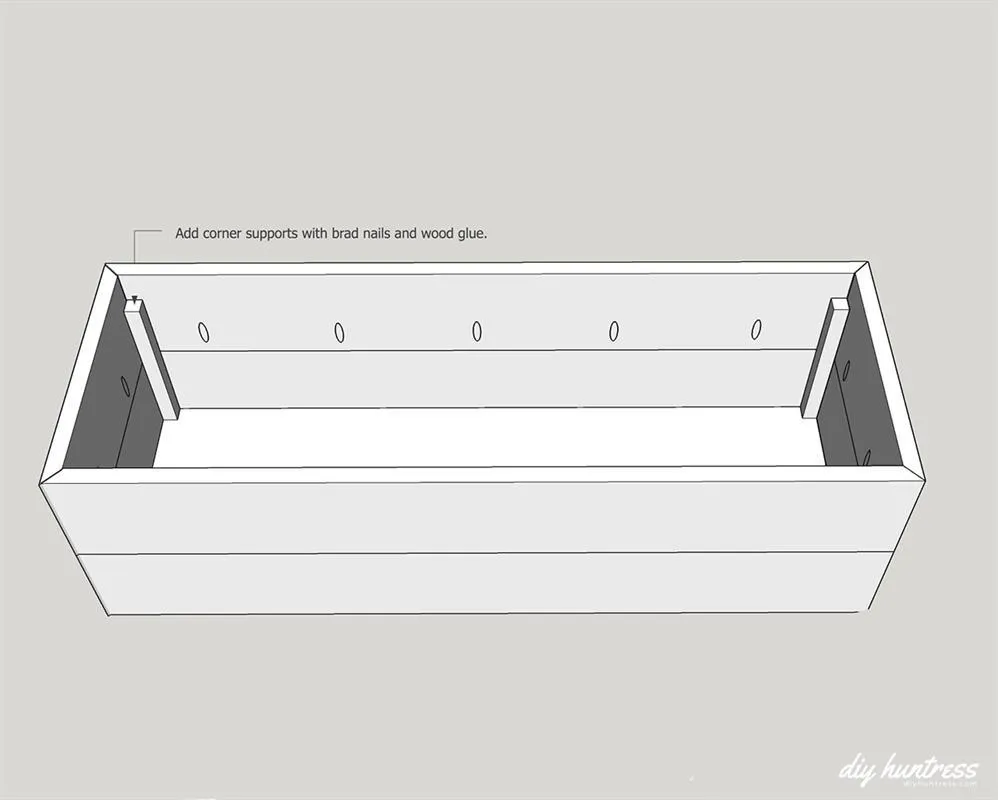
7Add Corner Supports
- Add the four small corner supports to the inside corners.
- Attach them from the outside of the planter by shooting 1" brad nails into each support. This will help keep the beveled corners tight.
- Add wood glue for extra strength.
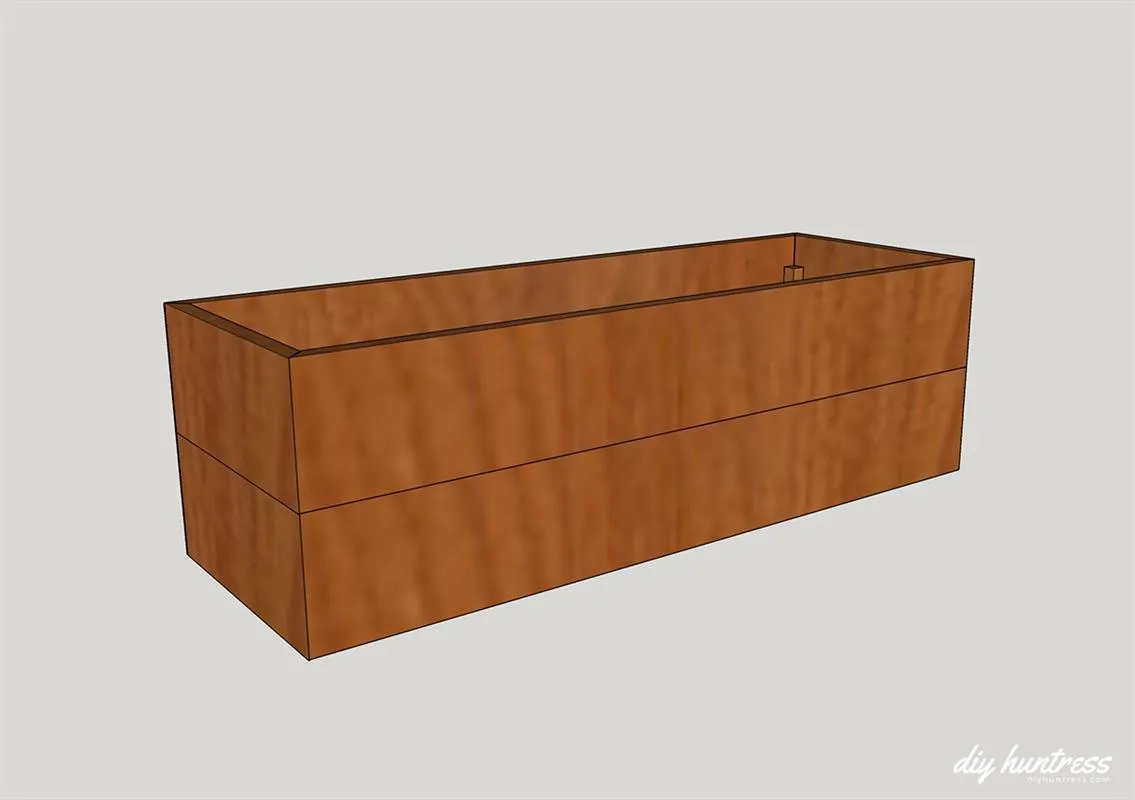
8Sand & Seal
Fill your pocket holes, nail holes, and corners (if there are gaps). Then sand & seal your planter!
9Do Some Planting
Make sure to add some plants to your awesome new build!
Tags
- Mother's Day Gifts
- Intermediate
Reviews & builds
No reviews yet
Sign in to review this plan or share your build.
No reviews yet. Be the first to build this.