Notch
NotchUse your browser's Print (Ctrl/Cmd + P) and choose Save as PDF. This page works offline once you've opened it with a signal.
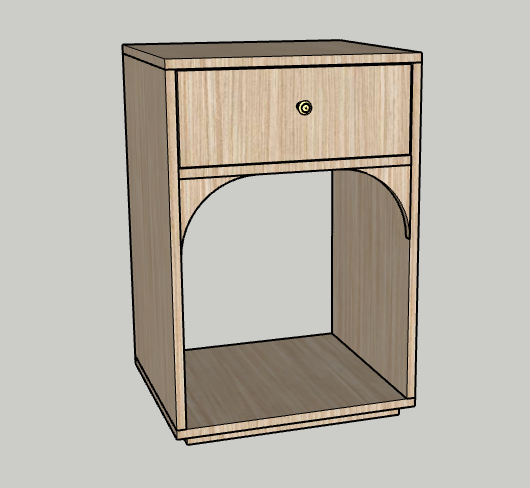
DIY Modern Bedside Table With Arches
Looking to add something new and modern to your bedroom?
- Difficulty
- Intermediate
- Time
- 3.3–6.3 hours
- Cost
- $$
Cut list
| Part | Qty | T × W × L | Material | ✓ |
|---|---|---|---|---|
| Top/Bottom | 2 | 3/4" × 18" × 20" | — | ☐ |
| Sides | 2 | 3/4" × 18" × 27" | — | ☐ |
| Front/Back Toe Kick | 2 | 3/4" × 1" × 18" | — | ☐ |
| Side Toe Kicks | 2 | 3/4" × 1" × 14" | — | ☐ |
| Under Drawer Support | 1 | 3/4" × 6" × 18" | — | ☐ |
| Arches | 2 | 3/4" × 6" × 6" | — | ☐ |
| Drawer Face | 1 | 3/4" × 7" × 18" | — | ☐ |
| Drawer Sides | 2 | 1/2" × 5" × 16" | — | ☐ |
| Drawer Back | 1 | 1/2" × 5" × 16" | — | ☐ |
| Drawer Bottom | 1 | 1/2" × 15" × 16" | — | ☐ |
Materials
| Item | Qty | ✓ |
|---|---|---|
| Plywood sheet, 4' x 8' x 3/4 | 1 board | ☐ |
| Plywood sheet, 4' x 4' x 1/2" | 1 board | ☐ |
| Drawer pull of choice | 1 each | ☐ |
| 3/4" edge banding | 1 each | ☐ |
| Wood glue | 1 each | ☐ |
| Box of 1 1/4" pocket hole screws (See tools list) | 1 each | ☐ |
| Box of 1" pocket hole screws (See tools list) | 1 each | ☐ |
| Pairs of 16" drawer slides | 2 each | ☐ |
Overall cost: $$. Lumber varies by region, species, and season, so we give a band rather than a figure.
Tools
- Drill / Driver
- Jigsaw
- Miter Saw
- Random Orbit Sander
- Table Saw
- Tape Measure — optional
Instructions
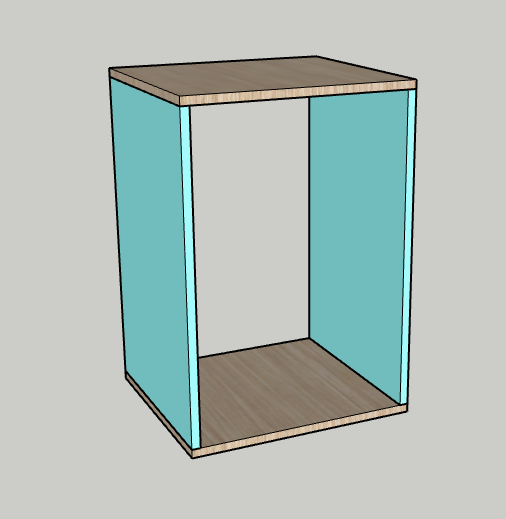
1. Build Box
Drill three pocket holes on the 18" ends of both Sides Using wood glue and pocket hole screws, attach the Sides to the top side of the Bottom, flush on the outside edges. Using wood glue and pocket hole screws, attach the Sides to the Top in the same manner.
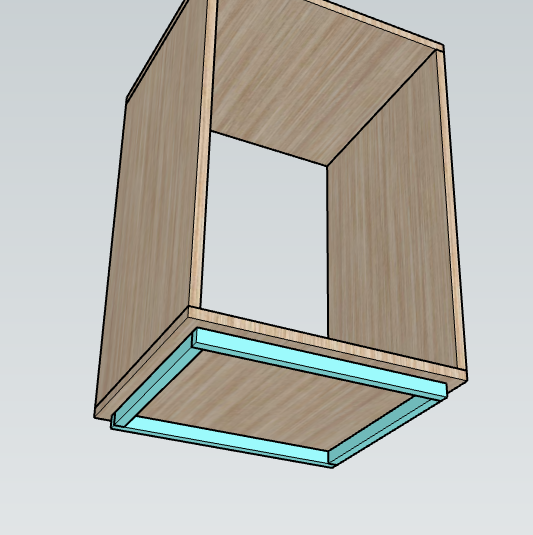
2. Attach toe kicks
Using wood glue and clamps, attach the two Side Toe Kicks to the inside edge of the Front and Back Toe Kicks. When dry, use wood glue and clamps to attach the Toe Kicks to the underside of the Bottom, centered on all sides.
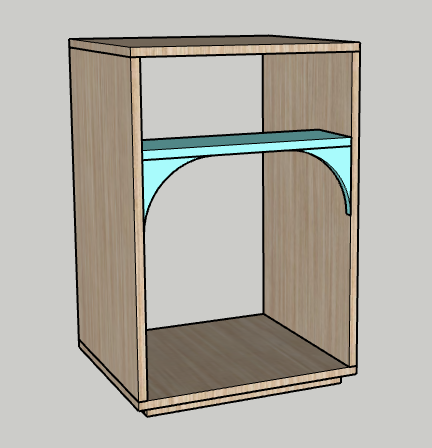
3. Attach arches
- Drill two pocket holes in each 6" side of the Under Drawer Support. Using wood glue and pocket hole screws, attach the Under Drawer Support to the Sides 7 1/4" down from the Top. On each of your Arches, draw a curve from one corner to its opposing corner with as much arch as you like.
- Cut this out with a jig saw, scroll saw or whatever you are comfortable with.
- Apply wood glue to the two straight sides of the Arches and clamp them into place in the corner between the Under Drawer Support and Sides. When this step is complete, consider adding iron-on edge banding to all plywood edges for a cleaner look.
4. Build drawer
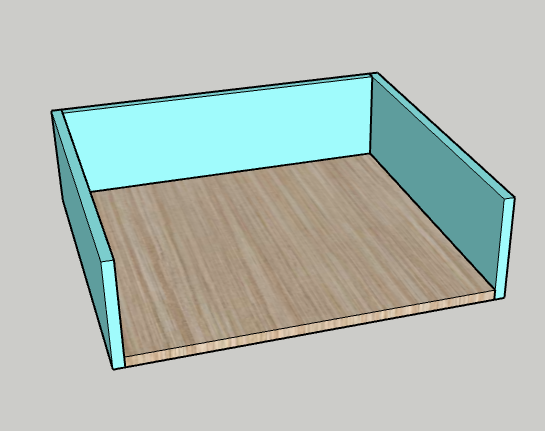
- Drill two pocket hole screws in each end of the Drawer Back, one end of each Drawer Side, and on three sides of the Drawer Bottom. Using wood glue and pocket hole screws, attach the Drawer Back between the ends of the Drawer Sides that don't have pocket holes.
- Set the Drawer Bottom in between this box and attach it to all three sides with pocket hole screws.
- Finally, use pocket hole screws to attach the Drawer Face to the rest of the drawer box, with the bottoms flush and the Face centered. After the drawer is finished, now would be a good time to stain or paint your entire project.
5. Insert drawer
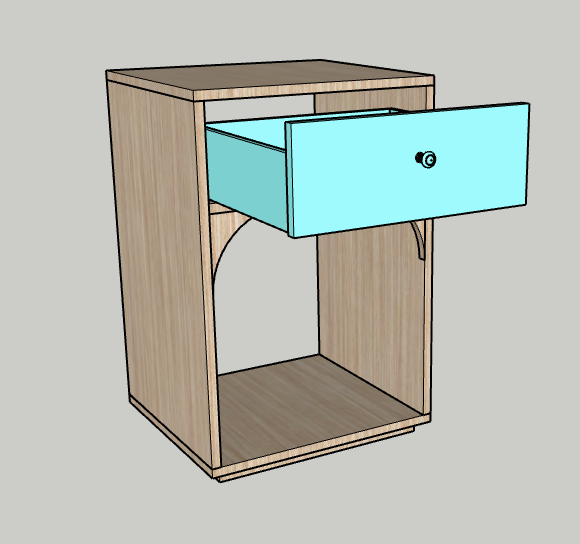
- Attach drawer slides to the inside of the Sides and the outside of the Drawer Sides as per manufacturer's instructions.
- Attach a knob or pull to the outside of the Drawer Face.
- Insert the drawer into the table.
6. Style
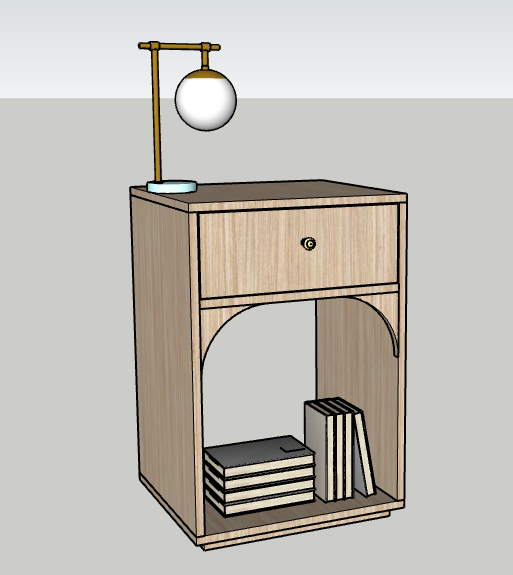
Add a reading lamp, books, decor or whatever accessories you'd like to your new bedside table.
7. Enjoy!
Enjoy your handiwork and tag @CharlestonCrafted on Instagram with a picture!