Notch
NotchUse your browser's Print (Ctrl/Cmd + P) and choose Save as PDF. This page works offline once you've opened it with a signal.
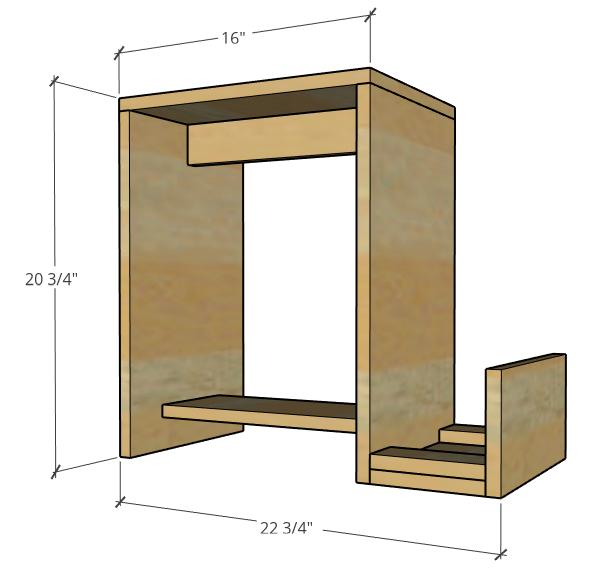
DIY Guitar Stand Stool
Don't just build a guitar stand.
- Difficulty
- Easy
- Time
- 2.3–4.5 hours
- Cost
- $$
Cut list
| Part | Qty | T × W × L | Material | ✓ |
|---|---|---|---|---|
| Stool Sides | 2 | 3/4" × 12" × 20" | — | ☐ |
| Top | 1 | 3/4" × 12" × 16" | — | ☐ |
| Seat Support | 1 | 3/4" × 2" × 14" | — | ☐ |
| Shelf | 1 | 3/4" × 6" × 14" | — | ☐ |
| Guitar Stand Pieces | 2 | 3/4" × 6" × 12" | — | ☐ |
| Scrap Blocks | 2 | 3/4" × 2" × 6" | — | ☐ |
Materials
| Item | Qty | ✓ |
|---|---|---|
| Plywood, 3/4" Thick Quarter Sheet | 1 board | ☐ |
| 1 1/4" pocket hole screws | 16 each | ☐ |
| 1 1/4" wood screws | 4 each | ☐ |
Overall cost: $$. Lumber varies by region, species, and season, so we give a band rather than a figure.
Tools
- Circular Saw
- Drill / Driver
- Miter Saw
- Pocket Hole Jig
- Tape Measure — optional
Instructions
1. Cut Plywood Pieces
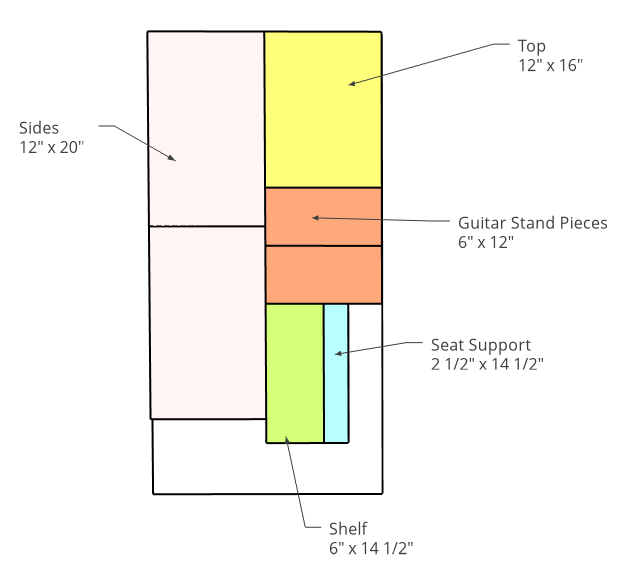
Cut plywood pieces according to the cut list. Feel free to use scraps for this project. However, if you don't have scraps, you can build this from a quarter sheet of plywood by cutting like the diagram shown here. I recommend using a circular saw and saw guide (like the Kreg Accu-Cut) or a table saw.
2. Assemble Stool Body
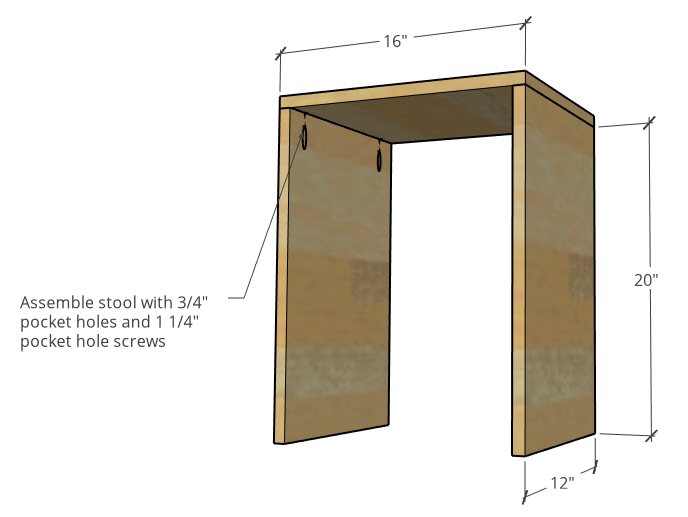
Drill 3/4" pocket holes along the top edge of the stool sides and attach to the stool top piece using 1 1/4" pocket hole screws like shown.
3. Add Seat Support and Shelf
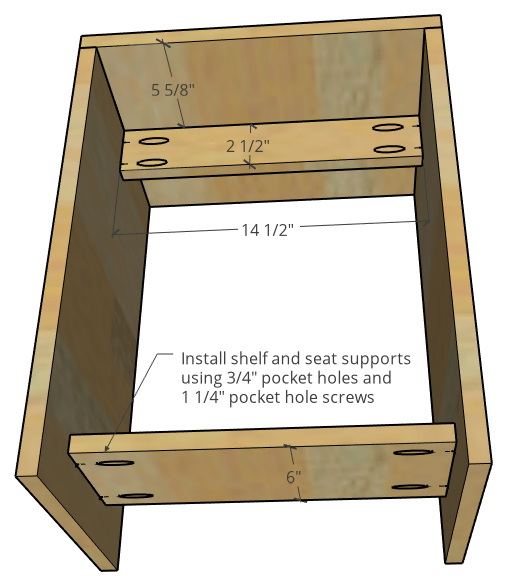
Install seat support and shelf like shown using 3/4" pocket holes and 1 1/4" pocket hole screws. You can place the shelf as high or as low as you wish. I placed mine 2" from the bottom and centered it front to back.
4. Add Guitar Stand to Stool
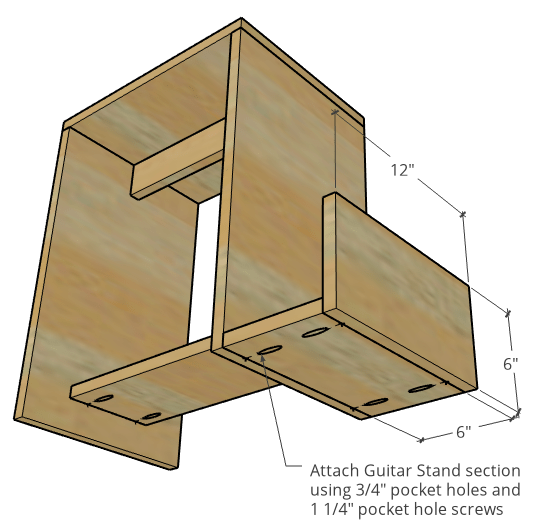
Attach the guitar stand section to the stool like shown using 3/4" pocket holes and 1 1/4" pocket hole screws.
5. Add Blocks to Prevent Rolling
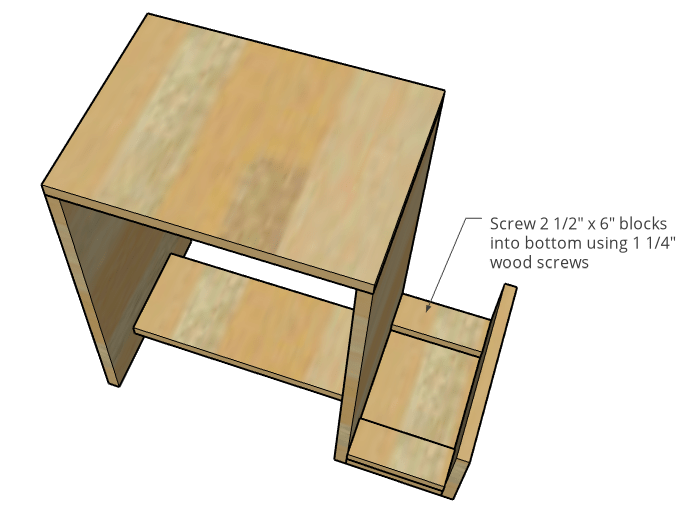
- Cut two pieces of scrap plywood and attach into the front and back edges of the guitar stand bottom like shown using 1 1/4" wood screws. This is to prevent the guitar from rocking front to back when placed in the stand. I cut my pieces 2 1/2" wide and 6" long, but you can play with the sizes to suit your own needs with your own guitar.
- Add felt or padding to these pieces if desired to prevent any scratches to your guitar.
6. Finish
Finish as desired and start playing! Head to the extras tab to watch the video tutorial before beginning.