 Notch
- Difficulty
- Easy
- Time
- 1.8–3.3 hours
- Cost
- $$
About this build
Keep the air clean in your workspace and keep dust out of the air you breathe by building a simple air filter. All you need is an inexpensive box fan, a furnace filter, and a couple boards. Even with casters to make it mobile, you can put one together for about $50.
Tools
Essential
- Drill / Driver
- Hammer
- Miter Saw
- Pocket Hole Jig
- Random Orbit Sander
Optional / nice to have
- Bar / Pipe Clamps
- Tape Measure
Materials
| Item | Qty |
|---|---|
| Pine board, 1x8 x 96" | 1 board |
| Pine board, 1x2 x 96" | 1 board |
| Screen molding, 1/4" x 3/4" x 24" | 1 board |
| 1 1/4" coarse-thread Kreg Pocket-Hole Screws | 28 each |
| 3/4" brad nails | 3 each |
| 20" box fan | 1 each |
| 1 5/8" swivel casters | 4 each |
| #8 x 3/4" wood screws (for casters) | 16 each |
Overall cost: $$. Lumber prices vary by region, species, and season, so we give a band rather than a figure we would only be pretending to know.
Cut list
| Part | Qty | T × W × L |
|---|---|---|
| Base | 1 | 3/4" × 7" × 22" |
| Sides | 2 | 3/4" × 7" × 20" |
| Cleat 1 | 2 | 3/4" × 1" × 20" |
| Cleat 2 | 2 | 3/4" × 1" × 20" |
What to buy
Buy 2 boards at 8 ft.
3/4" × 7"
1 board
3/4" × 1"
1 board
Assumes 8 ft stock, a 1/8" saw kerf, and buying each part at its own width. Change the board size or kerf on the full board plan →
Instructions
1Make the Base and Sides
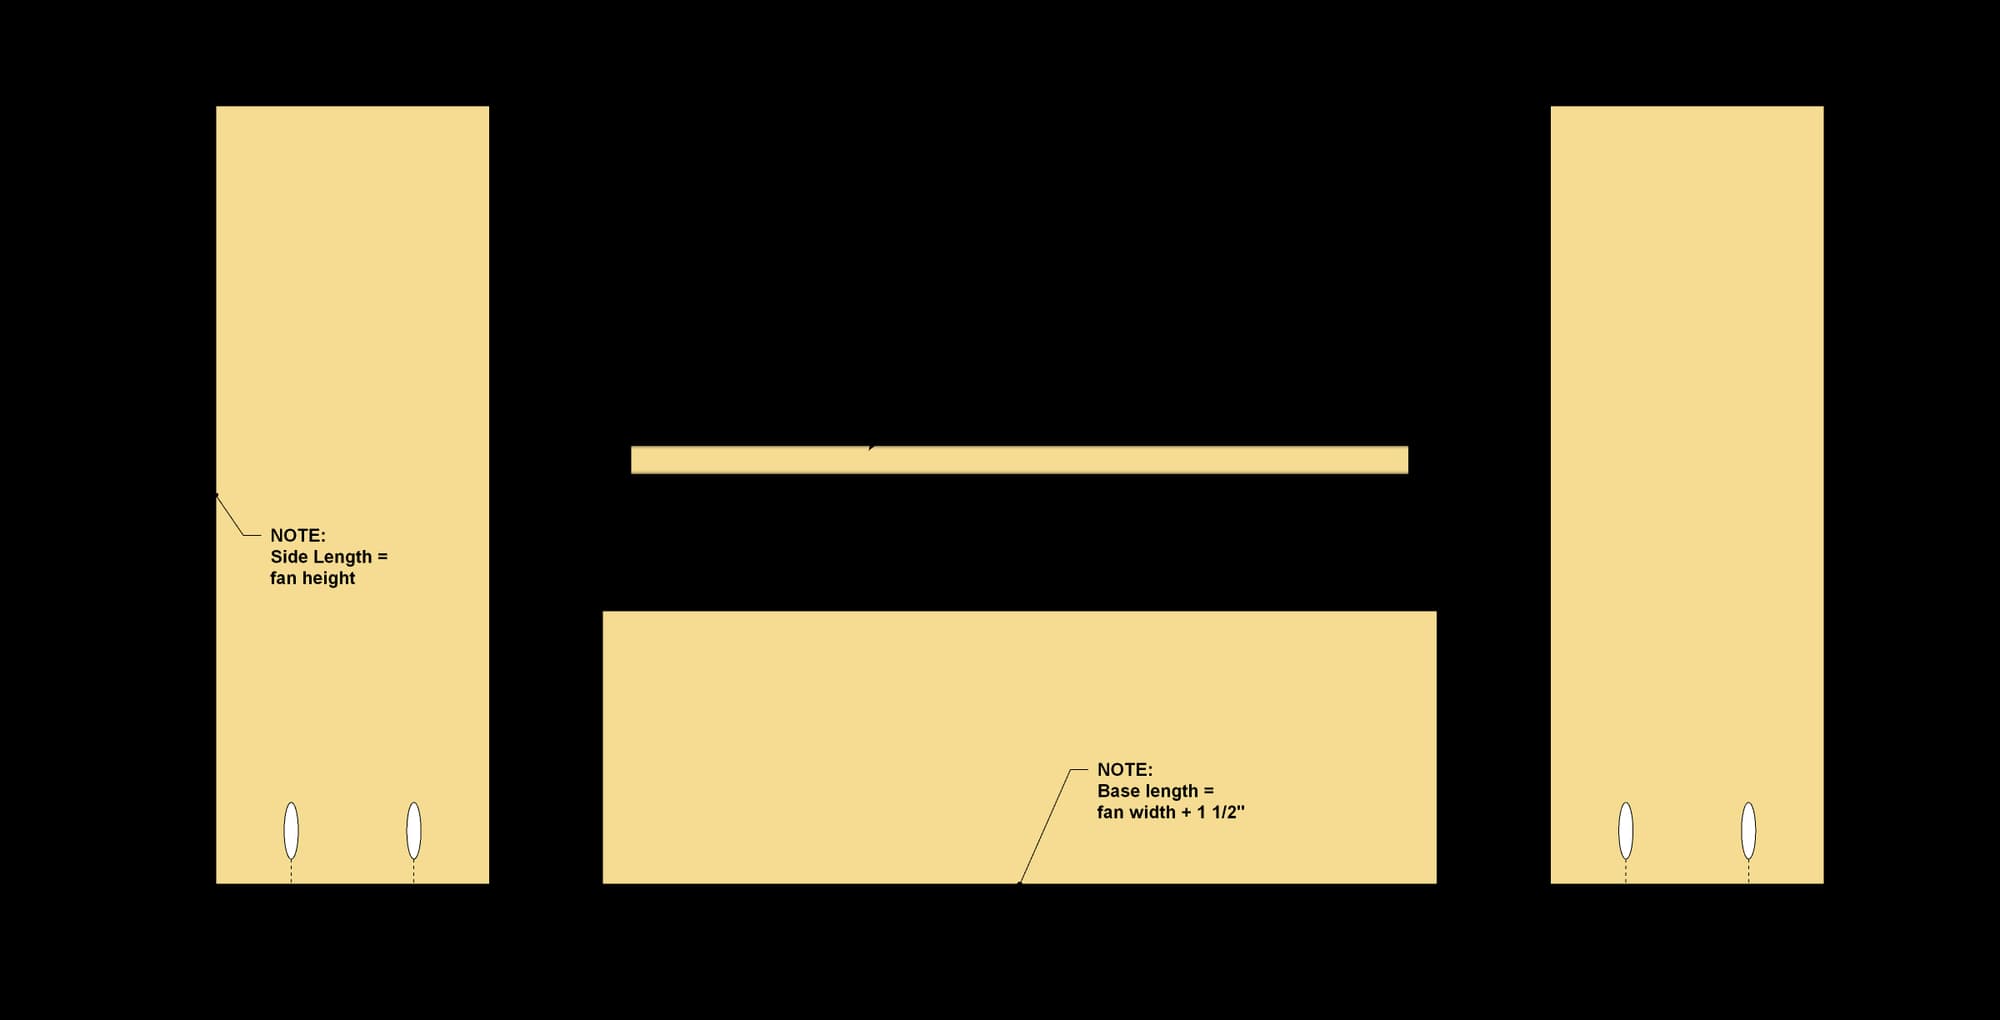
- Using a circular saw and a square -cutting guide, or using a miter saw, cut one Base and two Sides to length from a 1x8 board, as shown in the cutting diagram. Note that the dimensions given here match the box fan we used. You’ll want to measure your fan, and adjust the dimensions to fit, as shown. With the pieces cut to size, you can drill pocket holes in the Sides.
- Set your Kreg Pocket-Hole Jig for 3/4" thickness, and then drill a pair of pocket holes in one end of each Side.
- Then sand the Base and Sides smooth.
2Make the Cleats
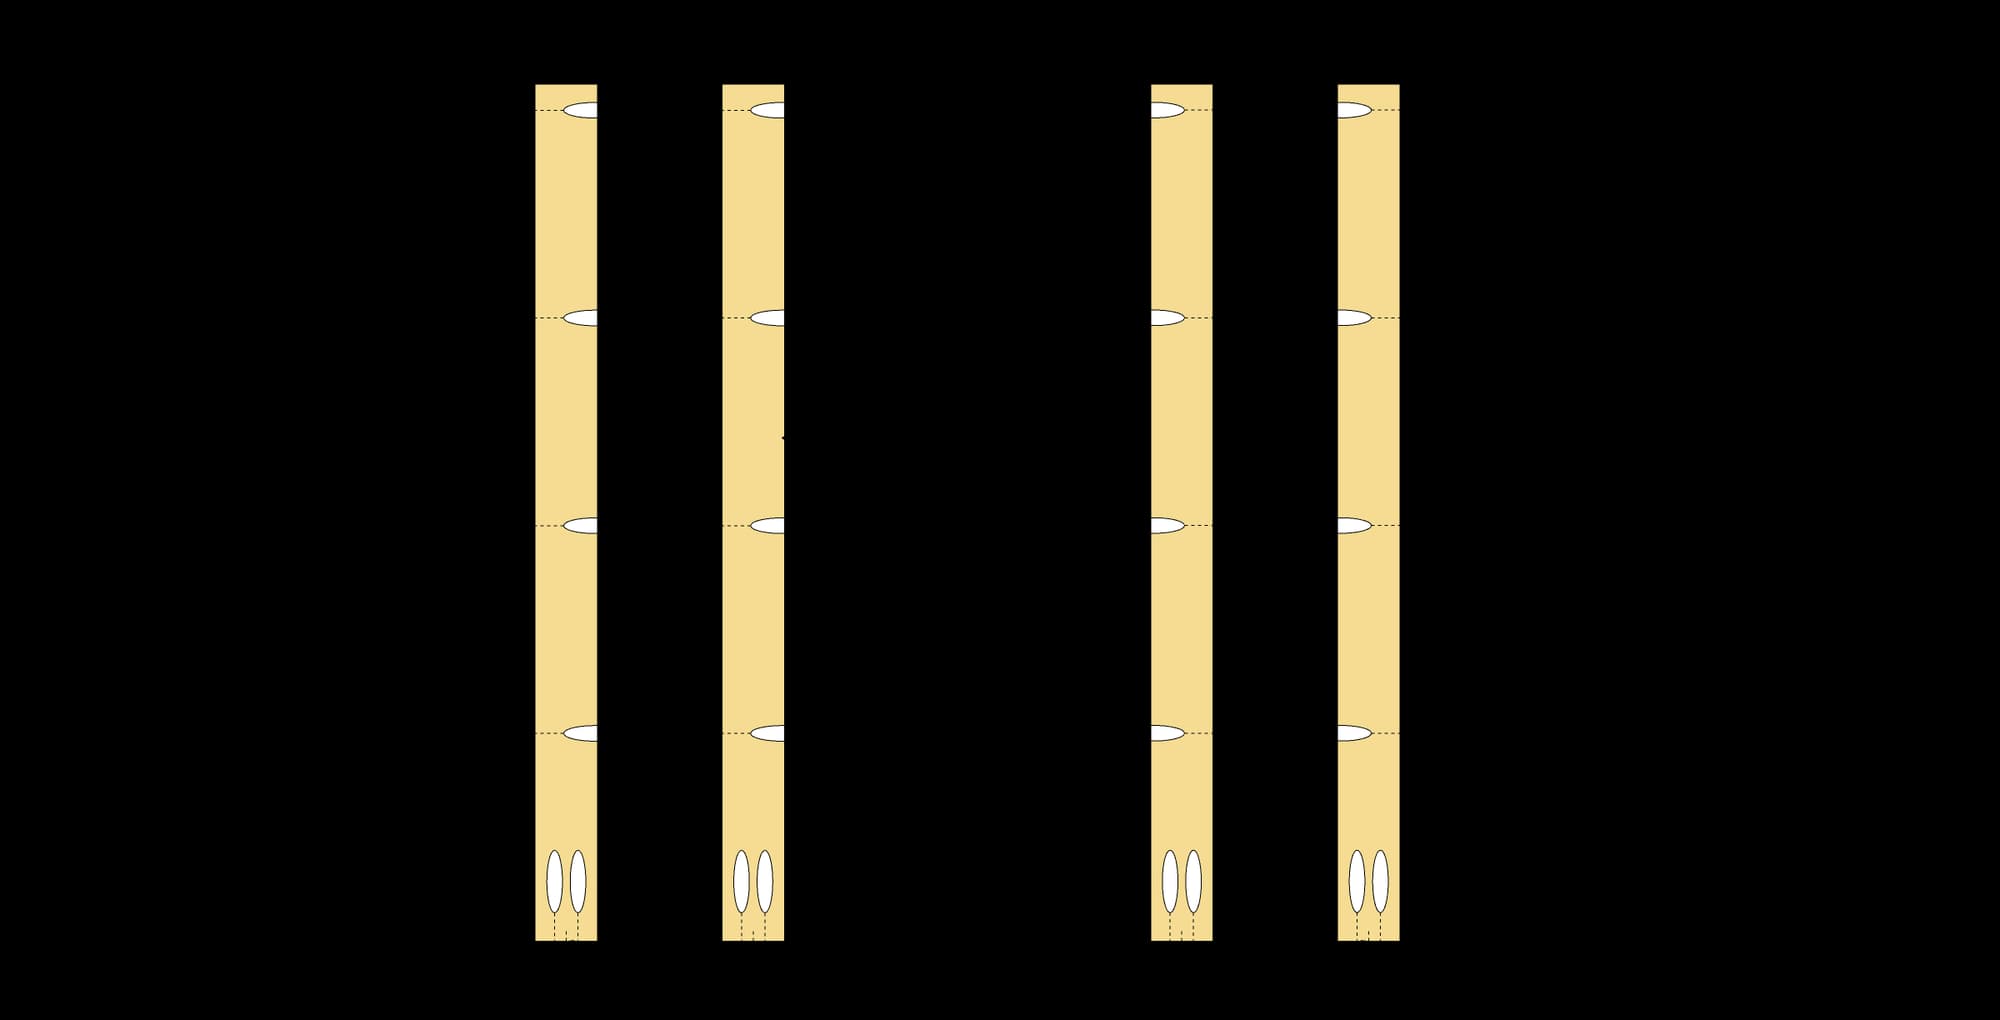
- Now you can cut the Cleats from a 1x2 board, as shown in the cutting diagram. They’re the same length as the Sides.
- Next, drill pocket holes. Note that you’ll make two pairs. All four have pocket holes at one end. The difference is in the placement of the pocket holes on the edges. The reason for doing this is so that, when you attach the Cleats to the Sides in the next step, the pocket holes will all face inward and not be visible on the final project.
3Attach the Cleats to the Sides
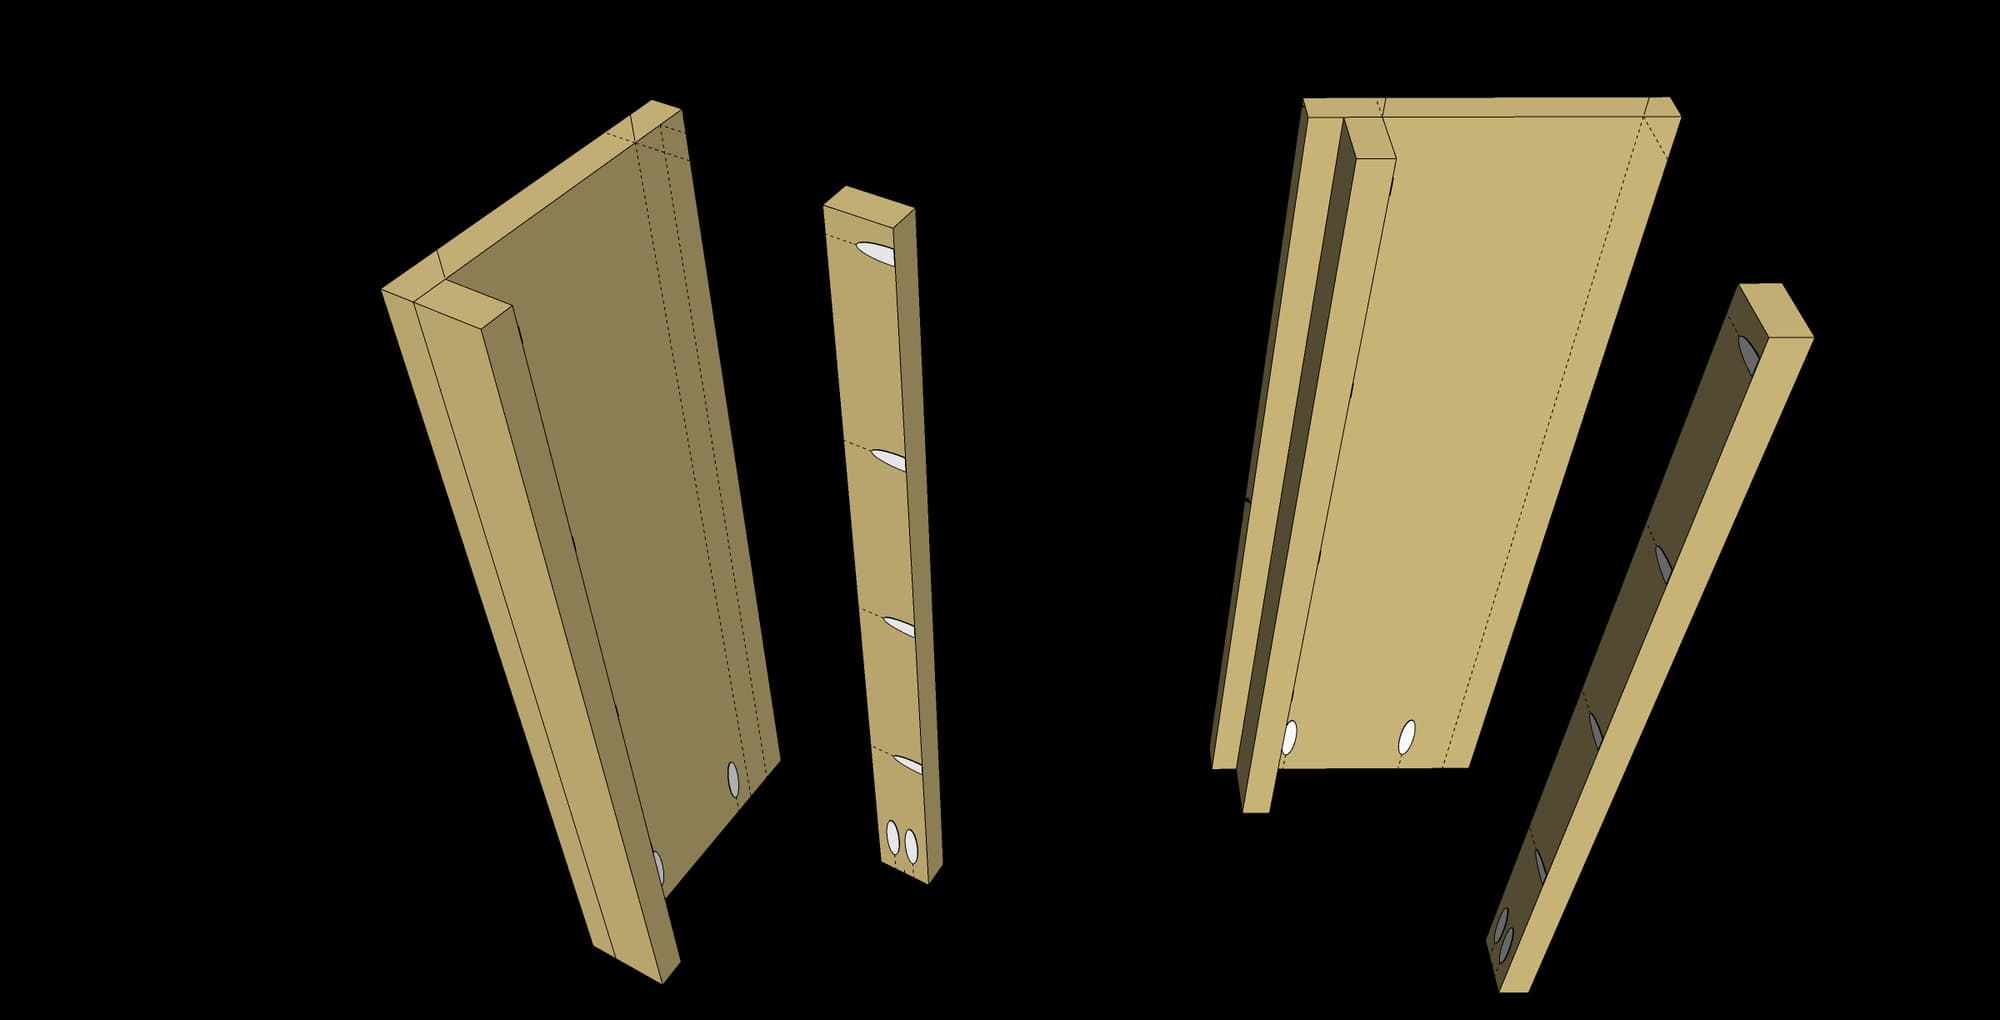
- Now you can attach the Cleats to the Sides using 11/4" coarse-thread pocket-hole screws.
- First, one of each type of Cleat flush with the forward edge of the Side. Make sure the pocket holes are oriented as shown. To attach the other pair of cleats, first position the fan and filter, as shown in the photo.
- Then attach these cleats at this position. Again, be sure the pocket holes are all oriented correctly.
4Complete the Assembly
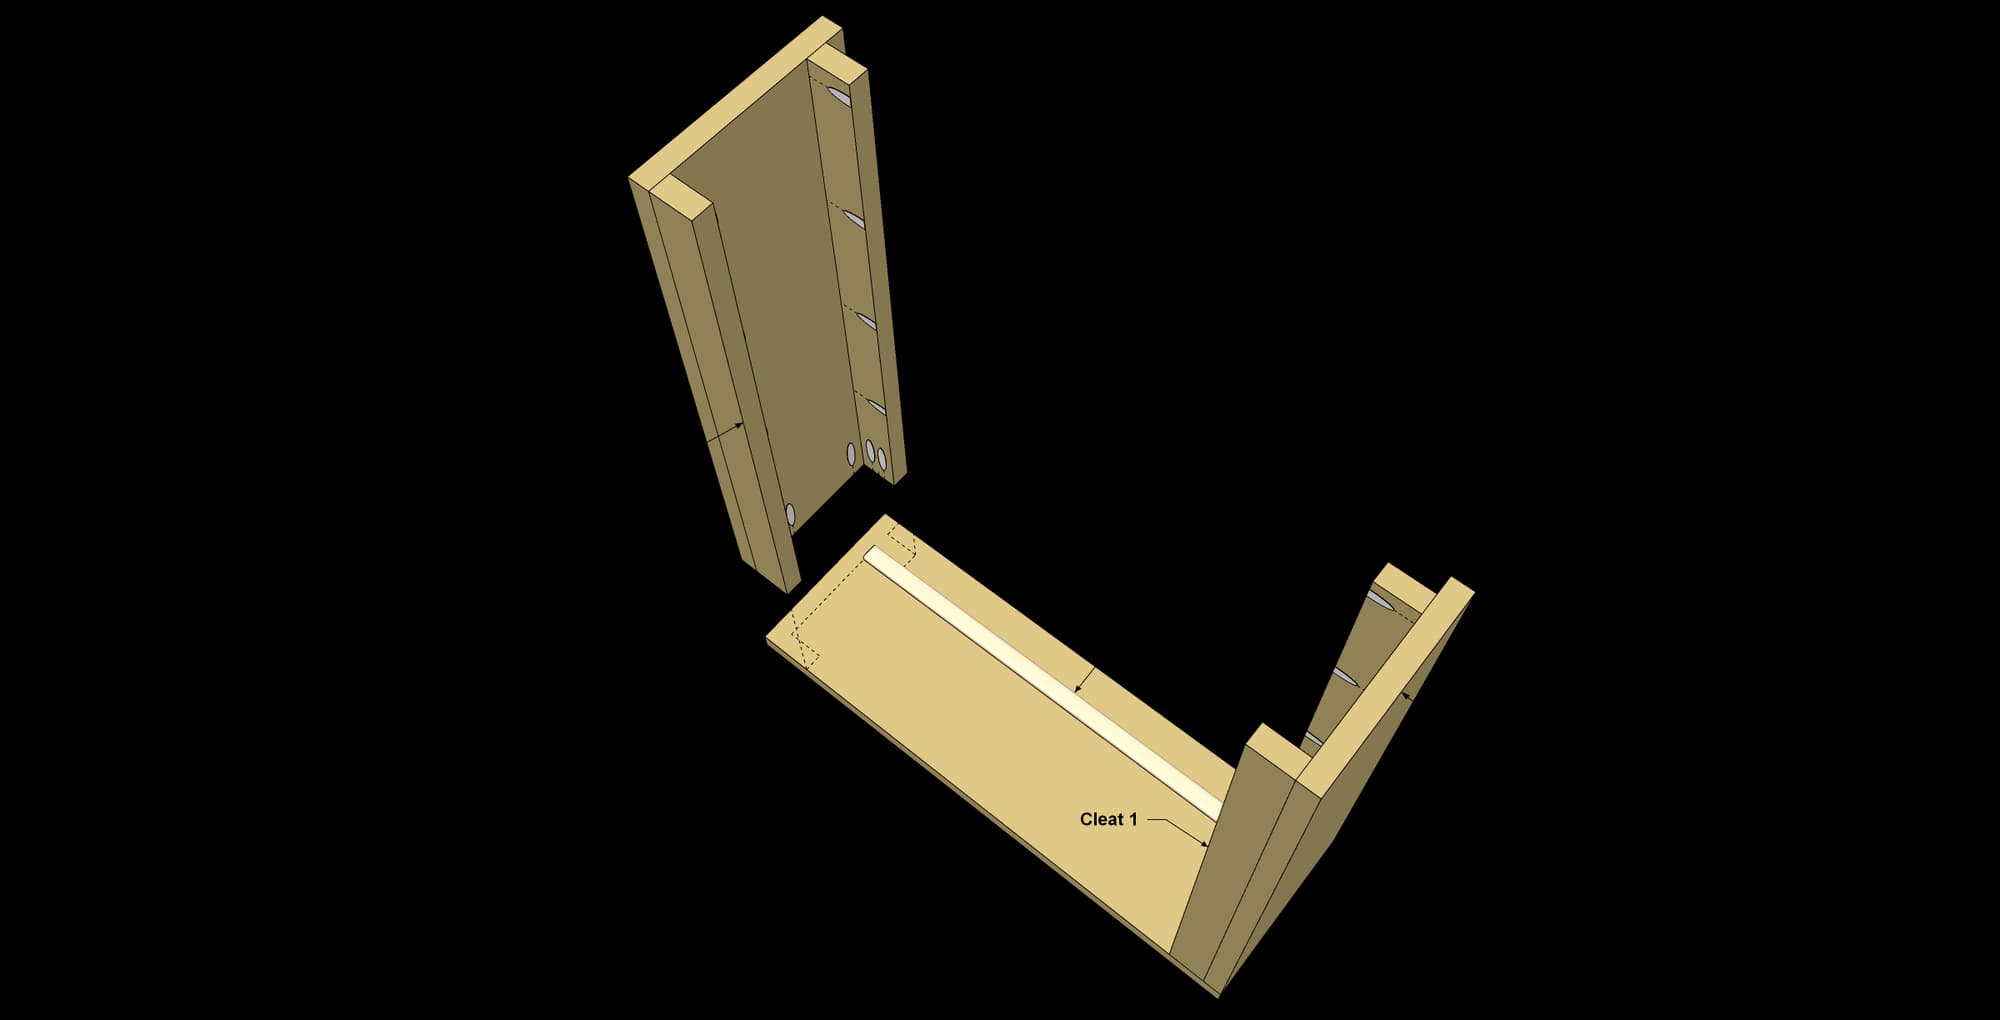
Attaching the Side assemblies to the Base is just a matter of positioning them as shown, and then driving in 11/4" coarse-thread pocket-hole screws. Some of the hole positions are a bit tight to reach with the driver bit, but the square drive on Kreg Pocket-Hole Screws allows a bit of leeway in the driver-bit angle, so you’ll have no problems. In our case, the filter was slightly smaller than the fan, so we nailed a small strip of leftover screen molding in place to push the filter up a quarter inch. To wrap it all up, mount the casters, slide the fan and filter in place, and you’re ready to start working in cleaner air.
Tags
- Dust Collection
- Beginner
Reviews & builds
No reviews yet
Sign in to review this plan or share your build.
No reviews yet. Be the first to build this.