Notch
NotchUse your browser's Print (Ctrl/Cmd + P) and choose Save as PDF. This page works offline once you've opened it with a signal.
Desktop Candy Dispenser
Make your childhood dreams come true by creating a simple and elegant desktop candy-dispensing machine.
- Difficulty
- Intermediate
- Time
- 4.8–9 hours
- Cost
- $$
Cut list
| Part | Qty | T × W × L | Material | ✓ |
|---|---|---|---|---|
| Back board | 1 | 3/4" × 5 1/2" × 12" | — | ☐ |
| Sides - cut into 2 shapes | 1 | 3/4" × 5 1/2" × 12" | — | ☐ |
| Lid | 1 | 3/4" × 1 1/2" × 5 1/2" | — | ☐ |
| Bottom | 1 | 3/4" × 2 1/2" × 5 1/2" | — | ☐ |
Materials
| Item | Qty | ✓ |
|---|---|---|
| Board, 1x6 24" | 1 board | ☐ |
| Board, 1x2 6" | 1 board | ☐ |
| Board, 1x3 6" | 1 board | ☐ |
| 11" x 14" x 1/6" acrylic sheet | 1 each | ☐ |
| 3/4" brass hinges | 2 each | ☐ |
| 1/2", #4 brass screws | 10 each | ☐ |
| 3/8" x 1" brass rod or knob | 1 each | ☐ |
| Wood glue | 1 each | ☐ |
| Food safe finish | 1 each | ☐ |
| 1-3/8" forstner drill bit | 1 each | ☐ |
| 1/16" drill bit | 1 each | ☐ |
Overall cost: $$. Lumber varies by region, species, and season, so we give a band rather than a figure.
Tools
- Chisels
- Circular Saw
- Drill / Driver
- Impact Driver
- Jigsaw
- Miter Saw
- Random Orbit Sander
- Router
- Bar / Pipe Clamps — optional
- Combination Square — optional
- Tape Measure — optional
Instructions
1. Cut Boards
Using a miter saw, cut 1x6, 1x2, and 1x3 boards to length.
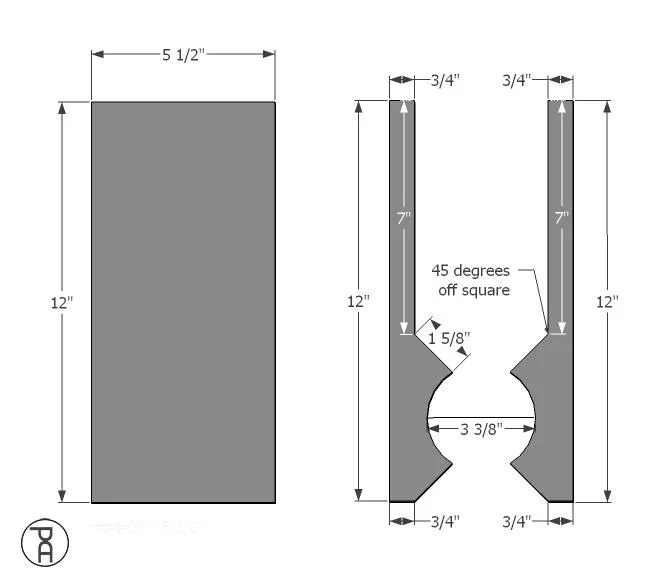
2. Cut Sides
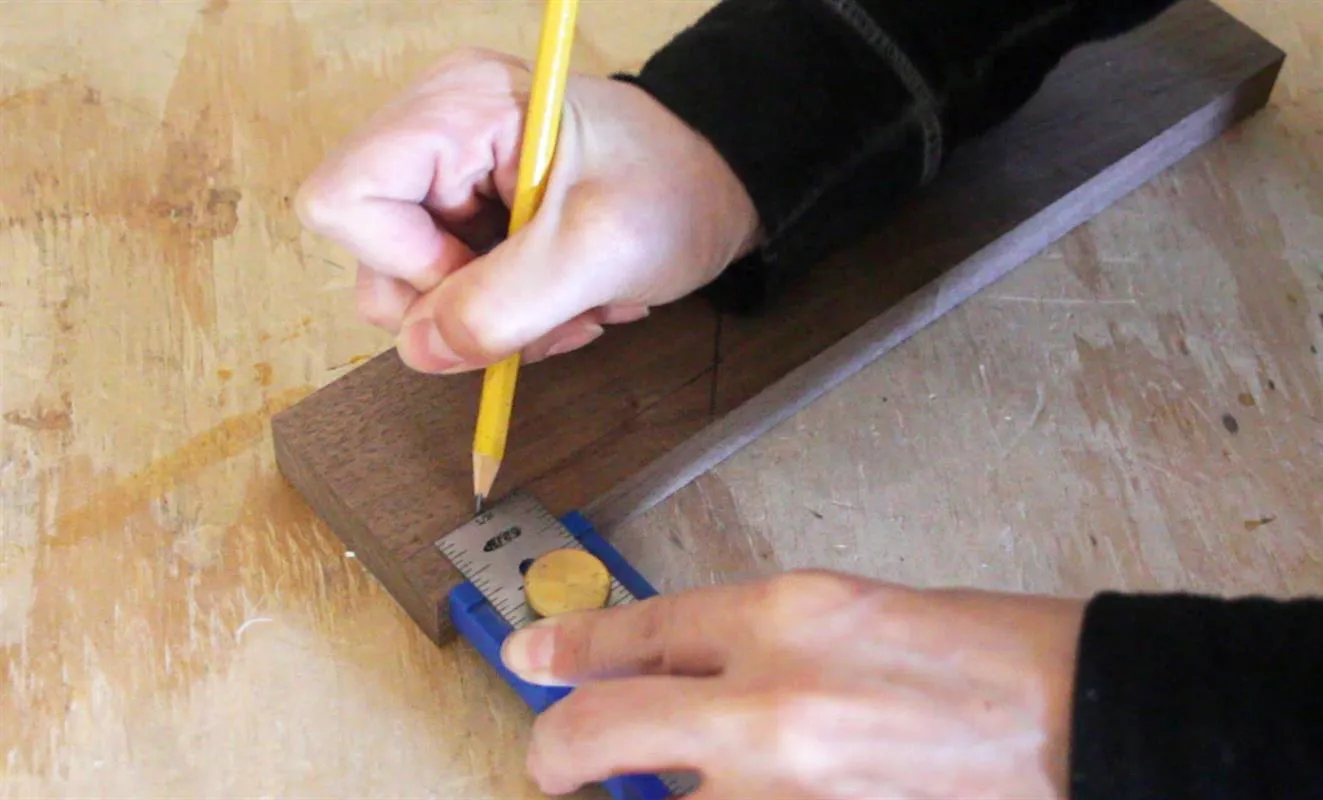
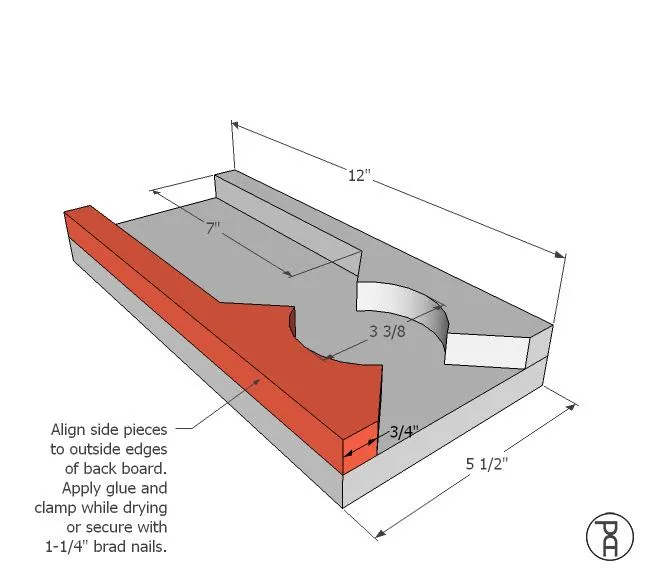
Use a Multi-Mark™ multi-purpose measuring tool to layout your desired design for the side pieces. Use a jigsaw, scroll saw or router to carefully cut out the outlined side pieces. Create a 3-3/8" diameter circular opening, centered between pieces.
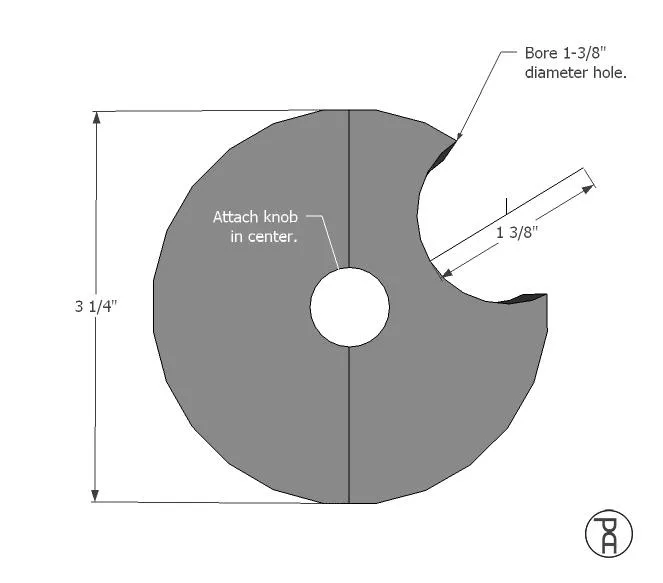
3. Dispenser Circle
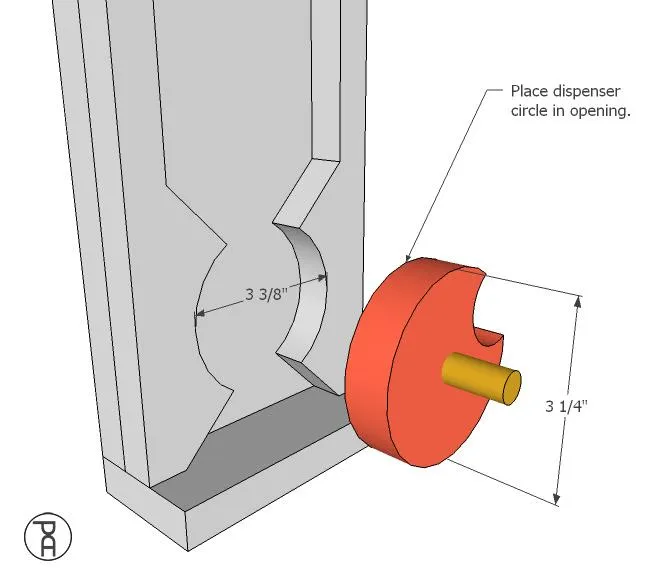
Use a router, jigsaw, or scroll saw to cut a smooth, 3-1/4" diameter dispenser circle. Determine where you would like the pick-up notch to be located. Use a 1-3/8" diameter forstner drill bit to bore a slightly off-centered semi-circle along the perimeter of the circle. Attach a 3/8" x 1" brass rod or knob in the center of the circle.
4. Connect Sides & Back
Place 5-1/2" x 12" back board face-up on your work surface. Align side pieces to the outside edges of back board.
5. Attach Bottom
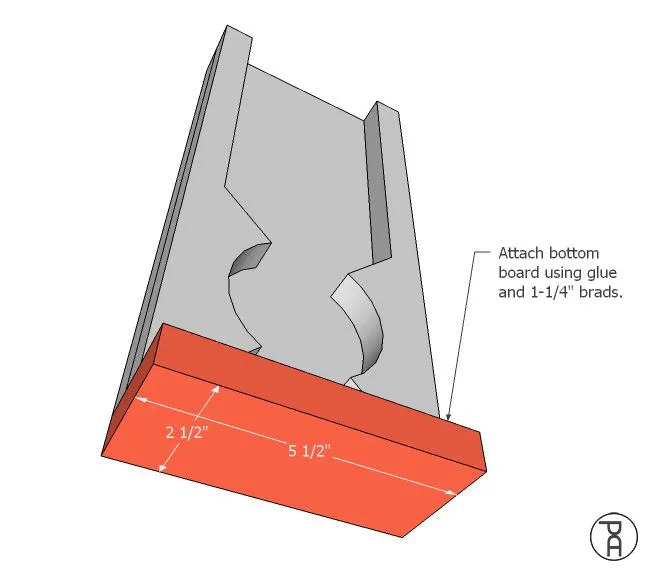
- Align 2-1/2" x 5-1/2" bottom board flush to the back side and edges of back board. Allow the bottom board to extend 1" beyond the front face of the side pieces.
- Apply wood glue to adjoining faces.
6. Attach Lid
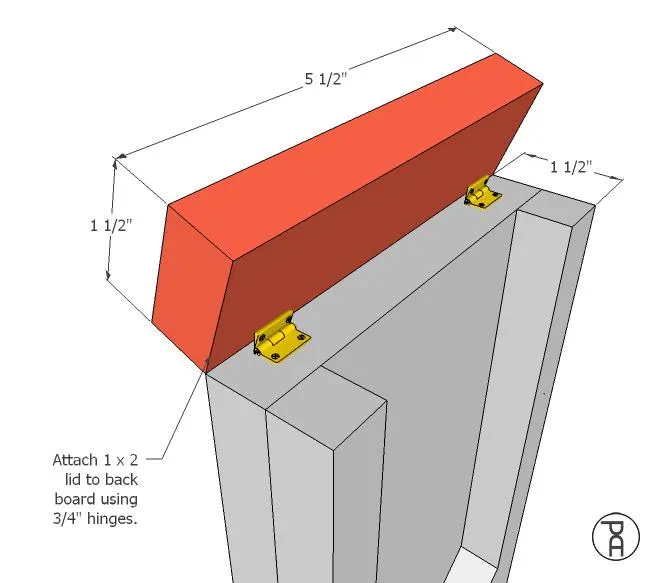
Align 1-1/2" x 5-1/2" lid on the top edge of the dispenser assembly. Attach using 3/4" x 1/2" brass hinges. (You may need to use a chisel to cut a 1/8" deep recess to accommodate the thickness of the hinges, depending on the style you use.)
7. Place Circle
Place dispenser circle in the circular opening between the side pieces.
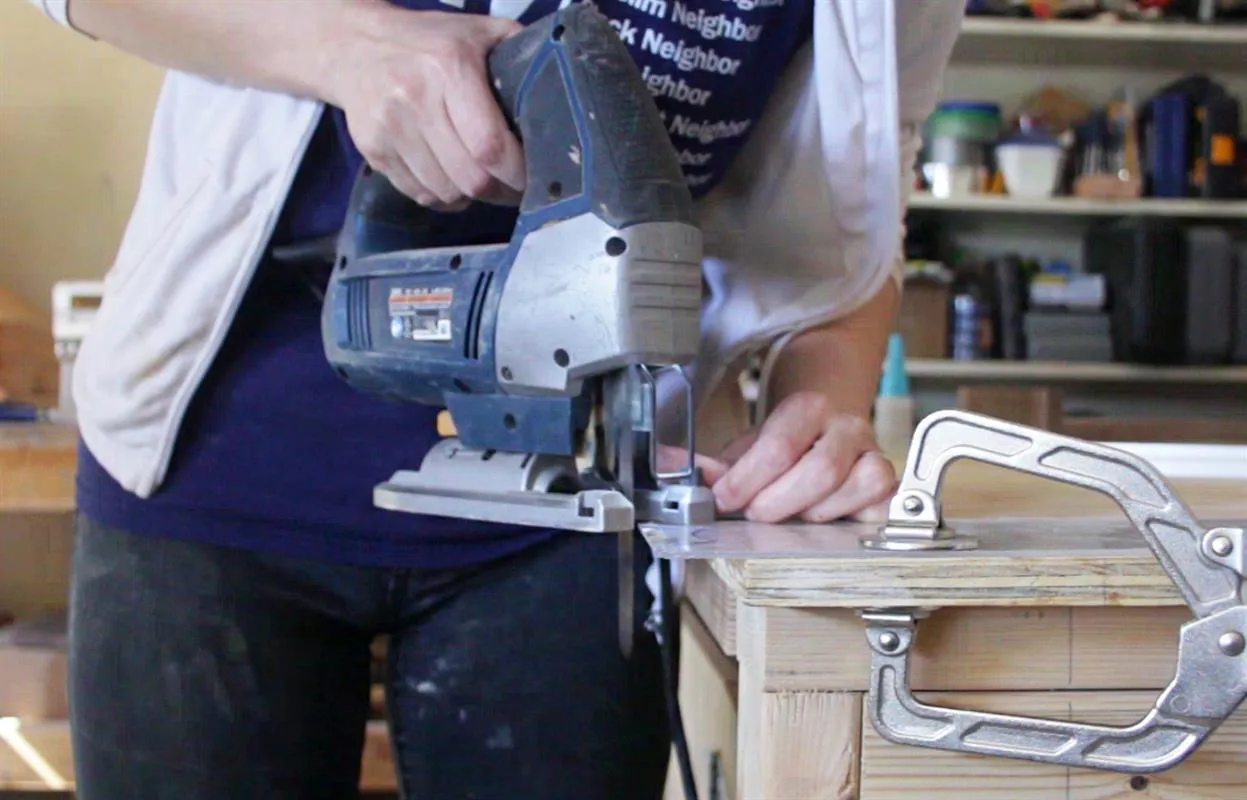
8. Cut Acrylic Sheet
- Place 1/16" thick acrylic sheet over the face of the dispenser assembly. Use a Multi-Mark™ measuring tool and permanent marker to trace the outline of the assembly. Use a jigsaw, scroll saw or router to carefully cut the acrylic sheet along the lines drawn.
- Drill a 1/2" diameter hole to allow the brass knob to protrude.
9. Attach Acrylic
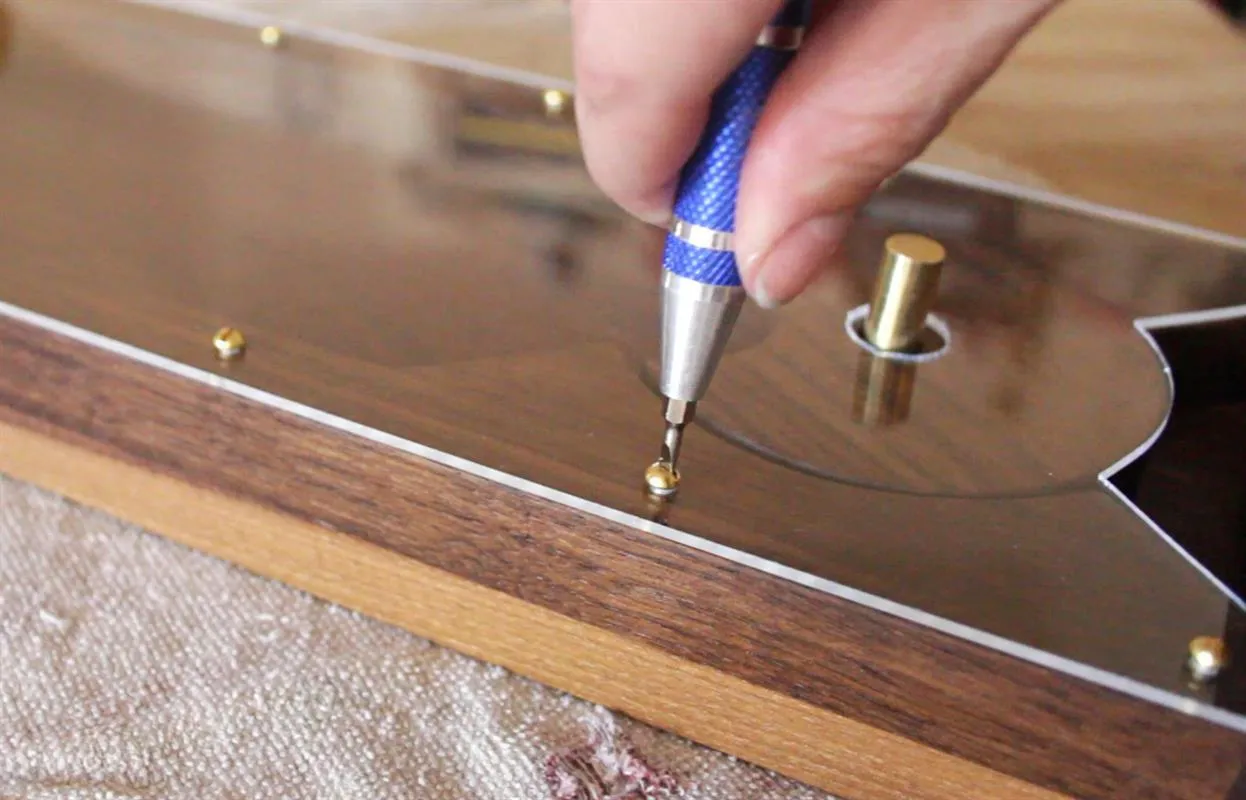
- Apply a food safe finish, like mineral oil or beeswax to all wood surfaces.
- Once fully dried, place the acrylic sheet over the front face of the assembly. Lightly clamp in place. Using a 1/16" drill bit, pre-drill 10 holes (5 along either edge) through the acrylic sheet and into the wood beneath. Use a small screwdriver to drive 1/2" long, #4 brass screws.
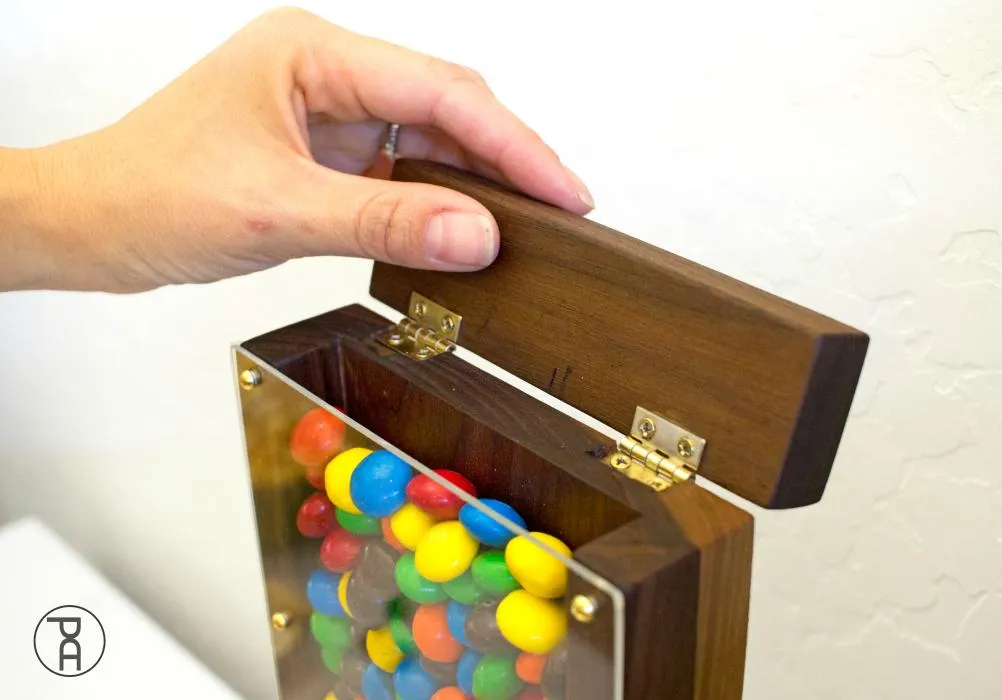
10. Add Candy
Fill the dispenser with your favorite small, hard shelled candy and enjoy!
11. More Tips and Ideas
Head to www.PneumaticAddict.com for more DIY tips and ideas.

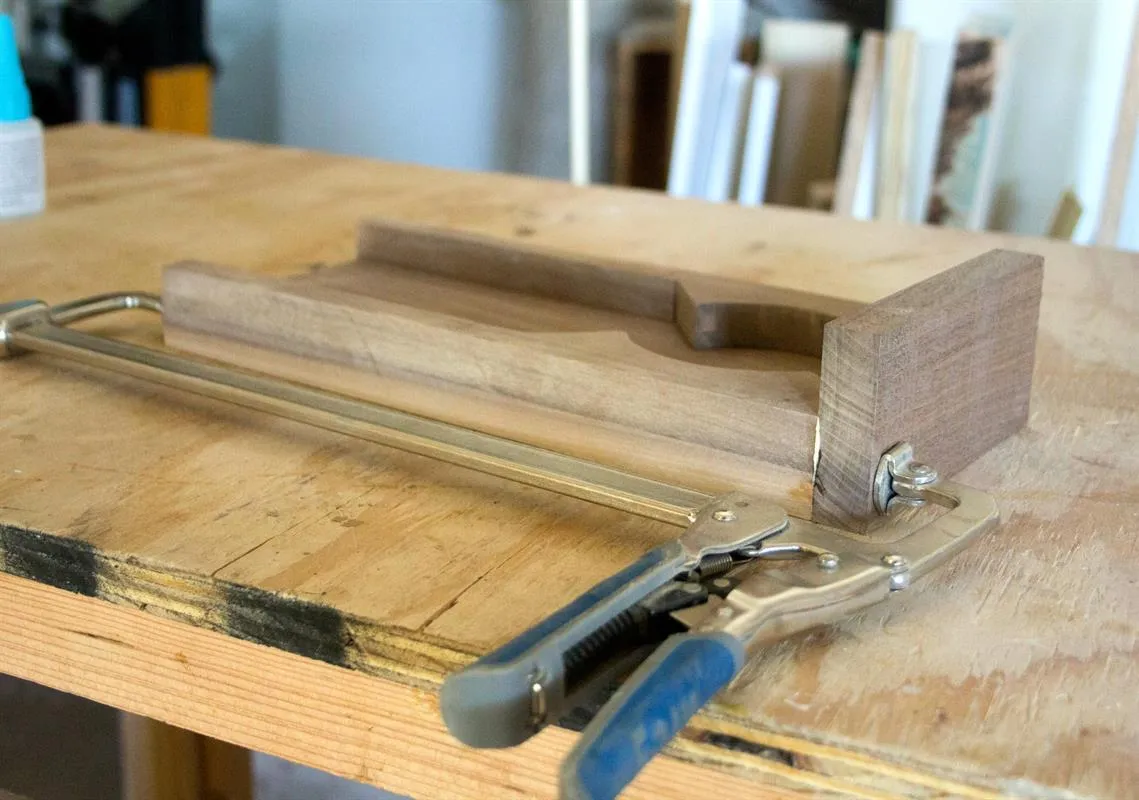
12. Clamp Pieces Together
Apply wood glue to adjoining faces. Use Kreg 3" Wood Project clamps to hold pieces together tightly in place while drying or secure with 1-1/4" brad nails.
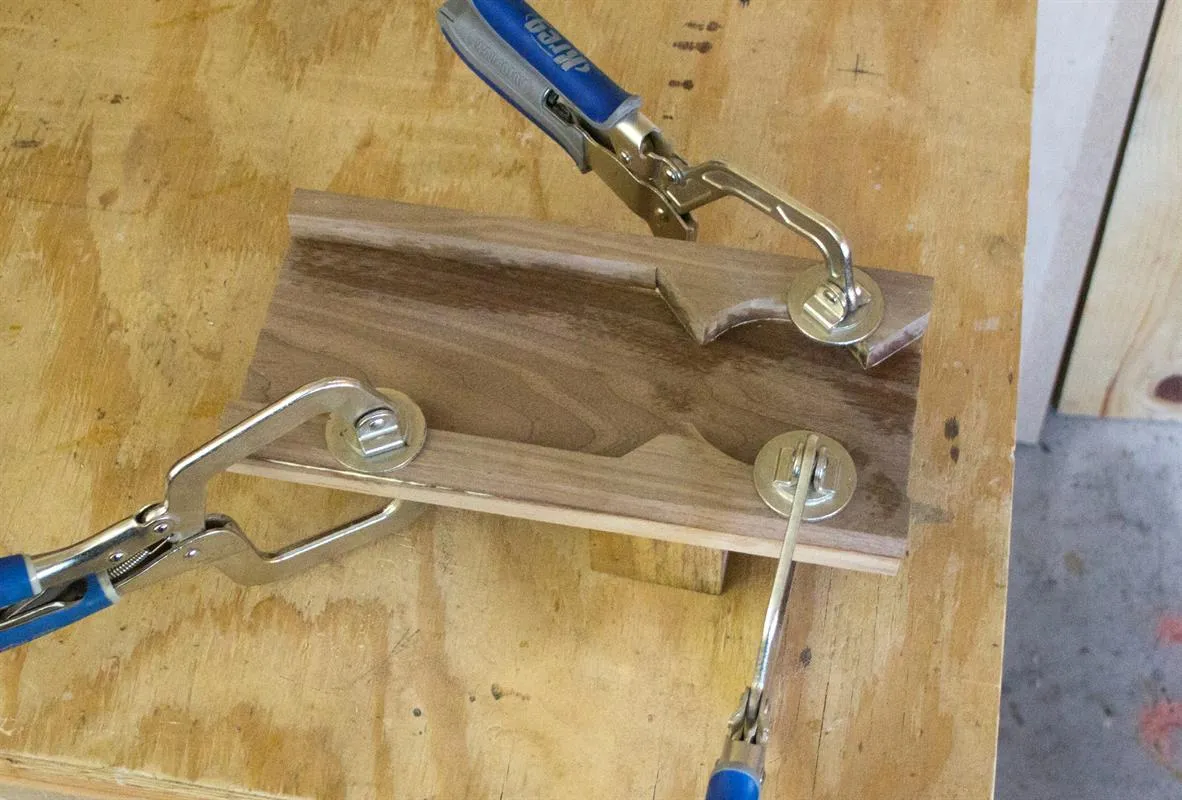
13. Clamp While Drying
Use a Kreg 16" Auto-Adjust bar clamp to hold pieces in place while drying or secure using 1-1/4" brads.