Notch
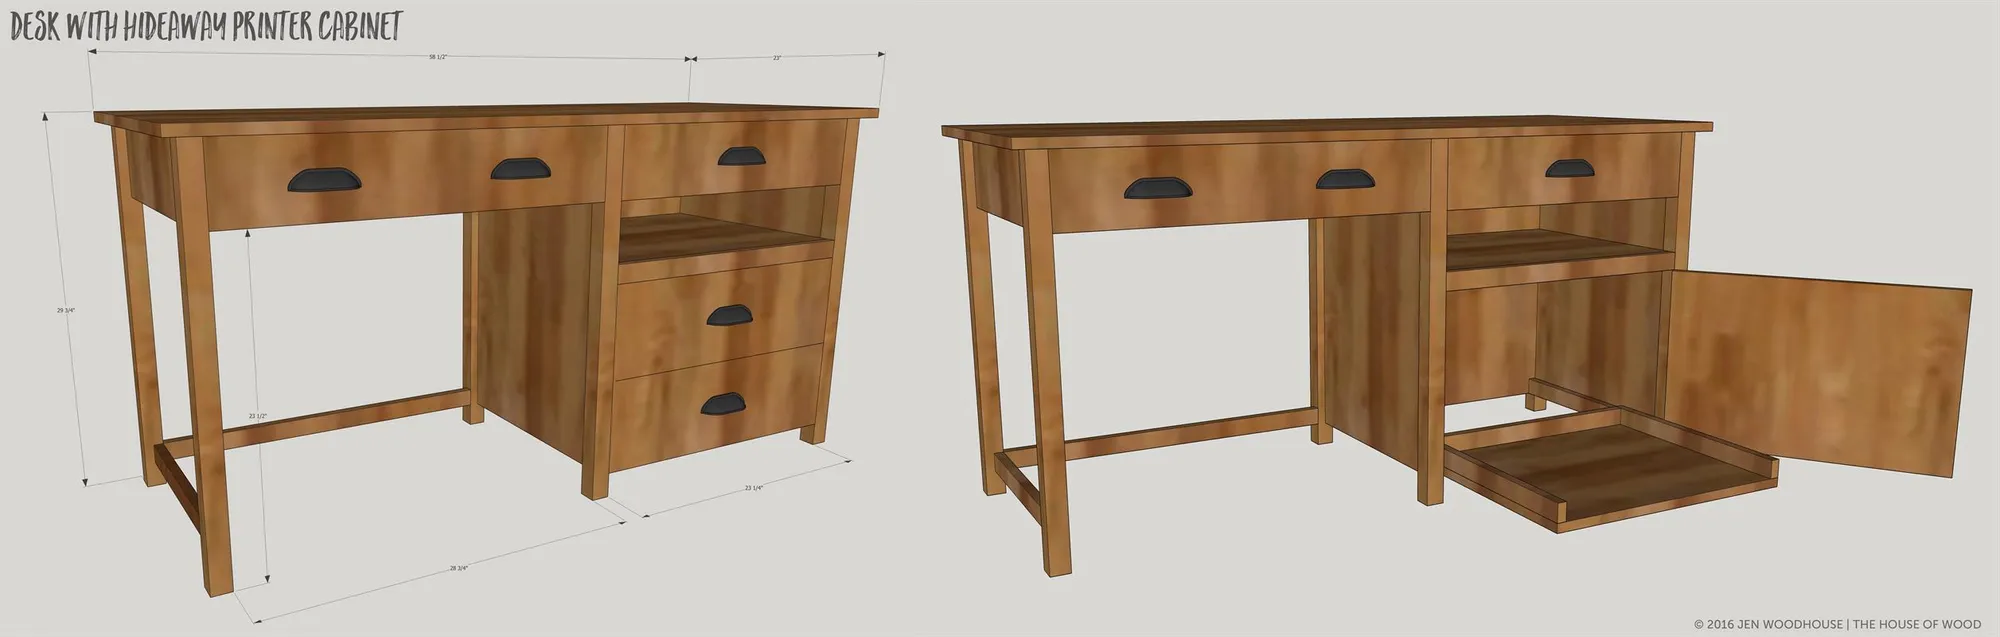
NotchDesk with Hideaway Printer Storage
Step-by-step build — 11 steps. Also available as a print sheet.
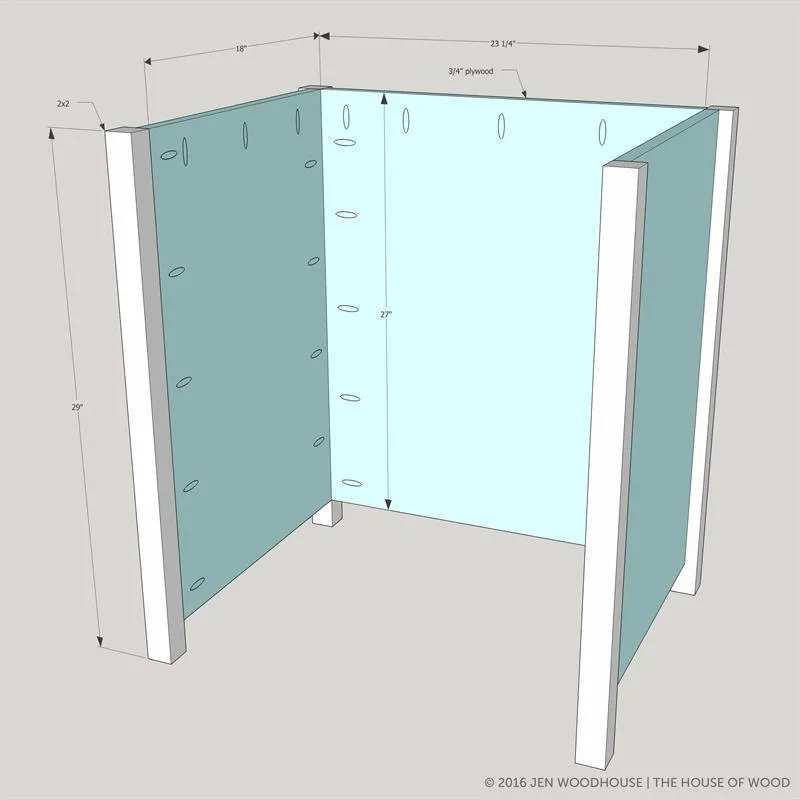
1Build the Printer Cabinet Carcass
Drill 3/4" pocket holes on the top and sides of the 3/4" plywood and attach it to the 2x2 legs with 1-1/4" pocket hole screws and wood glue. Note that the plywood panels are flush to the interior edge of the legs.
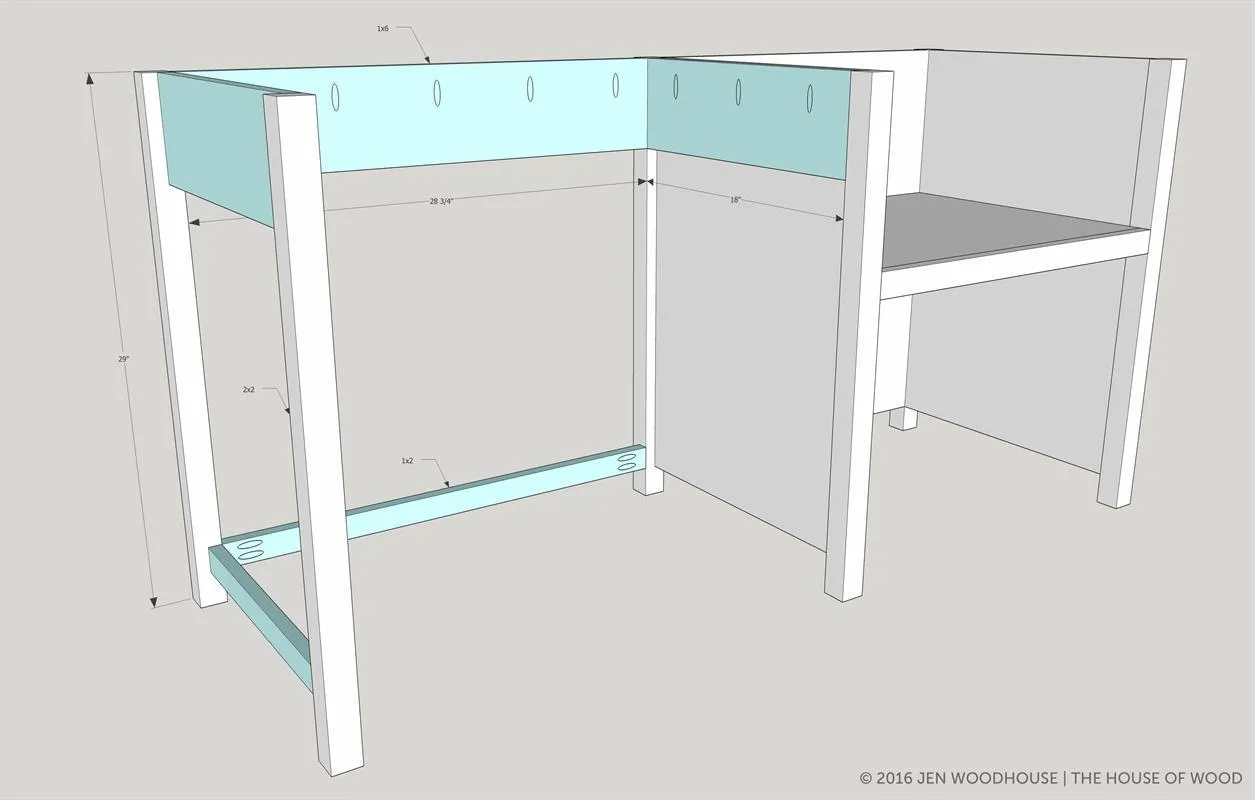
2Add the Desk Aprons and Legs
Drill 3/4" pocket holes into the 1x6s and 1x2s and attach to the printer cabinet carcass with 1-1/4" pocket hole screws and wood glue. All boards are flush to the interior edges of the legs.
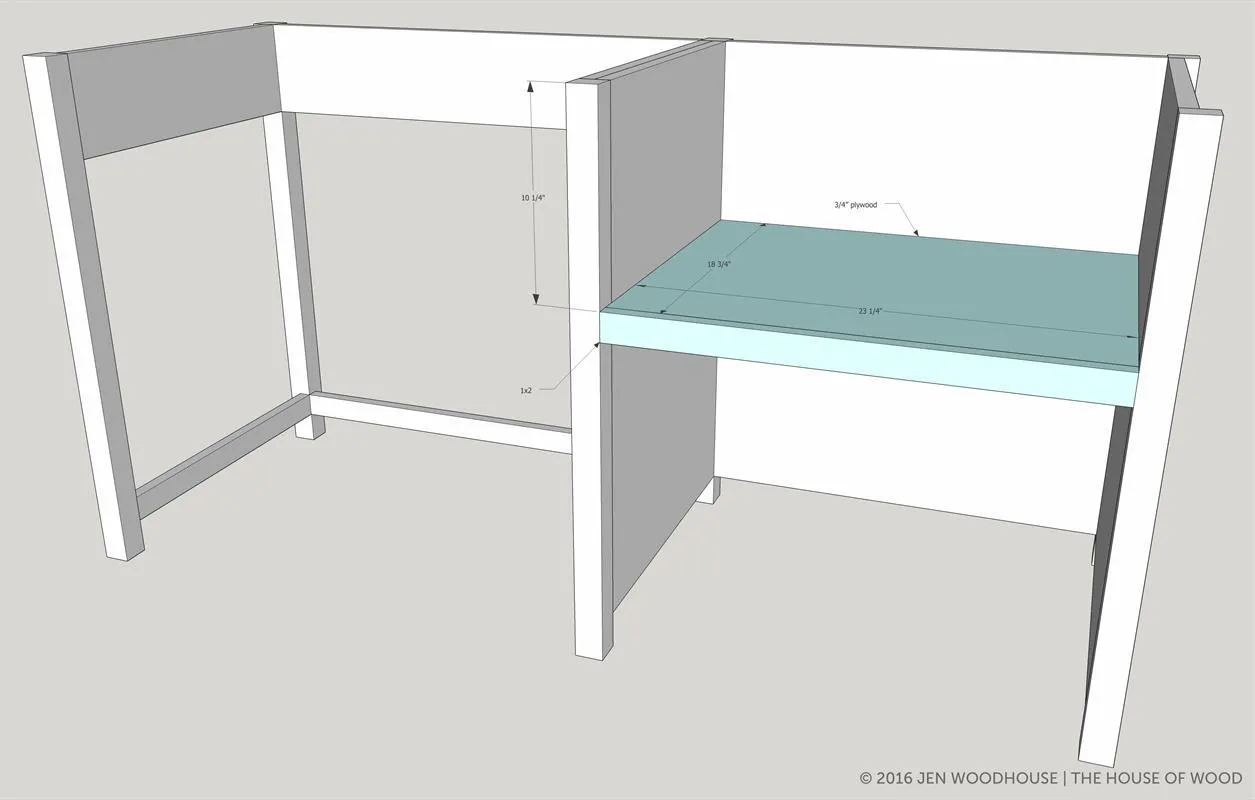
3Attach the Shelf
- Drill 3/4" pocket holes around all underside edges of the 3/4" plywood shelf.
- Attach the shelf to the printer cabinet carcass with 1-1/4" pocket hole screws and wood glue.
- Attach the 1x2 trim to the shelf with 1-1/4" pocket holes and wood glue.
4Build the Printer Tray
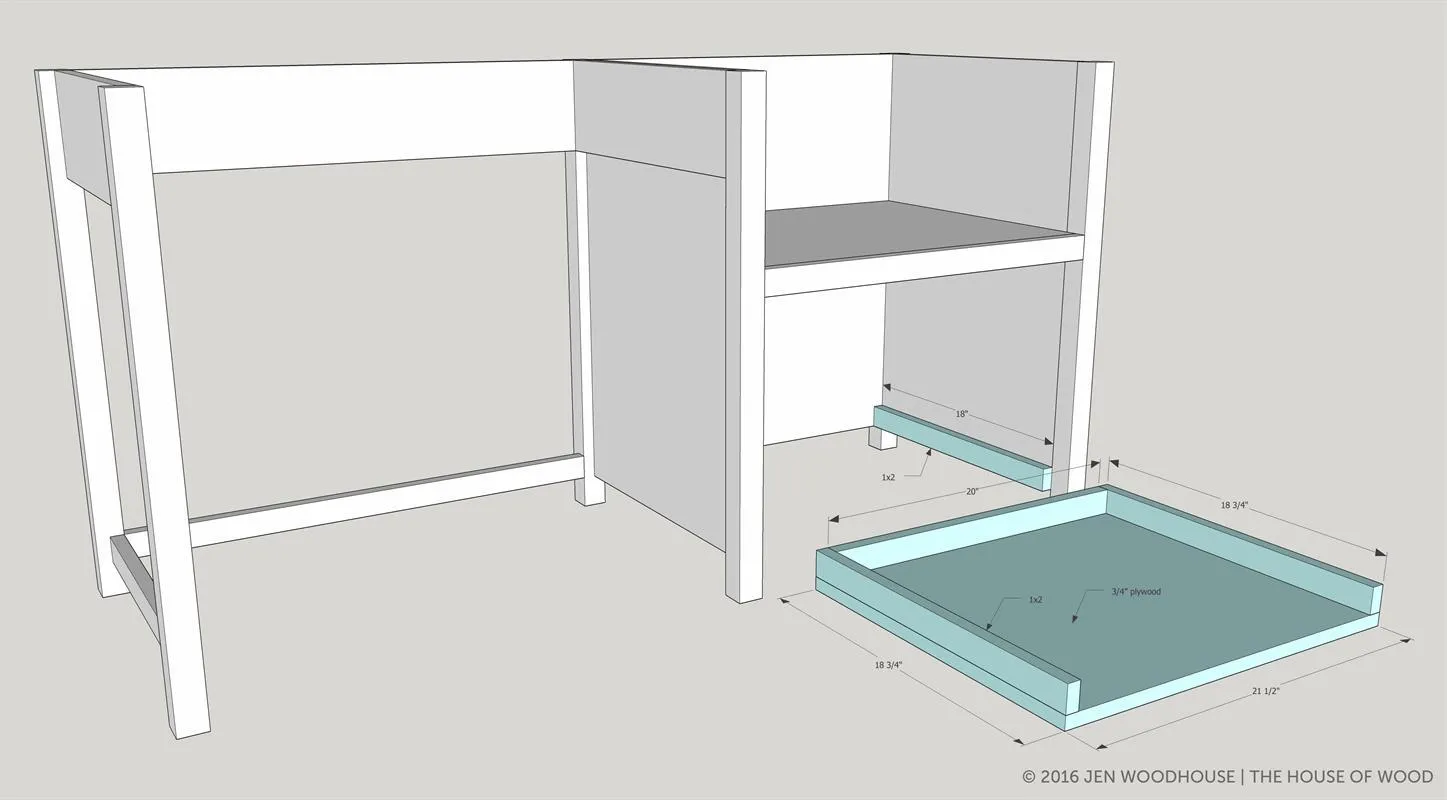
- Attach the 1x2 slide support to the right side of the printer cabinet carcass with 1-1/4" brad nails and wood glue.
- Build the tray by attaching the 1x2 back and sides to the 3/4" plywood bottom with 1-1/4" brad nails and wood glue. Install the drawer slides according to manufacturer's directions.
5Add the Printer Cabinet Door
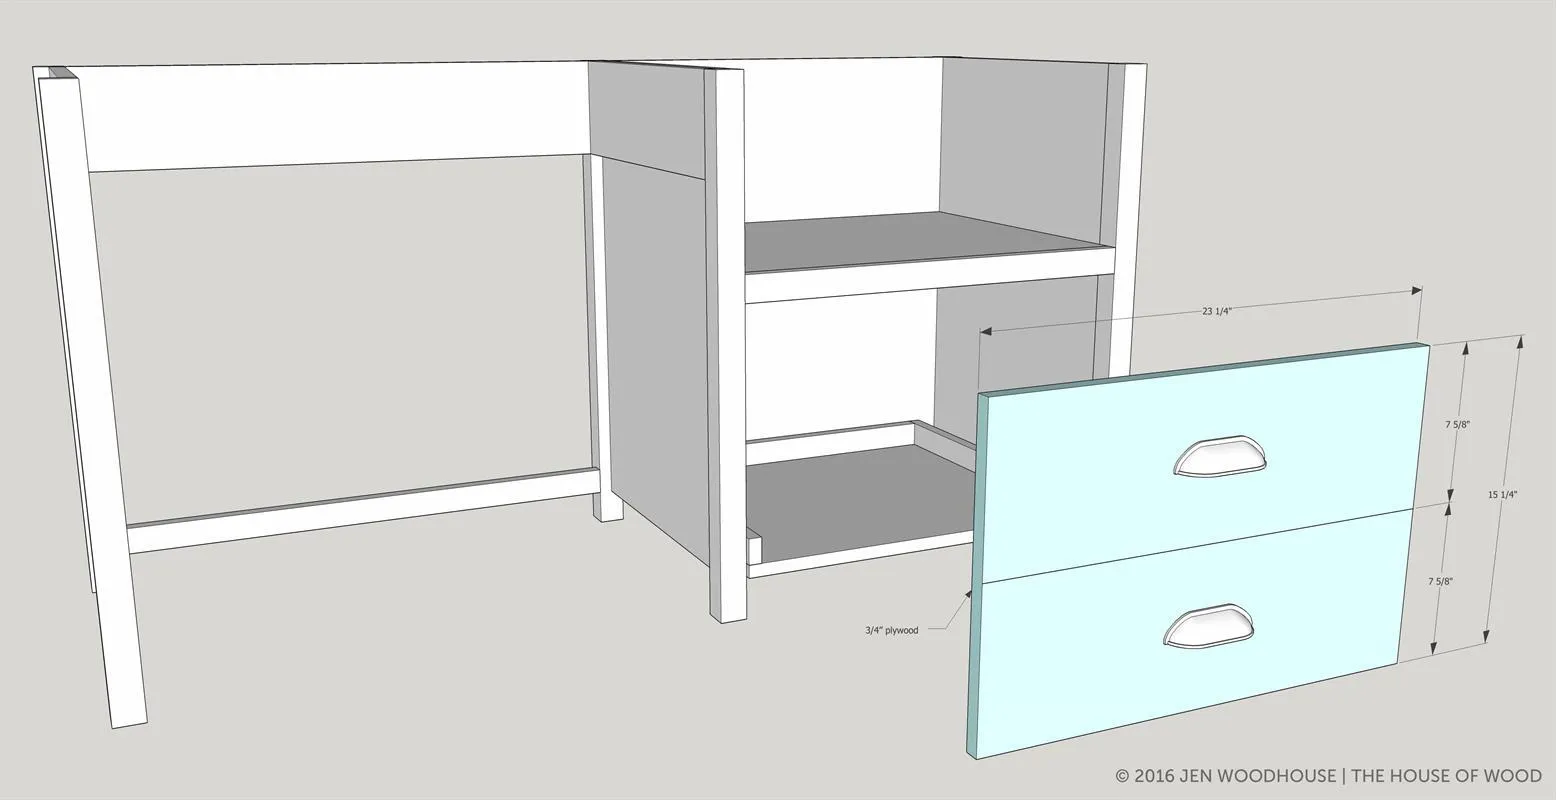
- Route a 1/8" deep groove into the 3/4" plywood door to mimic two faux drawer fronts.
- Attach door to printer cabinet with hinges.
- Attach drawer knobs or pulls.
6Build the Drawers
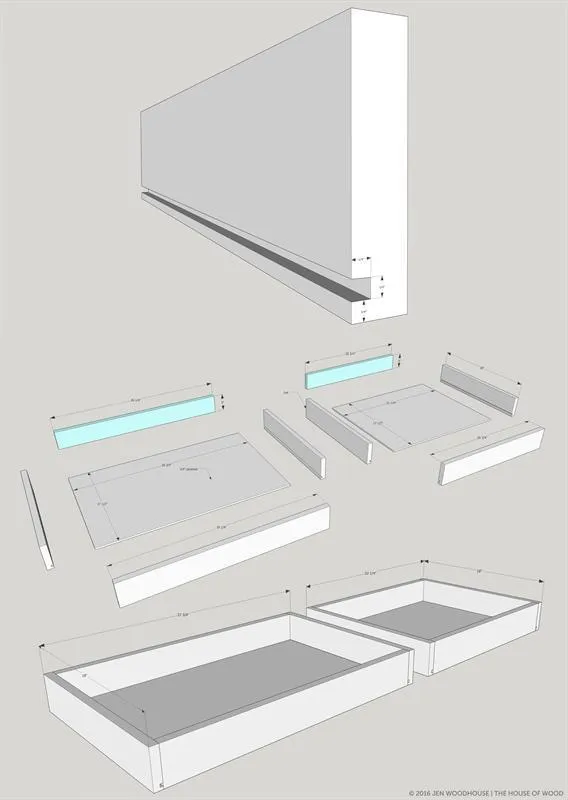
- For the drawer backs, rip a 1x4 board down to 3" wide.
- Next, route a 1/4" deep groove into the 1x4 drawer fronts and sides.
- Drill 3/4" pocket holes on the outsides of the drawer fronts and backs (pocket holes will be hidden by drawer face in the next step). Construct the drawer boxes with 1-1/4" pocket hole screws. The 1/4" plywood drawer bottom will slide into the grooves in the front and sides.
- Attach the bottom panel to the back with 3/4" brad nails.
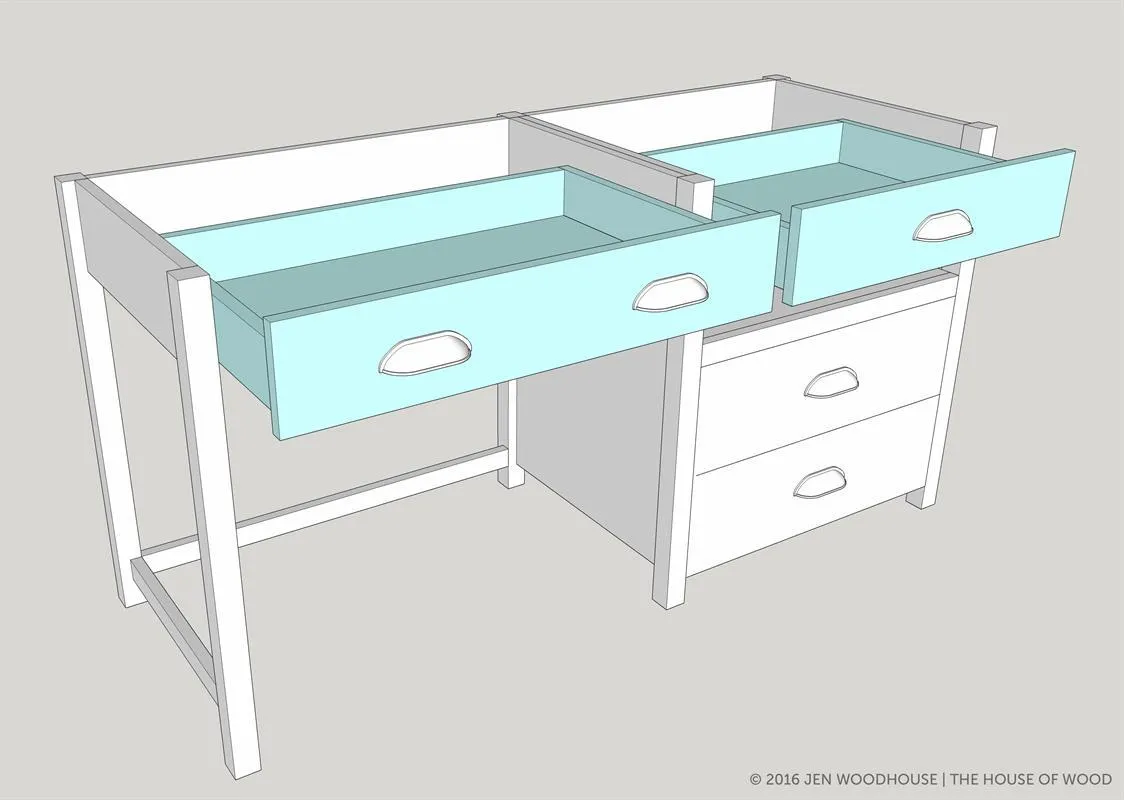
7Attach the Drawer Faces
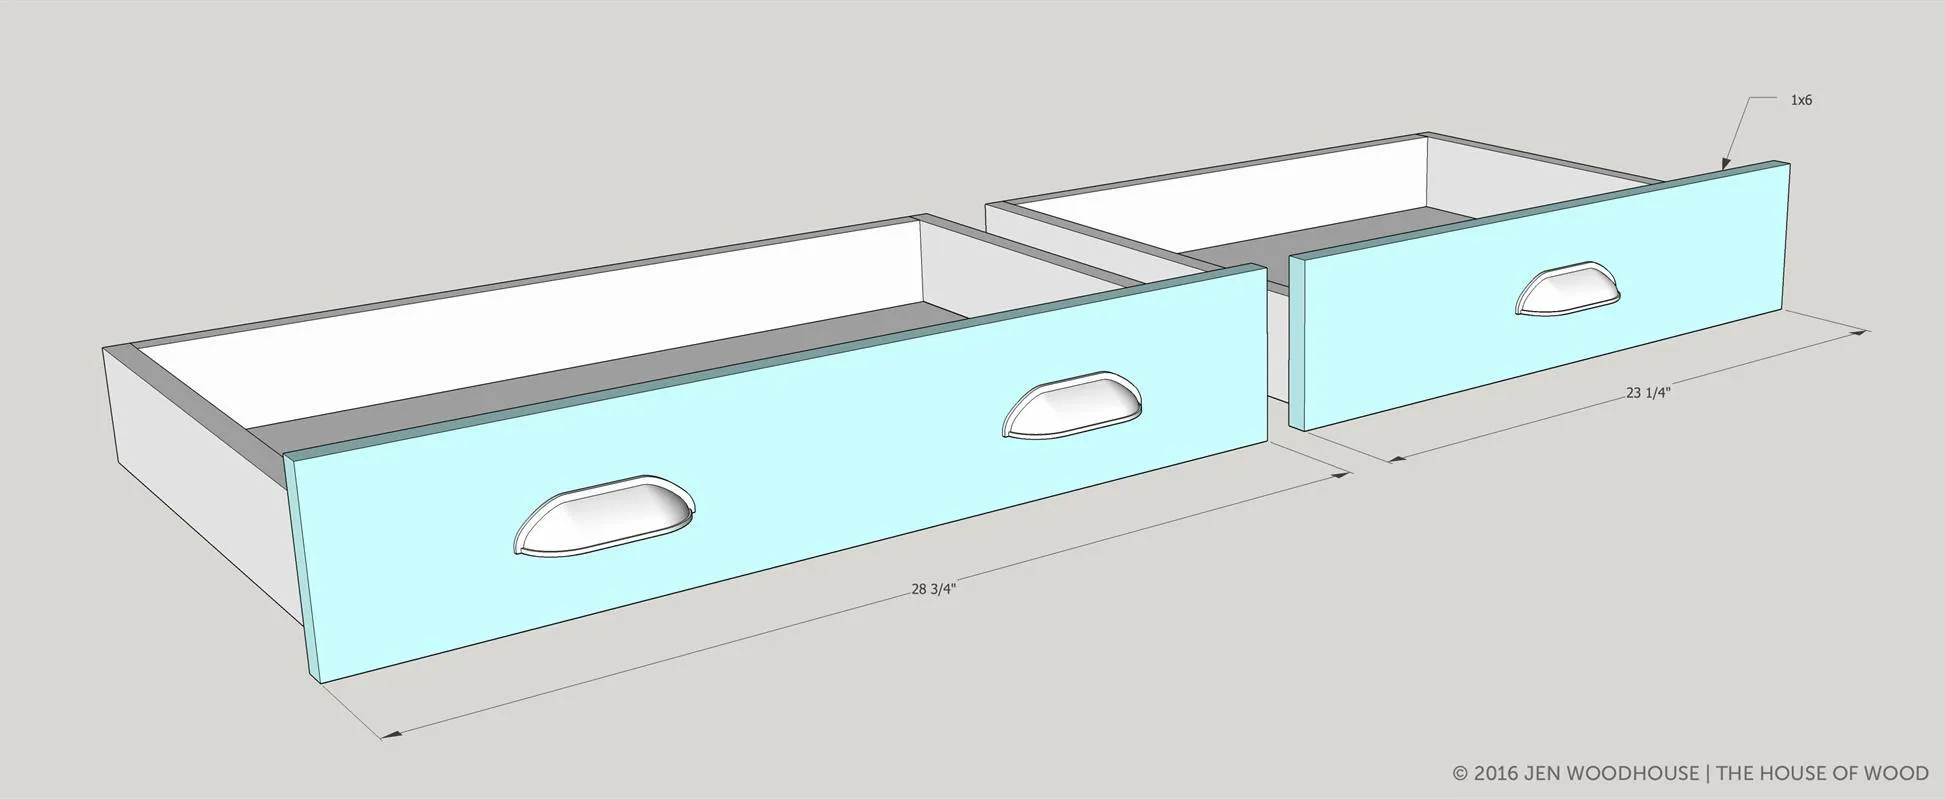
Attach the drawer faces to the drawer boxes with 1-1/4" screws. Install drawer knobs or pulls.
8Install Drawers and Drawer Slides
Install 18" drawer slides according to manufacturer's directions.
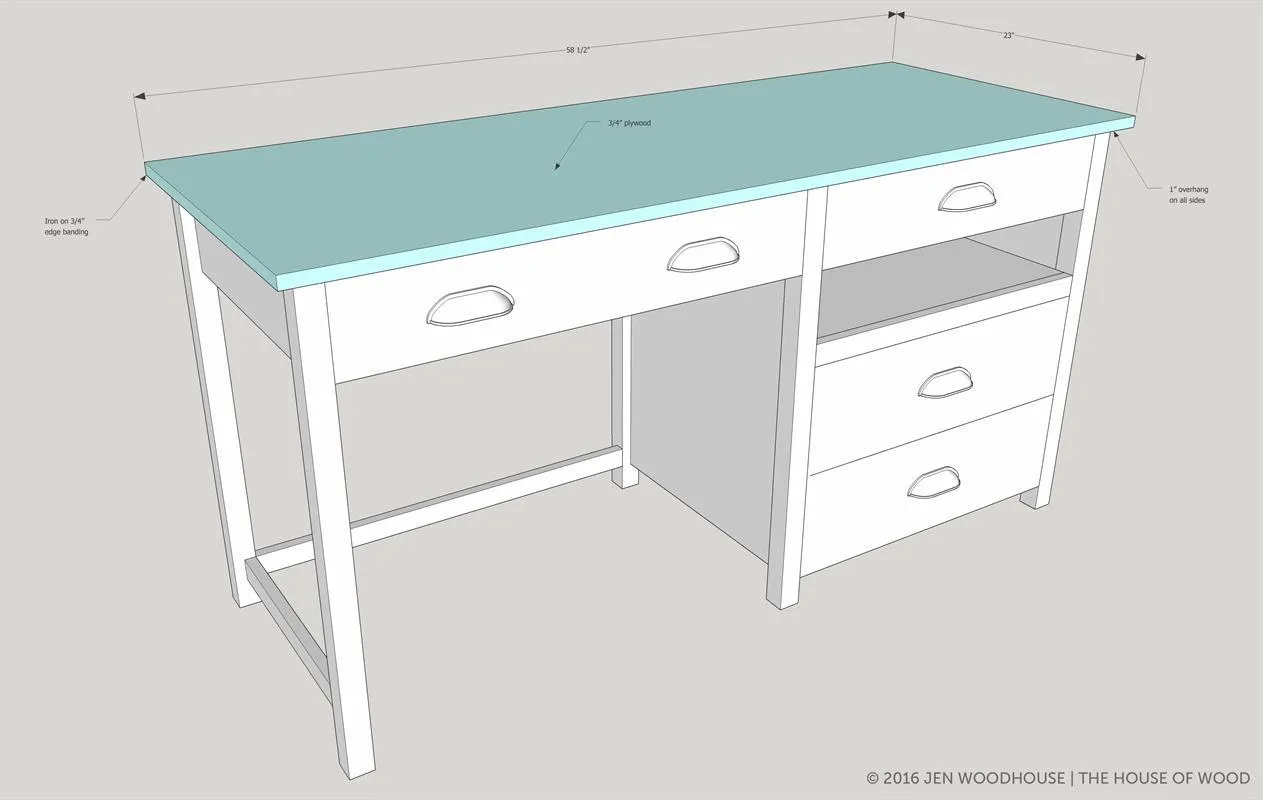
9Attach the Top
Attach the top with 1-1/4" pocket holes and wood glue. Pre-drill and countersink pilot holes above the 3 front legs and drive 1-1/4" wood screws down into the legs. Allow for a 1" overhang on all sides. To hide the raw plywood edges, iron on 3/4" veneer edge banding.
10Visit JenWoodhouse.com
For more free building plans and DIY project ideas, visit JenWoodhouse.com.

11Finishing Steps
Sand, stain or paint, and finish as desired.