 Notch
Notch- Difficulty
- Easy
- Time
- 3.5–6.8 hours
- Cost
- $$
About this build
With its extended rails, raised squares, and beveled glass, this decorative mirror recreates a classic Arts & Crafts style. You might think those features would make this project tough to build, but it’s actually incredibly easy. All you need are some stock boards, plywood, and a pre-cut mirror.
Tools
Essential
- Drill / Driver
- Miter Saw
- Pocket Hole Jig
- Random Orbit Sander
Optional / nice to have
- Tape Measure
Materials
| Item | Qty |
|---|---|
| Board, 1x3 96" | 1 board |
| Board, 1x3 48" | 1 board |
| Board, 1/4" x 3" 24" | 2 board |
| Plywood, 1/4" Thick Half Sheet | 1 board |
| 1 1/4" fine-thread pocket hole screws | 8 each |
| #6 x 3/4" pan-head woodscrews | 16 each |
| Heavy Duty Mirror/Picture Frame Hanging Kit | 1 each |
| 24" x 30" Beveled Mirror | 1 each |
| Mirror Adhesive | 1 each |
| Wood Glue | 1 each |
Overall cost: $$. Lumber prices vary by region, species, and season, so we give a band rather than a figure we would only be pretending to know.
Cut list
| Part | Qty | T × W × L |
|---|---|---|
| Rail | 2 | 3/4" × 2" × 30" |
| Stile | 2 | 3/4" × 2" × 31" |
| Thin Stile | 2 | 1/4" × 2" × 31" |
| Rail End | 4 | 3/4" × 1" × 2" |
| Decorative Square | 6 | 1/4" × 1" × 1" |
| Back | 1 | 1" × 27" × 33" |
What to buy
Buy 6 boards at 8 ft.
1" × 27"
1 board
3/4" × 2"
2 boards
3/4" × 1"
1 board
1/4" × 2"
1 board
1/4" × 1"
1 board
Assumes 8 ft stock, a 1/8" saw kerf, and buying each part at its own width. Change the board size or kerf on the full board plan →
Instructions
1Make the Rails
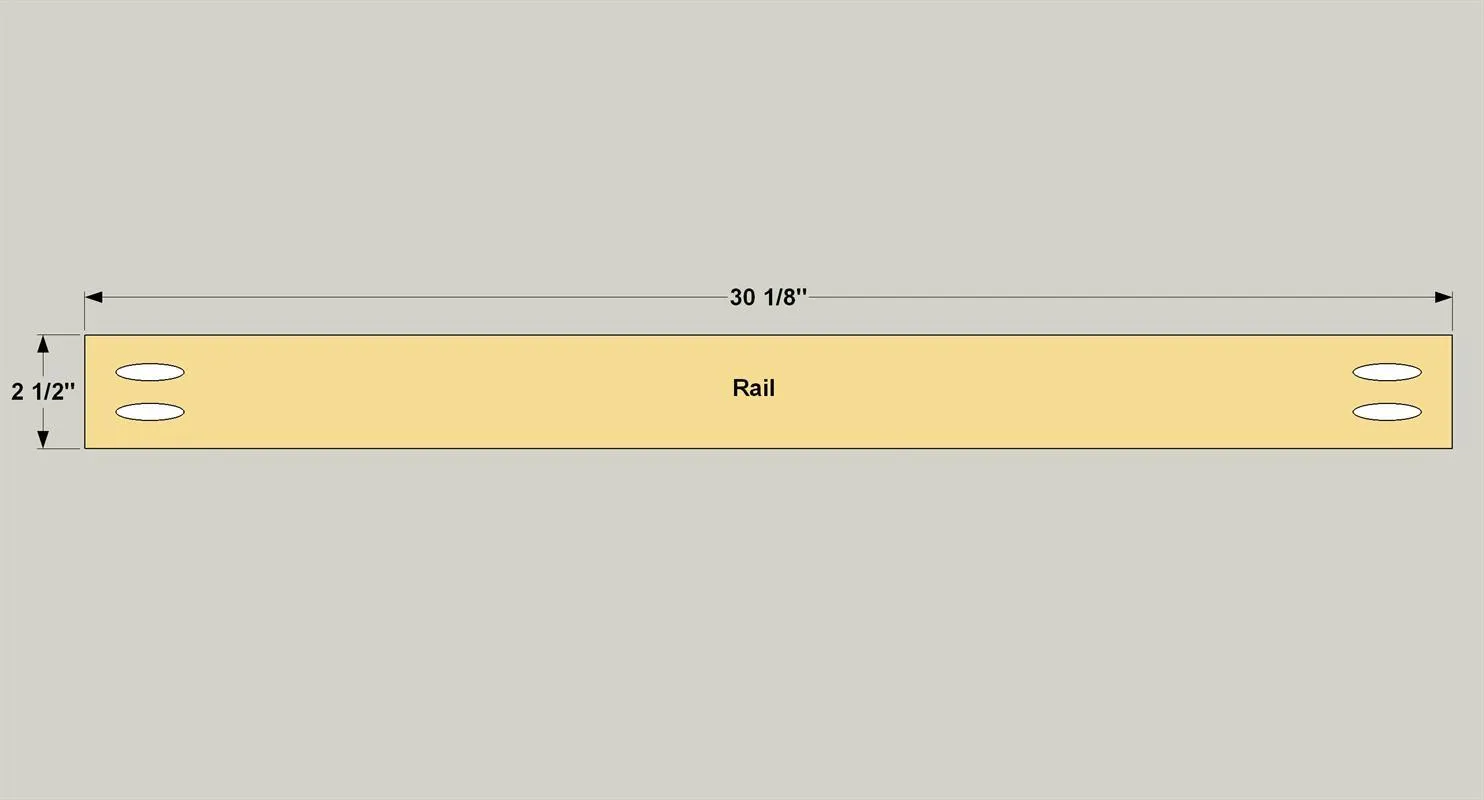
Cut two Rails to length from a 1x3 oak board, as shown in the cutting diagram. Set your pocket hole jig for 3/4" material, and then drill pocket holes in the Rails at the locations shown.
2Cut the Rail Ends and Stiles
- Cut four End Rails to length from a 1x3 oak board, as shown in the cutting diagram.
- Sand them smooth, and then set them aside for now. These Rail Ends will get glued in place later.
- Also cut two Stiles from a 1x3 oak board, as shown in the cutting diagram.
- Sand the Stiles smooth, too.
3Add Thin Stiles
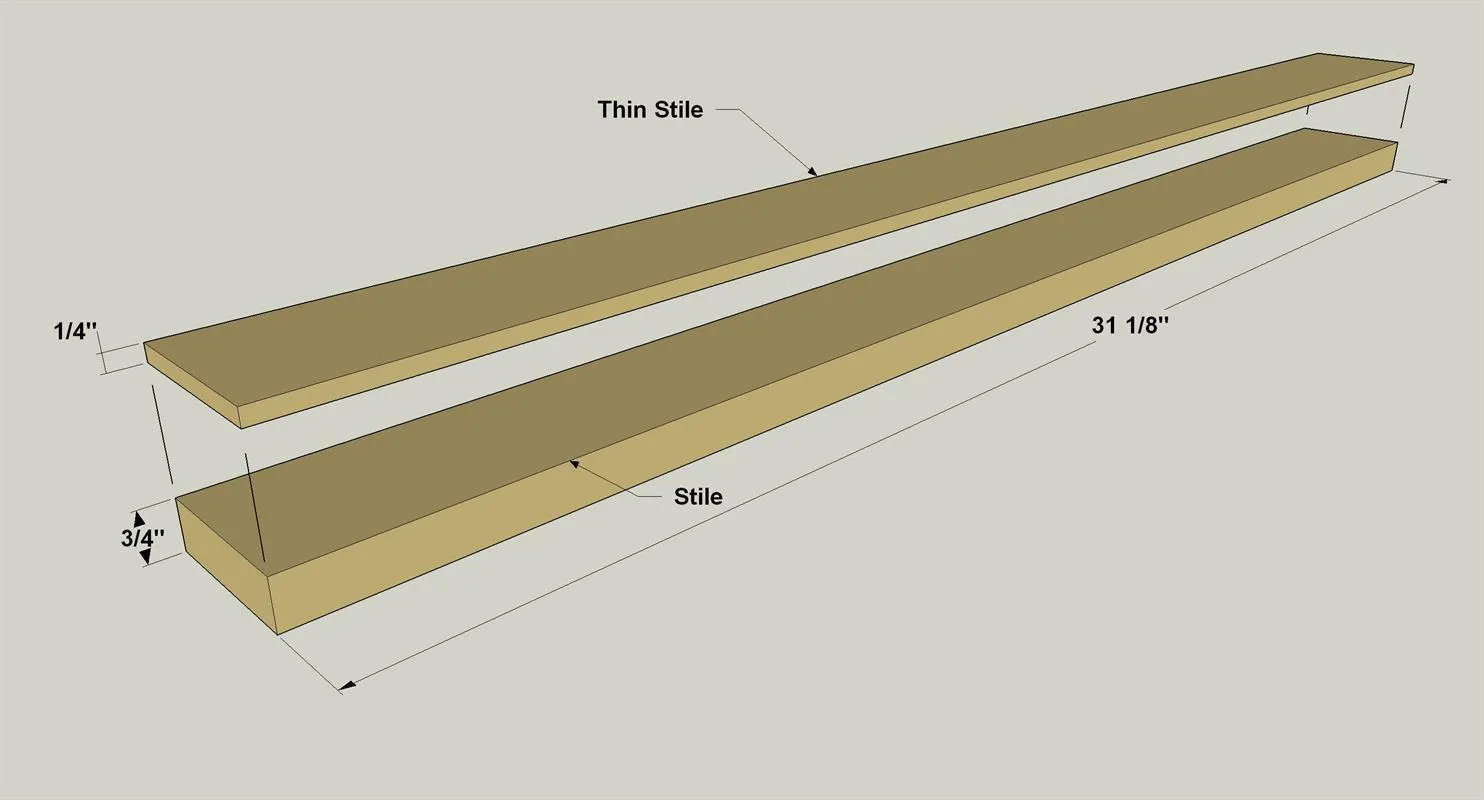
- Now cut two Thin Stiles from a 1/4"x3 oak board, as shown in the cutting diagram. These should match the thicker Stiles you cut from a 1x3.
- Now glue the Thin Stiles to the Stiles, as shown. Make sure the edges and ends are flush.
- Then, clamp the assemblies, or wrap them tightly with strips of masking tape, until the glue dries. When the glue dries, sand the edges so they are even and smooth.
4Assemble the Frame
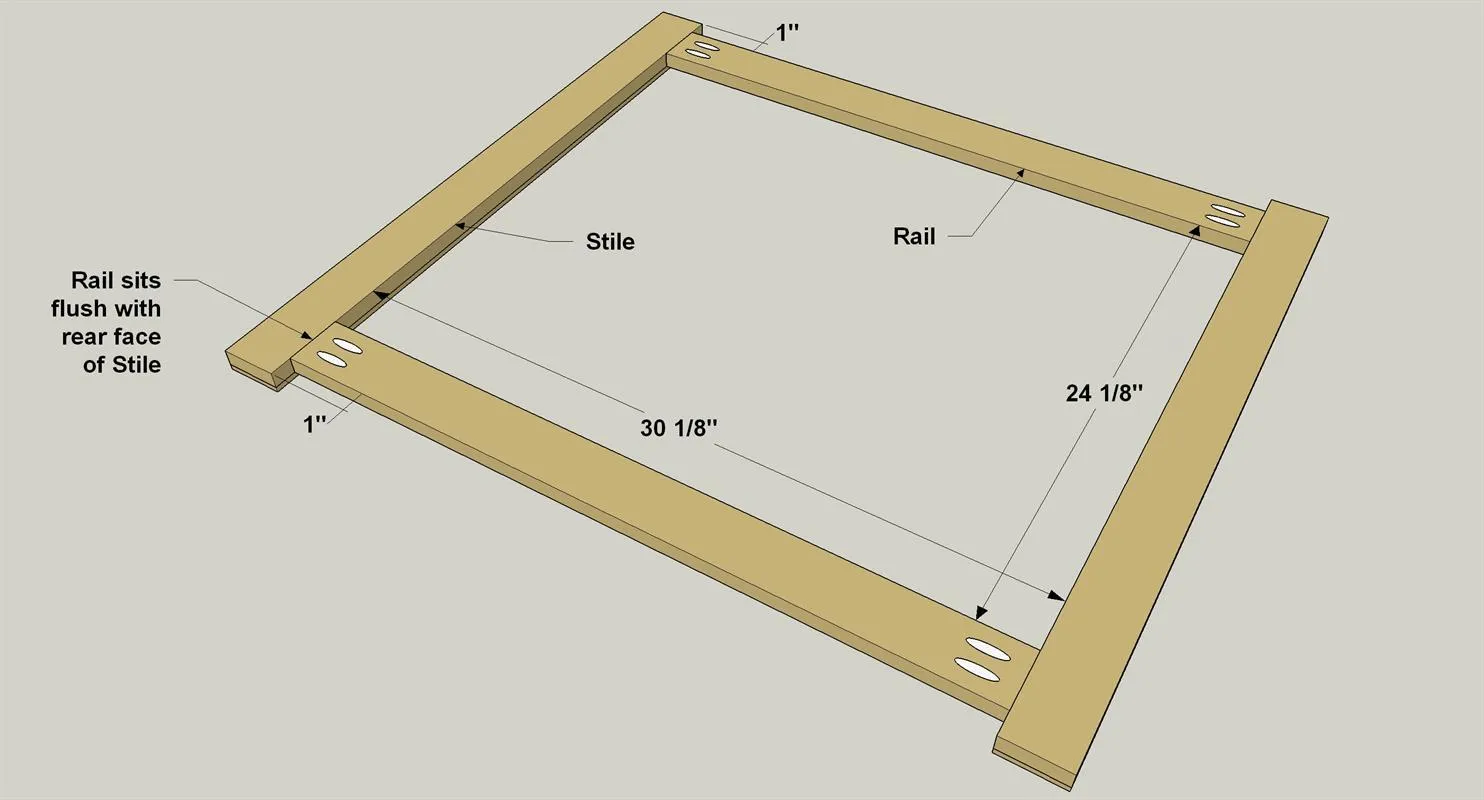
Attach the Rails to the two stile assemblies using 1 1/4" fine-thread pocket hole screws, as shown. Note that the Rails sit flush with the rear face of the thicker stiles.
5Add the Rail Ends
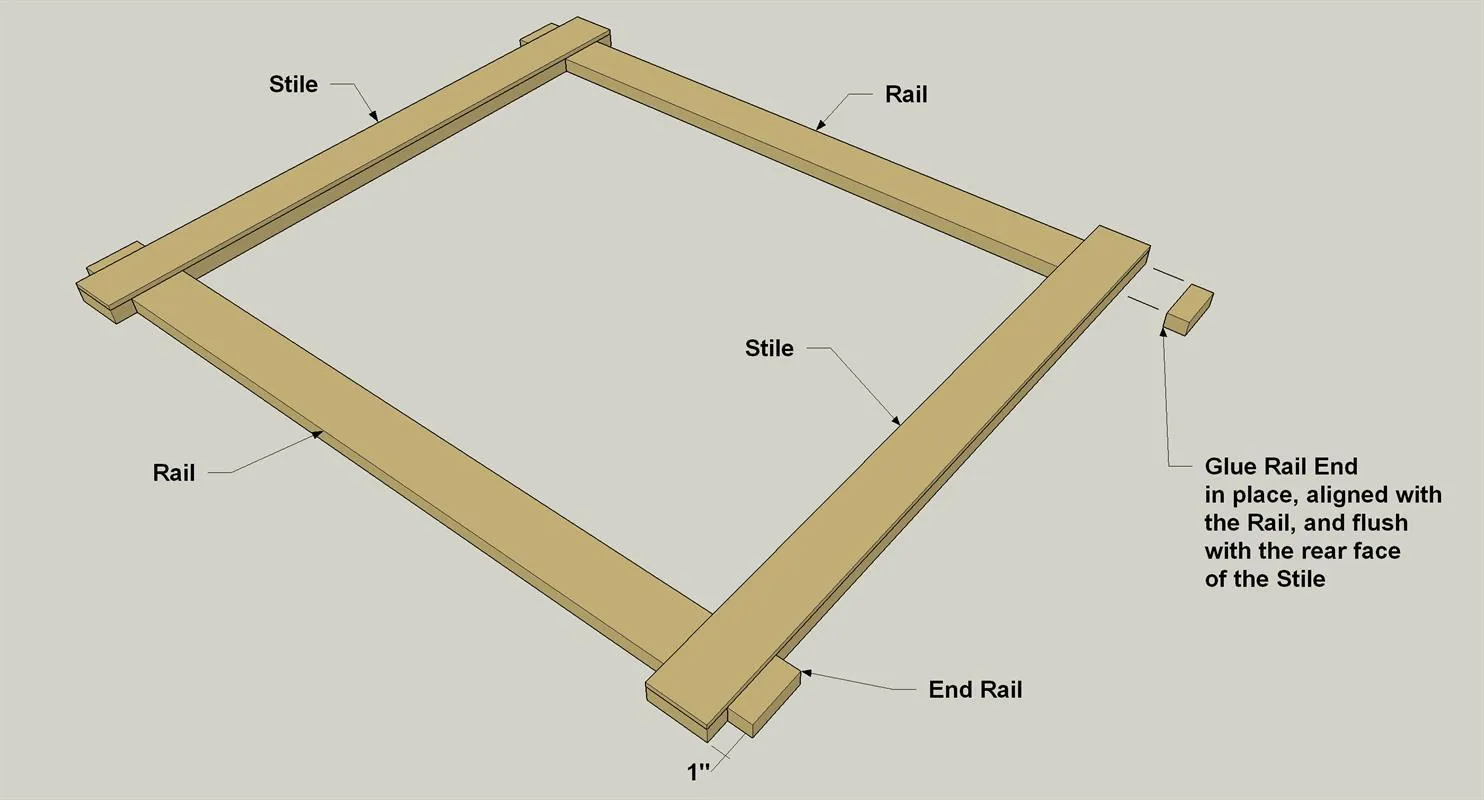
Now you can create the look of extended rails. To do that, glue the Rail Ends to the stiles at the locations shown. Make sure that the Rail Ends are aligned with the Stiles, and that they are flush with the rear face of each stile. Use clamps or tape to hold them in place while the glue dries.
6Cut and Apply Decorative Squares
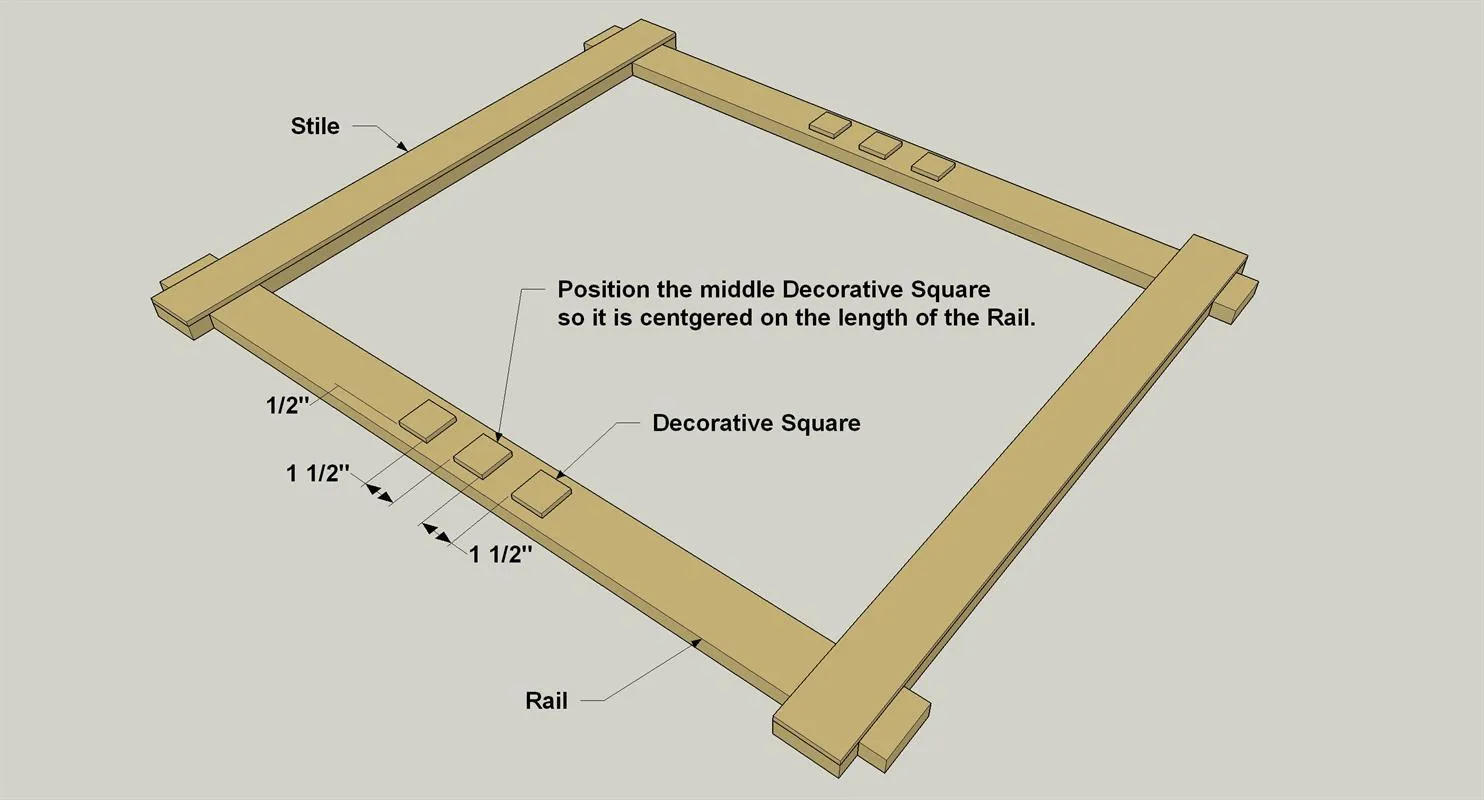
Cut six Decorative Squares, as shown in the cutting diagram. Dab some glue on the back of each one and set them on the Rails at the locations shown. An adjustable square is helpful here to get these pieces aligned.
7Cut the Plywood Back
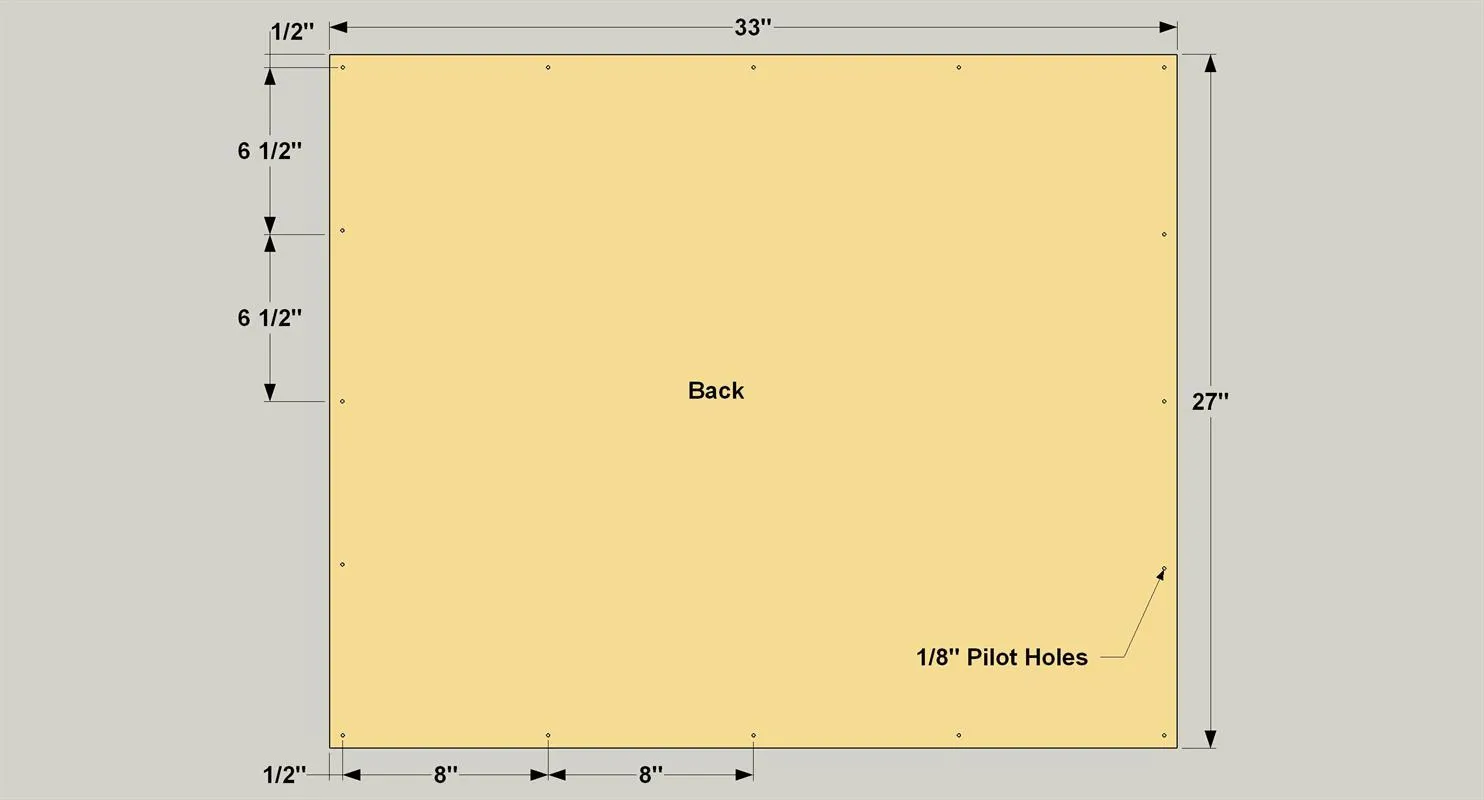
Cut the Back from 1/4" plywood as shown. Drill holes at the locations shown for screws that will be used to attach the Back to the mirror frame.
8Stain and Finish
Sand the mirror assembly, wipe it down to remove the dust, and then apply your favorite stain and top-coat.
9Install the Back
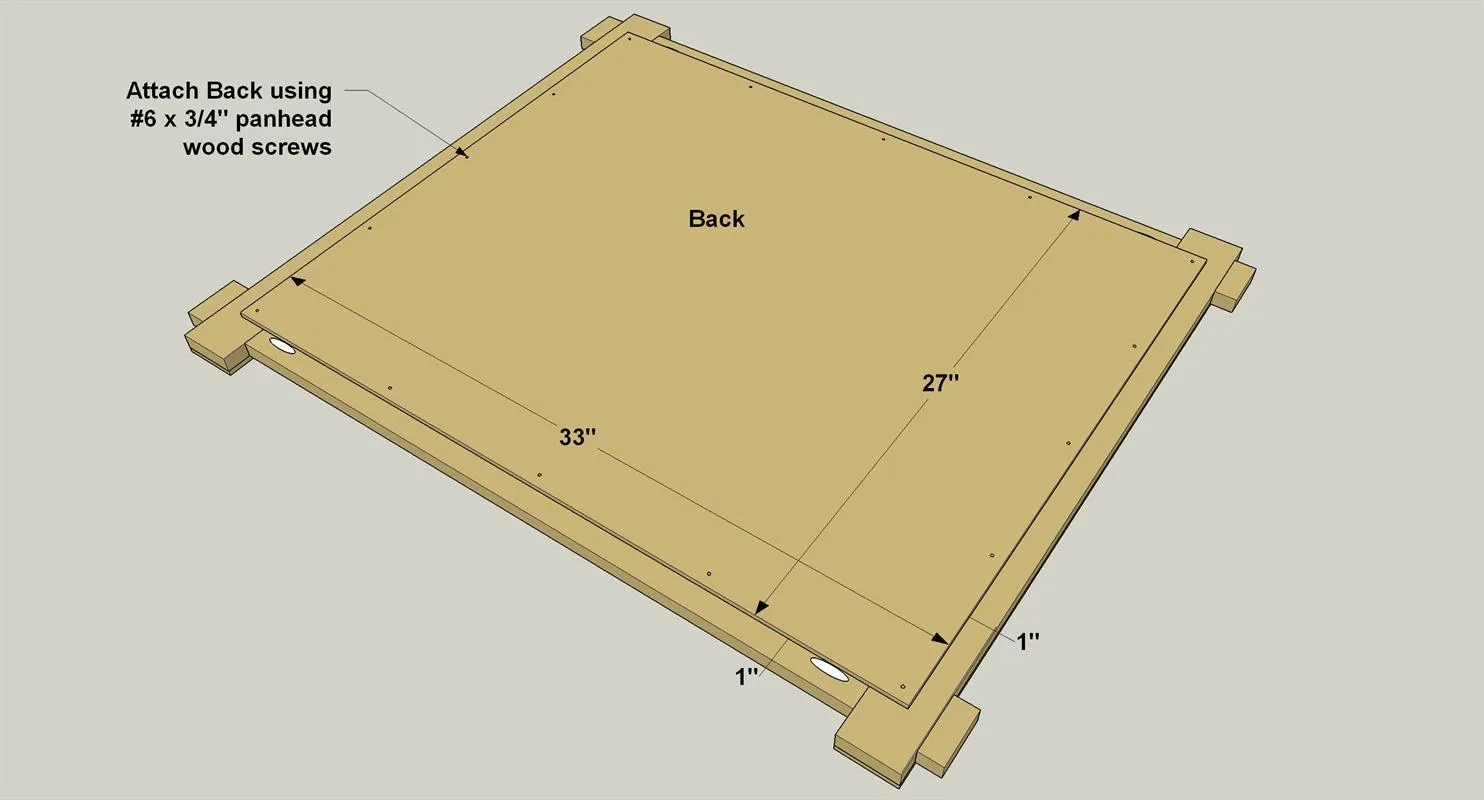
Screw the Back to the frame assembly using #6 x 3/4" pan-head screws, as shown.
10Add the glass
Now you can add the glass mirror. It simply gets adhered to the plywood. For a mirror, though, you need to use the proper type of adhesive. Ordinary glue or construction adhesive can actually pull the silver coating off of the glass. So, make sure you get mirror adhesive. It’s widely available. Follow the instructions to apply adhesive to the plywood, and then press the mirror in place. There should be a small gap between the edges of the mirror and the inside edges of the frame. Make sure the adhesive dries per the manufacturer’s instructions before you add the hardware and hang the mirror.
11Hang the Competed Mirror
- Add a hanging bracket or "D" rings and wire to hang the mirror. Make sure you screw any hanging mechanism into the solid wood part of the frame.
- Also, make sure any hanging hardware is rated for the appropriate weight of the mirror.
- Then, hang the mirror on your wall, and enjoy the view.
Tags
- Decor
- Beginner
Reviews & builds
No reviews yet
Sign in to review this plan or share your build.
No reviews yet. Be the first to build this.