Notch
NotchUse your browser's Print (Ctrl/Cmd + P) and choose Save as PDF. This page works offline once you've opened it with a signal.
Custom Built-in Console Cabinets
Create stylish custom console cabinets perfect for your living room, or any space you need extra storage.
- Difficulty
- Advanced
- Time
- 7–14 hours
- Cost
- $$$$
Cut list
| Part | Qty | T × W × L | Material | ✓ |
|---|---|---|---|---|
| Deep Cabinet - Sides | 4 | 1/2" × 24" × 32" | — | ☐ |
| Shallow Cabinet - Sides | 4 | 1/2" × 15" × 32" | — | ☐ |
| Deep Cabinet - Bottom | 2 | 1/2" × 24" × 38" | — | ☐ |
| Shallow Cabinet - Bottom & Shelves | 8 | 1/2" × 15" × 38" | — | ☐ |
| Shallow Cabinet - Securing Strip | 2 | 1/2" × 2 3/4" × 48" | — | ☐ |
| Face Frame - Sides | 8 | 3/4" × 1" × 32" | — | ☐ |
| Face Frame - Top & Bottom | 8 | 3/4" × 1 1/2" × 37" | — | ☐ |
| Face Frame - Middle | 4 | 3/4" × 1 1/2" × 26 1/2" | — | ☐ |
| Deep Cabinet - Middle Partition | 2 | 1/2" × 24" × 27 7/8" | — | ☐ |
| Deep Cabinet - Securing Strip | 4 | 1/2" × 2 1/2" × 18 3/4" | — | ☐ |
| All Cabinets - Toe Kick | 4 | 2" × 4" × 38" | — | ☐ |
| Door Panel | 8 | 1/2" × 12 5/8" × 21 3/8" | — | ☐ |
| Door Strips (top & bottom | 16 | 1" × 3" × 12 5/8" | — | ☐ |
| Door Strips (sides) | 16 | 1" × 3" × 26" | — | ☐ |
| Shallow Cabinet Countertop | 2 | 3/4" × 16" × 40" | — | ☐ |
| Deep Cabinet Countertop | 1 | 3/4" × 25" × 80" | — | ☐ |
Materials
| Item | Qty | ✓ |
|---|---|---|
| Plywood, 1/2" Thick Full Sheet | 4 board | ☐ |
| Board, 2x4 96" | 2 board | ☐ |
| Board, 1x2 96" | 6 board | ☐ |
| Board, 1x3 96" | 8 board | ☐ |
| Plywood, 3/4" Thick Full Sheet | 1 board | ☐ |
| 1" Kreg Screws | 200 each | ☐ |
| 1.5" Kreg Screws | 100 each | ☐ |
| Inset Cabinet Hinges (with face frame) | 16 each | ☐ |
| Wood Filler | 1 each | ☐ |
Overall cost: $$$$. Lumber varies by region, species, and season, so we give a band rather than a figure.
Tools
- Circular Saw
- Drill / Driver
- Miter Saw
- Pocket Hole Jig
- Random Orbit Sander
- Router
- Bar / Pipe Clamps — optional
Instructions
1. Drill Pocket Holes for Cabinets
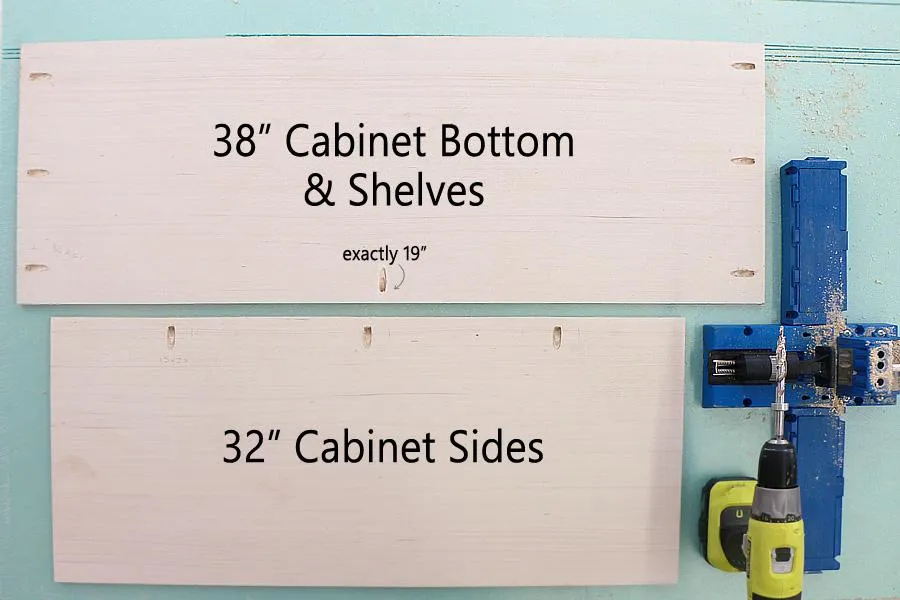
Drill pocket holes (as shown in the diagram) into the 15"x32" and 24"x32 cabinet sides", the 15"x38" and 24"x38" cabinet bottoms & shelves. Evenly space out your pocket holes (you can do 4 holes instead of 3 in the 24" sheets), and set the outside pocket holes at least 2 inches from the edge on the cabinet bottoms and shelves.
2. Drill Pocket Holes In Strips
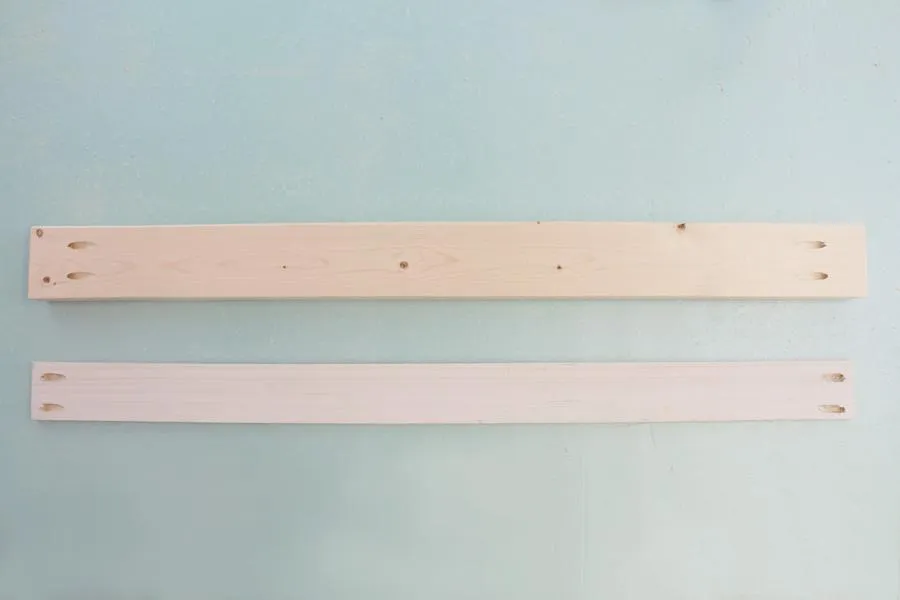
Drill two pocket holes in either end of all the securing strips and toe kicks (of any size).
3. Assemble 15" Cabinet Base
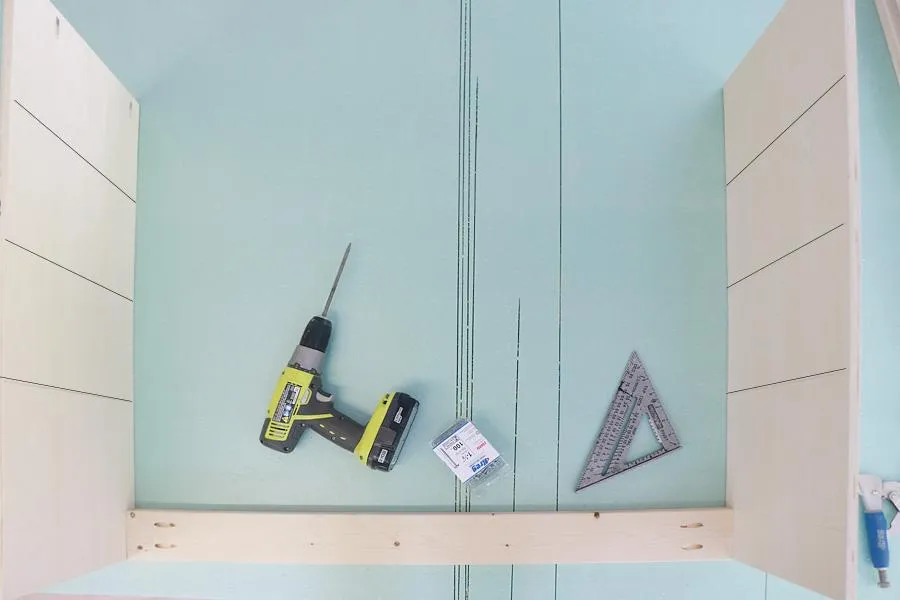
- Place two 15"x32" cabinet sides together on a level surface, pocket holes facing the work surface and finished wood sides facing each other. The side facing you will be the bottom. From the bottom up draw lines on the finished wood surface at the 11", 18", and 25" mark. This is where your shelves will be placed in the next step.
- Next attach the 2"x4" toe kick between the cabinet sides, and flush with the bottom.
4. Add Shelves
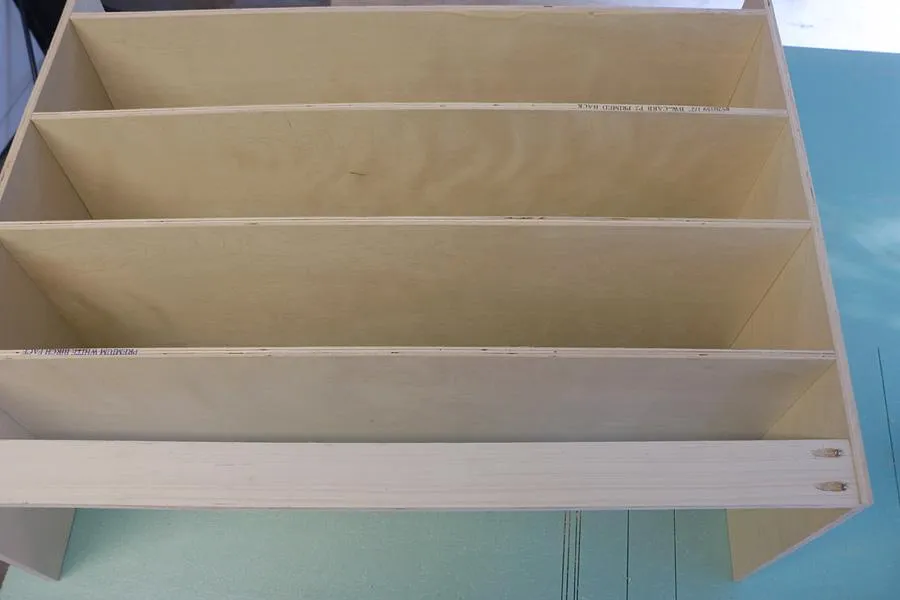
- Place the first cabinet shelf just above the 2"x4" and secure it via pocket screws, then the next shelf at the 11" mark, and on up until all 4 shelves have been placed. Be sure that the middle pocket hole in each shelf is facing the front of the cabinet base (toward the toe kick).
- Repeat with the second 15" cabinet base.
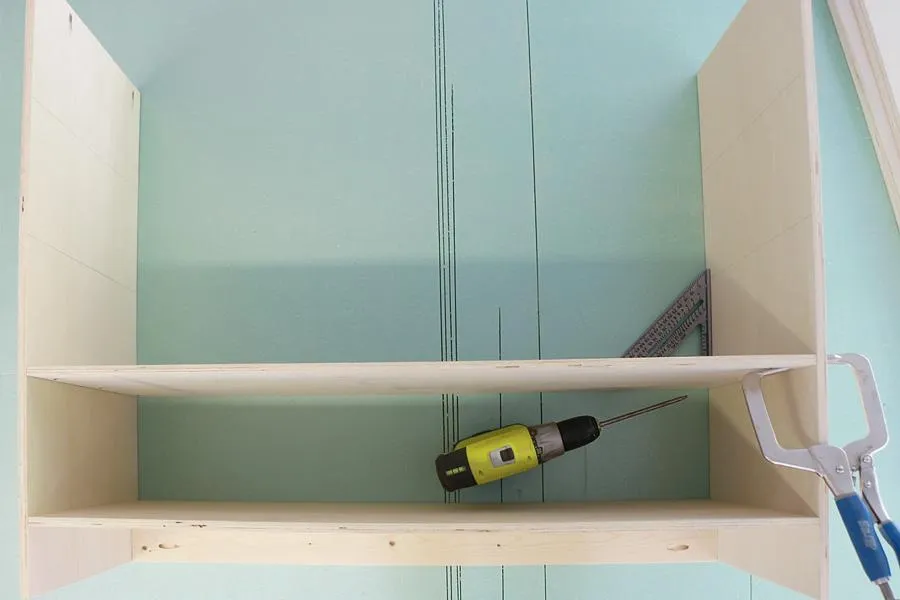
5. Drill Pocket Holes for 24" Cabinets
Drill pocket holes in bottom and front edges of the 1/2"x24"x27-7/8" middle partitions. Draw two lines down the center of the 1/2"x24"x38" cabinet bottom (finished wood side). Lines should be 18-3/4" from either edge...this line will help indicate where the middle partition should be attached.
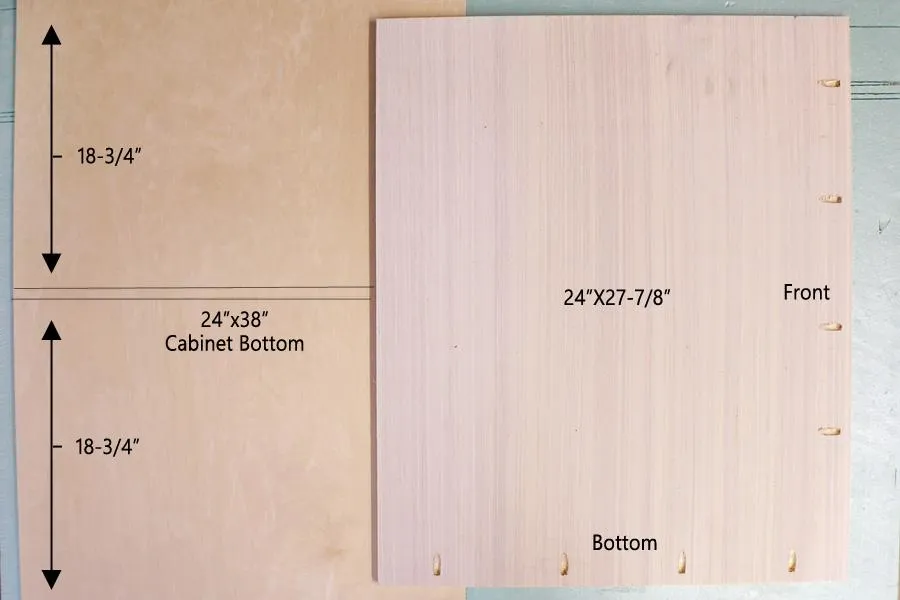
6. Assemble 24" Cabinet
- Start the assembly as you did the 15" cabinets.
- Attach the 2"x4"x38" toe kick between the 24"x32" cabinet sides.
- Add the 24"x38" cabinet bottom just above the toe kick.
- Next attach the middle partition (pocket holes facing down and the other set of holes facing front), use the guide lines you drew to help ensure it is properly centered as you attach it.
- Finally attach the 18-3/4" securing strips to the top back of each cabinet.
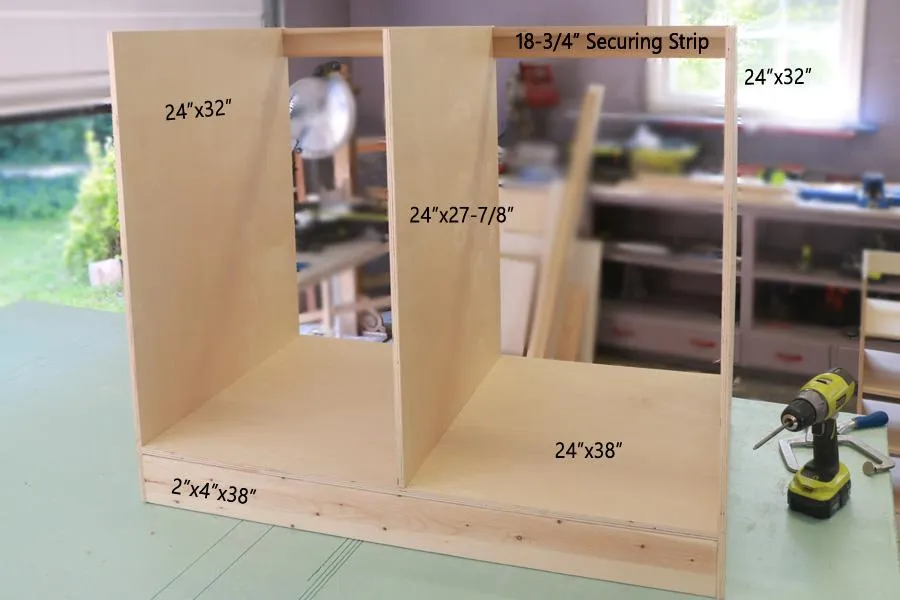
7. Assemble & Paint Face Frame
- Drill double pocket holes in either end of the the 1"x2"x37" face frame pieces, and the 1"x2"x26-1/2" face frame pieces.
- Assemble 4 face frames as shown.
- Paint (or stain) the face frame to your desired color.
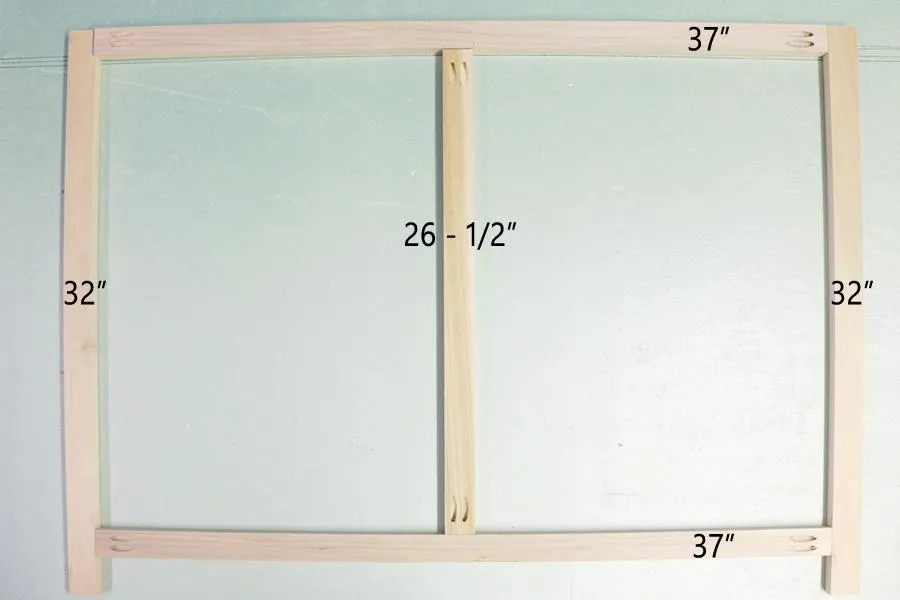
8. Attach Face Frames
- If you plan to use melamine strips on the raw edges of the shelves, now is the time to apply them, or make sure the edges are sanded smooth.
- Now attach the face frames to the cabinet bases.
- Leave a 1/2" overhang on the outsides. Don't forget to secure via pocket holes on the middle partition of the 24" deep cabinet to the middle strip on the faceframe, and also the pocket holes on the underside of each shelf on the 15" deep cabinets.
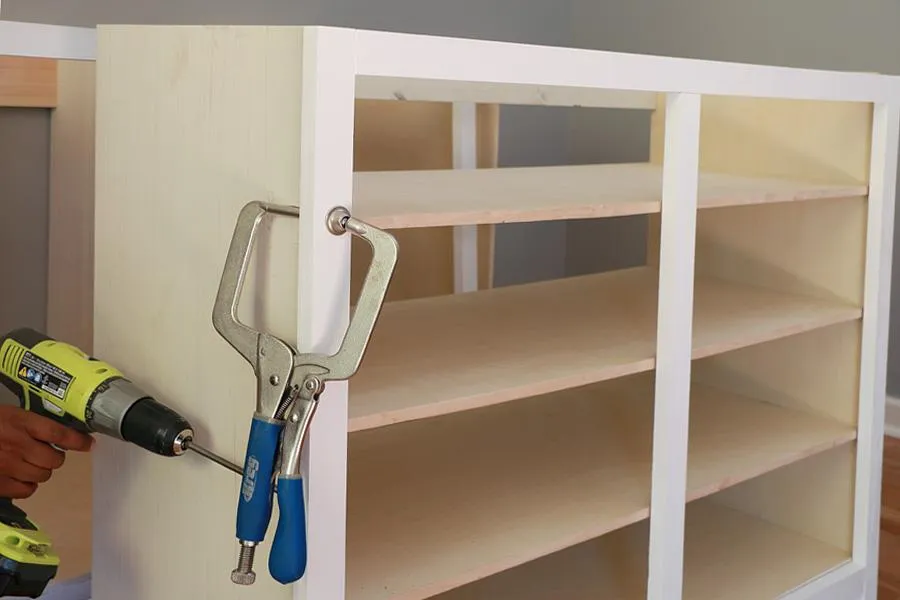
9. Add Side Panels & Secure Cabinets
- Set cabinet bases in place, add 15"x32" side panels between the 24" cabinet bases and the 15" cabinet bases to hide pocket holes. If there is any further gaping between cabinets add a filler piece between the two 24" cabinet bases so your built-ins will fit snugly. Secure the side panels and filler pieces from the inside of the cabinets.
- Finally secure the cabinet bases to each other (see arrows), and to the wall via the securing strips.
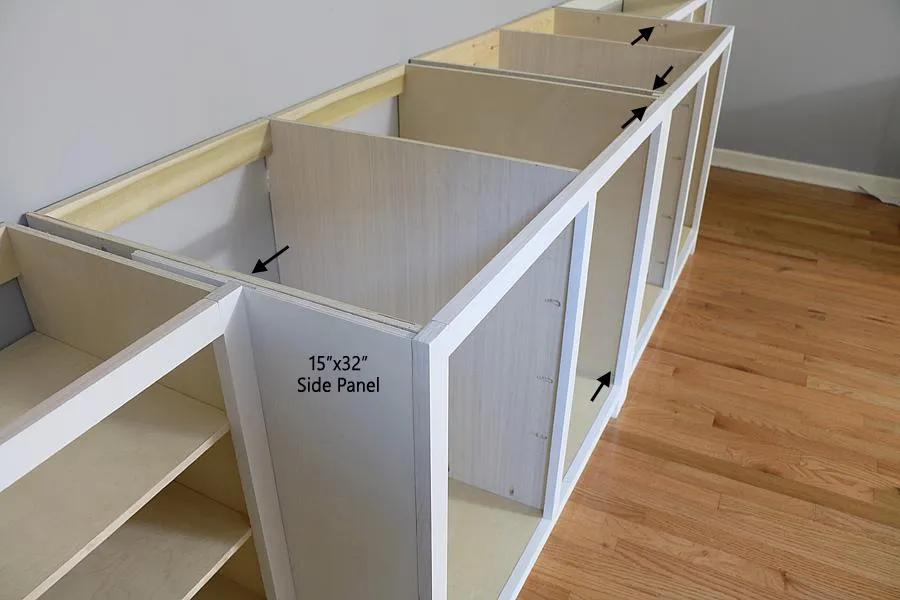
10. Build Cabinet Doors
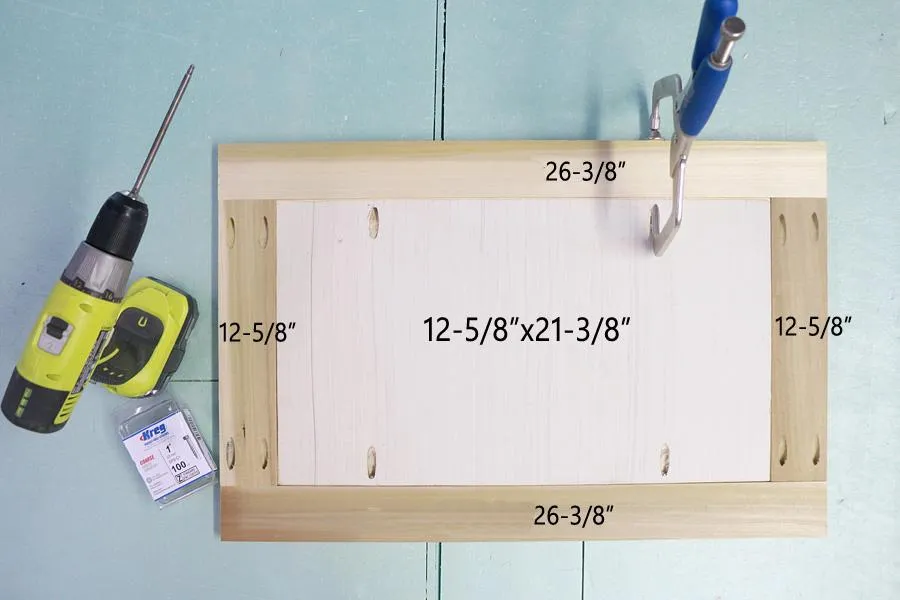
- Drill two pocket holes into either end of the 1"x3"x12-5/8" door strips.
- Also drill four pocket holes into the 1/2"x12-58"x21-3/8" door panel.
- Then assemble the door as shown in the photo. Make sure the door panel is attached flush with the TOP of the door strips (pocket holes all facing the top). This creates a recessed panel cabinet door.
- Fill holes, and paint/stain.
11. Attach Doors & Prep Countertop
After cutting the counter tops for your cabinet (will be in three segments for easy handling), optionally route the outside edge, sand, and paint/stain. While that is drying, attach your cabinet doors (much more easily accomplished before the counter top is added). You will need hinges designed for inset doors, and my also need to add a 1/2" strip of wood along the inside edges in order to make the hinges sit flush to the face frame (depends on what type of hinges you find).
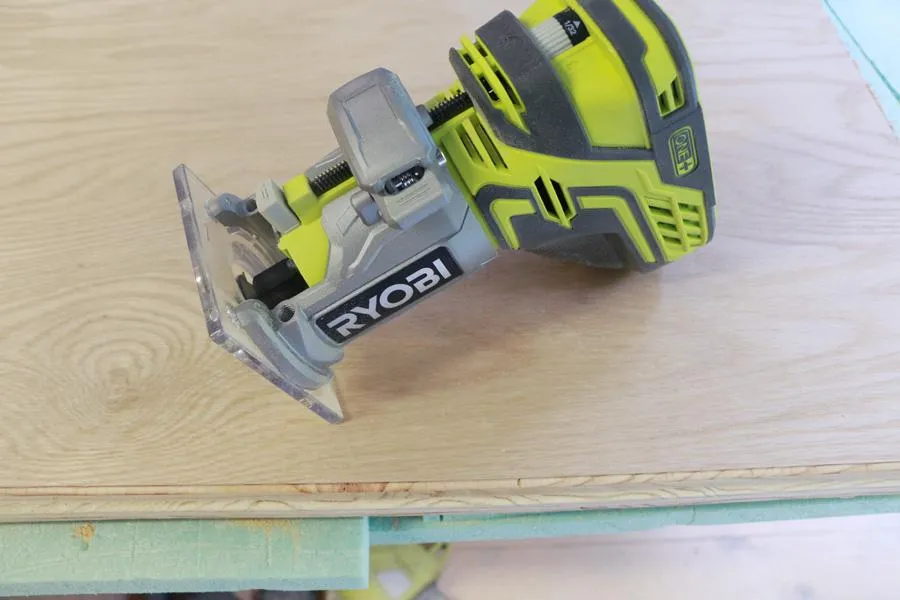
12. Attach Countertop
- Double check the fit of your counter tops before securing them. If necessary trim down to fluctuations in your wall.
- Finally secure the tops to the cabinet bases being sure to countersink your screws.
- Fill any holes, as well as the line between tops with a little silicone so you have a smooth top that appears to be one long unit.
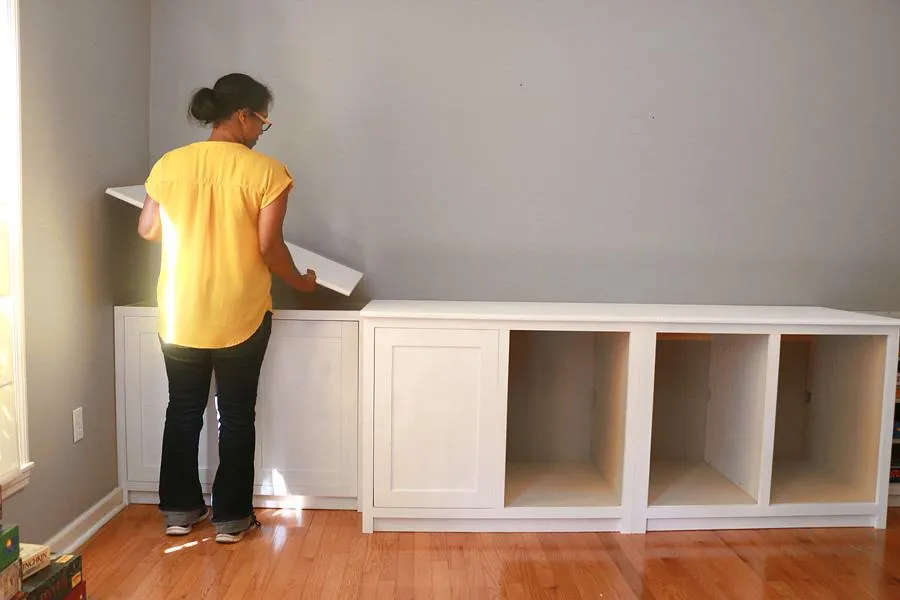
13. Add Securing Strip
After all your shelves are on, attach the 32" securing strip to the top. This strip should be opposite of the toe kick...toe kick is on the bottom, securing strip is on the top, toe kick is at the front of the cabinet, securing strip is at the back. Both flush with the outside edges.