Notch
NotchUse your browser's Print (Ctrl/Cmd + P) and choose Save as PDF. This page works offline once you've opened it with a signal.
Curio Box – In the Prairie School Design Style
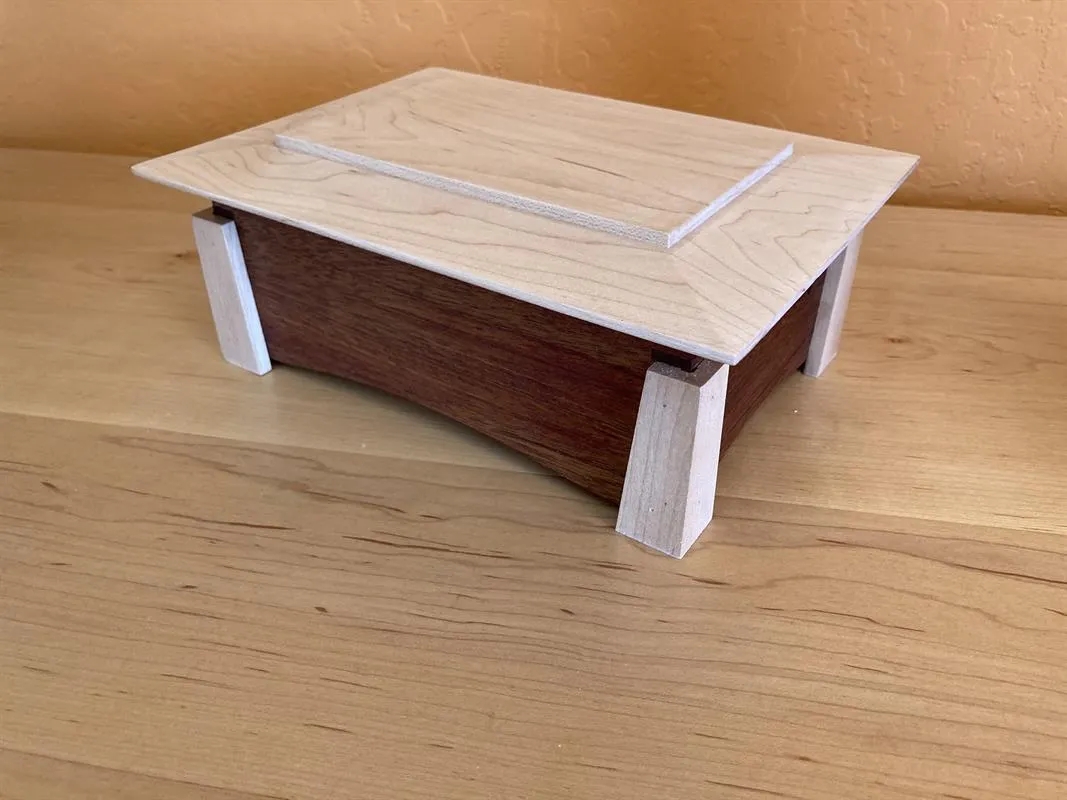
This beautiful Curio Box is built using Cherry & Hard Maple in the Prairie School Design style.
- Difficulty
- Advanced
- Time
- 7.5–14.3 hours
- Cost
- $$
Cut list
| Part | Qty | T × W × L | Material | ✓ |
|---|---|---|---|---|
| Box Sides Cherry | 2 | 1/2" × 3" × 8" | — | ☐ |
| Box Ends Cherry | 2 | 1/2" × 3" × 5" | — | ☐ |
| Box Top Maple | 1 | 1/2" × 7" × 9" | — | ☐ |
| Legs Maple | 4 | 1" × 1" × 2" | — | ☐ |
| Insert for Top, Maple Plywood | 1 | 1/4" × 4" × 6" | — | ☐ |
| Box Bottom Cherry Plywood | 1 | 1/4" × 5" × 7" | — | ☐ |
Materials
| Item | Qty | ✓ |
|---|---|---|
| Cherry Hardwood, 1x4 36" | 1 board | ☐ |
| Maple Hardwood, 1x8 12" | 1 board | ☐ |
| Maple Hardwood, 2x2 12" | 1 board | ☐ |
| Cherry plywood, 1/4" Thick 7 1/2" X 5" | 1 board | ☐ |
| Maple Plywood, 1/4" Thick 5" X 7" | 1 board | ☐ |
| 1" 23 gauge pin nails | 16 each | ☐ |
| Titebond 1 wood glue | 1 each | ☐ |
| Sandpaper 80 to 220 grit | 4 each | ☐ |
| TOTALBOAT Halcyon Clear Satin Varnish (water based) | 1 each | ☐ |
| Boiled Linseed Oil | 1 each | ☐ |
| Minwax Tung Oil Finish | 1 each | ☐ |
Overall cost: $$. Lumber varies by region, species, and season, so we give a band rather than a figure.
Tools
- Brad Nailer
- Jointer
- Miter Saw
- Pocket Hole Jig
- Random Orbit Sander
- Router
- Router Table
- Scroll Saw
- Table Saw
- Thickness Planer
- Bar / Pipe Clamps — optional
- Tape Measure — optional
Instructions
1. Introduction
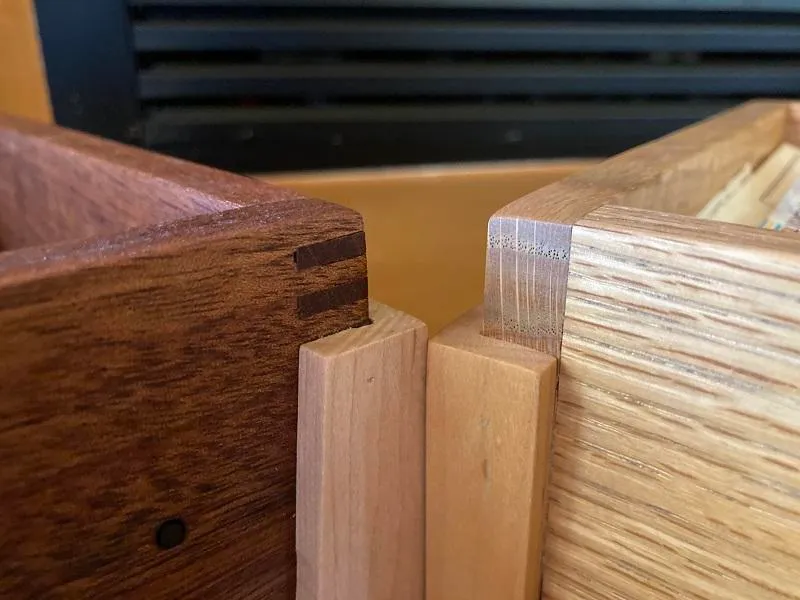
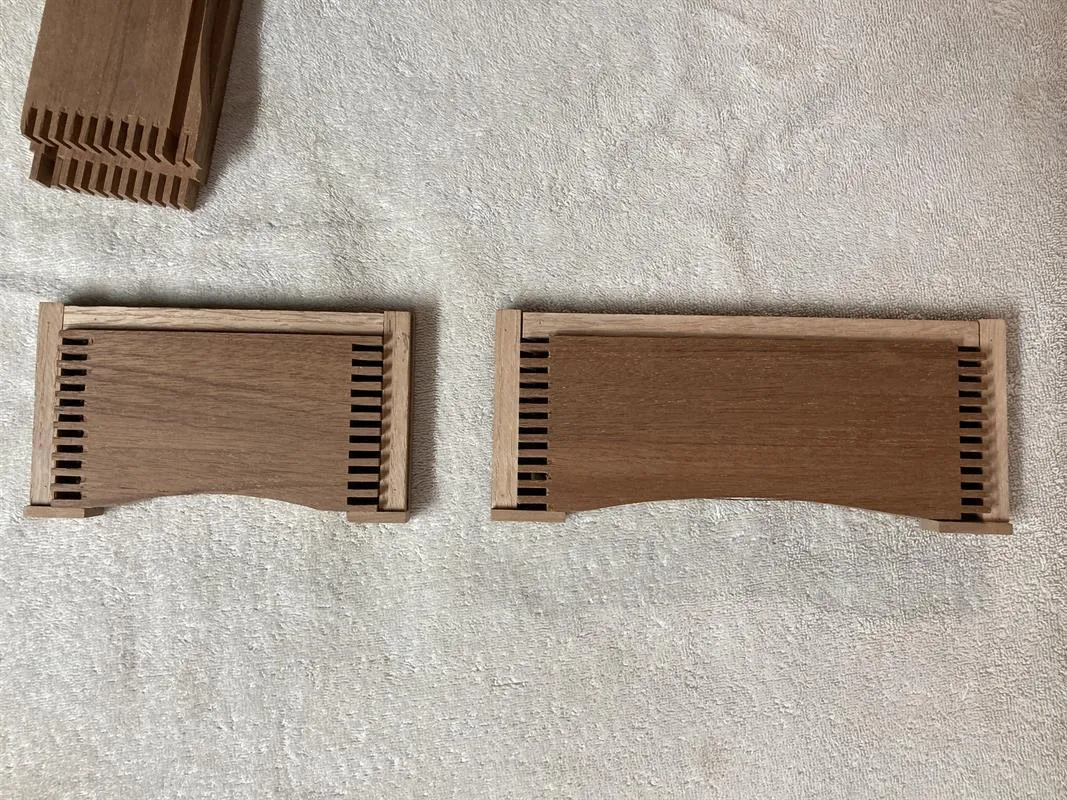
Please be sure to read through complete instructions before you begin any work on this project. I built the box using finger joints as I think that adds to the overall look. However that does require a specialized cutting jig. It can be built with simpler butt joints at the corners and most people will not notice the difference. I will include information on how to build it both ways. Finger joint on the left, butt joint on the right.
2. Box Sides and Ends
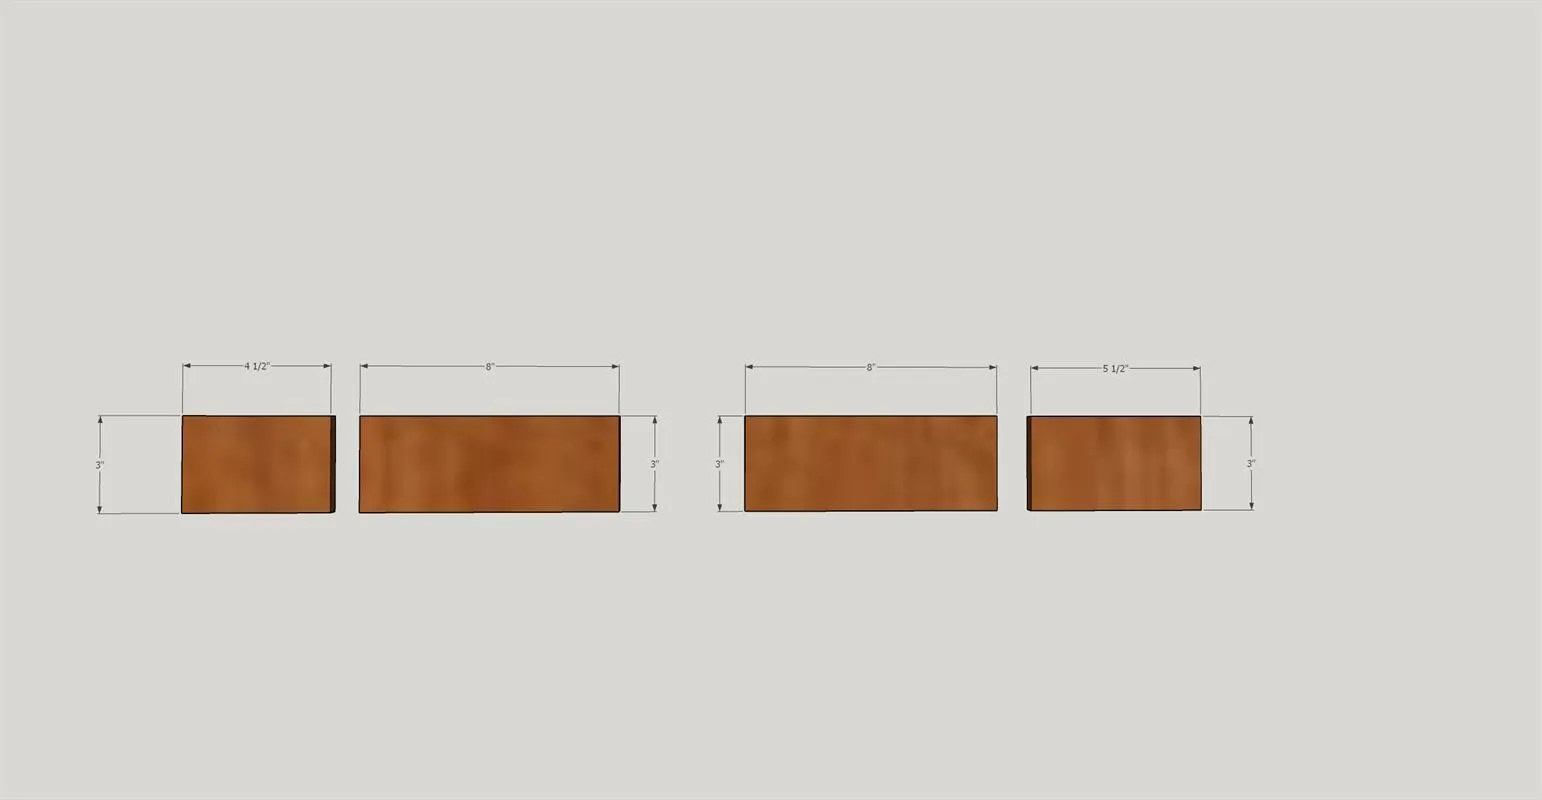
Using a table saw or a plainer reduce the 1" x 4" x 36" cherry board to a thickness of 1/2". If using finger joints cut 2 sides 3" x 8" and 2 ends 3" x 5 1/2" If using butt joints cut 2 sides 3" x 8" and 2 ends 3" x 4 1/2"
3. Cut Dados for Box Bottom
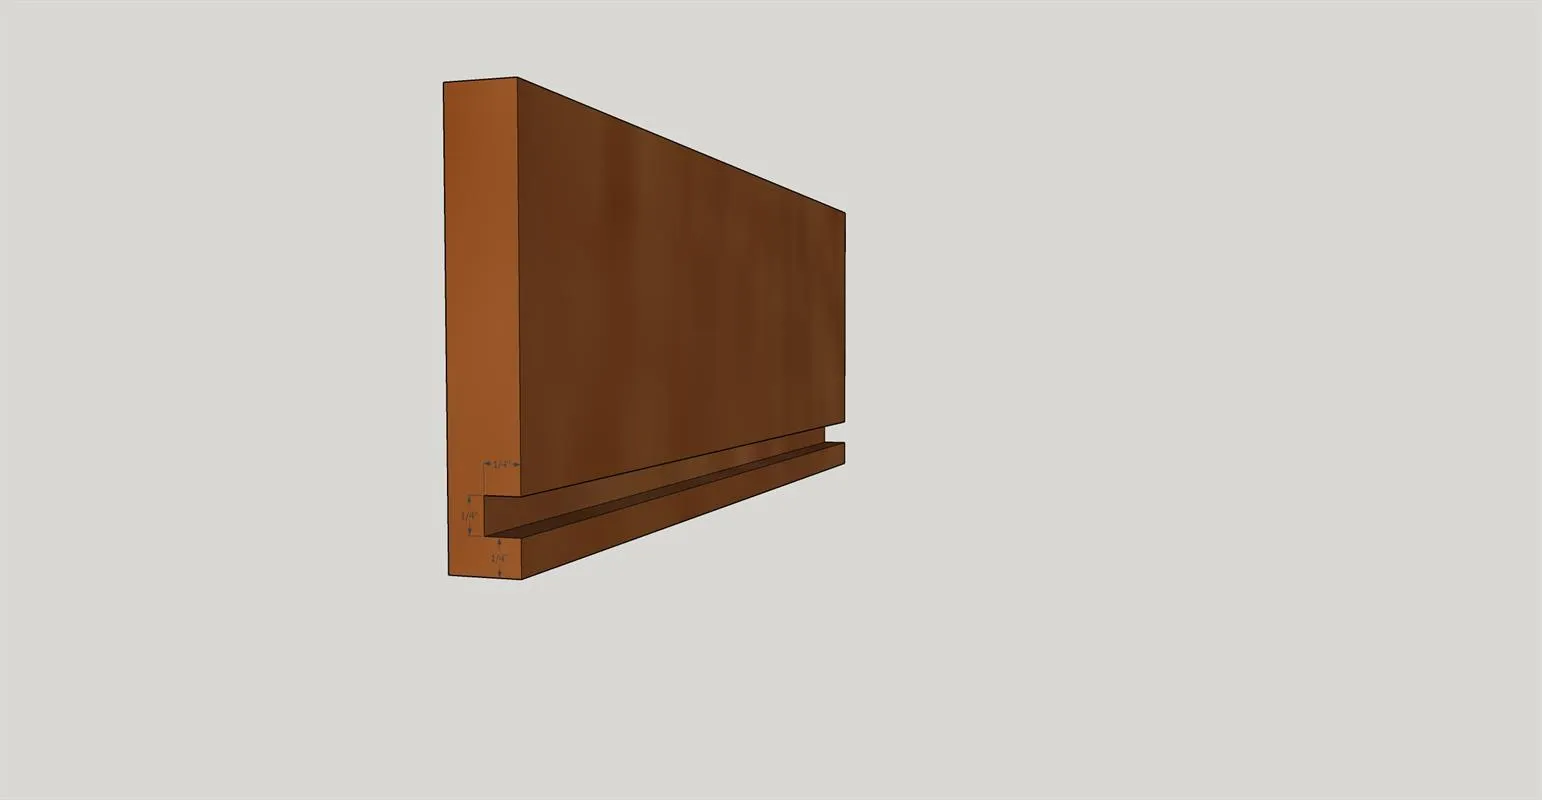
Use either a table saw or a router table with a straight bit to cut a 1/4" X 1/4" dado 1/4" up from the bottom edges of both the ends and sides. Use 100 - 220 grit sandpaper to smooth the ends and sides.
4. Box Bottom
Cut the bottom from 1/4" cherry plywood. I usually cut it 4 15/16" x 7 7/16". Use 100 - 220 grit sandpaper to smooth
5. Cut Curves on the Sides and Ends
I cut shallow curves in the lower sides and ends to add additional detail. As I have built a number of these boxes I built jigs to do this. I use a Freud 42-114 bearing flush trim router bit in my Kreg router table. The curve could also be cut using a jig saw or a coping saw. You can also choose to leave the bottoms flat for a simpler look. (If you are building the box with butt joints go to step 7 Box Assembly.)
6. Finger Joints
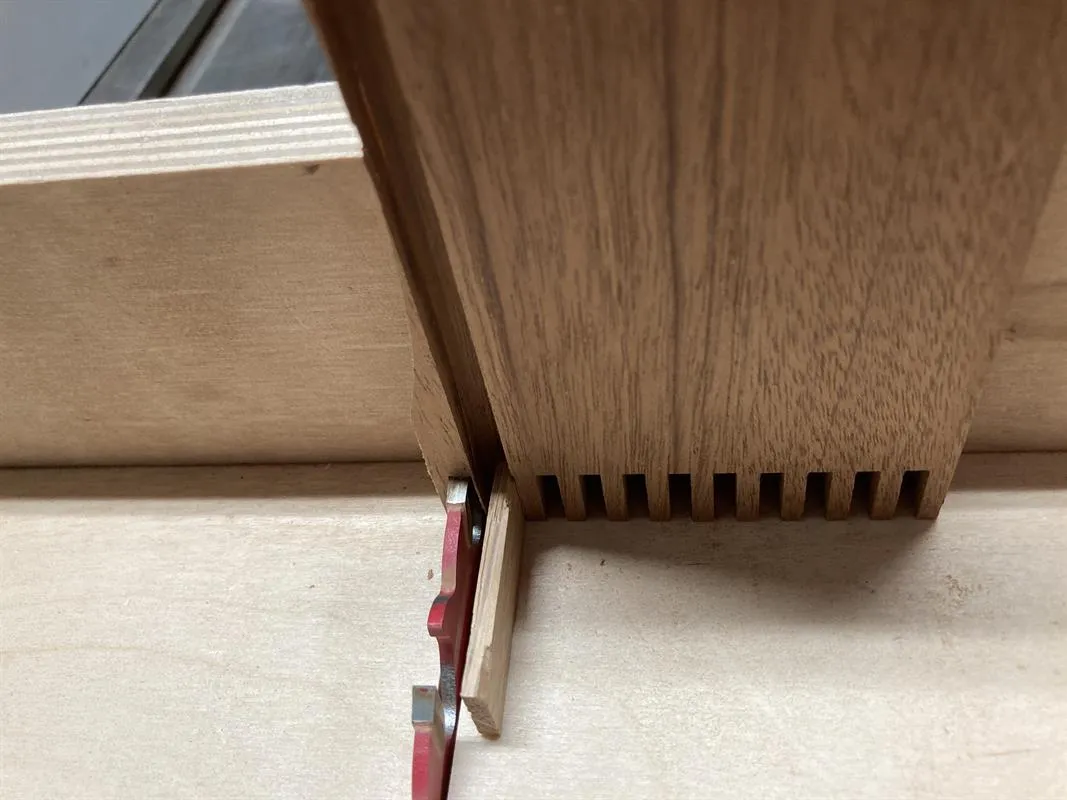
Using a finger joint jig cut the fingers in the ends and sides. Make sure to offset the sides 1 joint from the ends. There are numerous You Tube videos about how to build jigs and do finger and box joints if you are looking for additional information.
7. Assemble Boxes
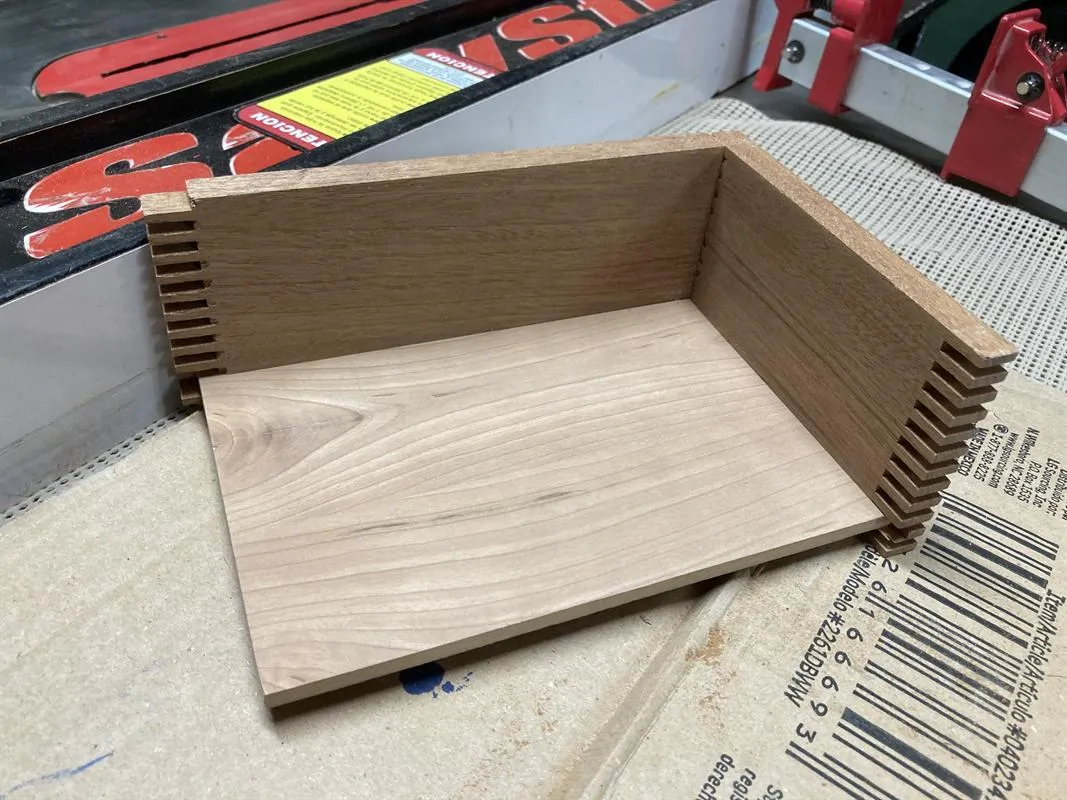
- For butt joints add a small amount of glue to the end of the end pieces and join to the side. I use a couple of 1" 23 gauge to hold together. Starting with one corner add the box bottom. Since the bottom is plywood and should not change size I add glue to the dado slot in the ends and sides to add structural rigidity. Connect the other end and side again using glue and pin nails. For the box joints add a small amount of glue between the fingers on the end only.
- Assemble by pushing together.
- Add glue to dado and place bottom in the dado. Continue adding the other end and side in a similar manner. Use clamps to hold assembly until dry. Make sure you check the box is square and adjust as needed.
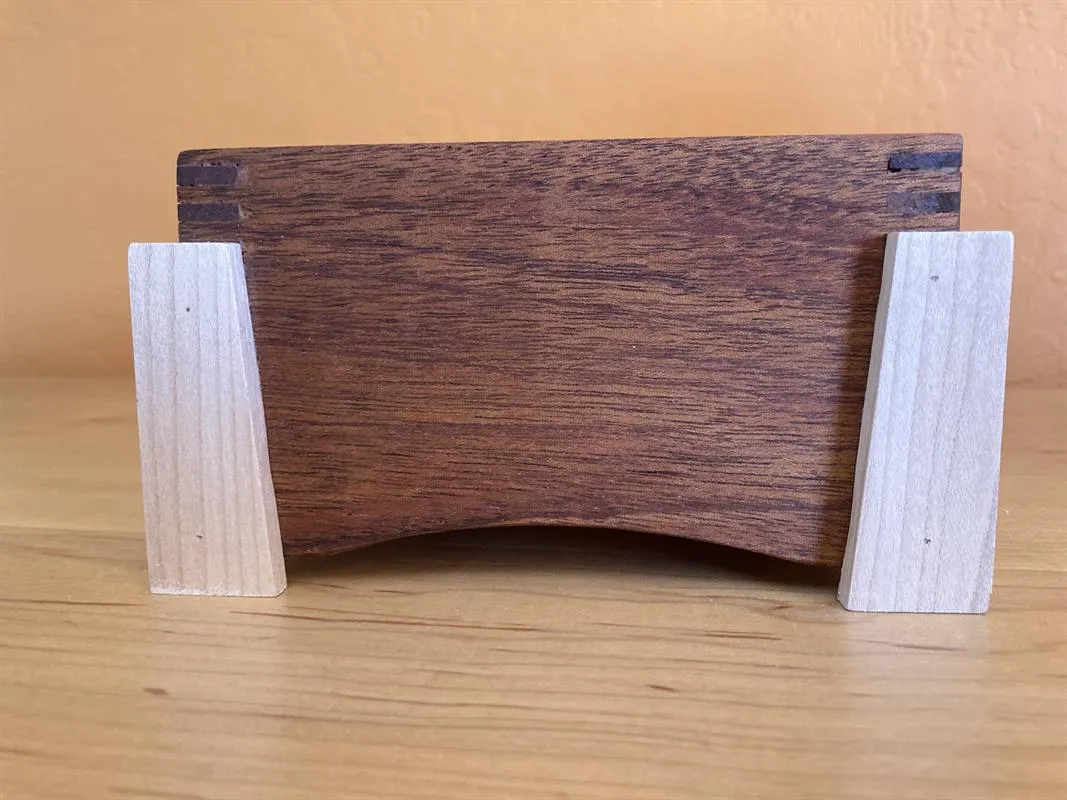
8. Make Leg Stock
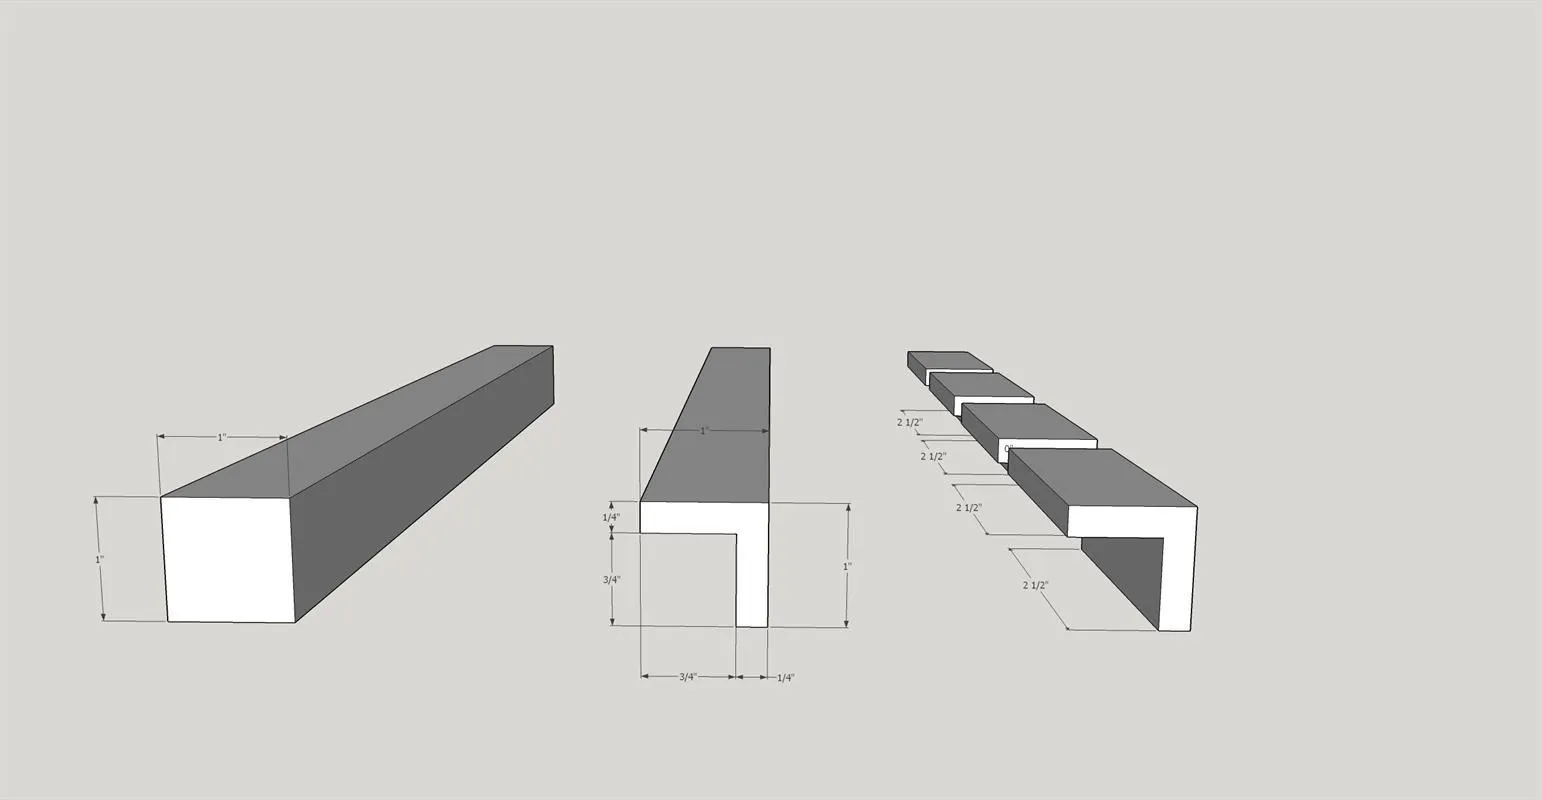
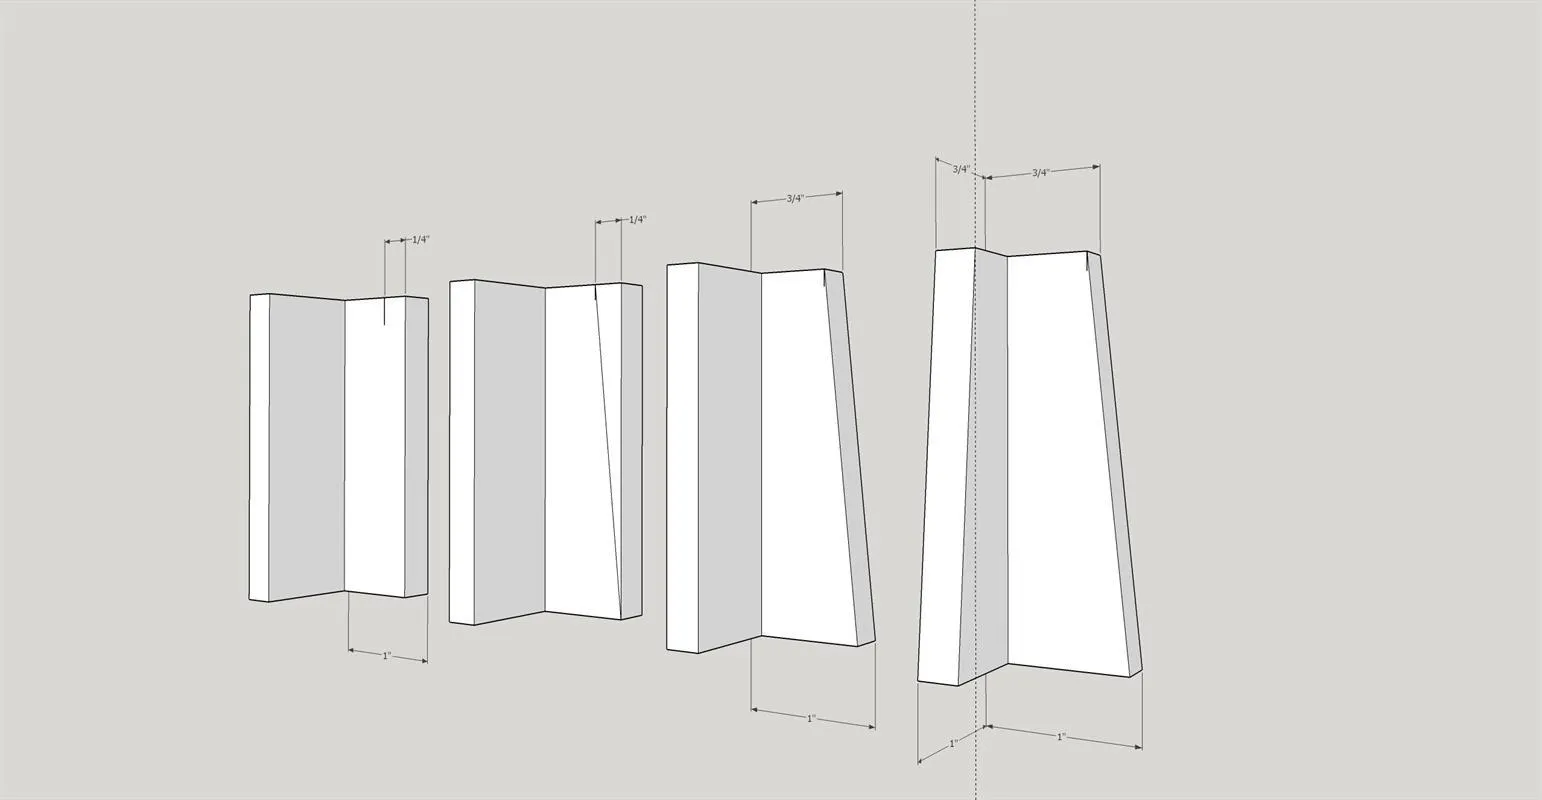
From the 2" by 2" white maple board saw down to a dimension of 1" x 1". Use either a table saw or a router table with a straight bit to cut a 3/4" X 3/4" rabbet in the 1" x 1" board. Then cross cut that board into the four 2 1/2" long legs.
9. Taper Legs
On the inside of the rabbit make a mark at 1/4" from the outside edge on one end of the leg. Using a straight edge draw a line from that mark to the outside edge of the other end of the leg. Cut along the line to create the leg taper. I use a scroll saw, a coping saw or a japanese style saw also work fine. Use 100 - 220 grit sandpaper to smooth the outside and ends of the legs.
10. Prepare Top
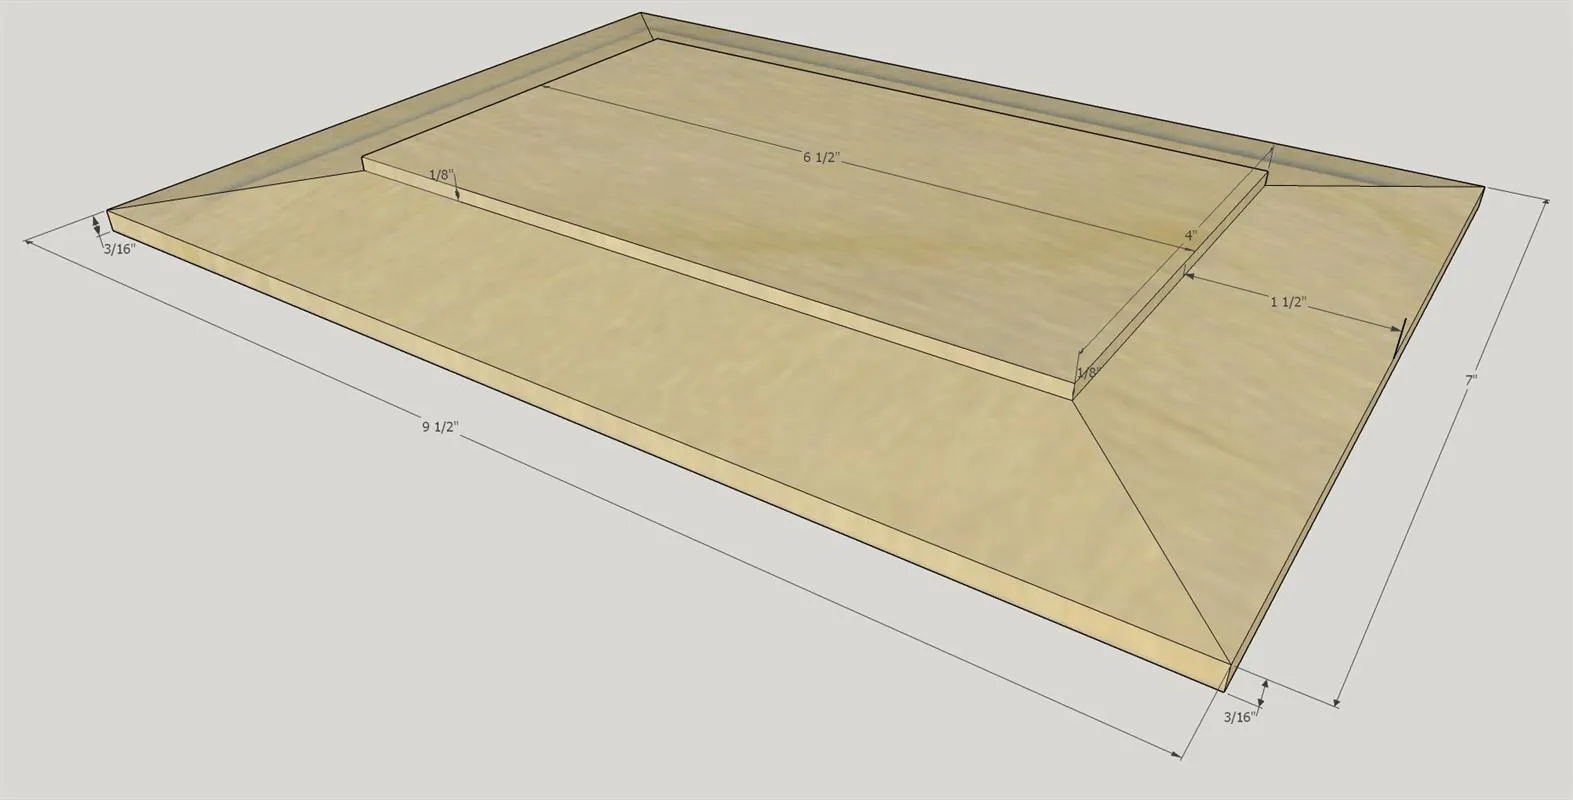
Using planer or table saw reduce the 1" x 8" x 12" white hard maple to a 1/2" thickness. Cut the board to 7" x 9 1/2" .
11. Cut the Top Bevels
Use a table saw to cut the four bevels in the top. (if you need information on how to do this there are numerous You Tube videos you can watch) The border of the field is 1 1/2" X 1/8" deep and the bottom of the bevel is 3/16" deep. The angle I used on my table saw was 8 degrees. Use 100 - 220 grit sandpaper to smooth the top.
12. Add Plywood to the Top
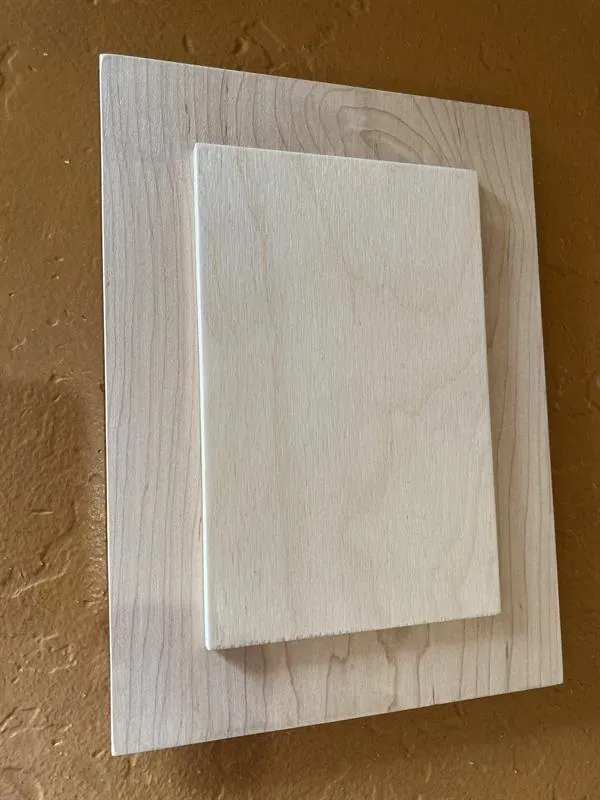
Use 1/4 inch maple plywood attached to the bottom of the tapered top to fit snugly into the box and hold the top in place. Measure the box opening and make your plywood piece 1/16" of an inch smaller than those dimensions. Mine was 4 7/16" x 6 15/16". Using wood glue attach the plywood to the underside of the top (make sure that you place the plywood equal distances from the sides and ends of the top for a proper fit). After the glue dries use 100 - 220 grit sandpaper to smooth the surfaces.
13. Finish Box
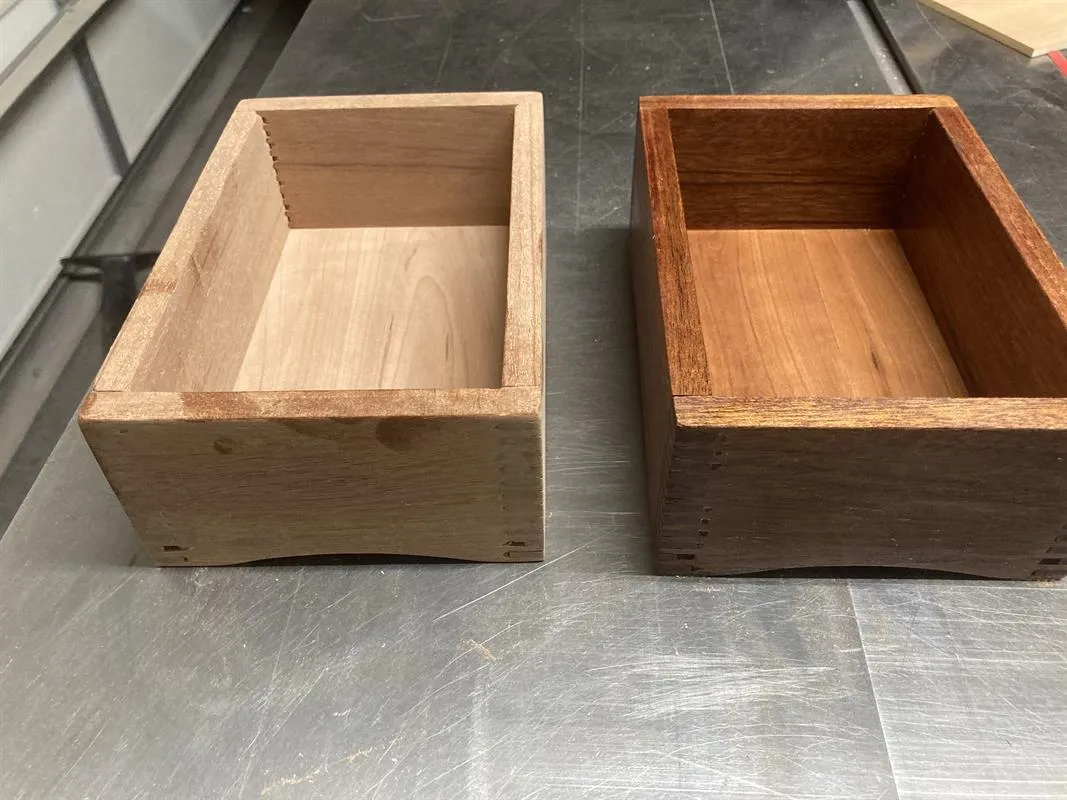
I use boiled linseed oil to bring out the rich dark color of the Cherry. For the final box finish I use Minwax Tung oil. I usually allow the linseed oil to cure for at least a week before applying the Tung oil. Right box has linseed oil applied.
14. Finish Top and Legs.
I use TOTALBOAT Halcyon Clear Satin Varnish, which is a water based finish, on the top and outside of the legs as that provides good protection with a clear finish. Oil based finishes, like Tung Oil, usually add a yellow hue and by using the water based finish you accent the color difference between the Cherry and the Hard Maple.

15. Attach Legs
I use 100 grit sandpaper at the corners of the box to rough up the surface in preparation for gluing on the legs. Be careful to only sand where the legs will cover the corners. I use a piece of 1/4 inch plywood under the bottom of the box as a spacer. Using a small amount of wood glue and 4 - 1" pin nails per leg attach them to the box.
16. Assemble Box
Finish assembling the box by placing the top.