Notch
NotchUse your browser's Print (Ctrl/Cmd + P) and choose Save as PDF. This page works offline once you've opened it with a signal.
Cube Storage Console Table
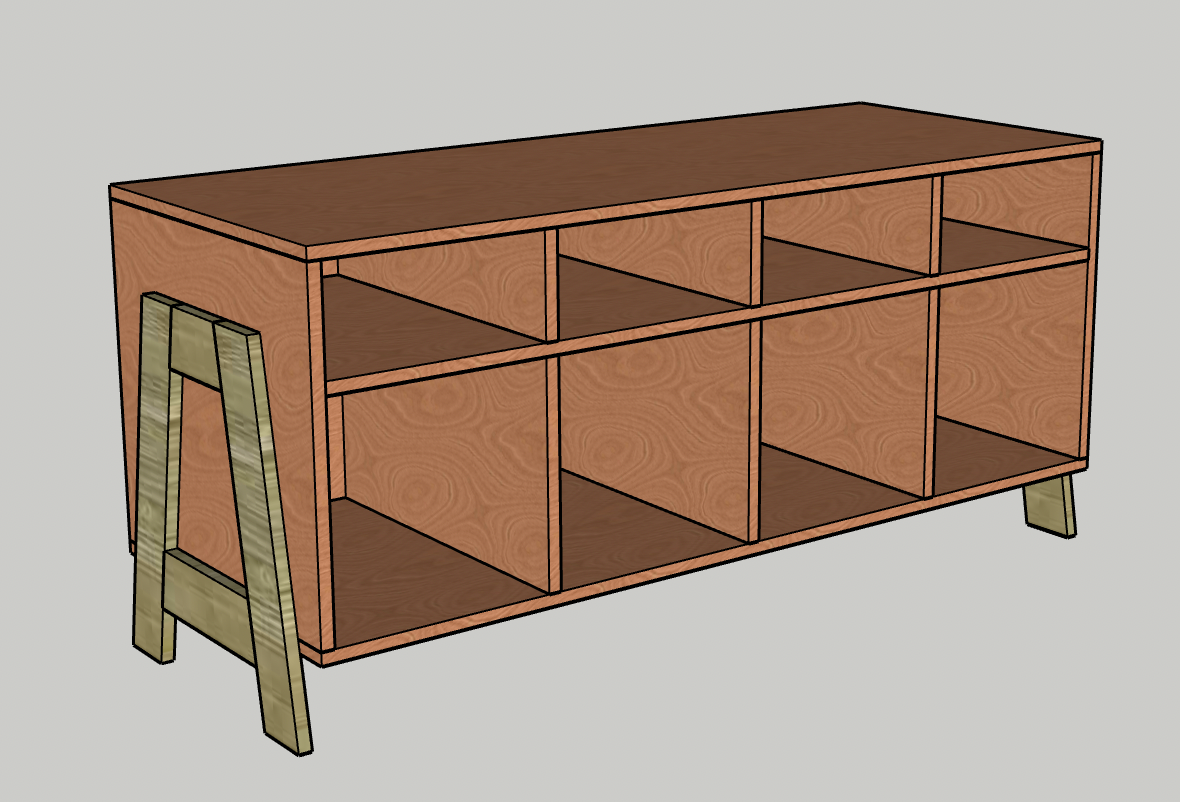
This storage console table is perfect for standard sized cubes as well as trays to keep miscellaneous items organized.
- Difficulty
- Intermediate
- Time
- 4.8–9 hours
- Cost
- $$$
Cut list
| Part | Qty | T × W × L | Material | ✓ |
|---|---|---|---|---|
| Top/Bottom | 2 | 3" × 22" × 55" | — | ☐ |
| Sides | 2 | 3" × 19" × 22" | — | ☐ |
| Shelf | 1 | 3" × 21" × 54" | — | ☐ |
| Big Dividers | 3 | 3" × 13" × 21" | — | ☐ |
| Small Dividers | 3 | 3" × 6" × 21" | — | ☐ |
| Back | 1 | 3" × 19" × 54" | — | ☐ |
| Legs | 4 | 3" × 3" × 22" | — | ☐ |
| Top Braces | 2 | 3" × 3" × 6" | — | ☐ |
| Low Braces | 2 | 3" × 3" × 11" | — | ☐ |
Materials
| Item | Qty | ✓ |
|---|---|---|
| 3/4" plywood, 4'x8'x8' | 2 board | ☐ |
| 1x4s, 3/4" x 3 1/2" x 8' | 2 board | ☐ |
| 1" dowel | 1 board | ☐ |
| 3/4" edge banding | 1 board | ☐ |
| 1 1/4" Kreg pocket hole screws | 60 each | ☐ |
| Wood glue | 1 each | ☐ |
| Stain | 1 each | ☐ |
| Polyurethane | 1 each | ☐ |
Overall cost: $$$. Lumber varies by region, species, and season, so we give a band rather than a figure.
Tools
- Drill / Driver
- Miter Saw
- Pocket Hole Jig
- Random Orbit Sander
Instructions
1. Drill pocket holes
After making all the cuts in the cut list, drill the following pocket holes: - Plywood (1) Top- None (1) Bottom- 2 on each short edge, 5" in from the long edges (2) Sides- 3 on each 22" edge (1) Shelf- 2 on each short edge, 2" in from the long edges (3) Big Dividers- 2 on each long edge, 2" in from the ends (3) Small Dividers- 2 on each long edge, 2" in from the ends (1) Back- 4 on long edges, 2 on short edges - Boards (4) Legs- None (2) Top Braces- 2 on each end (2) Low Braces- 2 on each end
2. Add edge banding
In order to get clean edges, I recommend applying edge banding before assembly so that it can be cut cleanly. Apply edge banding to the following: - Plywood (1) Top- 2 short edges and 1 long edge (1) Bottom- 2 short edges and 1 long edge (2) Sides- one 19 3/4" edge (1) Shelf- 1 long edge (3) Big Dividers- 1 short edge (3) Small Dividers- 1 short edge
3. Build base
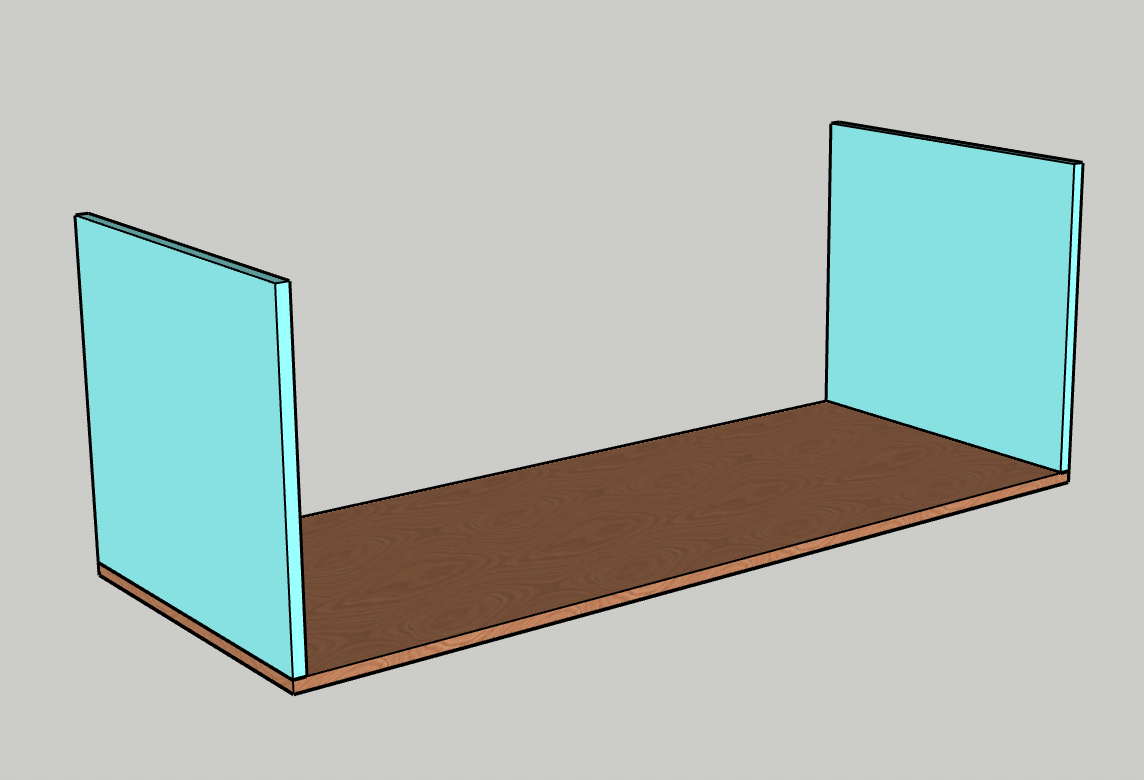
Using wood glue and pocket hole screws, attach the two Sides into the Bottom on the far ends with pocket holes on the inside.
4. Attach bottom dividers
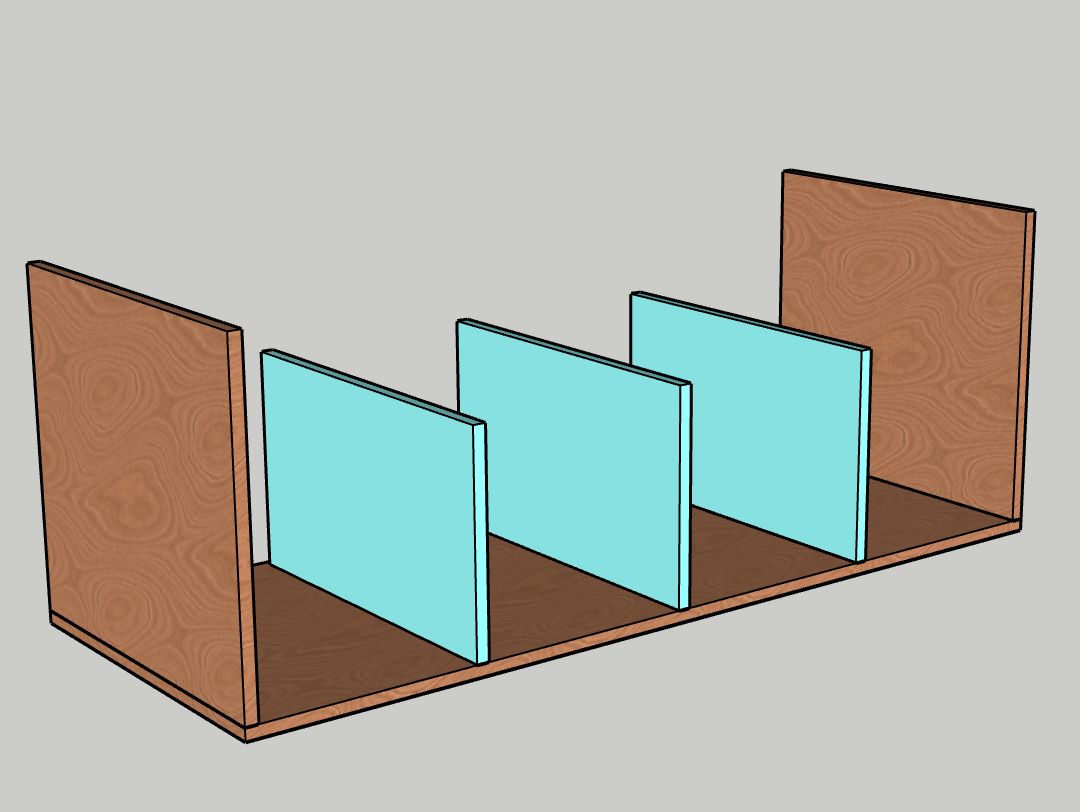
Using wood glue and pocket hole screws, attach the three Big Dividers to the Bottom with equal 13" spacing between them and aligned with the front edge of the Bottom.
5. Attach shelf
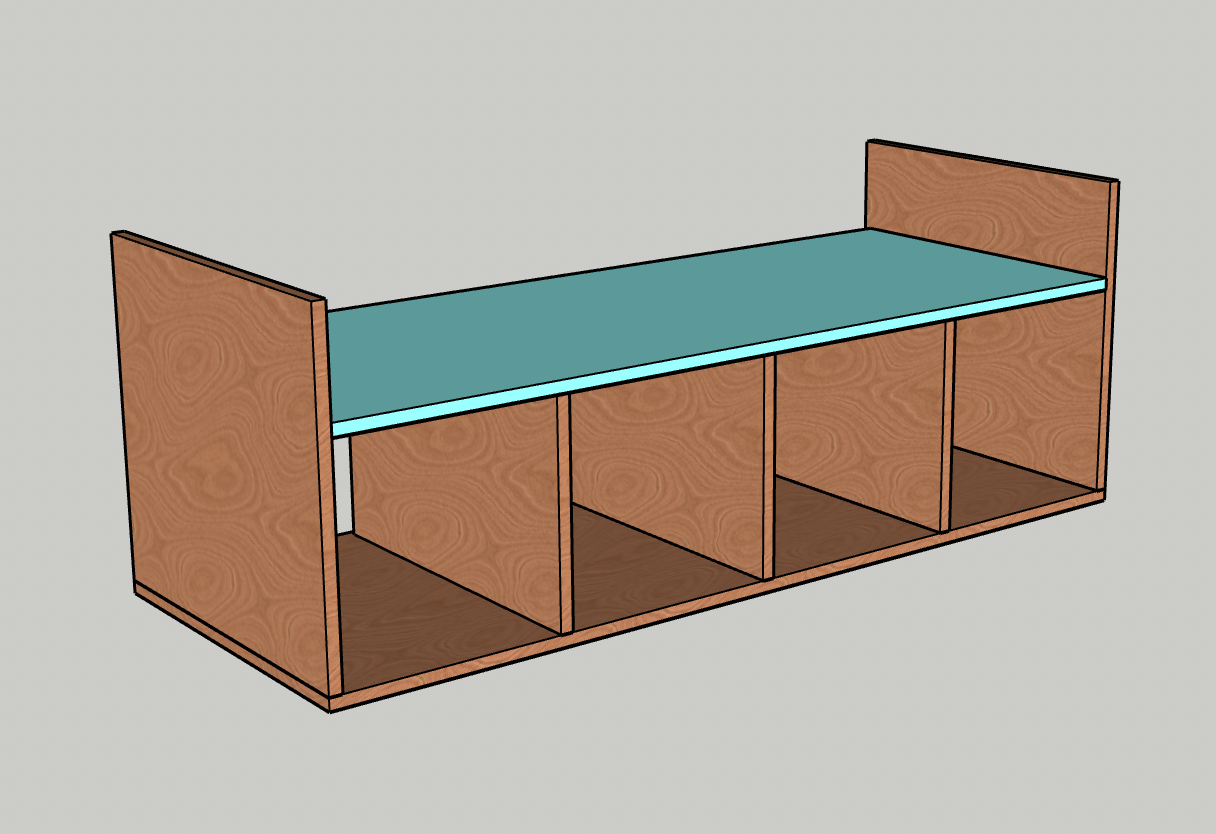
- Place the Shelf on top of the Big Dividers, between the Sides and aligned with the front edge of those pieces. - Using wood glue and pocket hole screws, attach the Shelf to the Sides and to the Big Dividers.
6. Attach upper dividers
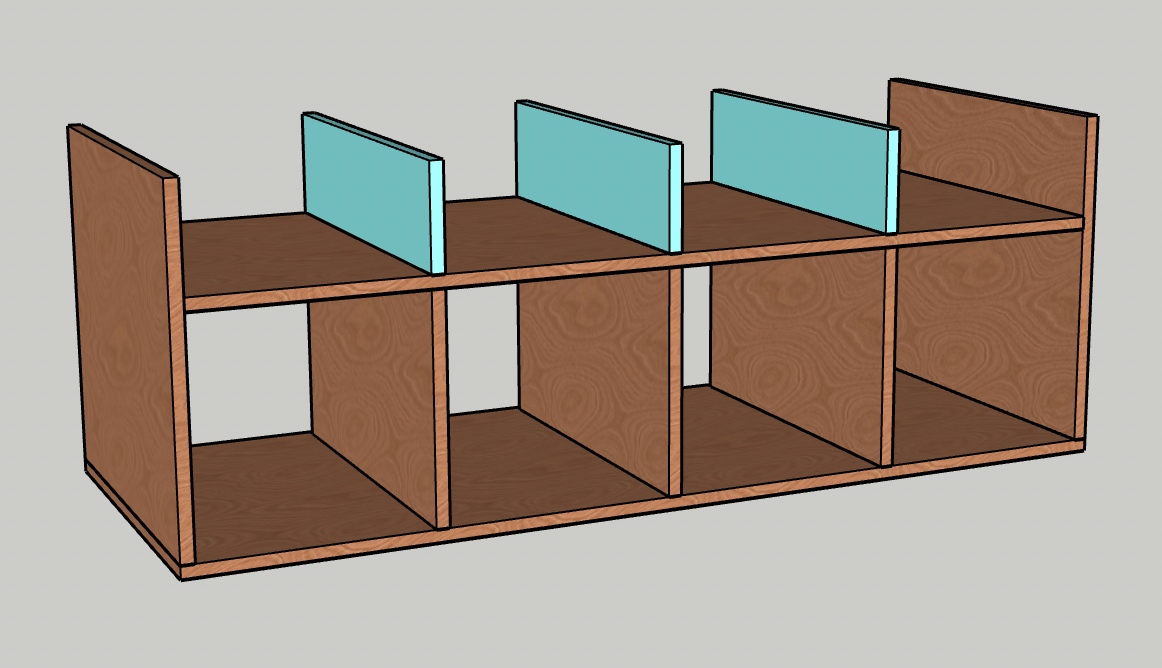
Using wood glue and pocket hole screws, attach the Small Dividers with 13" of space between them, perfectly aligned with the Big Dividers below them and aligned on the front edge of the Shelf.
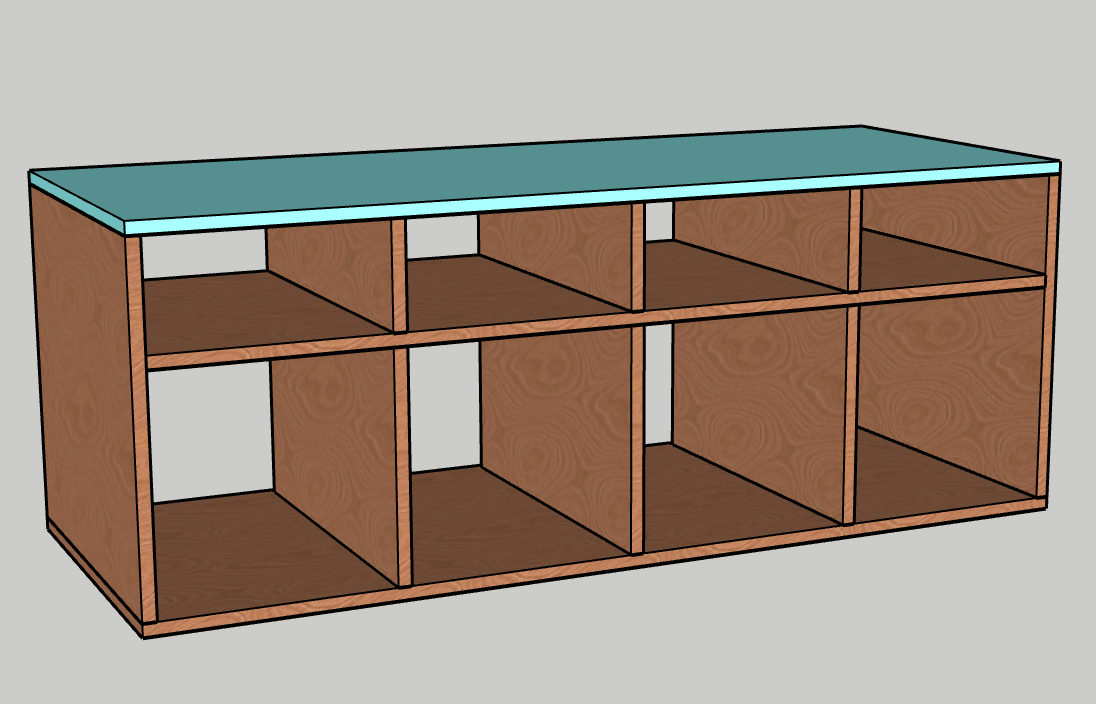
7. Attach top
Using wood glue and pocket hole screws, attach the top using the pocket holes on the Small Dividers and Sides.
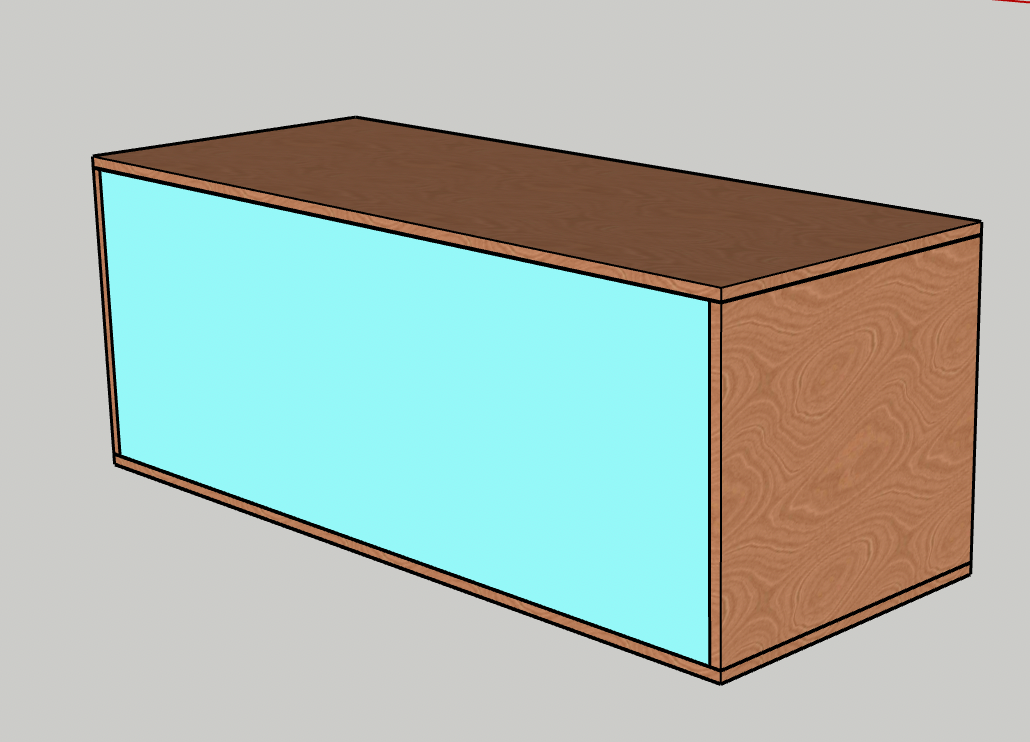
8. Insert back
- Slide the Back into the space between the Top, Bottom and Sides and flush with the Dividers and Shelf. - Using wood glue and pocket hole screws. screw the back into the Top, Bottom and Sides.
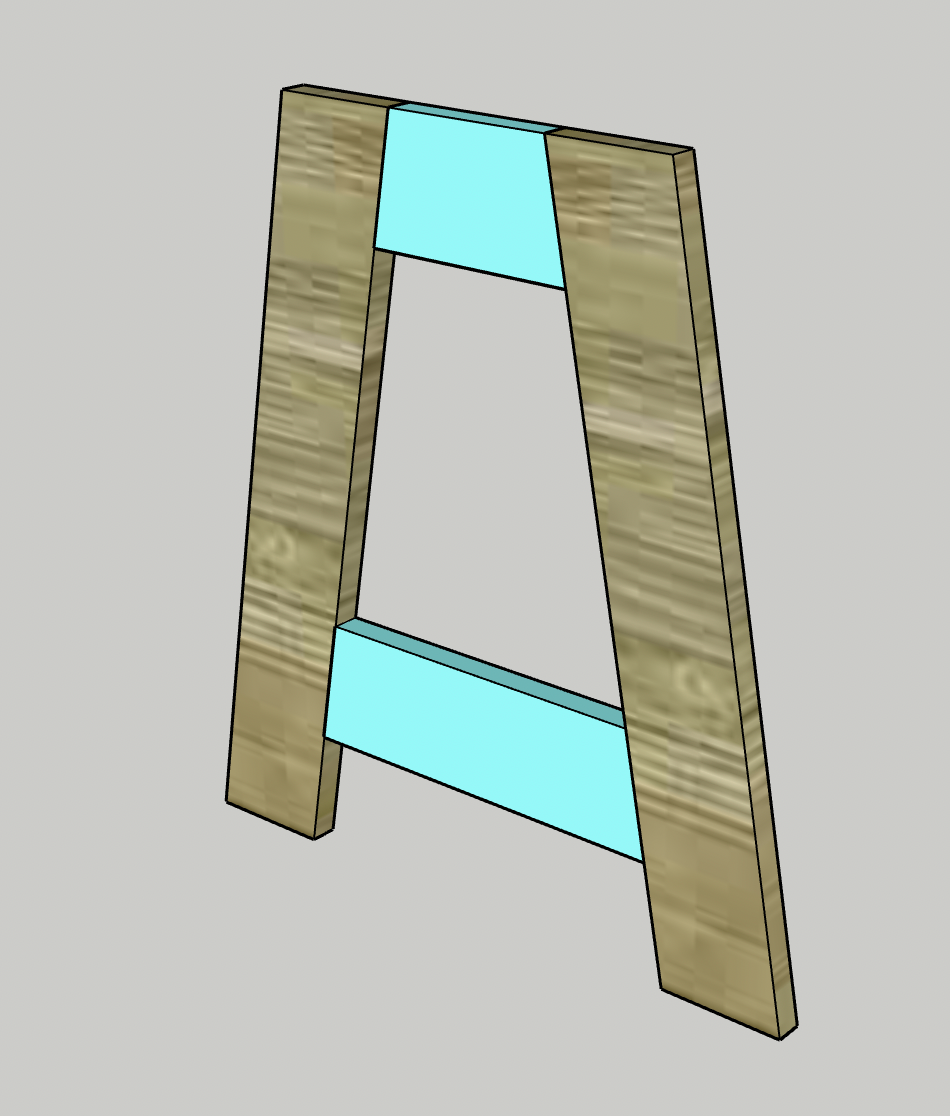
9. Build legs
- Using wood glue and pocket hole screws, attach a Top Brace between two Legs with the Top Brace aligned with the top edge of the Legs. - Using wood glue and pocket hole screws, attach a Low Brace between the Legs where both edges come in contact with the Legs. - Repeat for a second set of Legs.
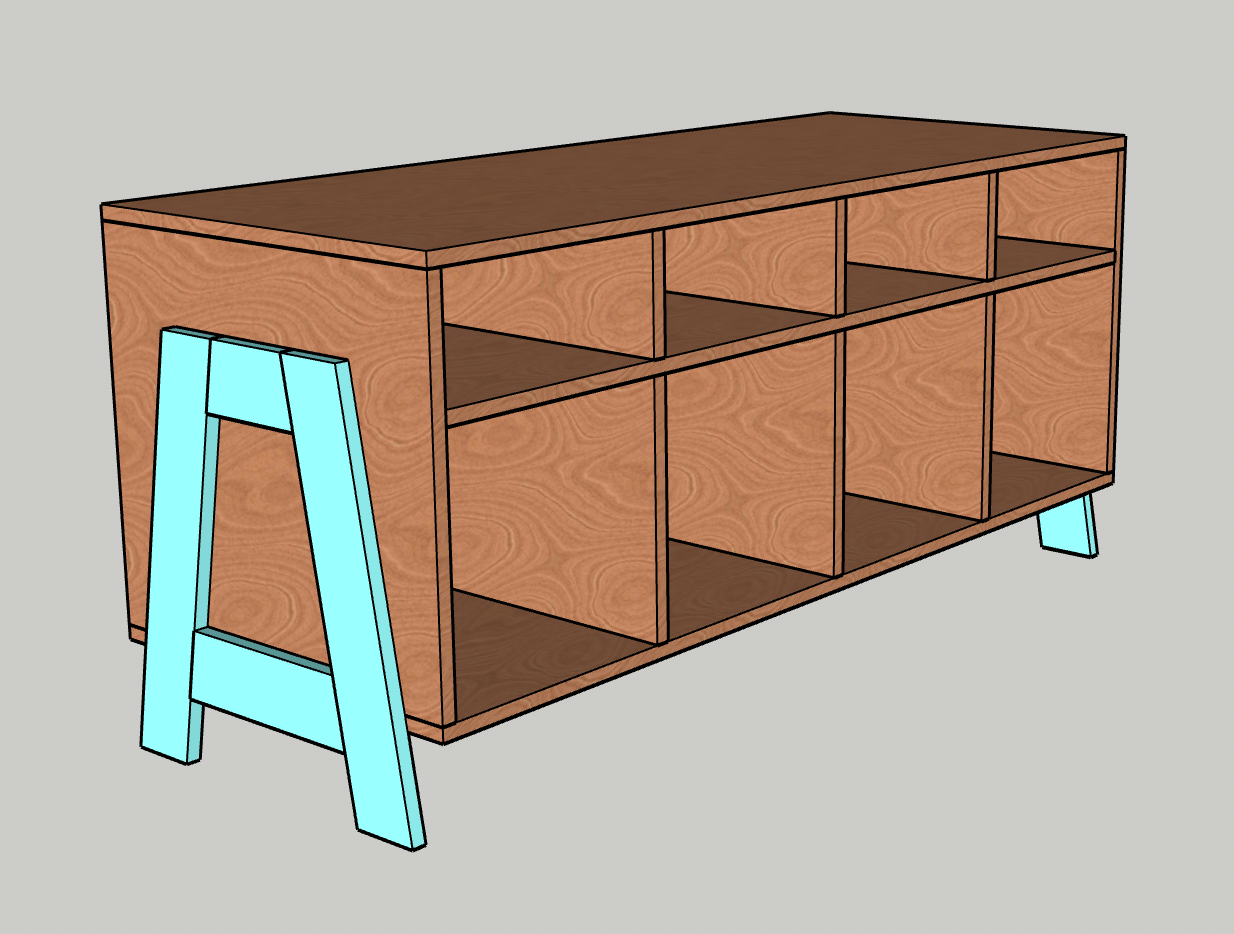
10. Attach legs
- Apply wood glue to the Legs above where the Low Braces are. - Align the Legs so they are centered on the Sides and hang down 5" below the Bottom. Using pocket hole screws through the holes on the Bottom, screw into the Legs. - Using a 1" drill bit, drill a hole in each of the four individual Legs about 17" up from the bottom. Drill through the Legs and the Sides of the box. - Apply wood glue to the inside of the holes then slide in 2" long dowel pieces. - Once adhered, saw dowels flush and sand smooth.
11. Stain and poly
- Apply stain or paint to your piece to give it some character if you’d like. - Add a coat of polyurethane to protect it.
12. Enjoy
Enjoy your handiwork and tag @CharlestonCraftedBuilds on Instagram with a picture!