 Notch
- Difficulty
- Easy
- Time
- 4.5–8.5 hours
- Cost
- $$
About this build
Cordless tools are great, but finding a place to keep their chargers and batteries can be a challenge. This wall-mounted station offers space for several chargers, plus storage for three drills. It’s a great way to keep your cordless tools organized and ready to go.
Tools
Essential
- Drill / Driver
- Miter Saw
- Pocket Hole Jig
- Random Orbit Sander
Optional / nice to have
- Bar / Pipe Clamps
- Tape Measure
Materials
| Item | Qty |
|---|---|
| Pine board, 1x2 x 48" | 1 board |
| Pine board, 1x3 x 48" | 1 board |
| Pine board, 1x4 x 24" | 1 board |
| Pine board, 1x6 x 48" | 1 board |
| Pine board, 1x8 x 96" | 1 board |
| 1 1/4" coarse-thread Kreg Pocket-Hole Screws | 35 each |
| 3" wood screws | 2 each |
Overall cost: $$. Lumber prices vary by region, species, and season, so we give a band rather than a figure we would only be pretending to know.
Cut list
| Part | Qty | T × W × L |
|---|---|---|
| Top Shelf | 1 | 3/4" × 3" × 16" |
| Top Shelf Trim | 1 | 3/4" × 1" × 16" |
| Top Rail | 1 | 3/4" × 5" × 16" |
| Middle Shelf | 1 | 3/4" × 7" × 16" |
| Side | 2 | 3/4" × 7" × 26" |
| Bottom Shelf | 1 | 3/4" × 7" × 16" |
| Bottom Shelf Trim | 1 | 3/4" × 1" × 17" |
| Bottom Rail | 1 | 3/4" × 5" × 16" |
What to buy
Buy 4 boards at 8 ft.
3/4" × 7"
1 board
3/4" × 5"
1 board
3/4" × 3"
1 board
3/4" × 1"
1 board
Assumes 8 ft stock, a 1/8" saw kerf, and buying each part at its own width. Change the board size or kerf on the full board plan →
Instructions
1Make a Top Shelf
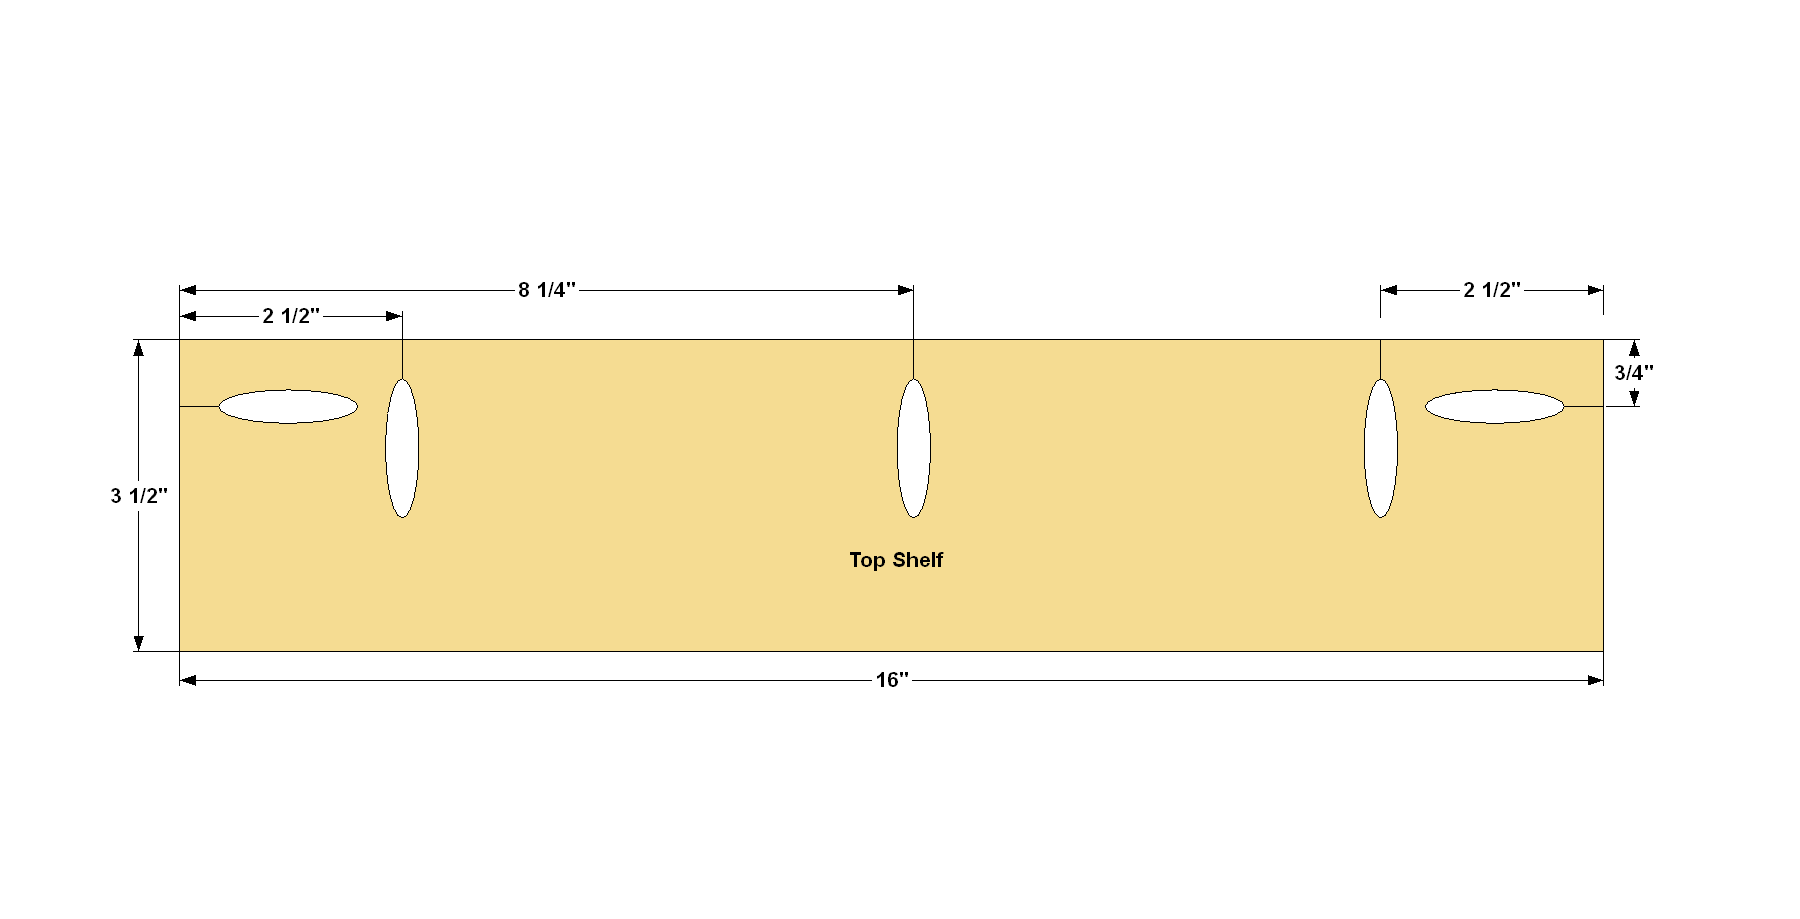
- Cut a Top Shelf to length from a 1x4 board, as shown in the cutting diagram.
- Set your Kreg® Pocket-Hole Jig for 3/4"-thick material, and then drill pocket holes in the Top Shelf, as shown.
- Sand the faces smooth.
2Add Top Shelf Trim
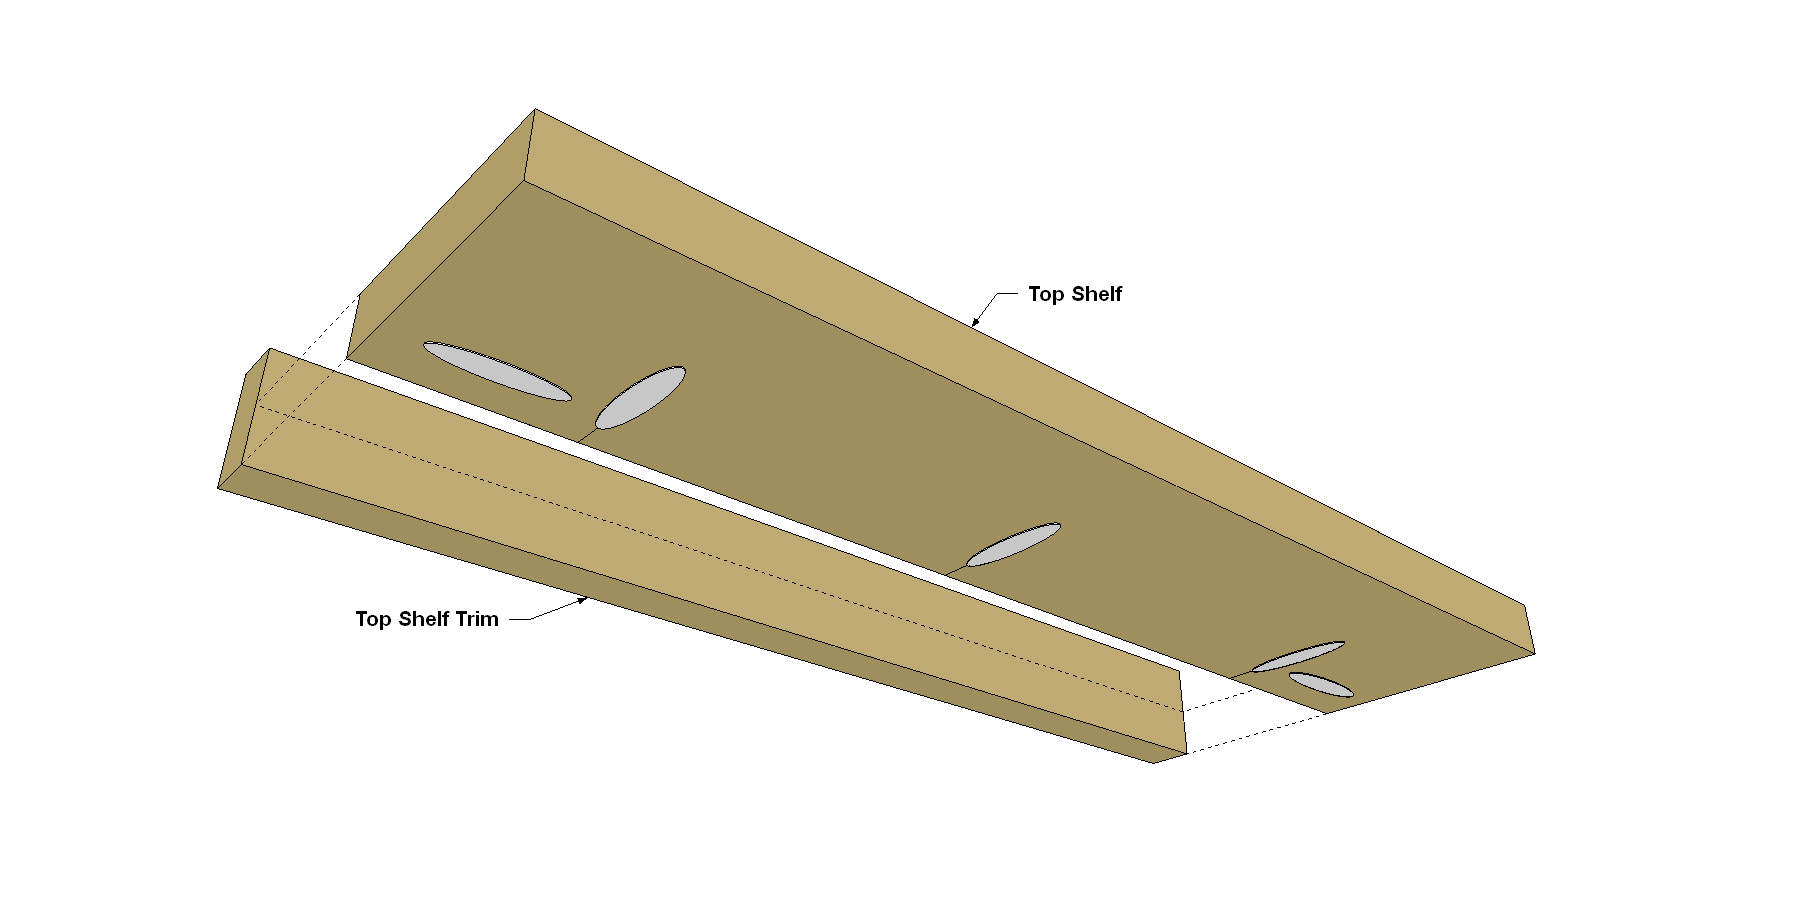
Now cut a piece of Top Shelf Trim from a 1x2 board, as shown in the cutting diagram, and sand the faces smooth. Then attach the Trim to the Top Shelf using 1 1/4" coarse-thread Kreg Pocket-Hole Screws, as shown.
3Make a Top Rail
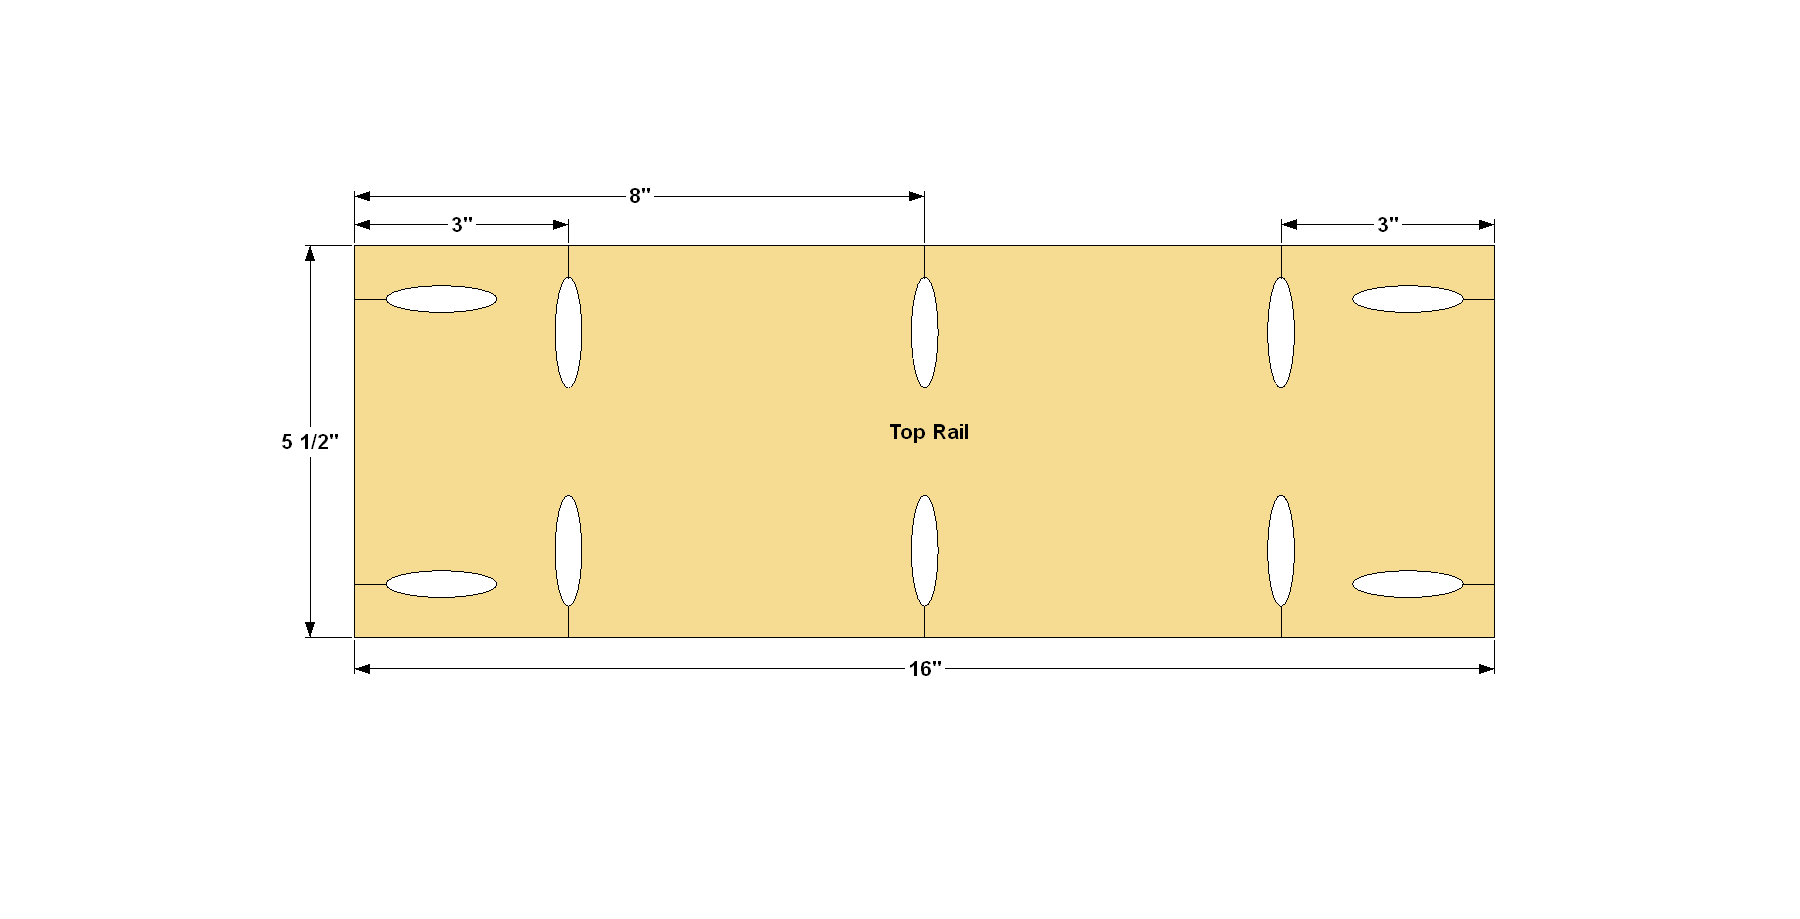
Cut a Top Rail to length from a 1x6 board, as shown in the cutting diagram. Drill pocket holes in the Top Rail, as shown, and then sand the faces smooth.
4Attach the Top Rail
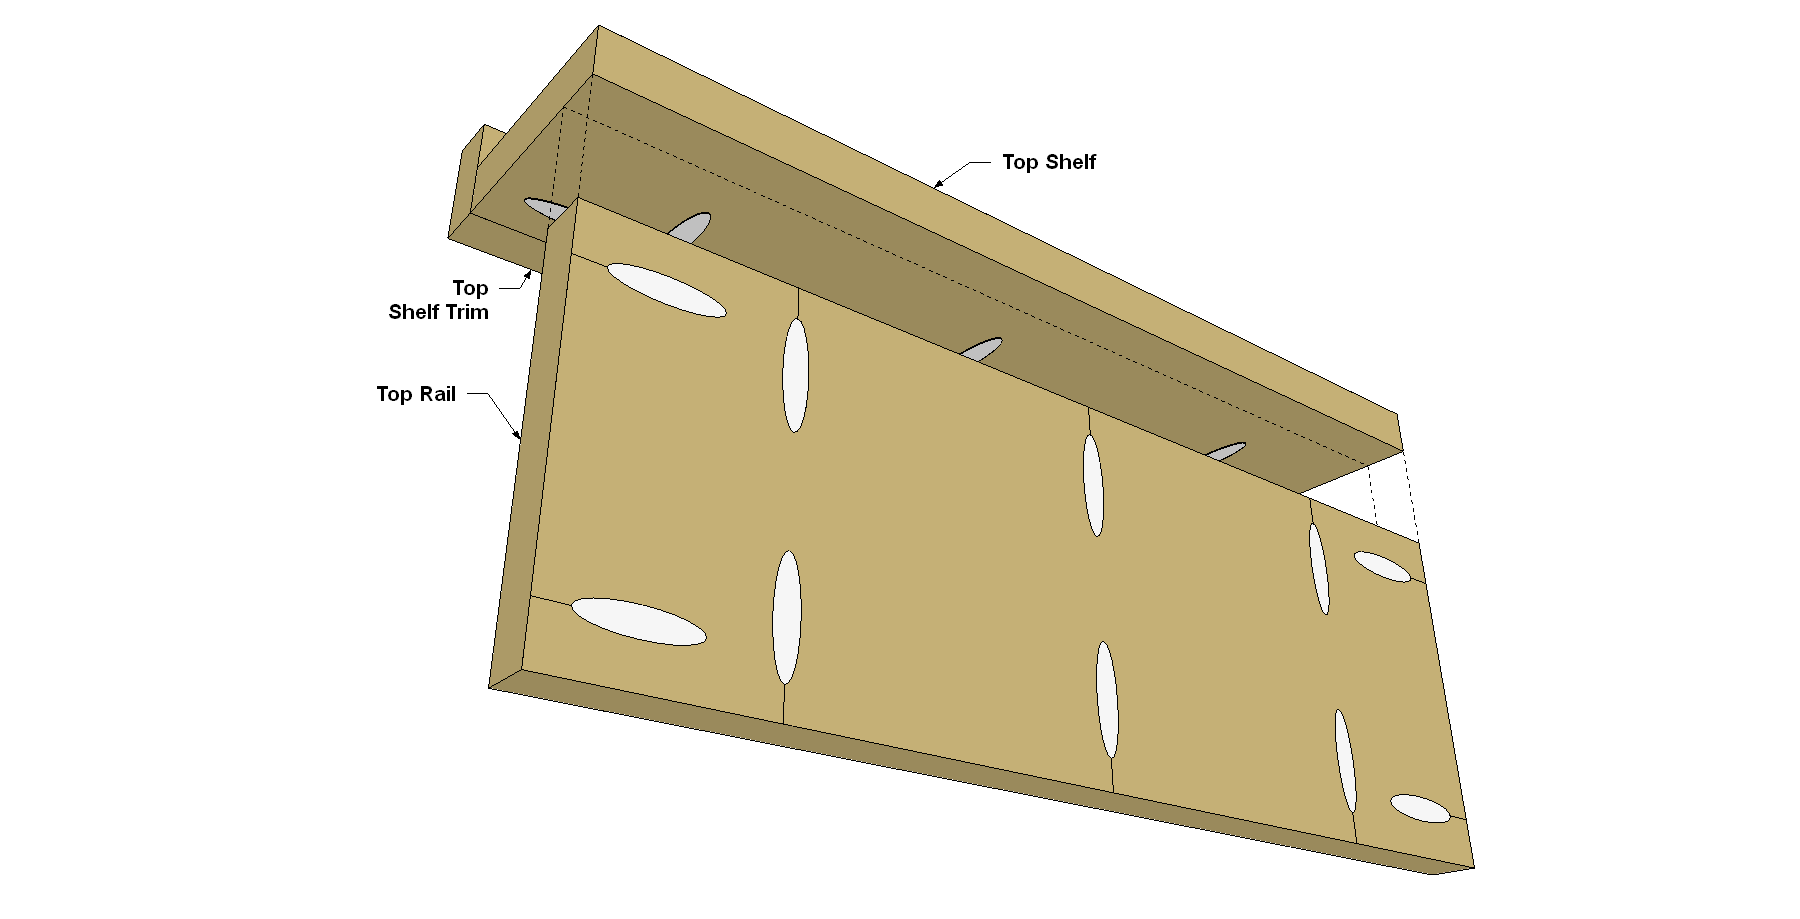
Now you can attach the Top Shelf assembly to the Top Rail using 1 1/4" coarse-thread Kreg Pocket-Hole Screws.
5Make the Middle Shelf
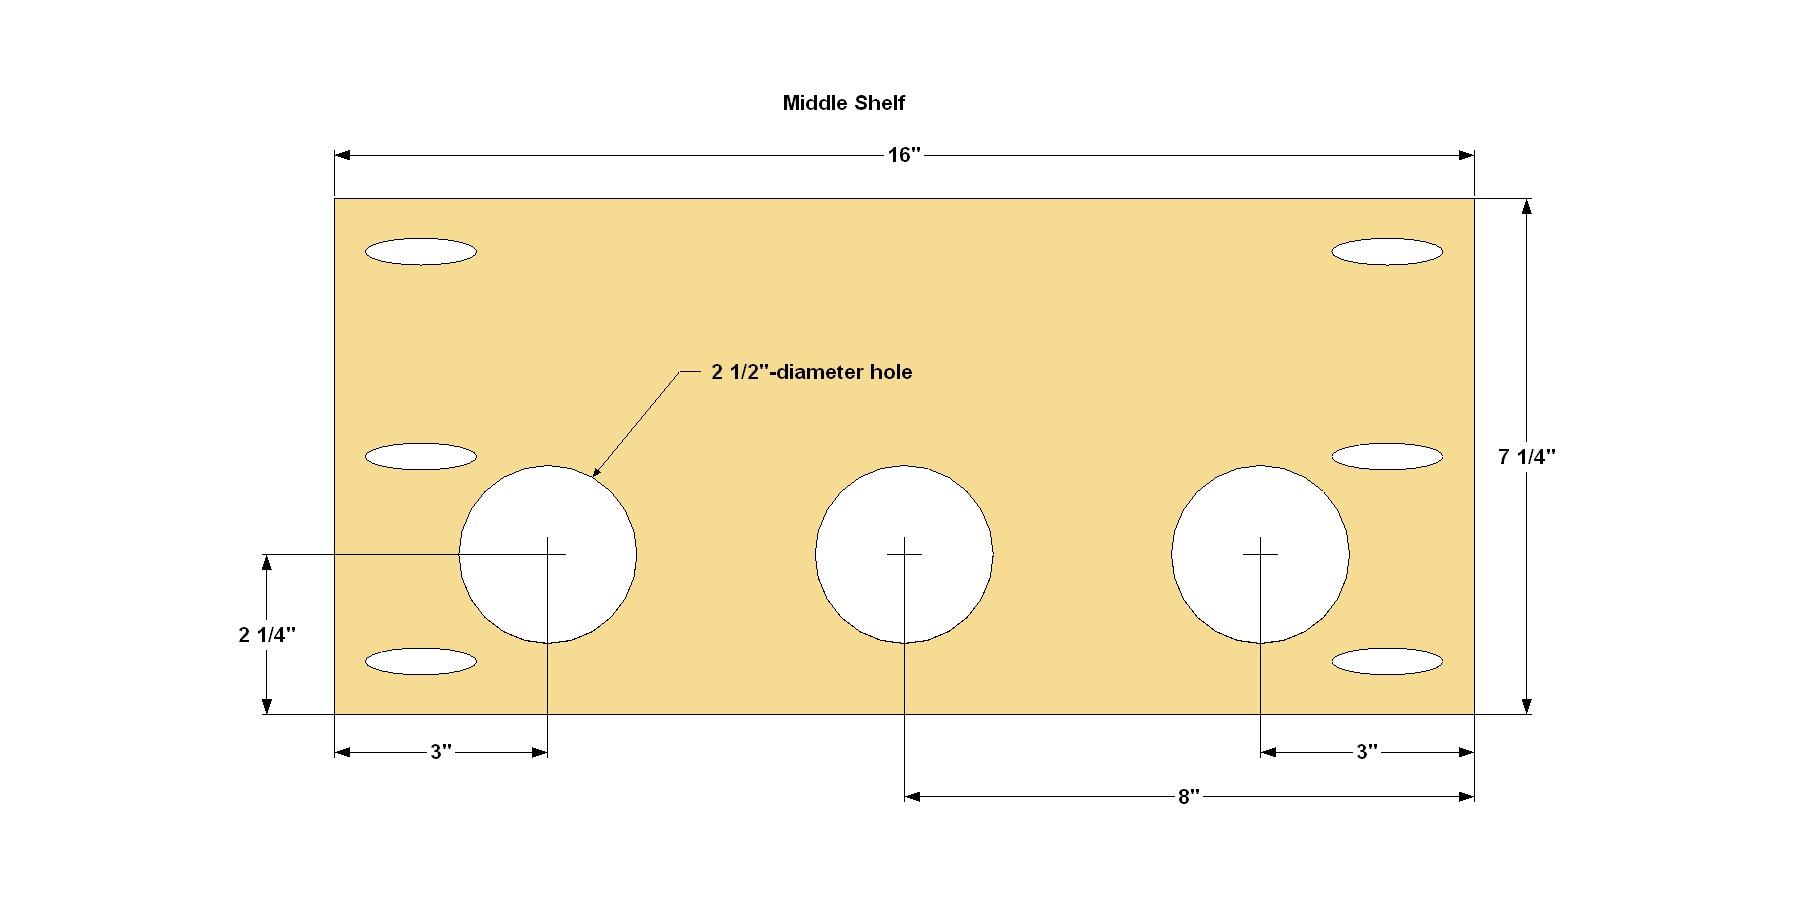
- Cut a Middle Shelf to length from a 1x8 board, as shown in the cutting diagram.
- Drill pocket holes at the ends, as shown.
- Then lay out and drill three 2 1/2"-diameter holes where shown. You’ll be able to slip your drill chucks into these holes for storage.
- Sand the faces smooth.
6Attach the Middle Shelf
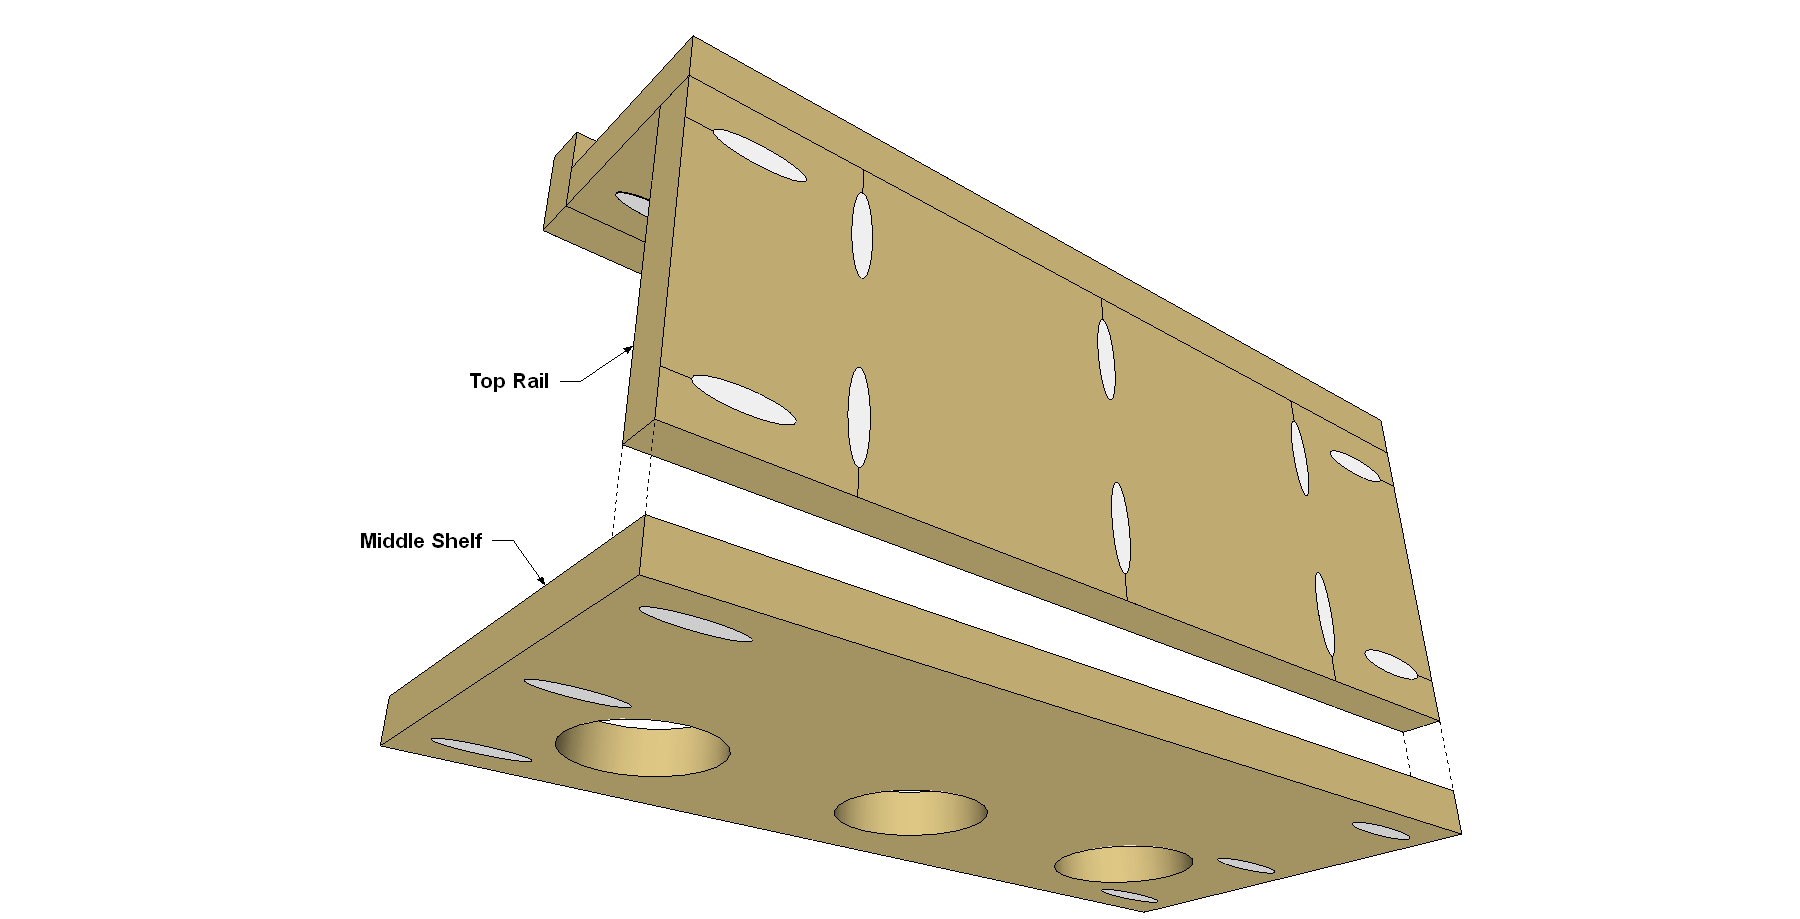
Next, attach the Middle Shelf to the Top Shelf/Rail assembly using 1 1/4" coarse-thread Kreg Pocket-Hole Screws. Make sure that the ends of the all the pieces are flush, and sand them if needed.
7Make the Bottom Shelf Parts
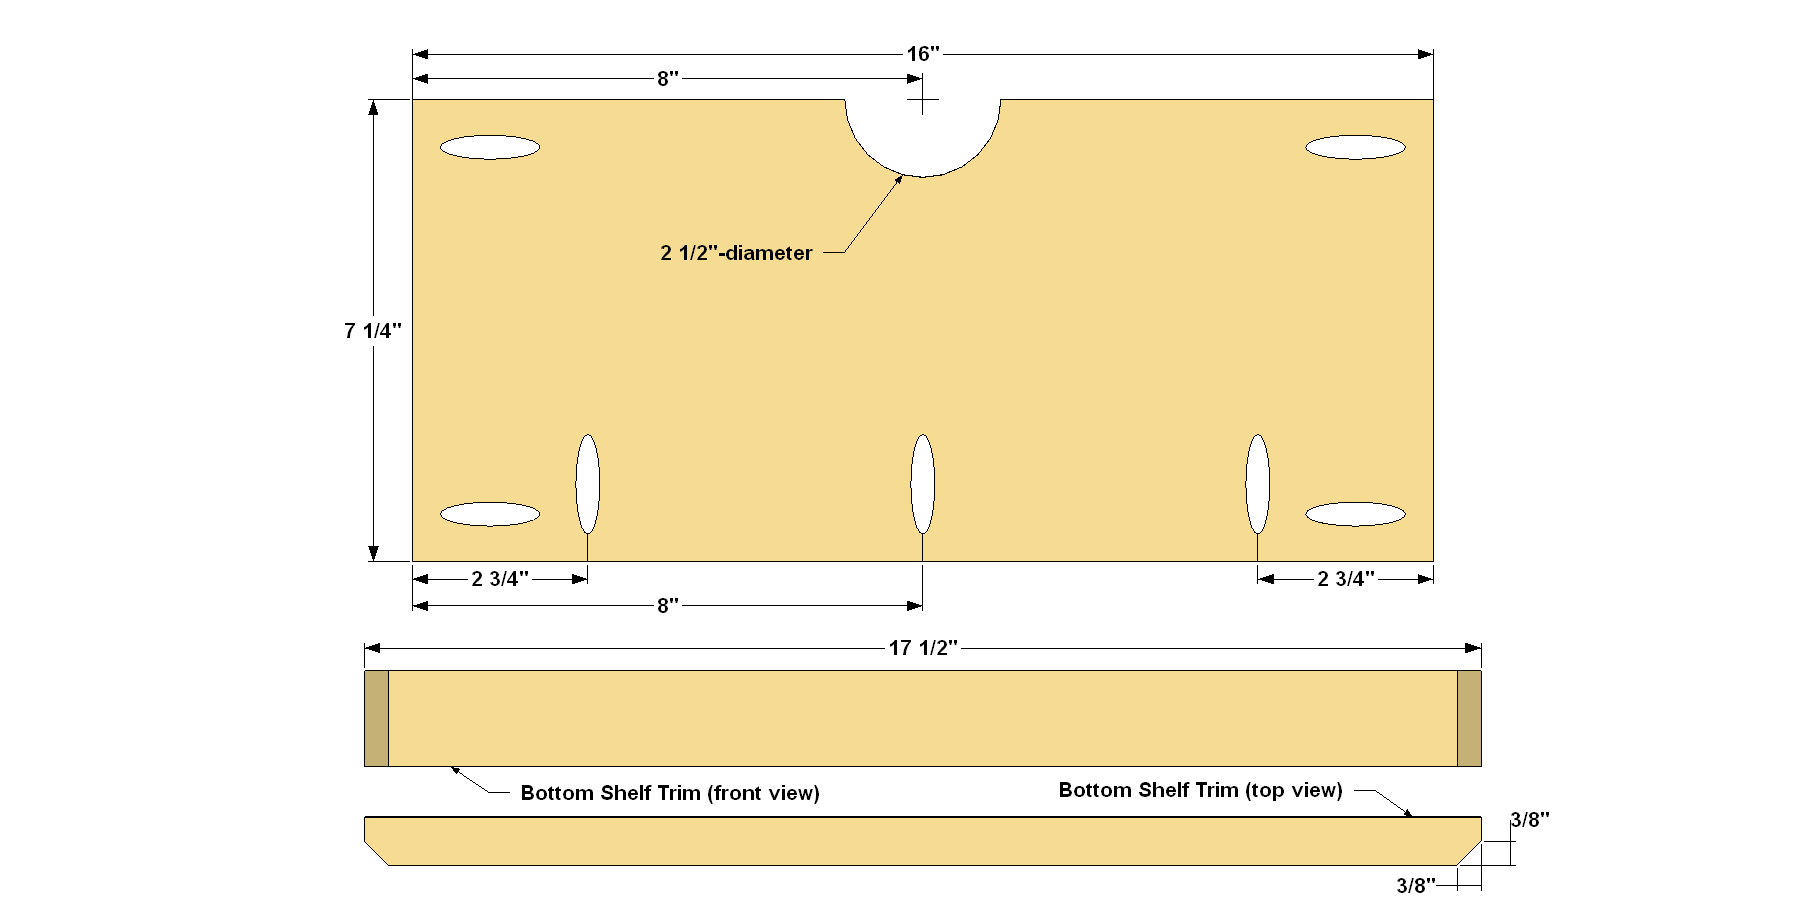
- Cut a Bottom Shelf to length from a 1x8 board, as shown in the cutting diagram.
- Drill pocket holes at the locations shown.
- Then drill a half-circle cutout along the back edge of the Middle Shelf using a 2 1/2" hole saw, as shown. The easiest way to do this is to clamp a scrap piece along the edge of the shelf, then drill where the board meet. You can also cut the Bottom Shelf Trim from a 1x2 board.
- Then cut the profile at each end, as shown. Just stand the piece on edge on your miter saw, set the saw for a 45° miter, and trim off the corners.
8Assemble the Bottom Shelf
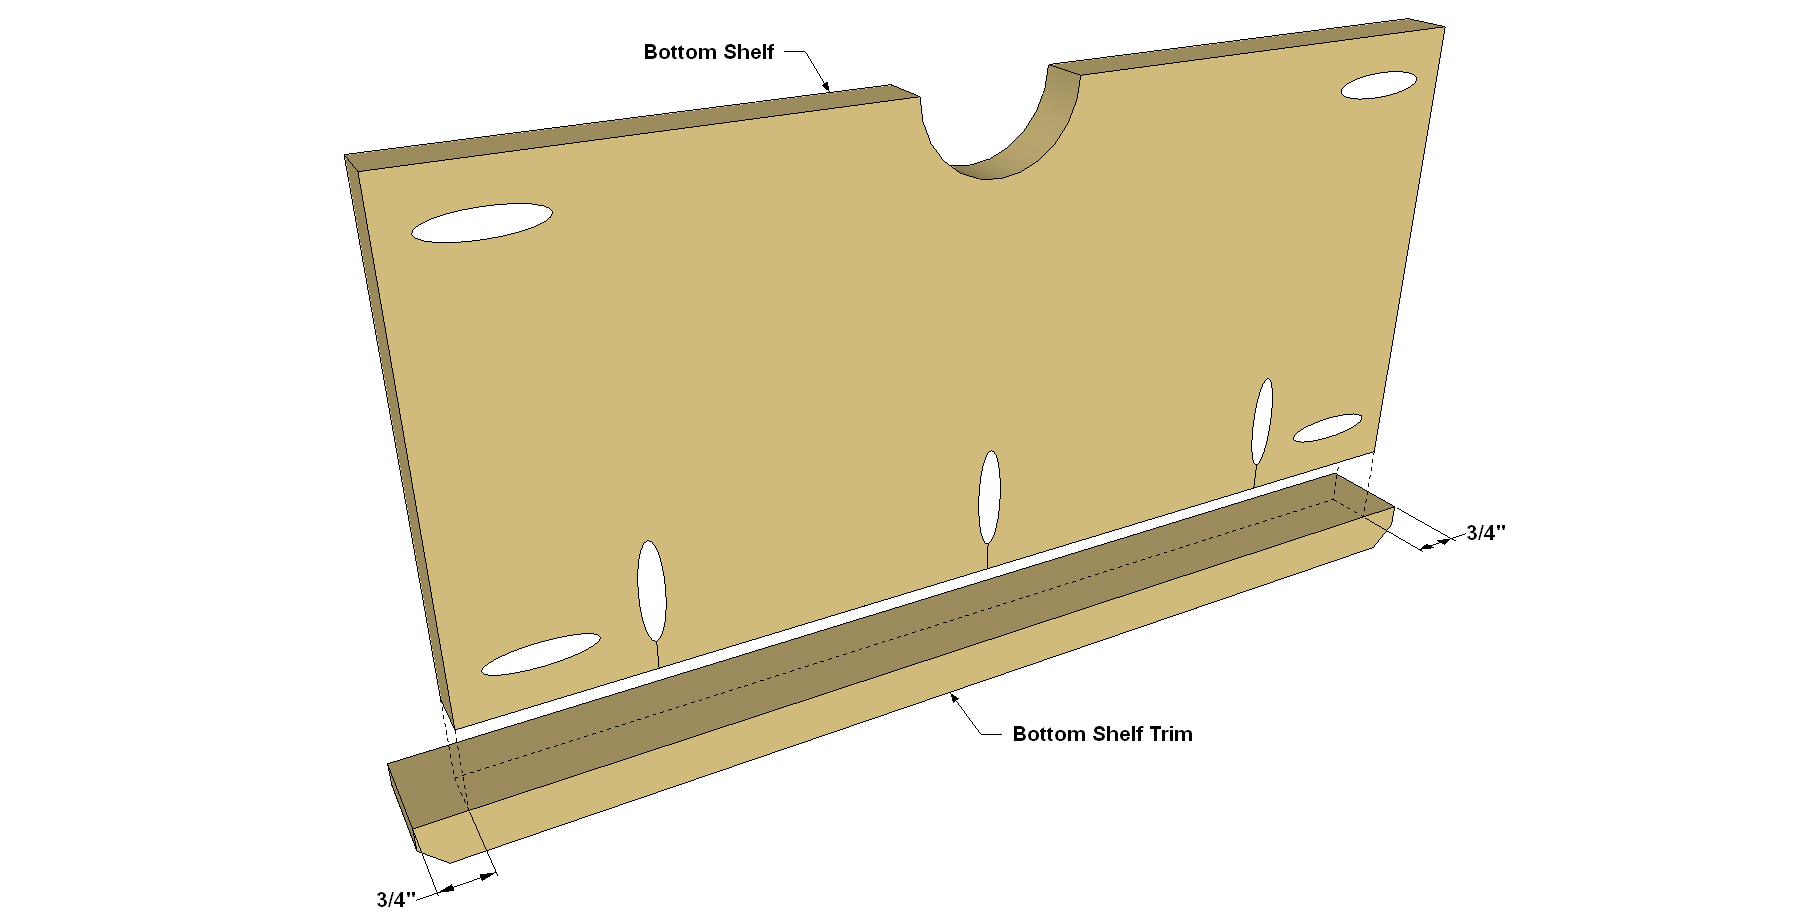
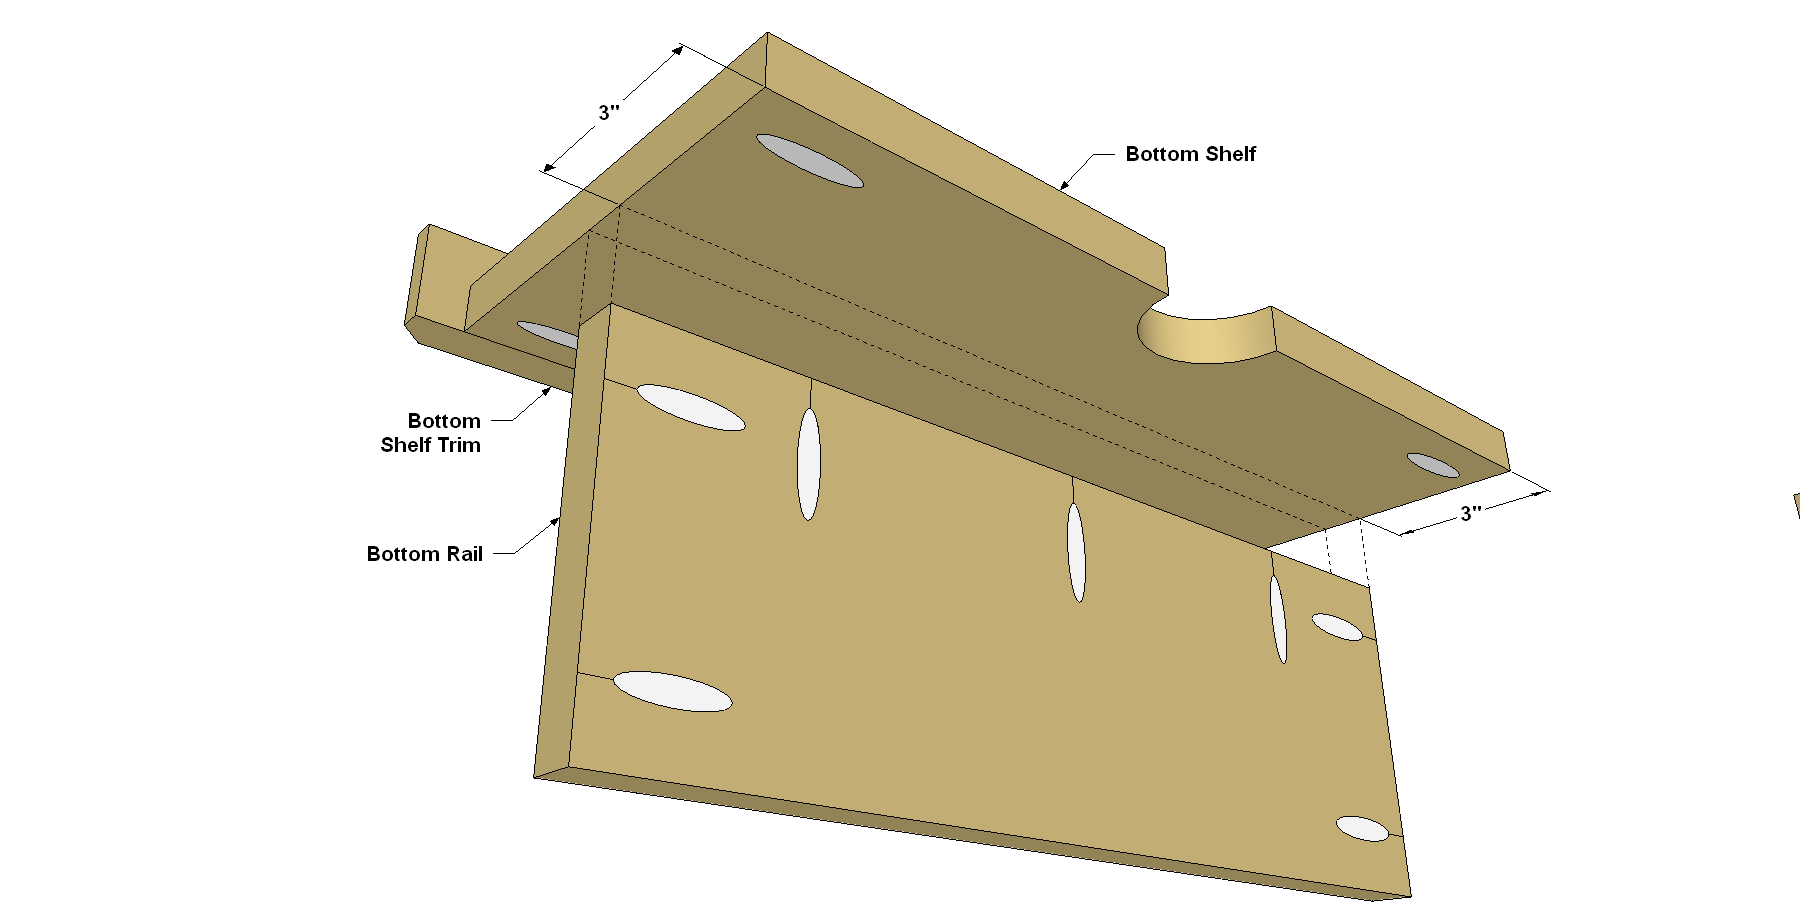
Position the Bottom Shelf Trim, as shown, so that it overhangs the Bottom Shelf by 3/4" on each end, and so that the lower edge of the Trim is flush with the underside of the Shelf. Attach the Trim to the Bottom Shelf using 1 1/4" coarse-thread Kreg Pocket-Hole Screws.
9Create a Bottom Rail
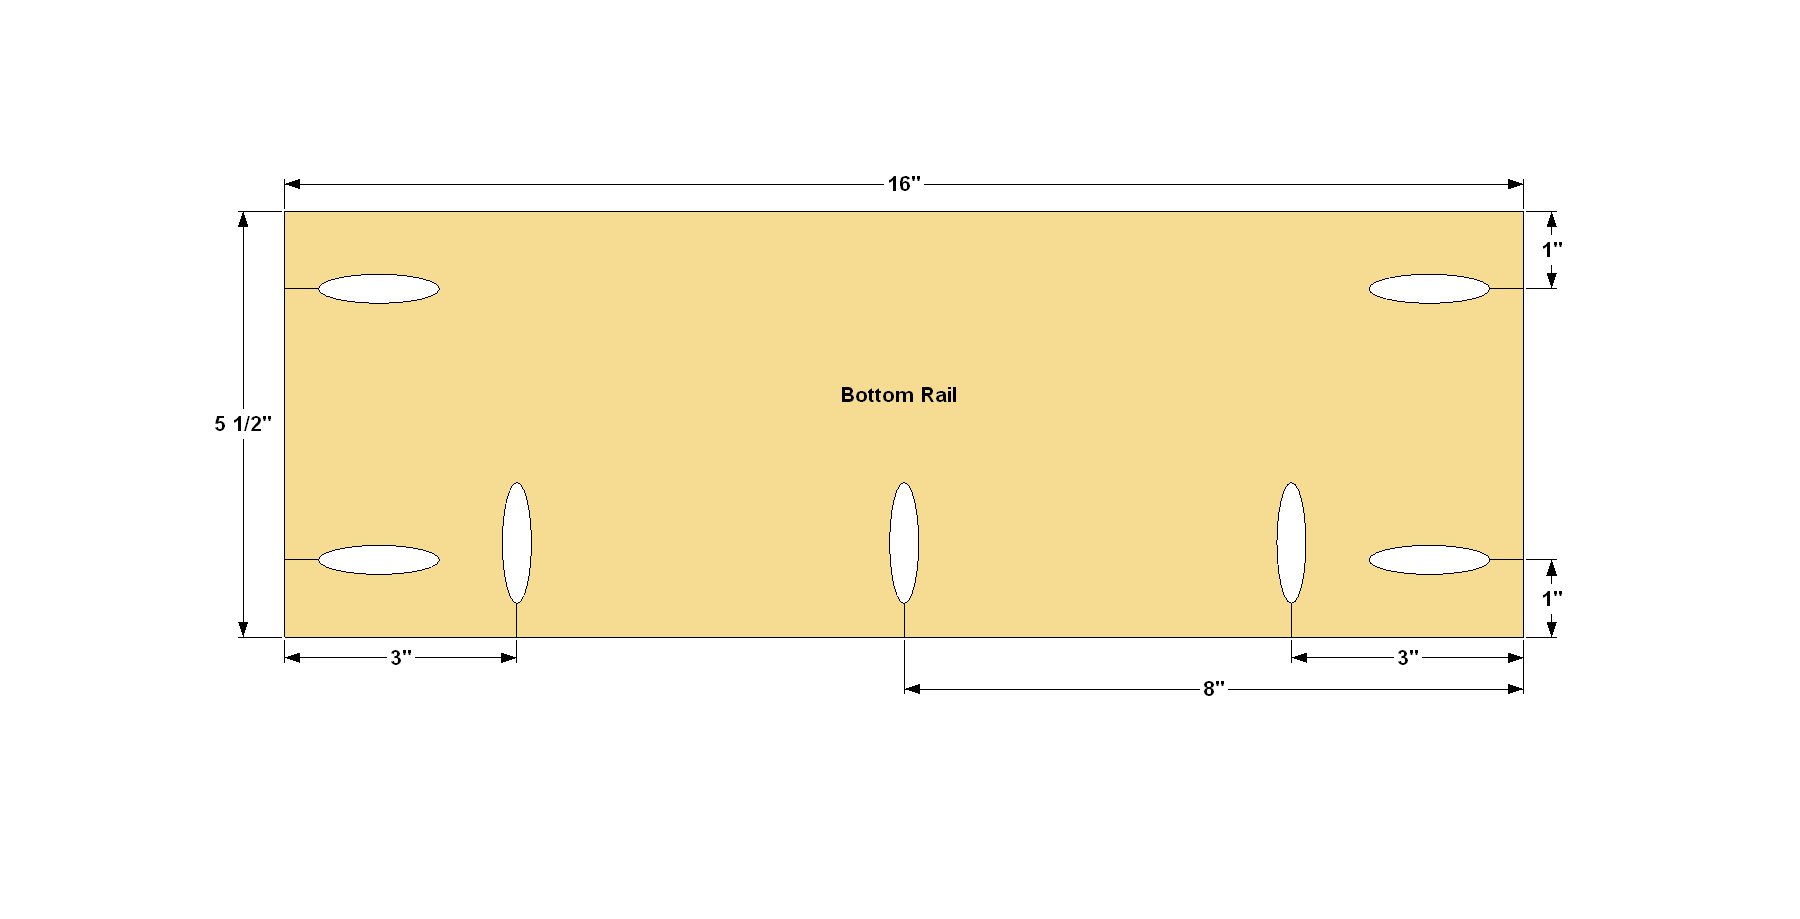
Cut a Bottom Rail to length from a 1x6 board, as shown in the cutting diagram. Drill pocket holes in the Bottom Rail, as shown, and then sand the faces smooth.
10Attach the Bottom Rail
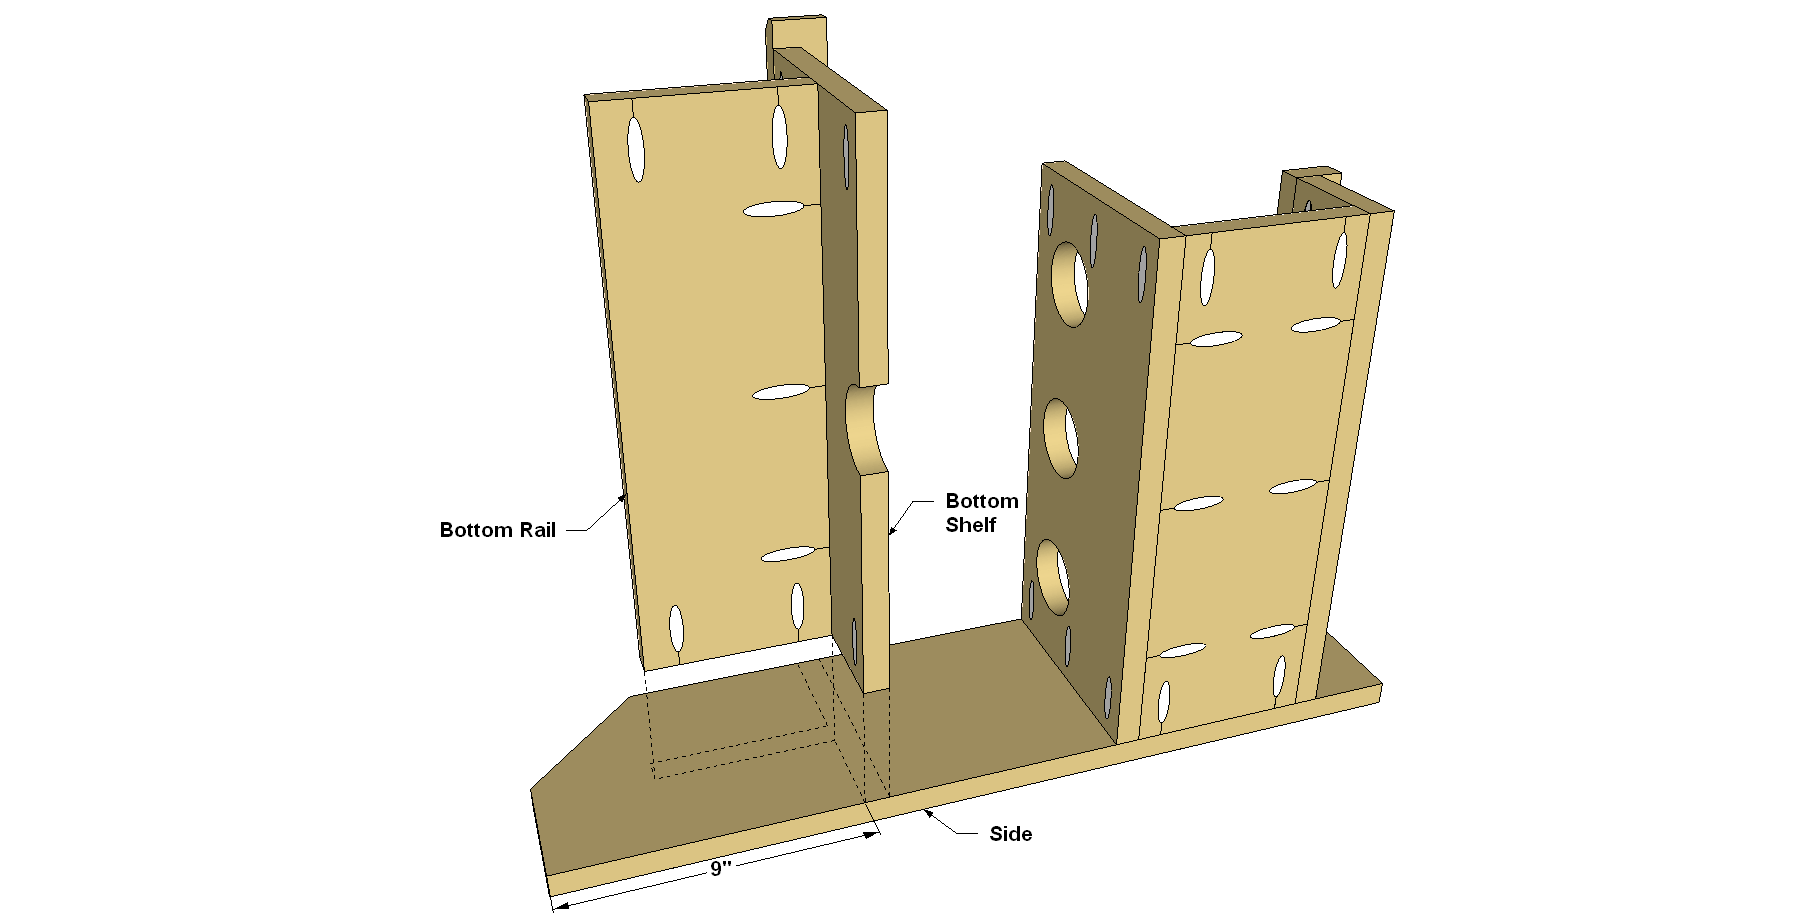
Now you can attach the Bottom Rail to the Bottom Shelf assembly using 1 1/4" coarse-thread Kreg Pocket-Hole Screws, as shown. Make sure that the ends of the Bottom Rail and the Bottom Shelf are flush, and sand them if needed.
11Make the Sides
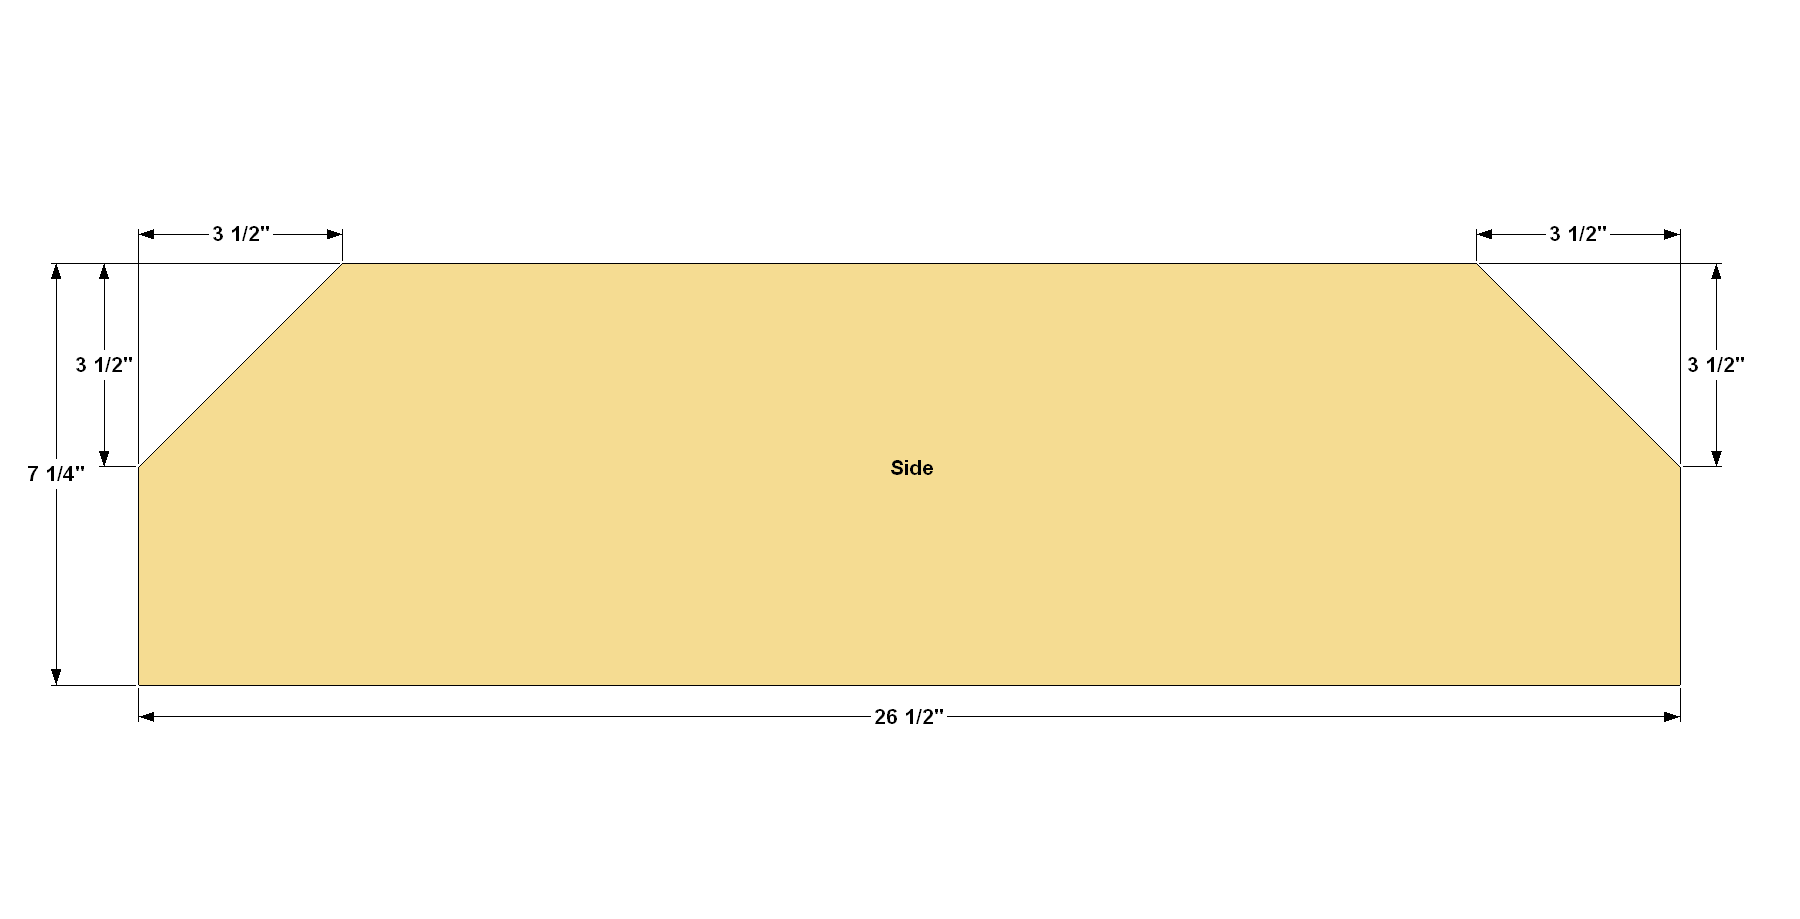
- Cut two Sides to length from a 1x8 board, as shown in the cutting diagram.
- Then cut the angles on the ends, as shown. You can do this easily with a miter saw by setting the saw for a 45° cut.
- Sand the faces, edges, and ends smooth.
12Attach the Middle Shelf Assembly
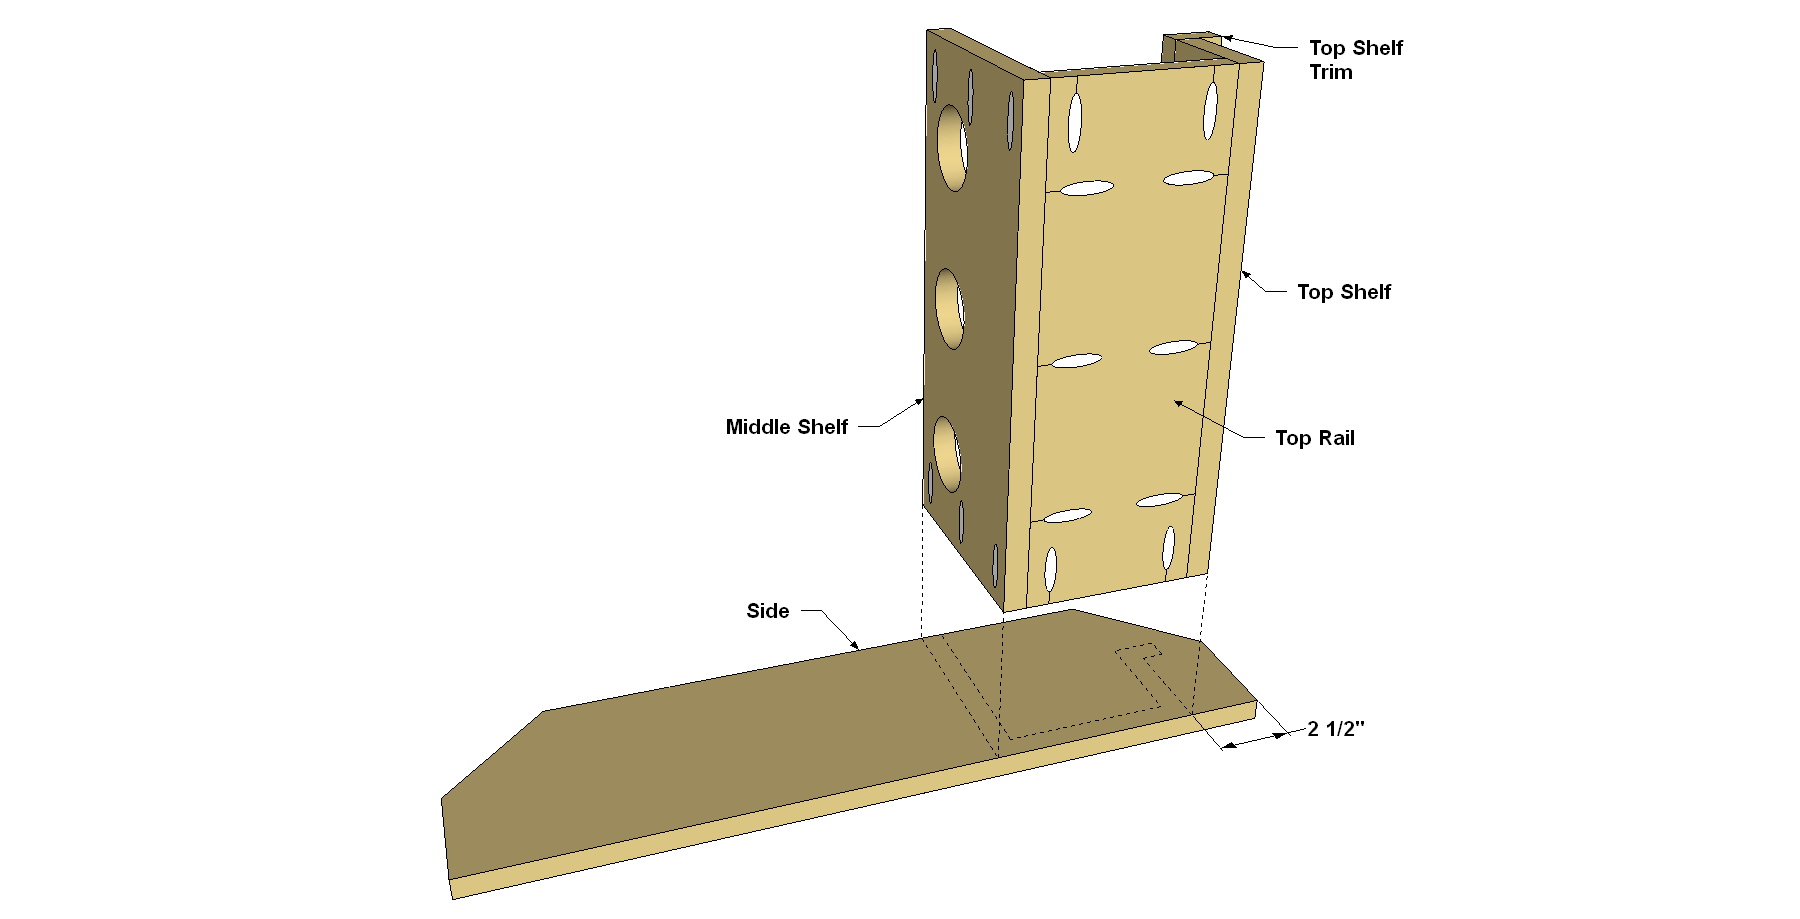
With the parts all made and the subassemblies together, you can begin final assembly. Position the Middle Shelf/Rail/Top Shelf assembly as shown, and then attach these pieces using 1 1/4" coarse-thread Kreg Pocket-Hole Screws.
13Add the Bottom Shelf Assembly
Position the Bottom Shelf/Rail assembly, as shown, and attach it to the Side using 1 1/4" coarse-thread Kreg Pocket-Hole Screws.
14Add the Other Side
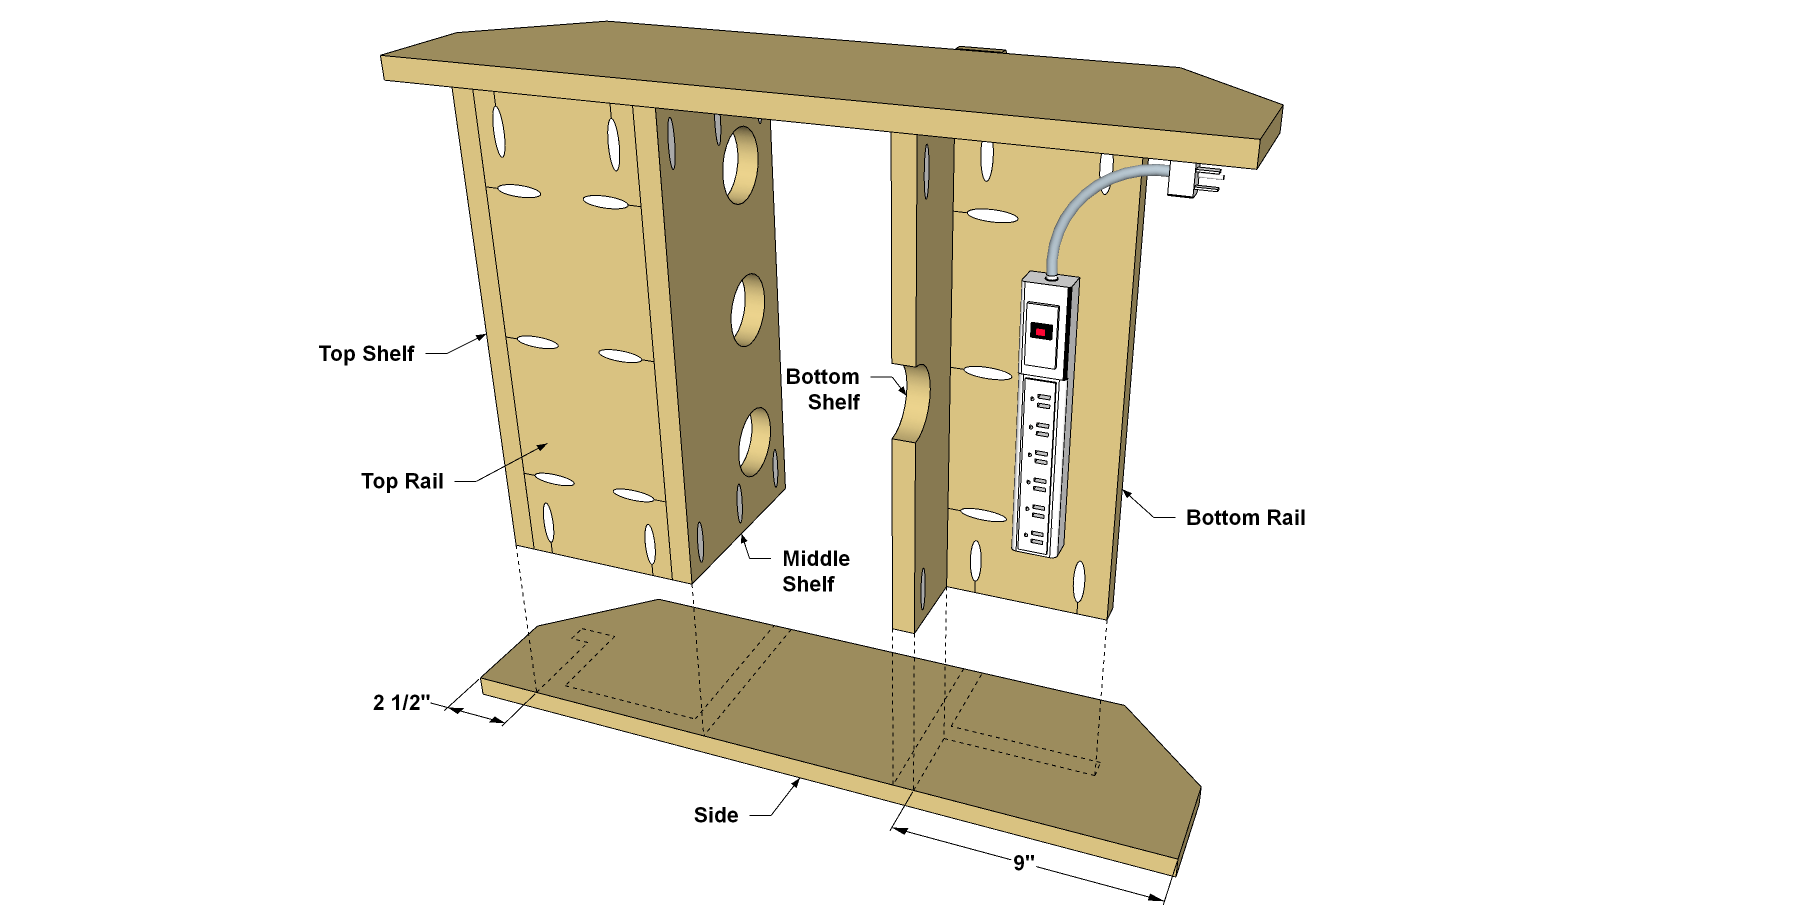
- To complete your charging station, attach the other Side, as shown. You can use the station as is, or you can add a coat of paint or finish. We wiped on a couple coats of oil finish.
- Then you can mount a power strip to the backside of the Bottom Rail. That way, you can plug your chargers into the power strip, rather than needing a separate wall outlet for each one.
- Finally, hang your charging station on the wall. If possible, locate it over a wall stud, and drive two 3" screws through the Top Rail and into the stud. If you can’t locate the station over a stud, use medium- or heavy-duty wall anchors.
Tags
- Tool Storage
- Beginner
Reviews & builds
No reviews yet
Sign in to review this plan or share your build.
No reviews yet. Be the first to build this.