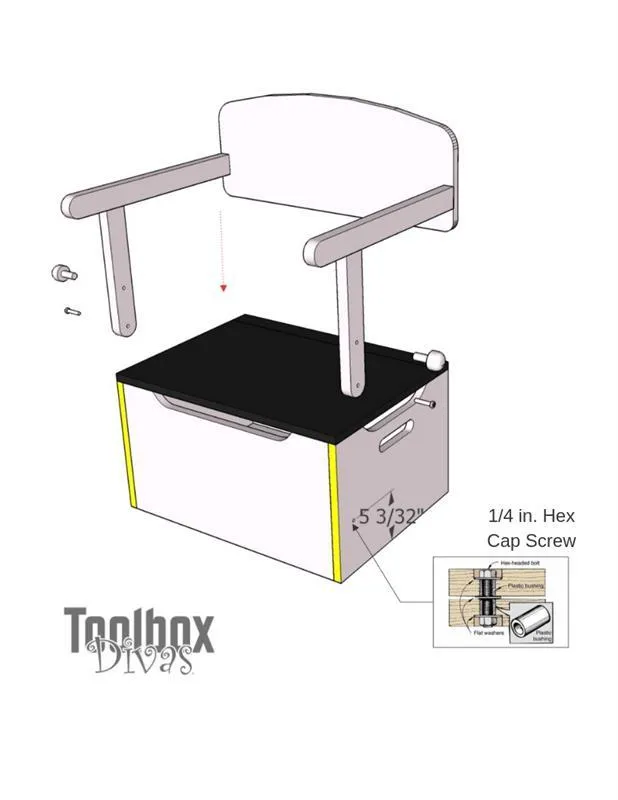
Notch
Notch← Back to the plan
Use your browser's Print (Ctrl/Cmd + P) and choose Save as PDF. This page works offline once you've opened it with a signal.
Convertible 3 in 1 Toy Chest
Keep your little one's room organized and clean with this multi-purpose toy chest.
- Difficulty
- Intermediate
- Time
- 2.5–4.8 hours
- Cost
- $$
Cut list
| Part | Qty | T × W × L | Material | ✓ |
|---|---|---|---|---|
| Sides of the Toy Box | 2 | 3/4" × 13" × 18" | — | ☐ |
| Back and front of the Toy Box | 2 | 3/4" × 13" × 23" | — | ☐ |
| Bottom of the Toy Box | 1 | 3/4" × 16" × 23" | — | ☐ |
| Lid Back Board of Toy Box (non-movable) | 1 | 3/4" × 2" × 25" | — | ☐ |
| Lid of the Toy Box | 1 | 3/4" × 16" × 25" | — | ☐ |
| Bench Rest/ Table Top | 1 | 3/4" × 11" × 27" | — | ☐ |
| Arm Rest | 2 | 1" × 2" × 20" | — | ☐ |
| Arm Supports | 2 | 1" × 2" × 13" | — | ☐ |
Materials
| Item | Qty | ✓ |
|---|---|---|
| Plywood, 3/4" Thick Full Sheet | 1 board | ☐ |
| Board, 1x2 96" | 1 board | ☐ |
| 1/4in. x 2-5/8in. Eye Bolt with nut | 2 each | ☐ |
| 1/4in. Flat Washers | 6 each | ☐ |
| 1/4in. - 28 x2 in. Hex Cap Screw | 2 each | ☐ |
| 2in. Narrow hinges | 2 each | ☐ |
| Universal lid support | 1 each | ☐ |
| Magnetic catch with strike | 2 each | ☐ |
Overall cost: $$. Lumber varies by region, species, and season, so we give a band rather than a figure.
Tools
- Circular Saw
- Drill / Driver
- Impact Driver
- Jigsaw
- Miter Saw
- Random Orbit Sander
- Router
- Bar / Pipe Clamps — optional
- Tape Measure — optional
Instructions
1. Assemble the box
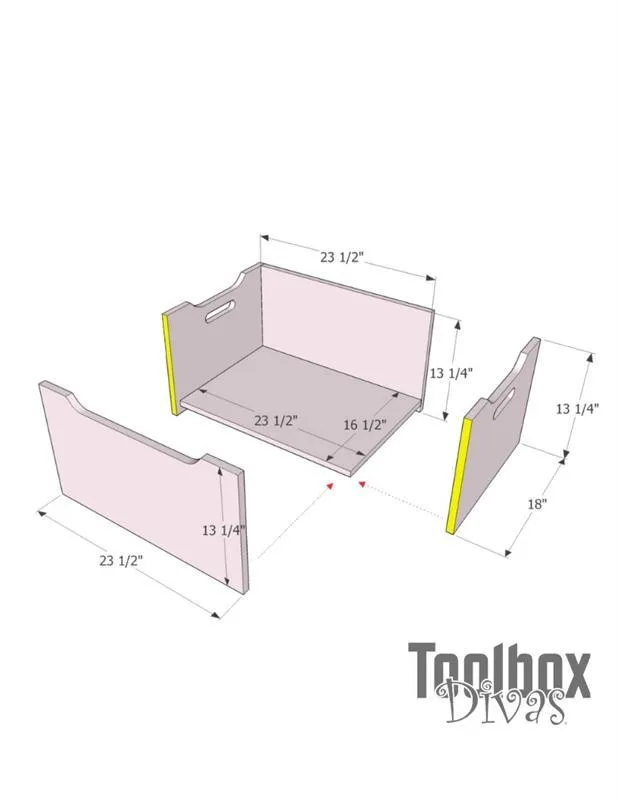
- Cut the sides of the toy box to size. Using a drill and a router notch out the handles on the two side boards. Using a jigsaw cut the lip into the 2 sides and front panel boards.
- Now assemble using pocket screws the base of the toy box.
2. Attach the lid
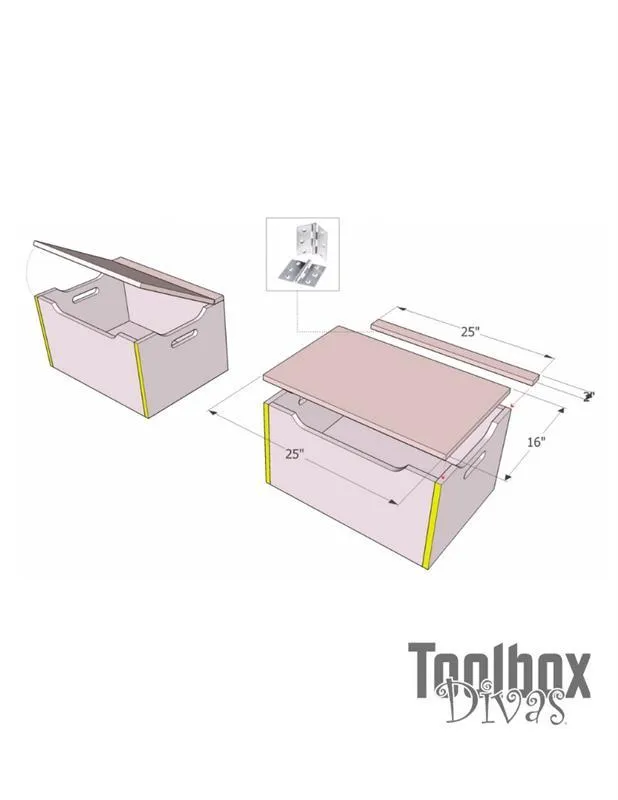
- Attach the lid to the top of the toy box.
- Start by attaching the back fixed portion of the lid. This is where the backrest board will rest when the toy box is a bench.
- Now using the narrow hinges attach the lid in front and flush with the fixed board. I recommend using a router to recess the hinge.
3. Back Rest
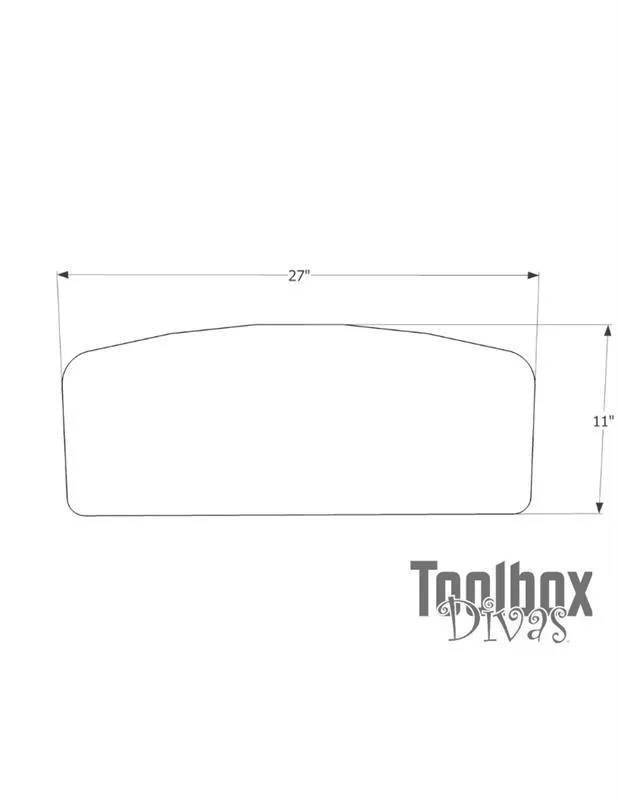
Cut out the backrest. Using a jigsaw create a curved top. Actually, with the back rest, you can get creative with how you choose to cut the top portion of the backrest. For this, I just curved the top sides. It's just important that the side and bottom stay straight.
4. Assemble table top
WIth the backrest cut out attach Armrest and support legs to the backrest. I recommend attaching the 1x2s together first then attaching it to the backrest.
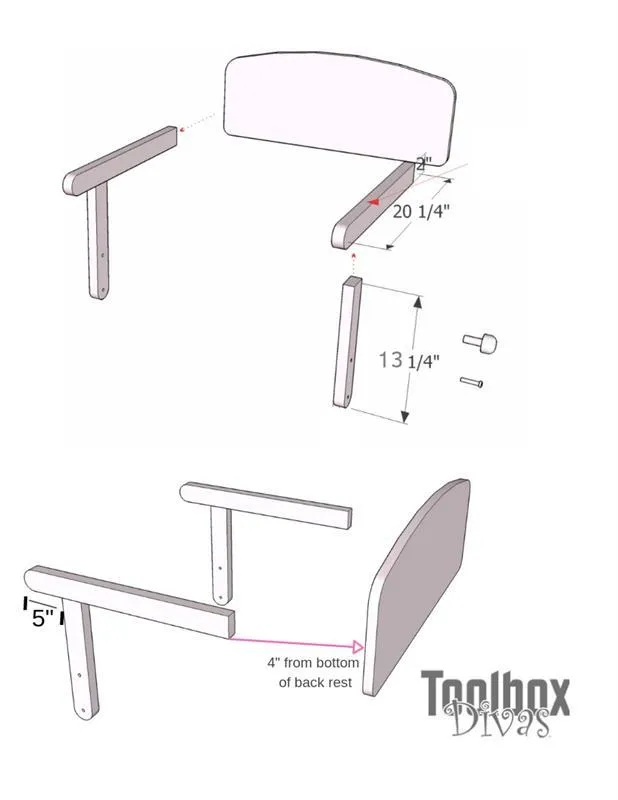
5. Creating the bench table
- Mount backrest/table top to toy box base by drilling a hole for the 1/4 in. Hex Cap Screw.
- Place washers between each board on both sides and secure it with the nut inside the toy box.
- Then drill a hole for the placement of the eyebolt. This is what will secure the table in place when the backrest is down and in a table position or when it's up in a bench position.