 Notch
Notch- Difficulty
- Intermediate
- Time
- 5–9.8 hours
- Cost
- $$$
About this build
This compact bookcase offers a perfect solution whether you’re looking for a place to keep your favorite books or you’re seeking a place to display objects you love. Its compact size means you can fit it into almost any room, and the simple style means it will match a variety of decorating styles.
Tools
Essential
- Circular Saw
- Drill / Driver
- Hammer
- Miter Saw
- Pocket Hole Jig
- Random Orbit Sander
Optional / nice to have
- Tape Measure
Materials
| Item | Qty |
|---|---|
| Plywood, 3/4" Thick Half Sheet | 2 board |
| Board, 1x2 72" | 1 board |
| Screen Molding, 1/4" x 3/4" 96" | 3 board |
| Base Cap Molding, 5/8" x 1 1/4" 96" | 1 board |
| 1 1/4" coarse pocket hole screws | 50 each |
| #18 x 3/4" brad nails | 32 each |
| #18 x 1 1/4" brad nails | 10 each |
| Shelf Pins | 8 each |
Overall cost: $$$. Lumber prices vary by region, species, and season, so we give a band rather than a figure we would only be pretending to know.
Cut list
| Part | Qty | T × W × L |
|---|---|---|
| Back | 1 | 3" × 24" × 36" |
| Left Side | 1 | 3" × 11" × 36" |
| Right Side | 1 | 3" × 11" × 36" |
| Rails | 2 | 3/4" × 1" × 22" |
| Stretchers | 2 | 3/4" × 1" × 10" |
| Bottom | 1 | 3" × 11" × 22" |
| Top | 1 | 3" × 12" × 24" |
| Top Side Molding | 2 | 5/8" × 1" × 12" |
| Top Front Molding | 1 | 5/8" × 1" × 25" |
| Bottom Edging | 1 | 1/4" × 3/4" × 22" |
| Shelf | 2 | 3" × 11" × 22" |
| Shelf Edging | 2 | 1/4" × 3/4" × 22" |
| Front Edging | 2 | 1/4" × 3/4" × 35" |
| Side Edging | 2 | 1/4" × 3/4" × 35" |
What to buy
Buy 9 boards at 8 ft.
3" × 24"
1 board
3" × 12"
1 board
3" × 11"
2 boards
3/4" × 1"
1 board
5/8" × 1"
1 board
1/4" × 3/4"
3 boards
Assumes 8 ft stock, a 1/8" saw kerf, and buying each part at its own width. Change the board size or kerf on the full board plan →
Instructions
1Create the Back
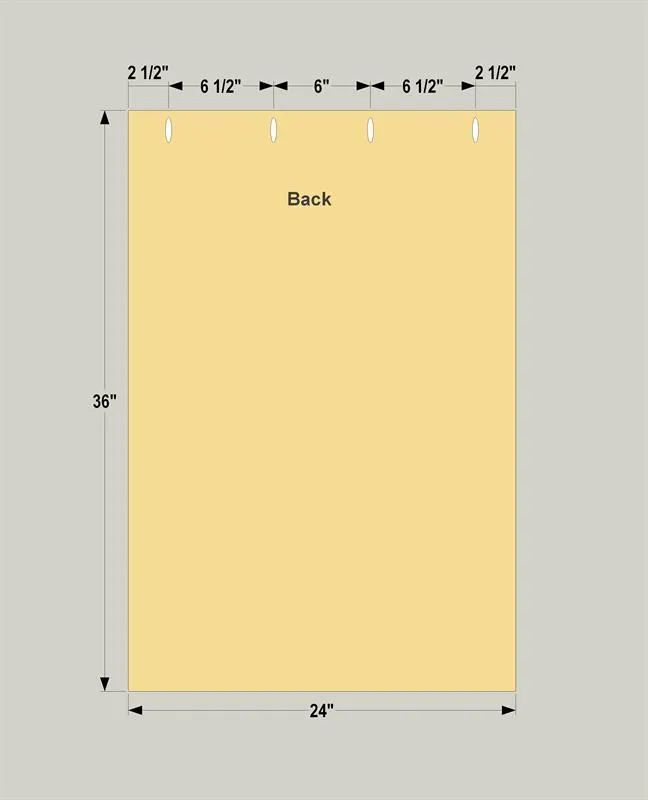
Cut one Back to size from 3/4" plywood, as shown in the cutting diagram. Then, with your pocket hole jig set up for 3/4" material, drill pocket holes in the Back, as shown.
2Create a Pair of Sides
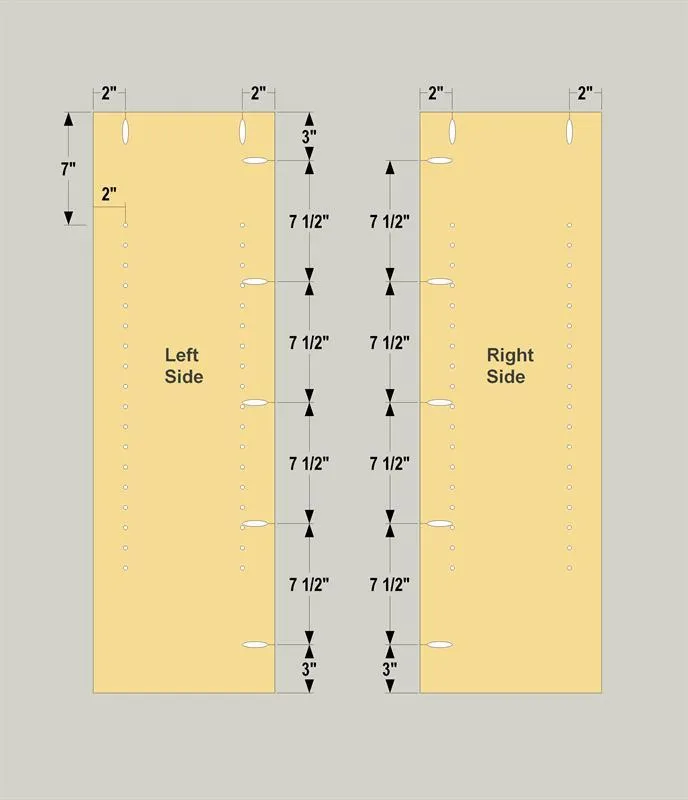
- Cut one Left Side and one Right Side to size from 3/4" plywood, as shown in the cutting diagram.
- Then, with your pocket hole jig set up for 3/4" material, drill pocket holes in the Sides, as shown.
- Then, drill holes for adjustable shelf pins, as shown. The easiest way to do this is with a Kreg Shelf Pin Jig. NOTE: The setback spacing (distance from the edge to the shelf-pin holes) shown matches the first-generation Kreg Shelf Pin Jig. The second generation model, released in March 2022, has different setback spacing. The vertical distance between the pin holes, though, matches the dimensions shown here—1 1/4". You can create the shelf-pin holes accurately using either the first- or second-generation jig.
3Assemble the Back and Sides
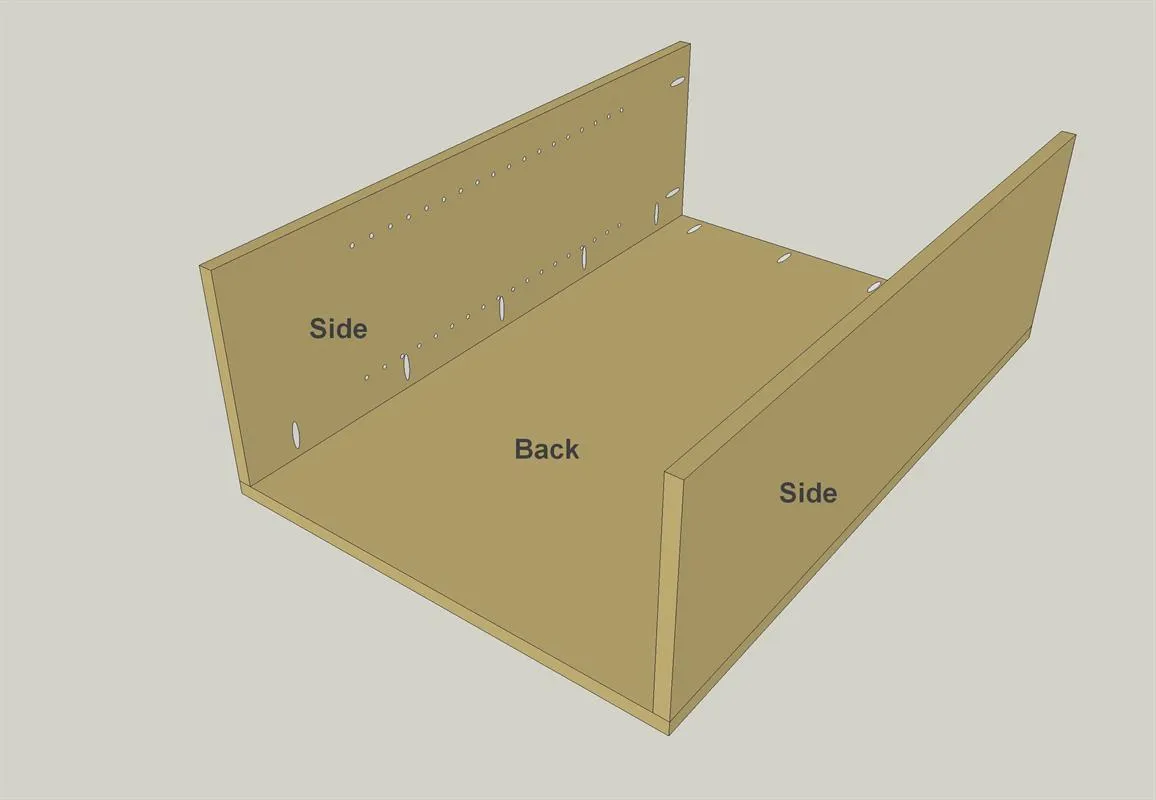
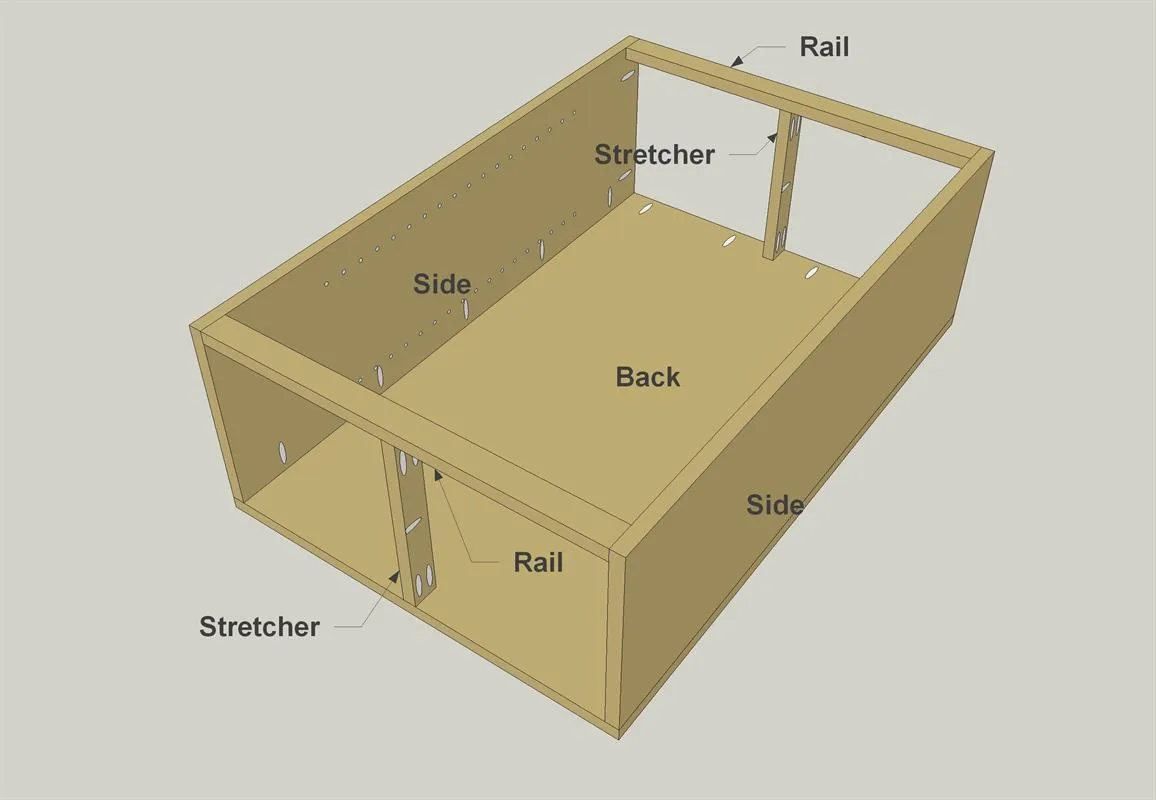
Attach the Sides to the Back using 1 1/4" coarse-thread pocket hole screws. Make sure that that the parts are oriented in the proper direction before assembly.
4Make Rails and Stretchers
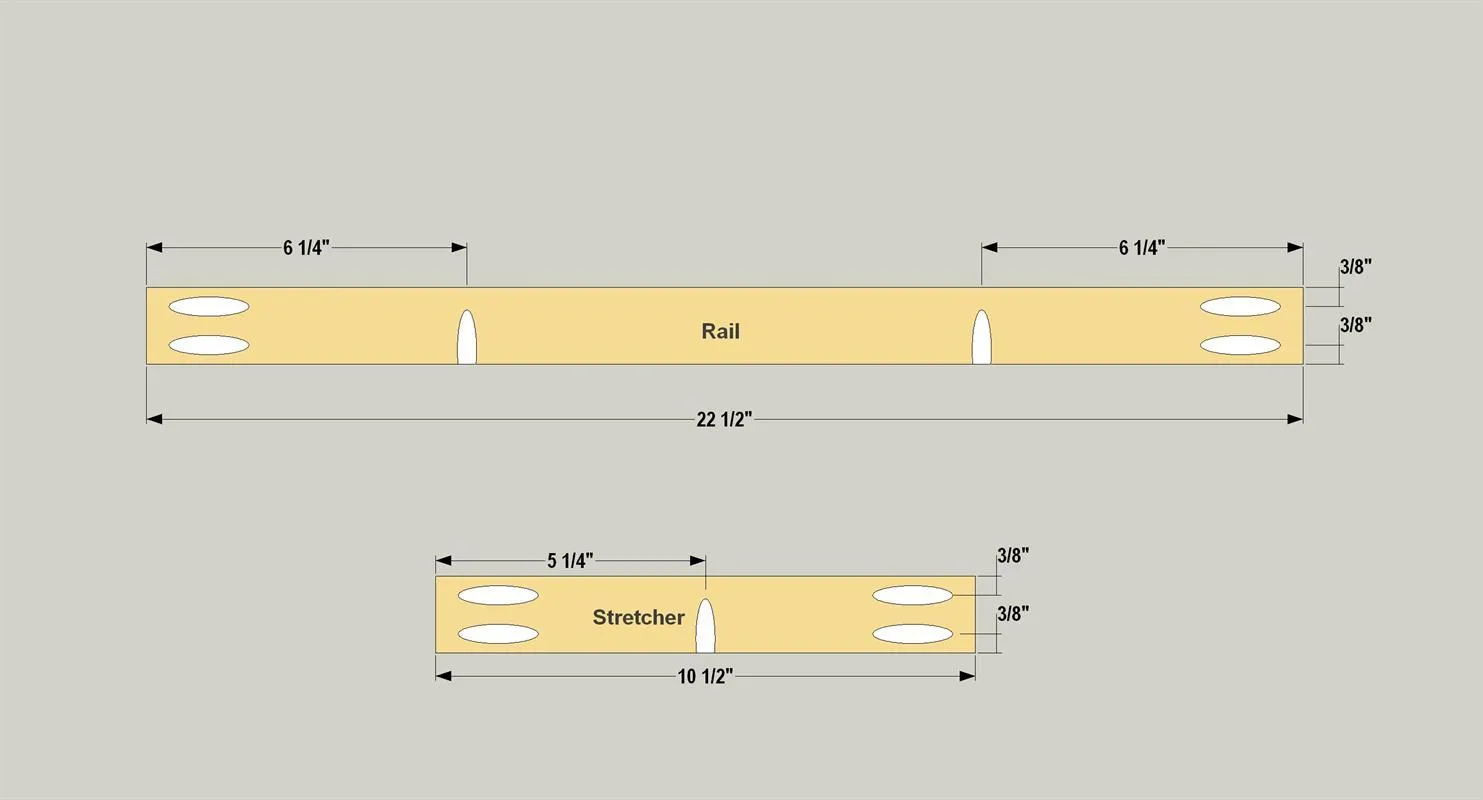
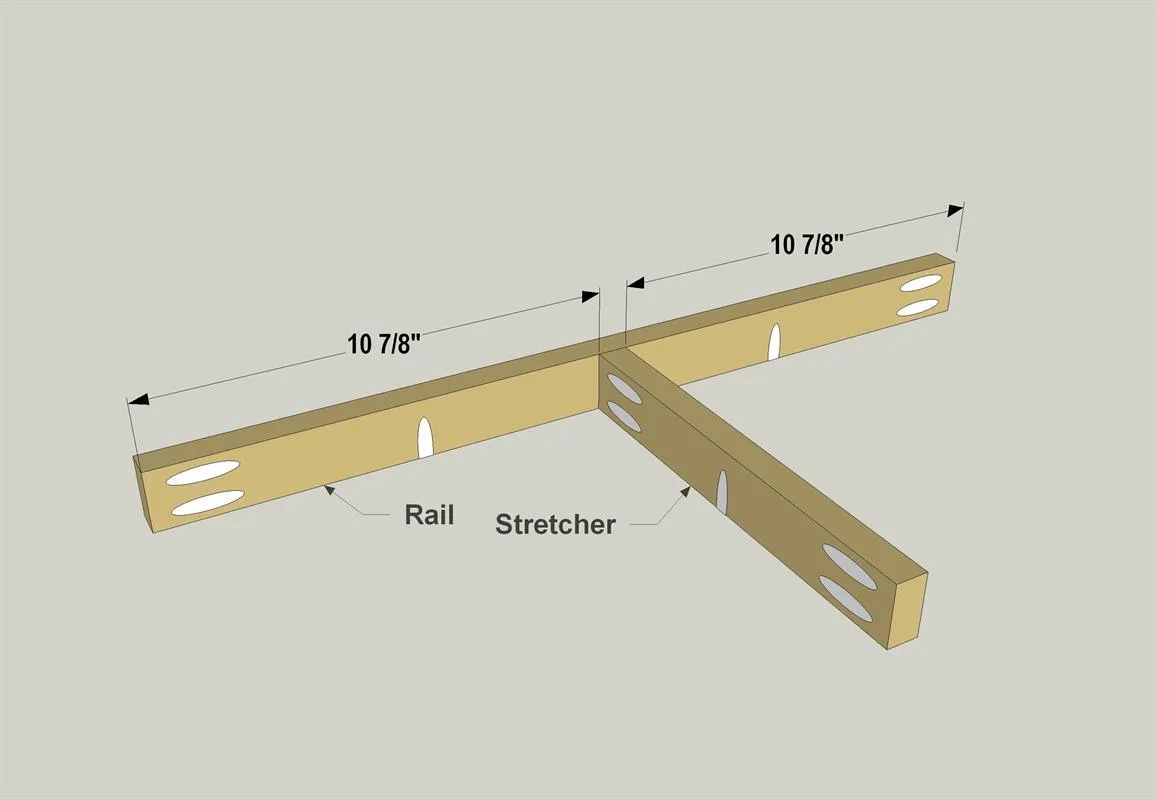
Cut two Rails and two Stretchers from a 1x2 board, as shown in the cutting diagram. Then, with your pocket hole jig set up for 3/4" material, drill pocket holes in the Rails and Stretchers, as shown.
5Assemble the Rails and Stretchers
Attach each Stretcher to each Rail using 1 1/4" coarse-thread pocket hole screws. Make sure that that the pocket holes in the edges of the pieces are all oriented in the proper direction before assembly.
6Install the Rails and Stretchers
Attach Rail/Stretcher assemblies using 1 1/4" coarse-thread pocket hole screws. Make sure that the pocket holes in the edges of the Rails and Stretchers are oriented so that you'll be able to attach the bookcase top and bottom later.
7Make a Bottom
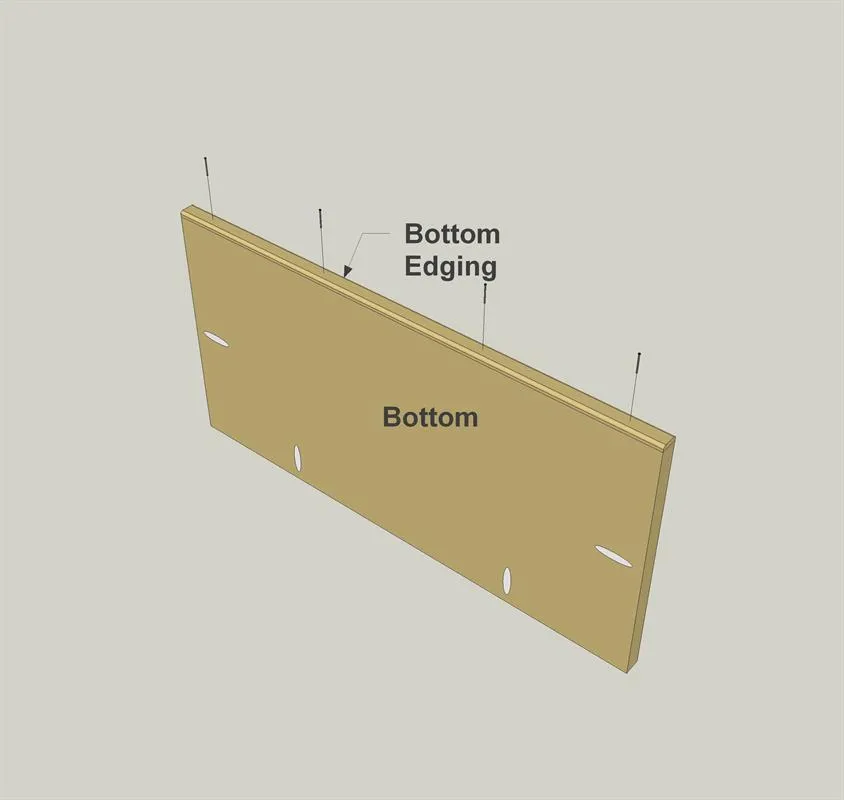
- Cut one bottom to size from 3/4" plywood, as shown in the cutting diagram.
- Also cut Bottom Edging to length from a piece of screen molding.
- Then, attach the Bottom Edging to the Bottom using #18 x 3/4" brads and wood glue, as shown.
8Make the Top
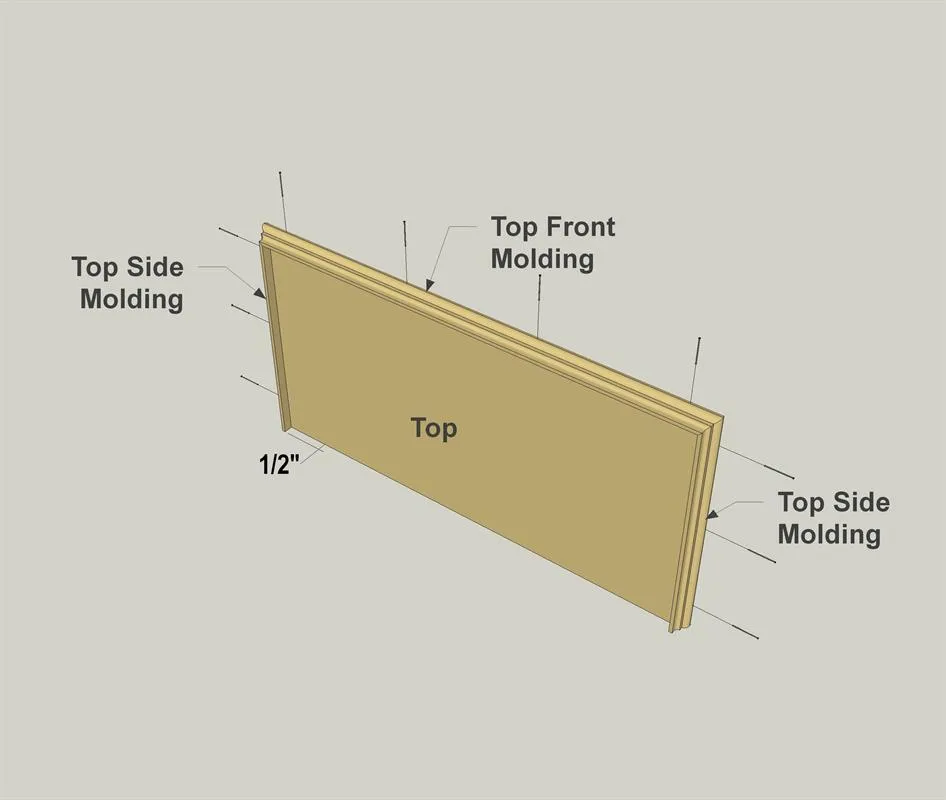
- Cut one Top to size from 3/4" plywood, as shown in the cutting diagram.
- Also cut Top Side Molding and Top Front Molding to size from a piece of base cap molding (which you can get at a home center). Note that the Molding pieces are mitered to wrap around the front and sides of the bookcase Top.
9Attach the Top Molding
Now you can attach the Top Side Molding and Top Front Molding to the Top using #18 x 1 1/4" brads, along with wood glue. Make sure that the molding fits flush with the upper face of the Top, and that the mitered joints fit tightly.
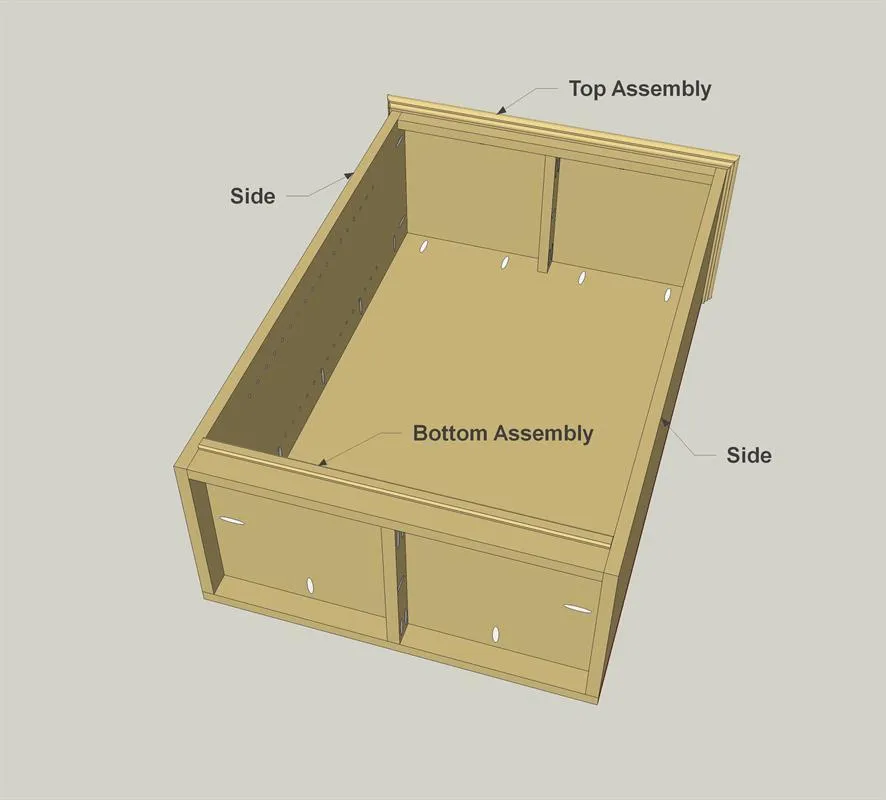
10Install the Top and Bottom
Attach the Top and Bottom assemblies to the bookcase using 1 1/4" coarse-thread pocket hole screws.
11Make a Pair of Shelves
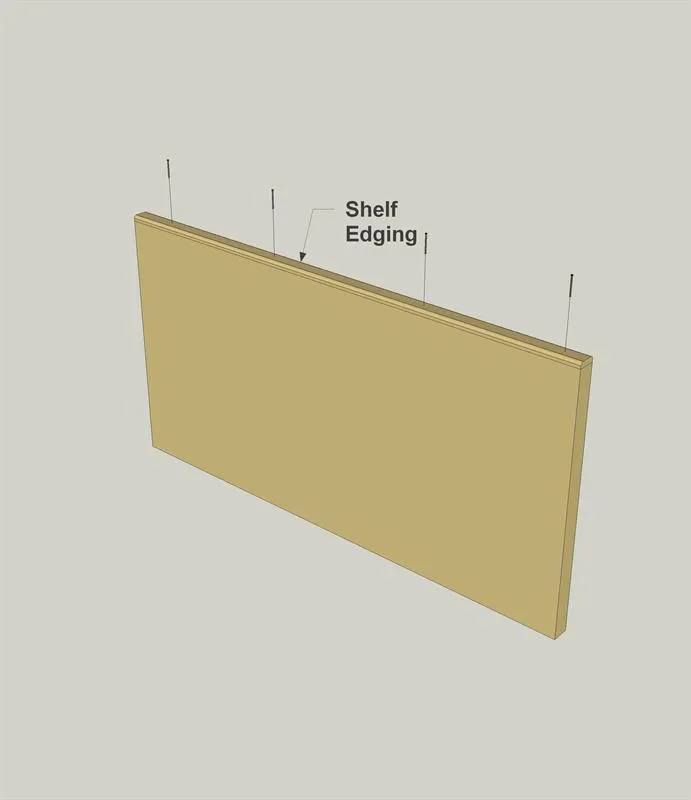
- Cut one Left Side and one Right Side to size from 3/4" plywood, as shown in the cutting diagram.
- Also cut Shelf Edging to length from a piece of screen molding.
- Then, attach the Shelf Edging to each Shelf using #18 x 3/4" brads, as well as wood glue, as shown.
12Finish with Front and Side Edging
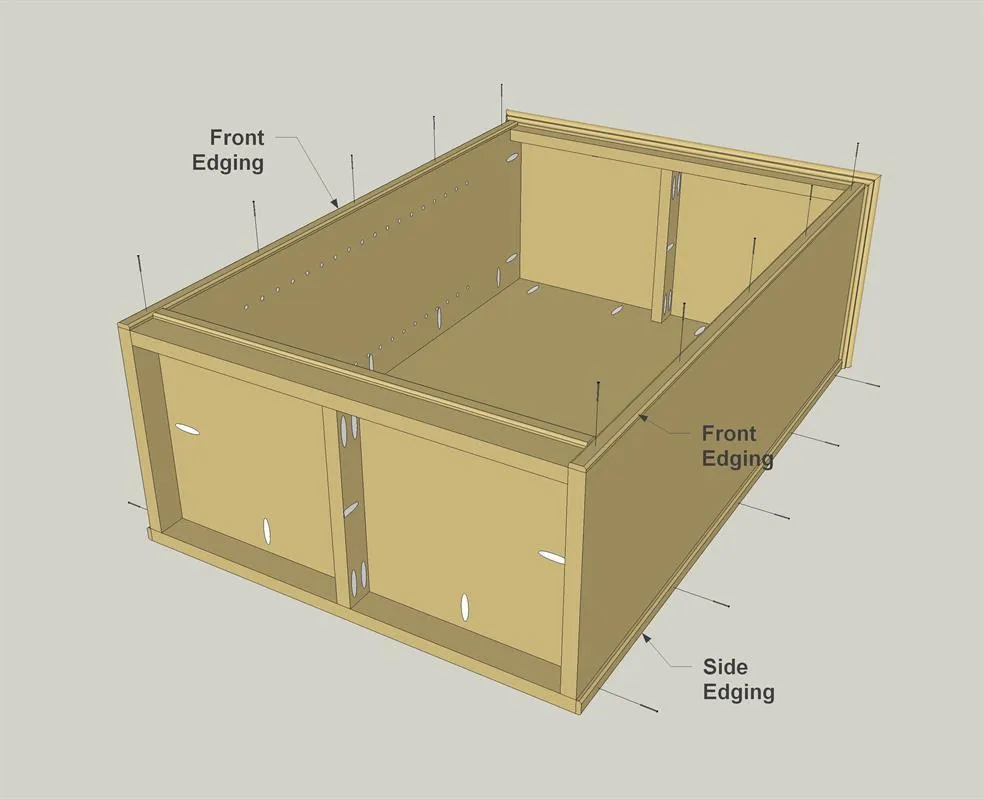
- Now you can cut two pieces of Front Edging and two pieces of Side Edging to length from screen molding, as shown in the cutting diagram.
- Then, glue and nail them on to cover the exposed plywood edges, as shown.
- Once the glue dries, you'll be set to stain or paint your shelves and load them up!
Tags
- Book
- Intermediate
Reviews & builds
No reviews yet
Sign in to review this plan or share your build.
No reviews yet. Be the first to build this.