 Notch
Notch- Difficulty
- Intermediate
- Time
- 4.3–8.3 hours
- Cost
- $$$
About this build
This sleek, unique dining table is the perfect fit for any style of home. It can be fully customizable to seat as many people as you'd like and is the perfect piece to have nice meals with your family. This design is set to seat 6 people and will become a staple in your home.
Tools
Essential
- Drill / Driver
- Miter Saw
- Random Orbit Sander
- Router
Optional / nice to have
- Bar / Pipe Clamps
- Safety Glasses
- Sandpaper (assorted grits)
- Tape Measure
Materials
| Item | Qty |
|---|---|
| Hardwood Lumber, 1 1/2" X 6" 96" | 15 board |
| Threaded Inserts | 6 each |
| Screws | 6 each |
| Wood Glue | 1 each |
| Flush Trim Bit | 1 each |
Overall cost: $$$. Lumber prices vary by region, species, and season, so we give a band rather than a figure we would only be pretending to know.
Cut list
| Part | Qty | T × W × L |
|---|---|---|
| Table Top | 10 | 1" × 6" × 72" |
| Table Support | 4 | 1" × 6" × 40" |
| Table Legs | 8 | 1" × 6" × 30" |
What to buy
Buy 15 boards at 8 ft.
1" × 6"
15 boards
Assumes 8 ft stock, a 1/8" saw kerf, and buying each part at its own width. Change the board size or kerf on the full board plan →
Instructions
1Know Before You Go
Before beginning the assembly, all pieces need to be fully surfaced (S4S) to 1 1⁄2” to ensure an even finish. For a demonstration of this step, please reference the video listed in the Extras tab. You can also purchase S4S lumber and skip this step.
2Assembly (Part 1)
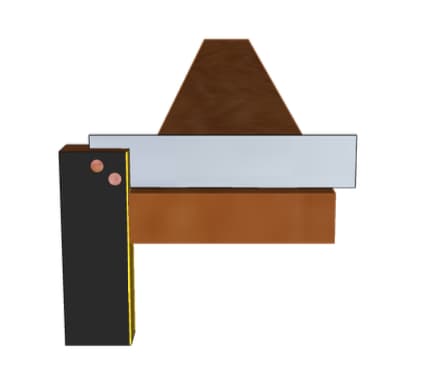
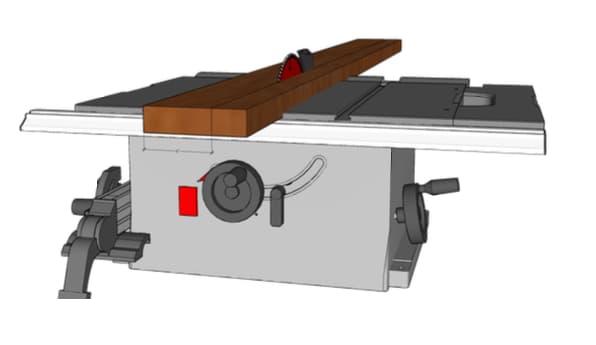
Cut all the tabletop, table support, and leg pieces to measure 4” wide using a table saw or track saw.
3Assembly (Part 2)
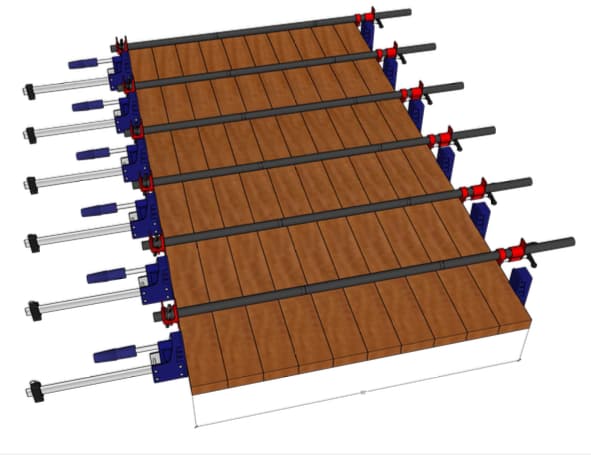
To assemble the tabletop, add wood glue along the edge of each piece and clamp together using parallel and pipe clamps. Allow the wood to dry for at least 24 hours before moving to the next step.
4Assembly (Part 3)
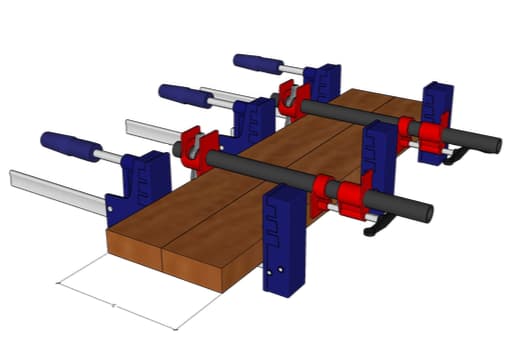
- Add wood glue along the edge of each leg piece and the cross pieces and clamp together using parallel and pipe clamps. Allow the wood to dry for at least 24 hours before moving to the next step.
- Repeat step for each leg panel and support panel.
5Assembly (Part 4)
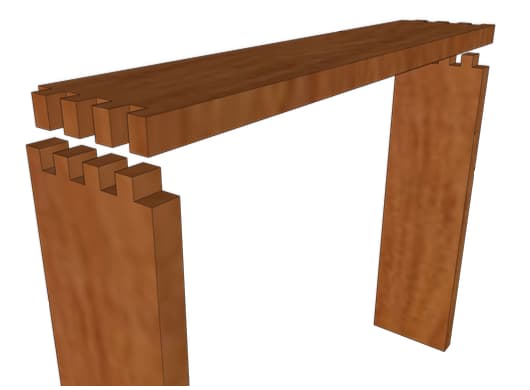
Using a router and template, create a box joint to connect the legs with the table support, as shown here. For a demonstration of this step, please reference the video listed in the Extras tab.
6Assembly (Part 5)
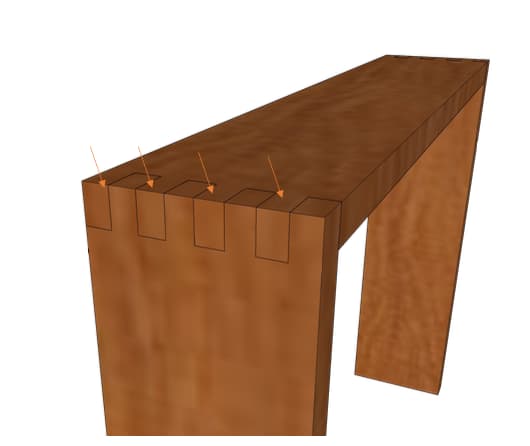
Add wood glue along the inside of the joinery and allow the wood to dry for at least 24 hours before moving to the next step. Repeat steps 4 & 5 for each leg and table support piece.
7Assembly (Part 6)
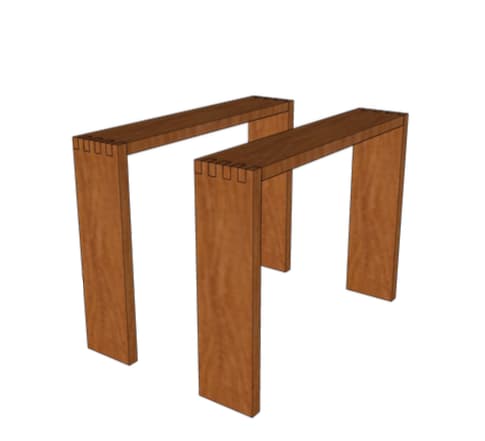
There should be a total of 2 leg piece panels like this.
8Assembly (Part 7)
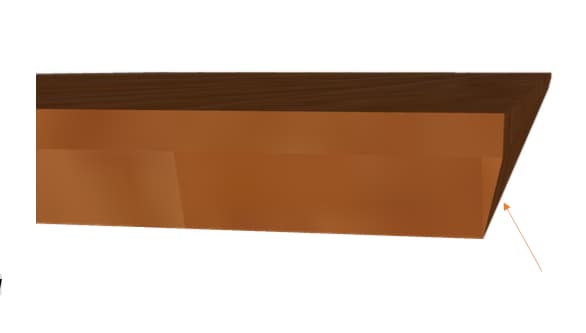
Set your track saw to a 22- degree bevel and run it along the edge of your tabletop to create this profile. This step is fully optional, depending your desired final look.
9Assembly (Part 8)
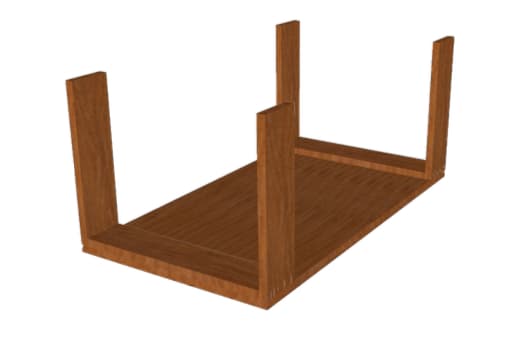
Flip the tabletop over and place leg on each side, flush with the table, with the support section facing towards the tabletop, as shown here.
10Assembly (Part 9)
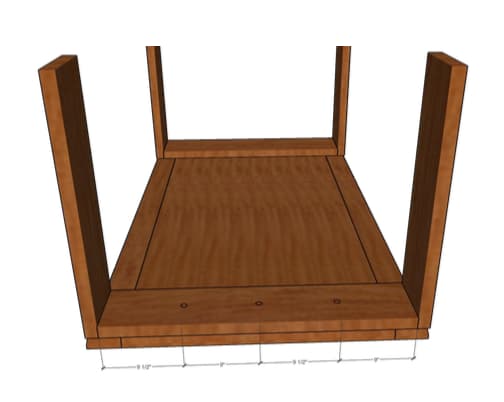
Using a 3/8” drill bit, open three pilot holes to attach the legs to the tabletop. Repeat step for both sides. Make sure to drill through the table support until you reach the tabletop, but do not drill through the tabletop. (Tip: You can place tape on your drill bit to achieve the same depth)
11Assembly (Part 10)
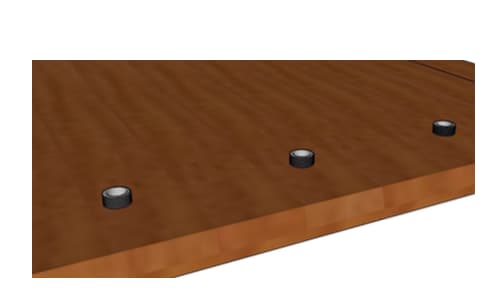
Remove the table legs and install threaded inserts on tabletop using CA glue, as shown in the video in the Extras tab. Repeat step for both sides.
12Assembly (Part 11)
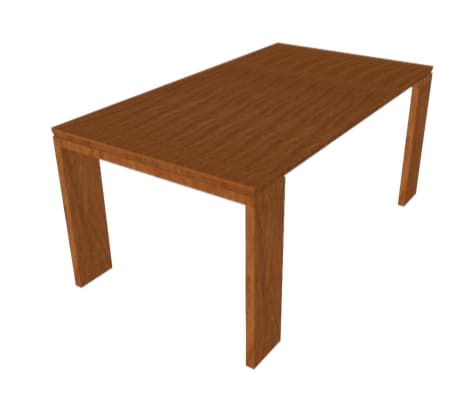
- Place legs on the tabletop.
- Align the 3/8” holes and secure leg pieces using bolts from the supply list.
- Finish table with preferred wood finish.
Tags
- Kitchen
- Intermediate
Reviews & builds
No reviews yet
Sign in to review this plan or share your build.
No reviews yet. Be the first to build this.