Notch
NotchUse your browser's Print (Ctrl/Cmd + P) and choose Save as PDF. This page works offline once you've opened it with a signal.
Build It: A Modern Bench
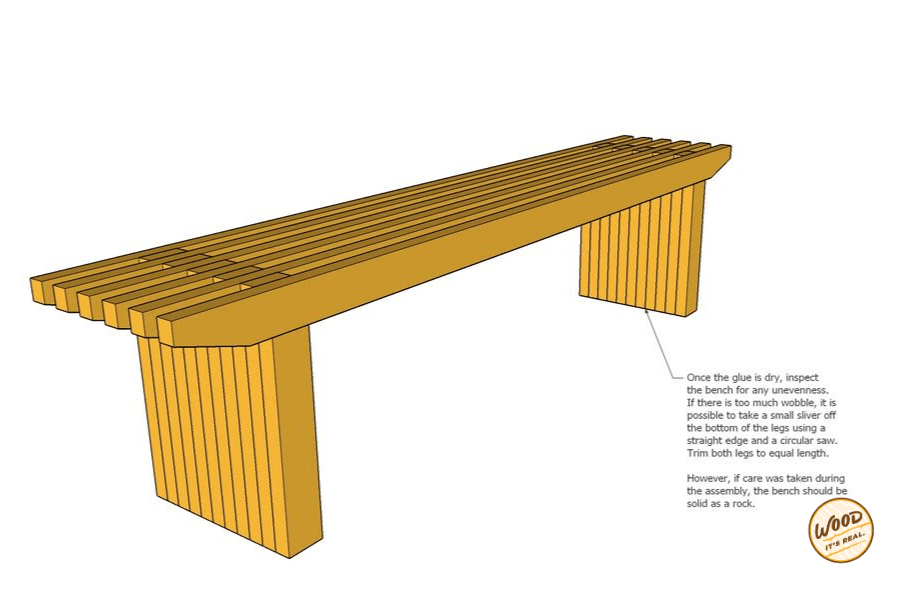
Sometimes you see a bench that is so simple – yet so striking.
- Difficulty
- Beginner
- Time
- 1.8–3.3 hours
- Cost
- $$
Cut list
| Part | Qty | T × W × L | Material | ✓ |
|---|---|---|---|---|
| Pressure Treated Southern Yellow Pine | 11 | 2" × 4" × 8" | — | ☐ |
Materials
| Item | Qty | ✓ |
|---|---|---|
| Board, 2x4 96" | 11 board | ☐ |
| 1.5" Wood Deck Screws | 50 each | ☐ |
Overall cost: $$. Lumber varies by region, species, and season, so we give a band rather than a figure.
Tools
- Circular Saw
- Drill / Driver
- Jigsaw
- Random Orbit Sander
- Tape Measure — optional
Instructions
1. Cut the Slats
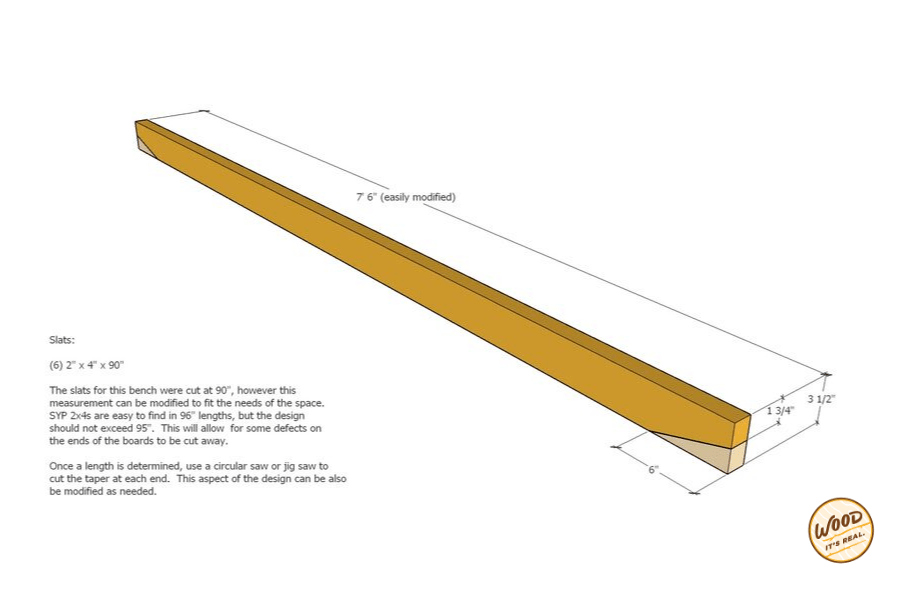
(1) Cut six boards to your desired length, not to exceed 95 inches – especially if purchasing 8′ length (2) Once the ideal length is determined, use a circular saw or a jigsaw to cut the taper at each end to the desired angle. (3) The assembly will use one slat at a time. However, cut all six slats at the same time to save time later and to reduce potential error.
2. Cut and Assemble the Bench Legs
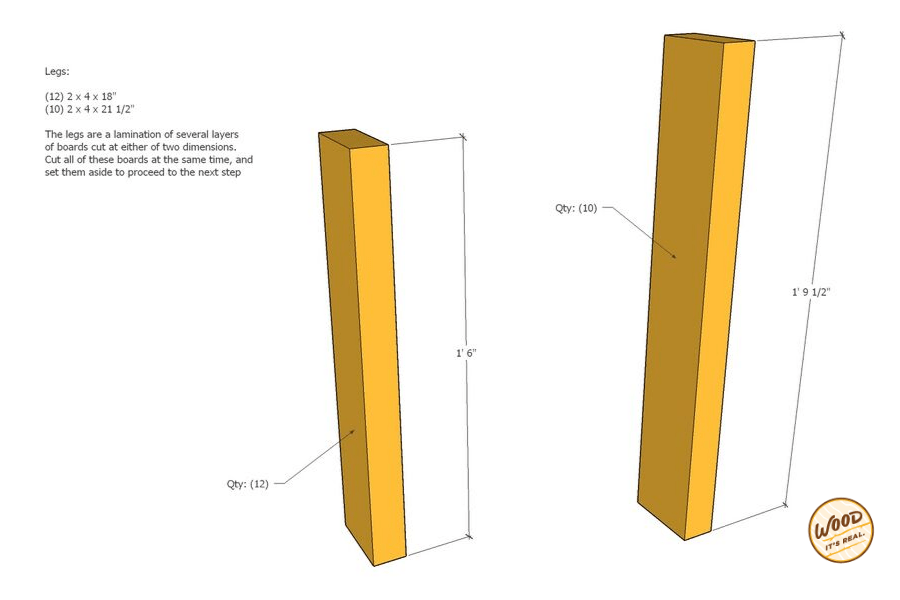
(1) The legs are a lamination of several layers of boards cut at either of the dimensions. (2) Cut all of the boards at the same time. (3) Cut 10 lengths at 1 foot, 9.5 inches; Cut 12 lengths at 1 foot, 6 inches. (4) Lay one of the longer cut boards on top of the smaller cut boards. (5) Using glue and fasteners, attach these two boards to make a leg assembly, taking care to line up the edges and bottoms of the two boards.
3. Assemble Bench - Part 1
(1) Lay one of the slats face down on a flat surface. (2) Place one leg assembly on top, eight inches from the end. (3) Use a square to place the leg 90-degrees to the face of the slat. (4) Glue and screw to attach the longer piece of the leg assembly to the face of the slat. (5) Be sure to use at least two decking screws to avoid rotation of the leg piece.
4. Assemble Bench - Part 2
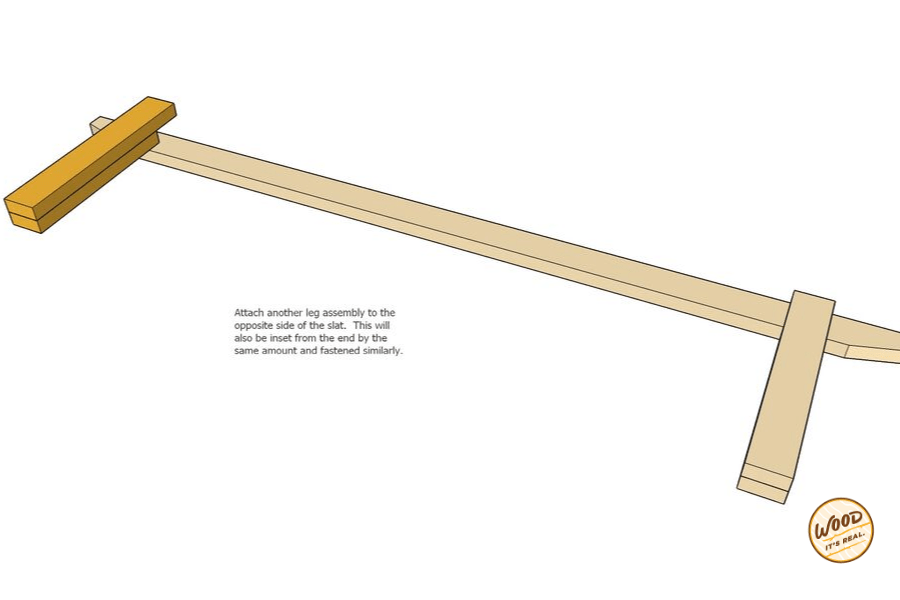
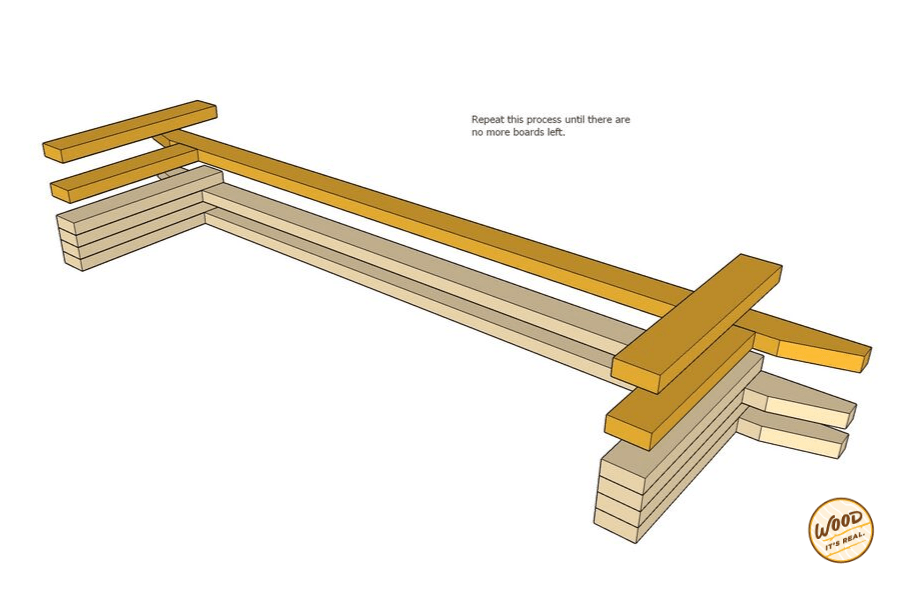
(6) Attach another leg assembly to the opposite side of the slat by 8 inches, just like the other side. (7) Lay another slat and shorter leg pieces face down on the previous assembly. (8) Line everything up with the parts below and attach with wood glue and decking screws. (9) Keep the leg parts flush with each other on the sides and bottom to prevent the final assembly from being uneven. (10) Repeat the process until there are no more boards left.
5. Enjoy!
(1) Once the glue is dry, inspect the bench for any unevenness. (2) If there’s too much of a wobble, it’s possible to take a small sliver off the bottom of the legs using a straight edge and a circular saw. (3) However, if care was taken during the assembly, the bench should be solid as a rock.