Notch
NotchUse your browser's Print (Ctrl/Cmd + P) and choose Save as PDF. This page works offline once you've opened it with a signal.
Beginner Friendly Sofa Table
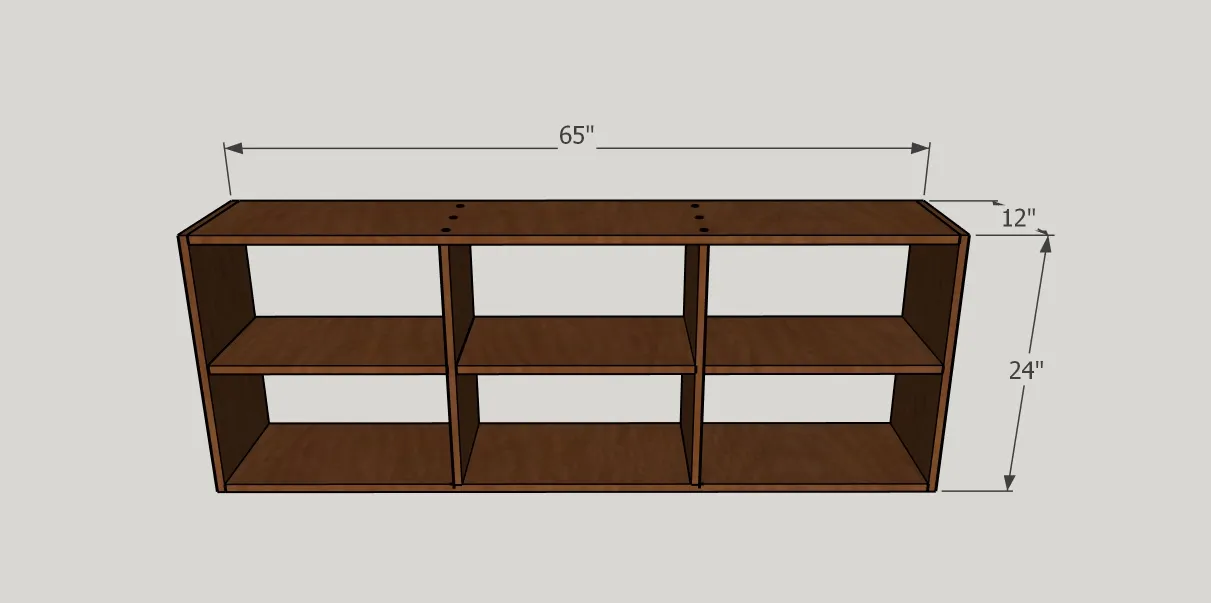
Build a sleek and low profile table that can double as a sofa table, console, or bookshelf.
- Difficulty
- Easy
- Time
- 3.3–6 hours
- Cost
- $$
Cut list
| Part | Qty | T × W × L | Material | ✓ |
|---|---|---|---|---|
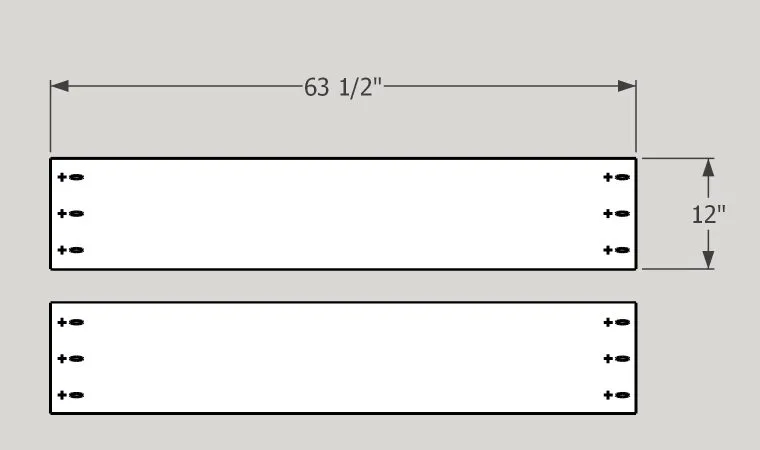
| Table Top and Bottom | 2 | 3/4" × 12" × 63 1/2" | — | ☐ |
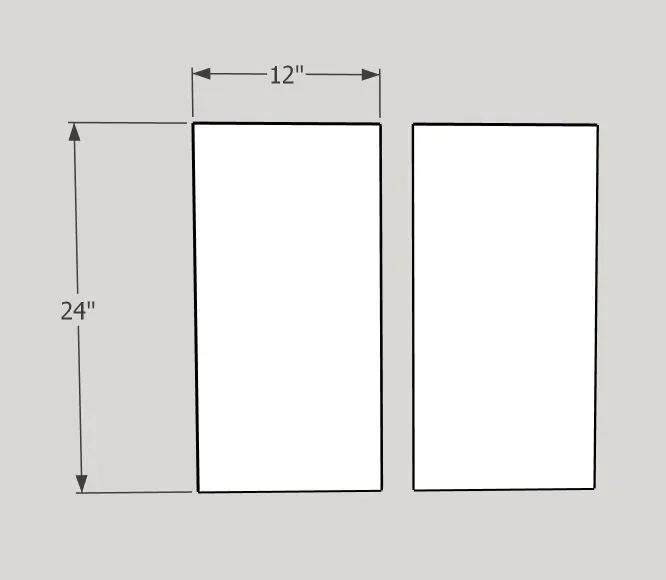
| Sides | 2 | 3/4" × 12" × 24" | — | ☐ |
| Vertical shelves | 2 | 3/4" × 12" × 22 1/2" | — | ☐ |
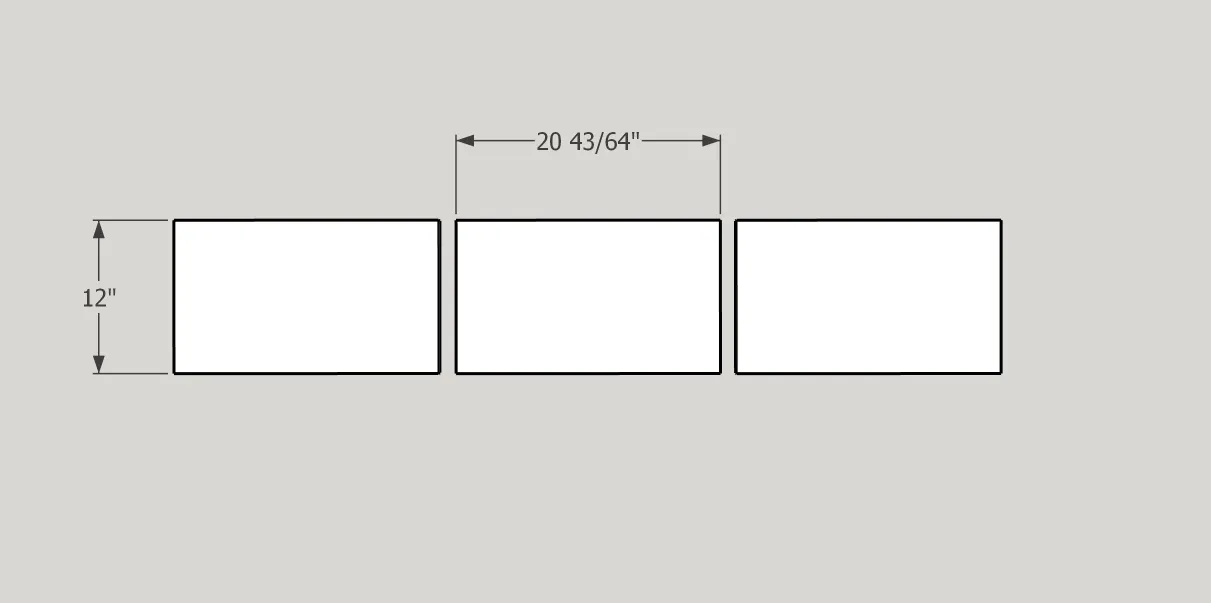
| Horizontal shelves | 3 | 3/4" × 12" × 20 11/16" | — | ☐ |
Materials
| Item | Qty | ✓ |
|---|---|---|
| 1x12x8', .75" x 12" x 96" | 4 board | ☐ |
| 1 1/4" pocket screws | 25 each | ☐ |
| Countersink bits | 1 each | ☐ |
| Wood glue | 1 each | ☐ |
| 1 1/4" wood screws | 25 each | ☐ |
| Optional: countersink bit | 1 each | ☐ |
| Optional: dowel/wood plug cutter bit | 1 each | ☐ |
| Optional: flush trim saw | 1 each | ☐ |
Overall cost: $$. Lumber varies by region, species, and season, so we give a band rather than a figure.
Tools
- Drill / Driver
- Miter Saw
- Pocket Hole Jig
Instructions
1. 1
- Cut the top and bottom to size. I suggest using a miter saw or a track saw.
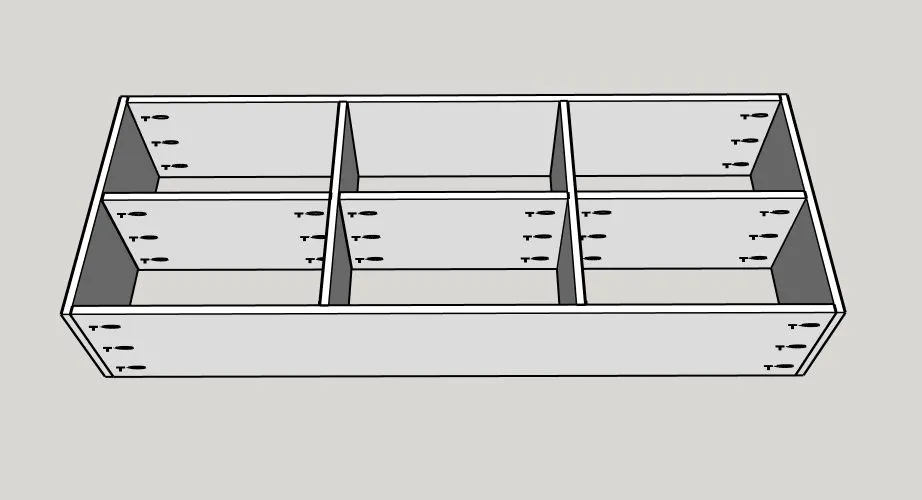
- Drill pocket holes on both ends of the top and bottom as shown in the picture. The pocket hole jig should be set to 3/4" and the drill collar should be set to 3/4".
2. 2
Cut the sides to size.
3. 3
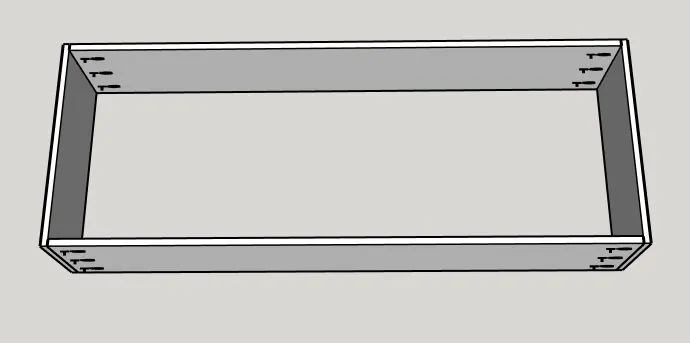
Attach the top and bottom to the sides using wood glue and 1 1/4" pocket screws. Make sure the pocket holes face the bottom so they won't be visible when the table is finished. Tip: clamps really help with this step!
4. 4
Cut the vertical shelves to size.
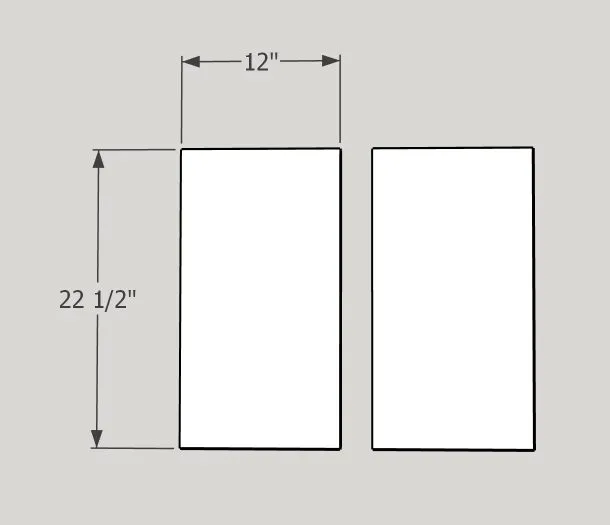
5. 5
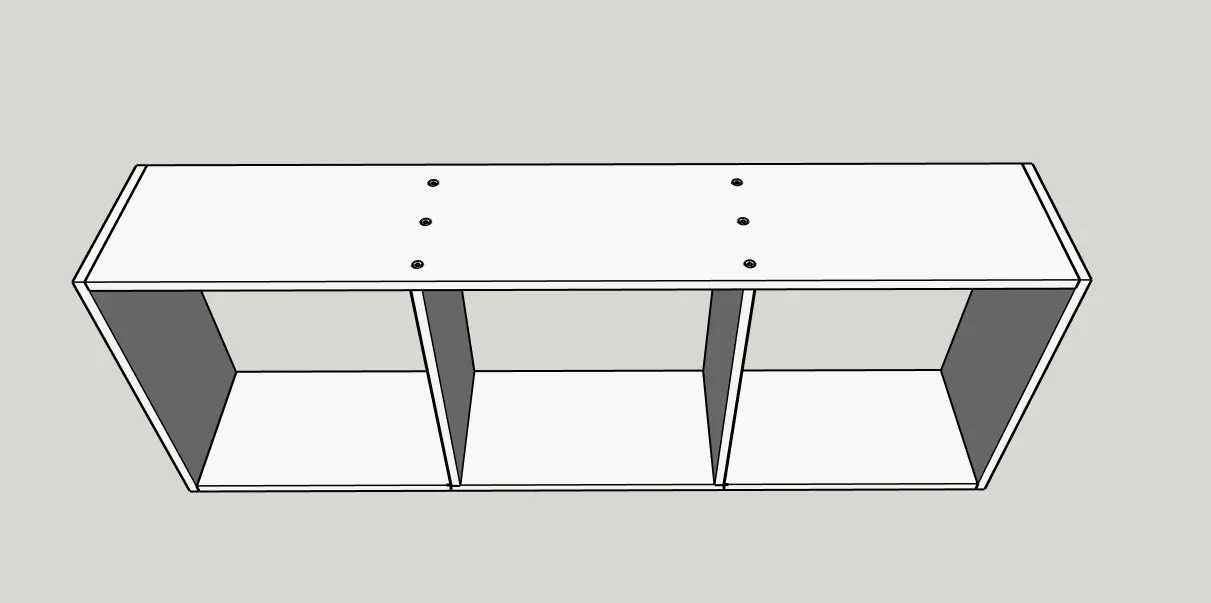
- Screw the vertical shelves into top and bottom of the table using 1 1/4" screws and wood glue. Put 3 in the top and bottom as shown in the image. Optional: To hide the screw holes, use a countersink bit to first drill a hole deep enough to hide the screw top.
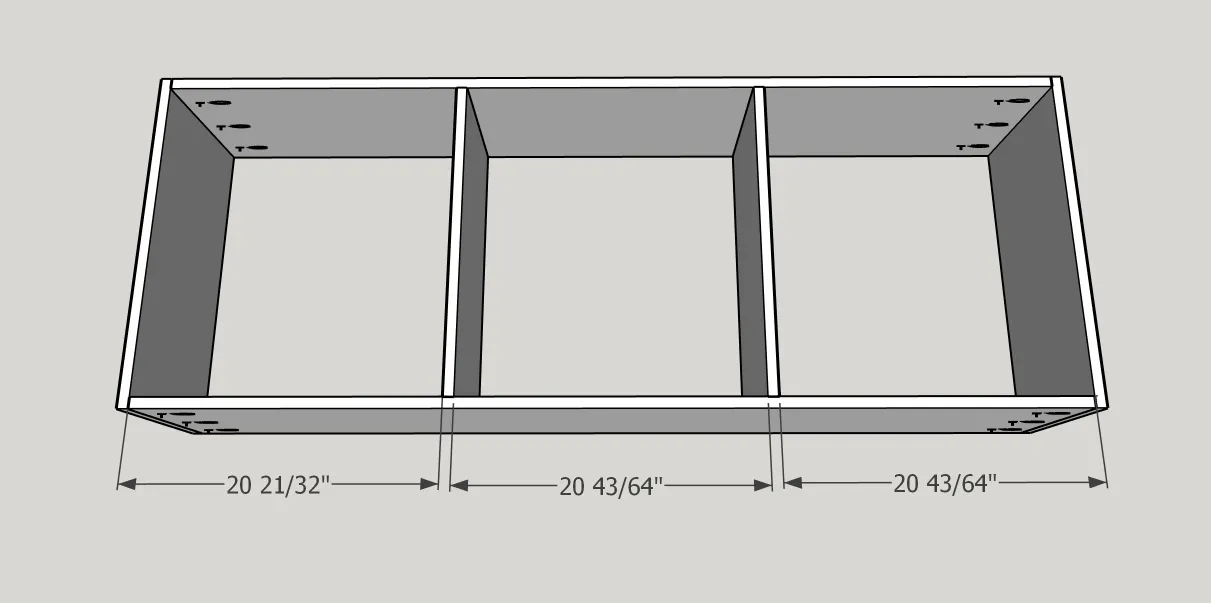
- Then screw the boards together and using either dowels that match the wood or a wood plug bit, glue in the wood and use a flush trim saw to trim it flush with the table. See step 6 for the spacing between the vertical shelves and the sides.
6. 6
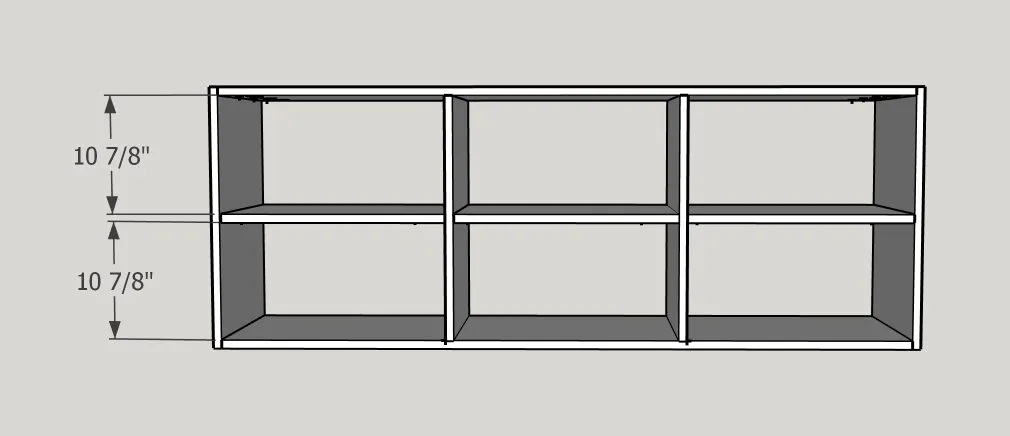
Refer to the image for the spacing needed between the vertical shelves and the sides of the table.
7. 7
Cut the horizontal shelves to size.
8. 8
Attach the shelves with pocket holes and wood glue. Refer to step 9 for the spacing between the shelves and the top and bottom of the table.
9. 9
Refer to the image for equal distance spacing between the vertical shelves and the top and bottom of the table.
10. 10
Sand and choose your favorite stain and you've made the perfect multi-functional table!