Notch
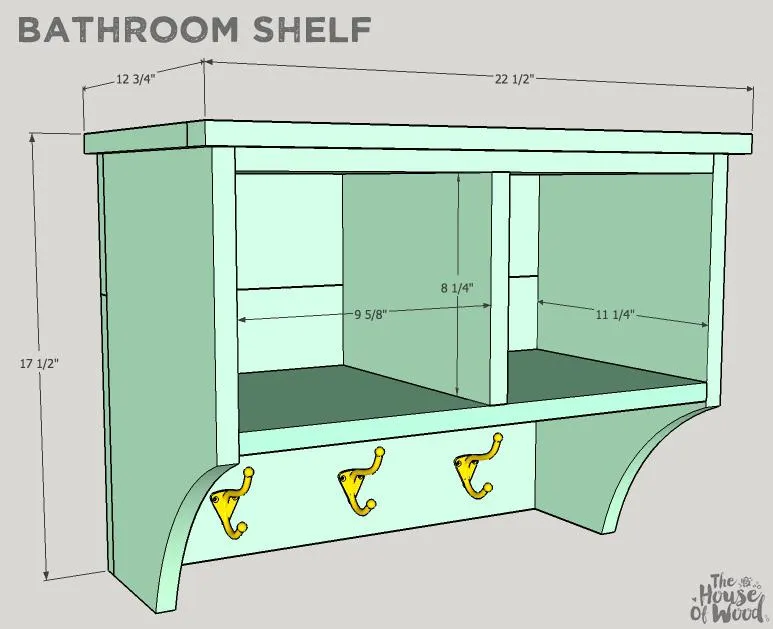
Bathroom Shelf
Step-by-step build — 8 steps. Also available as a print sheet.
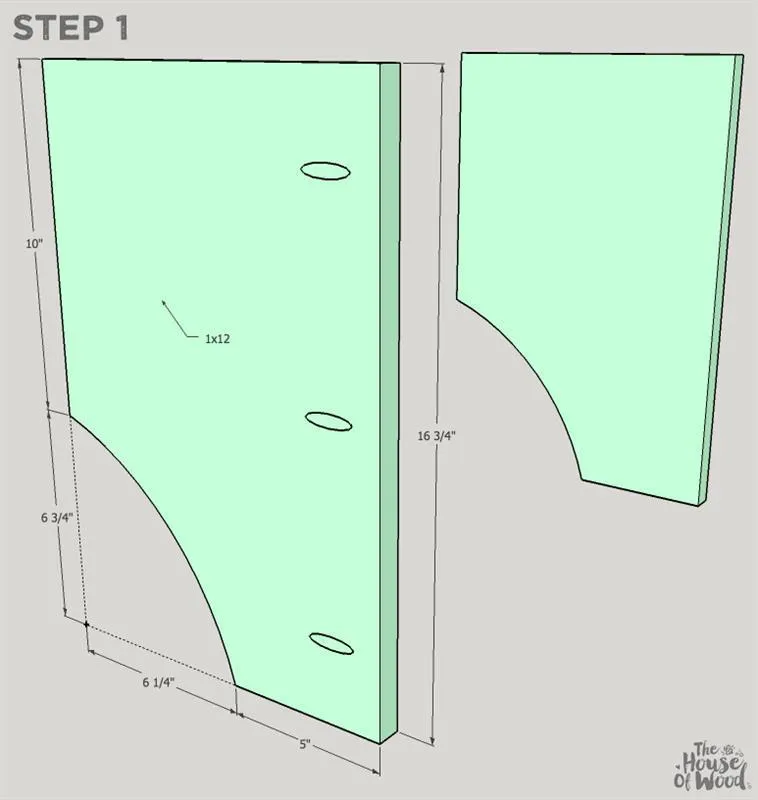
1Cut the Sides
Using a jigsaw, cut the two sides as shown and drill 3/4" posterior-facing pocket holes.
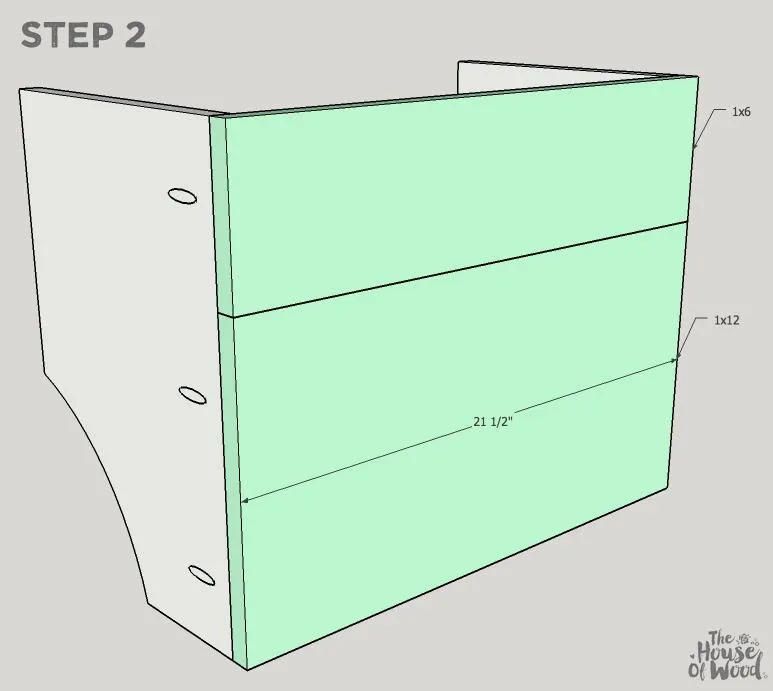
2Attach the Back
Attach the back to the sides with 1-1/4" pocket hole screws. You may opt to drill 3/4" pocket holes into the 1x6 and 1x12 back boards and join them together with 1-1/4" pocket hole screws before attaching the sides.
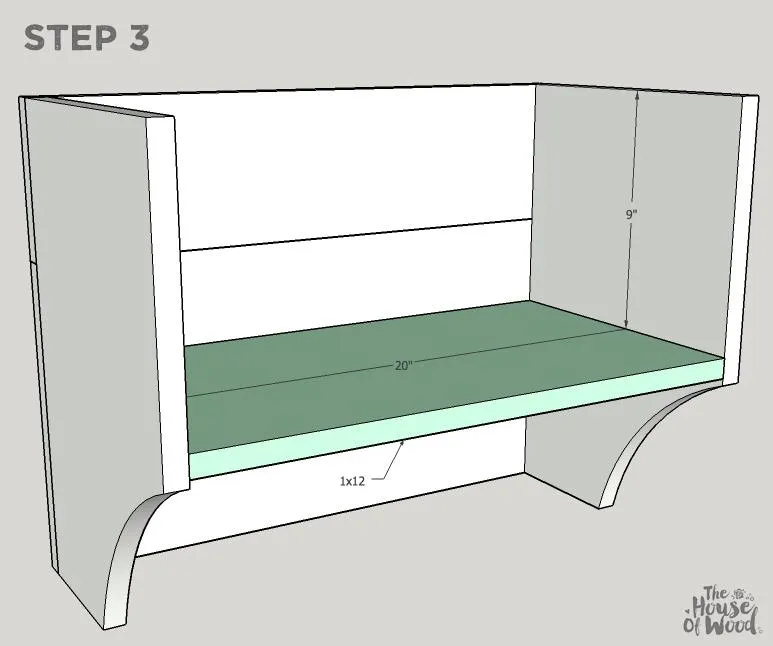
3Attach the Bottom
Drill 3/4" pocket holes into the bottom board and attach it to the carcass with 1-1/4" pocket hole screws.
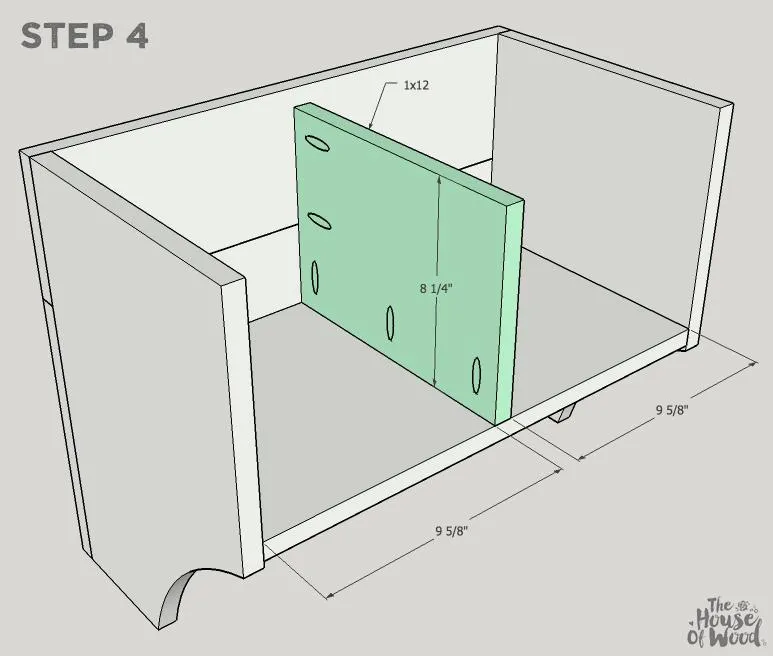
4Attach the Divider
Drill 3/4" pocket holes into the divider and attach it to the shelf with 1-1/4" pocket hole screws.
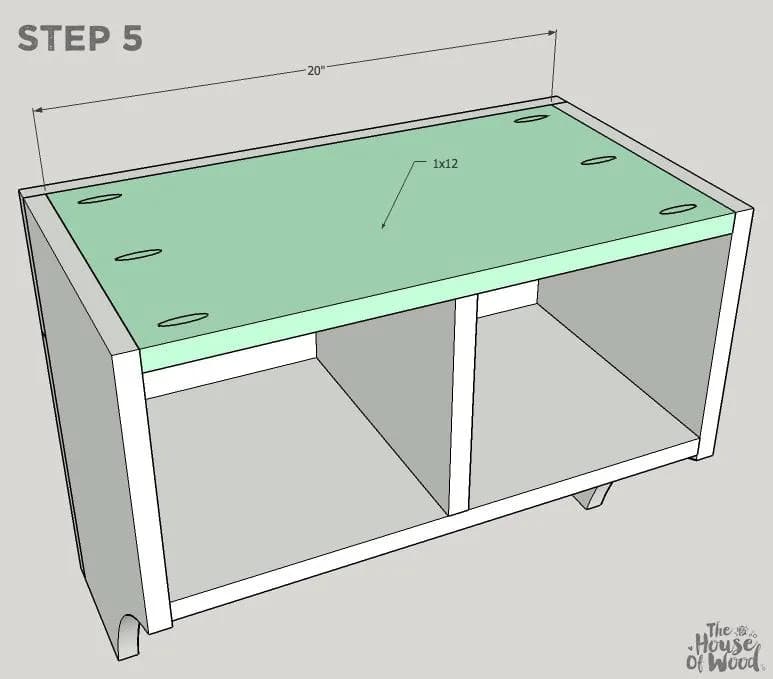
5Attach the Top
Drill 3/4" pocket holes into the top and attach it to the shelf with 1-1/4" pocket hole screws.
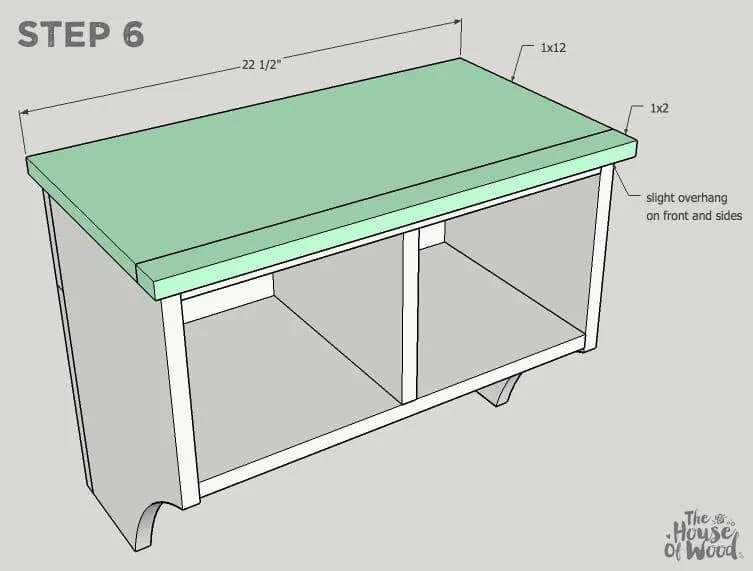
6Construct and attach the top
Drill 3/4" pocket holes into the 1x12 board and attach the 1x2 board with 1-1/4" pocket hole screws. Pre-drill and countersink pilot holes into the top and attach it to the shelf with 1-1/4" wood screws.
7Attach Robe Hooks
- Attach robe hooks as shown.
- Fill pocket holes with wood filler or pocket hole plugs, sand, and finish as desired. To hang the shelf on the wall, drive 2-1/2" wood screws from the inside the shelf into the wall studs.
8Visit JenWoodhouse.com
For more free building plans and DIY project ideas, visit www.JenWoodhouse.com