 Notch
- Difficulty
- Easy
- Time
- 2.8–5.5 hours
- Cost
- $$
About this build
Featuring two deep cubbies and three hooks for hanging, this pretty storage shelf is perfect for your bathroom. Store hand towels, toilet paper, and other bath accessories in the cubbies or hide them away in wicker baskets. The faucet shaped hooks add a whimsical touch to the whole project.
Tools
Essential
- Circular Saw
- Drill / Driver
- Jigsaw
- Pocket Hole Jig
- Random Orbit Sander
Optional / nice to have
- Combination Square
- Tape Measure
Materials
| Item | Qty |
|---|---|
| Board, 1x12 72" | 2 board |
| Board, 1x6 24" | 1 board |
| Board, 1x2 24" | 1 board |
| 1-1/4" Pocket Hole Screws | 1 each |
| Robe Hooks | 3 each |
| 1-1/4" Wood Screws | 1 each |
Overall cost: $$. Lumber prices vary by region, species, and season, so we give a band rather than a figure we would only be pretending to know.
Cut list
| Part | Qty | T × W × L |
|---|---|---|
| Sides | 2 | 3/4" × 11 1/4" × 16 3/4" |
| Back | 1 | 3/4" × 5 1/2" × 21 1/2" |
| Back | 1 | 3/4" × 11 1/4" × 21 1/2" |
| Shelf and Top | 2 | 3/4" × 11 1/4" × 20" |
| Divider | 1 | 3/4" × 8 1/4" × 11 1/4" |
| Top | 1 | 3/4" × 11 1/4" × 22 1/2" |
| Top Trim | 1 | 3/4" × 1 1/2" × 22 1/2" |
What to buy
Buy 5 boards at 8 ft.
3/4" × 11 1/4"
2 boards
3/4" × 8 1/4"
1 board
3/4" × 5 1/2"
1 board
3/4" × 1 1/2"
1 board
Assumes 8 ft stock, a 1/8" saw kerf, and buying each part at its own width. Change the board size or kerf on the full board plan →
Instructions
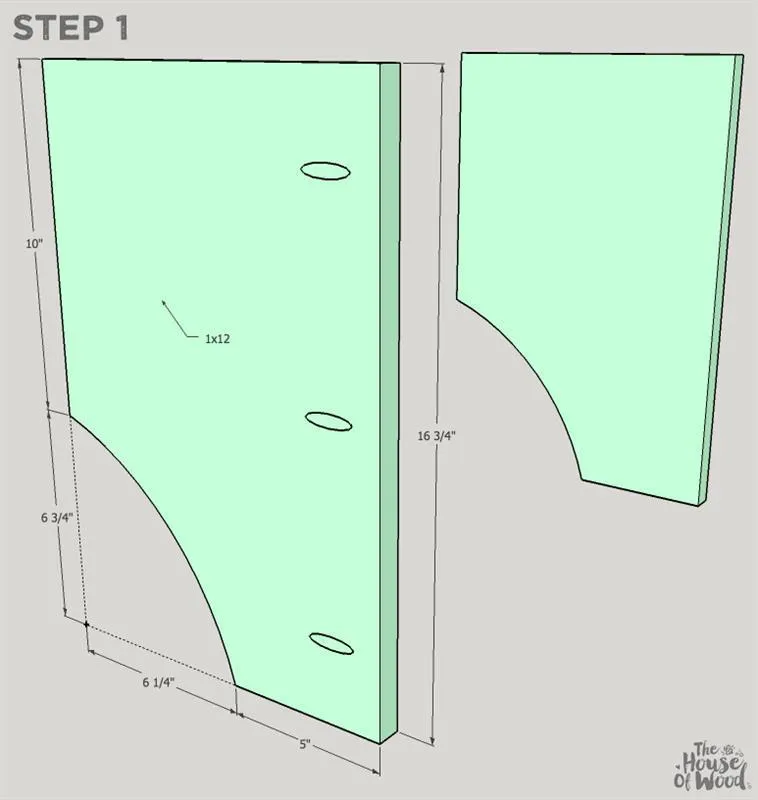
1Cut the Sides
Using a jigsaw, cut the two sides as shown and drill 3/4" posterior-facing pocket holes.
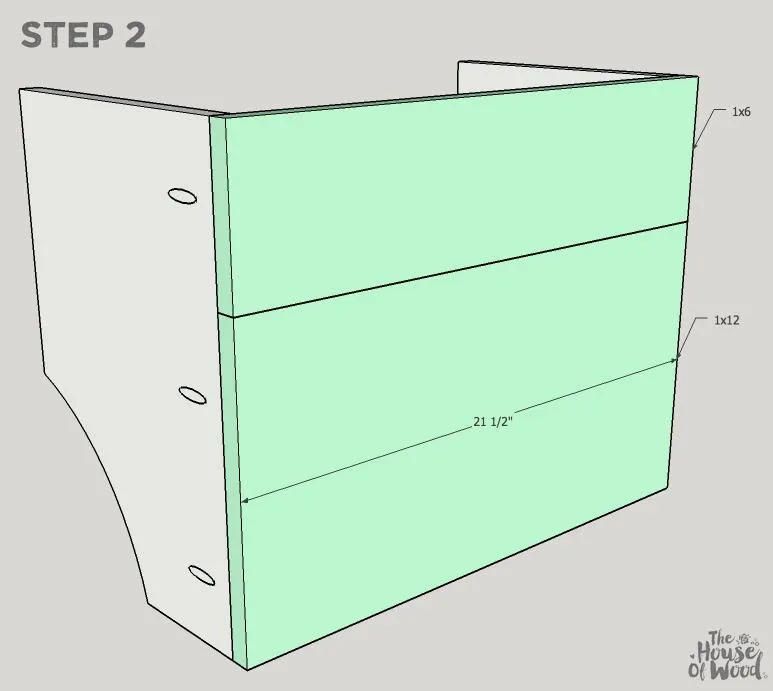
2Attach the Back
Attach the back to the sides with 1-1/4" pocket hole screws. You may opt to drill 3/4" pocket holes into the 1x6 and 1x12 back boards and join them together with 1-1/4" pocket hole screws before attaching the sides.
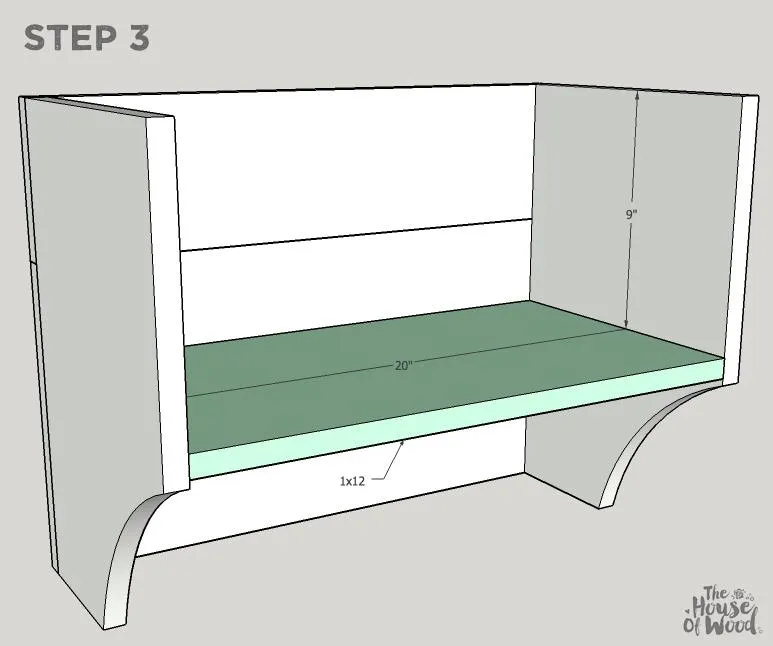
3Attach the Bottom
Drill 3/4" pocket holes into the bottom board and attach it to the carcass with 1-1/4" pocket hole screws.
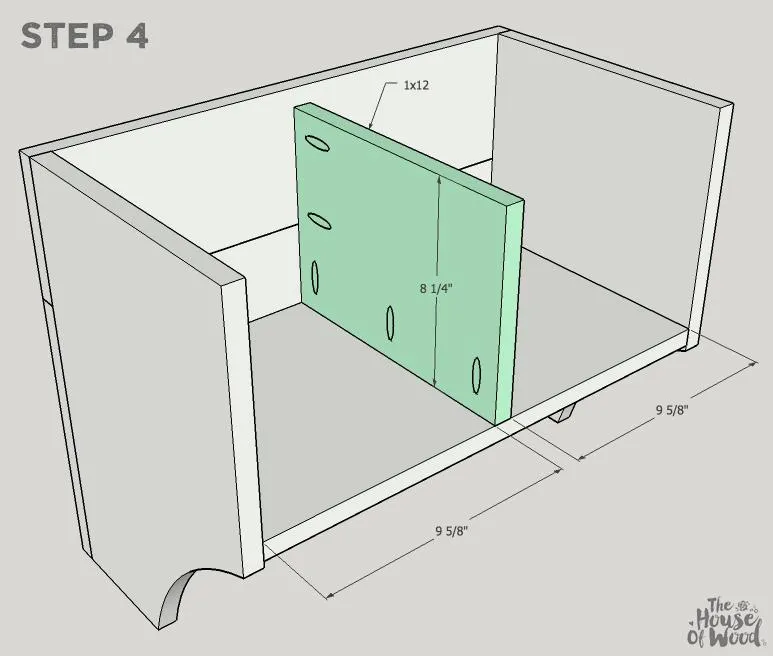
4Attach the Divider
Drill 3/4" pocket holes into the divider and attach it to the shelf with 1-1/4" pocket hole screws.
5Attach the Top
Drill 3/4" pocket holes into the top and attach it to the shelf with 1-1/4" pocket hole screws.
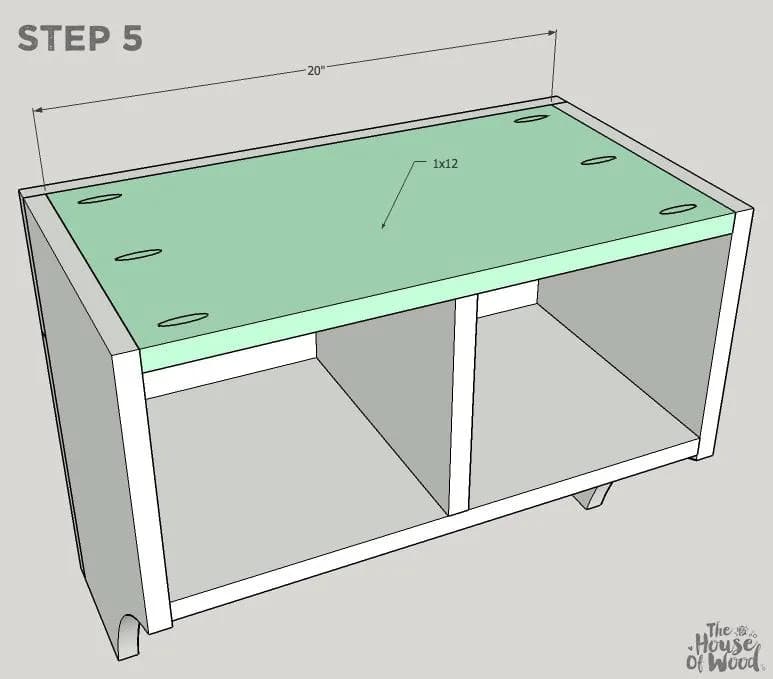
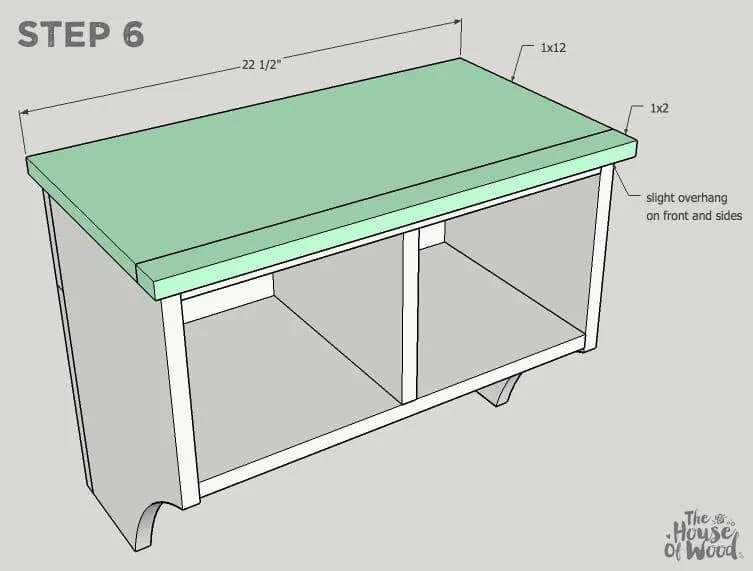
6Construct and attach the top
Drill 3/4" pocket holes into the 1x12 board and attach the 1x2 board with 1-1/4" pocket hole screws. Pre-drill and countersink pilot holes into the top and attach it to the shelf with 1-1/4" wood screws.
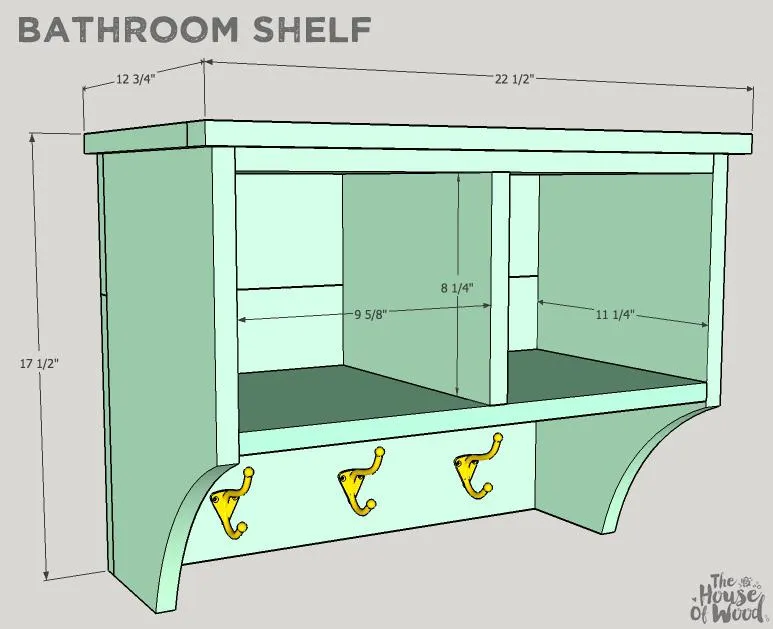
7Attach Robe Hooks
- Attach robe hooks as shown.
- Fill pocket holes with wood filler or pocket hole plugs, sand, and finish as desired. To hang the shelf on the wall, drive 2-1/2" wood screws from the inside the shelf into the wall studs.
8Visit JenWoodhouse.com
For more free building plans and DIY project ideas, visit www.JenWoodhouse.com

Tags
- Bathroom
- Beginner
Reviews & builds
No reviews yet
Sign in to review this plan or share your build.
No reviews yet. Be the first to build this.