 Notch
- Difficulty
- Advanced
- Time
- 5.3–10 hours
- Cost
- $$$
About this build
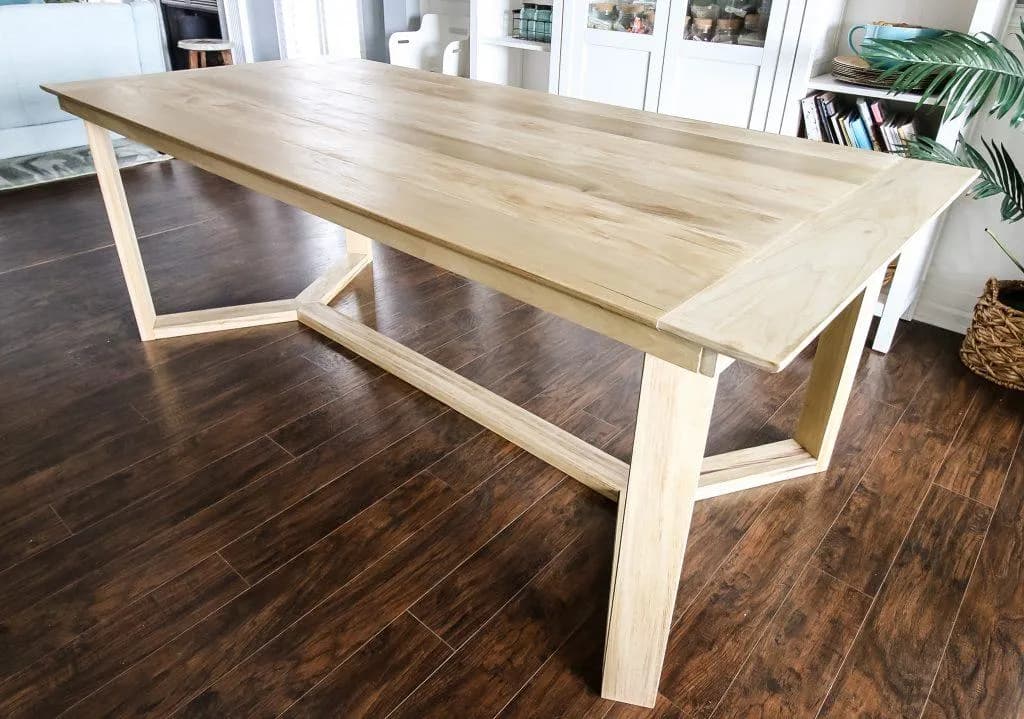
This DIY angled base dining table is sleek, modern and open and perfect for an open concept home. This build is really easy and is made entirely out of dimensional lumber available at the hardware store. This plan is perfect for those looking for a modern design to be the star of their home!
Tools
Essential
- Drill / Driver
- Miter Saw
- Pocket Hole Jig
- Random Orbit Sander
- Router
Optional / nice to have
- Bar / Pipe Clamps
- Tape Measure
Materials
| Item | Qty |
|---|---|
| Board, 1x6 72" | 7 board |
| Board, 1x6 96" | 1 board |
| Board, 1x2 96" | 3 board |
| Board, 1x4 120" | 4 board |
| 2 1/2" Kreg Screws | 14 each |
| 1 1/4" Kreg Screws | 30 each |
| Wood Glue | 1 each |
Overall cost: $$$. Lumber prices vary by region, species, and season, so we give a band rather than a figure we would only be pretending to know.
Cut list
| Part | Qty | T × W × L |
|---|---|---|
| Long Tops | 7 | 3/4" × 5" × 72" |
| Top Ends | 2 | 3/4" × 5" × 38" |
| Angled Leg Bases | 8 | 3/4" × 3" × 18" |
| Straight Legs | 8 | 3/4" × 3" × 29" |
| Base Spreader | 2 | 3/4" × 3" × 52" |
| Short Lips | 2 | 3/4" × 1" × 37" |
| Long Lips | 2 | 3/4" × 1" × 75" |
What to buy
Buy 17 boards at 8 ft.
3/4" × 5"
8 boards
3/4" × 3"
6 boards
3/4" × 1"
3 boards
Assumes 8 ft stock, a 1/8" saw kerf, and buying each part at its own width. Change the board size or kerf on the full board plan →
Instructions
1Glue and Cut Base Pieces
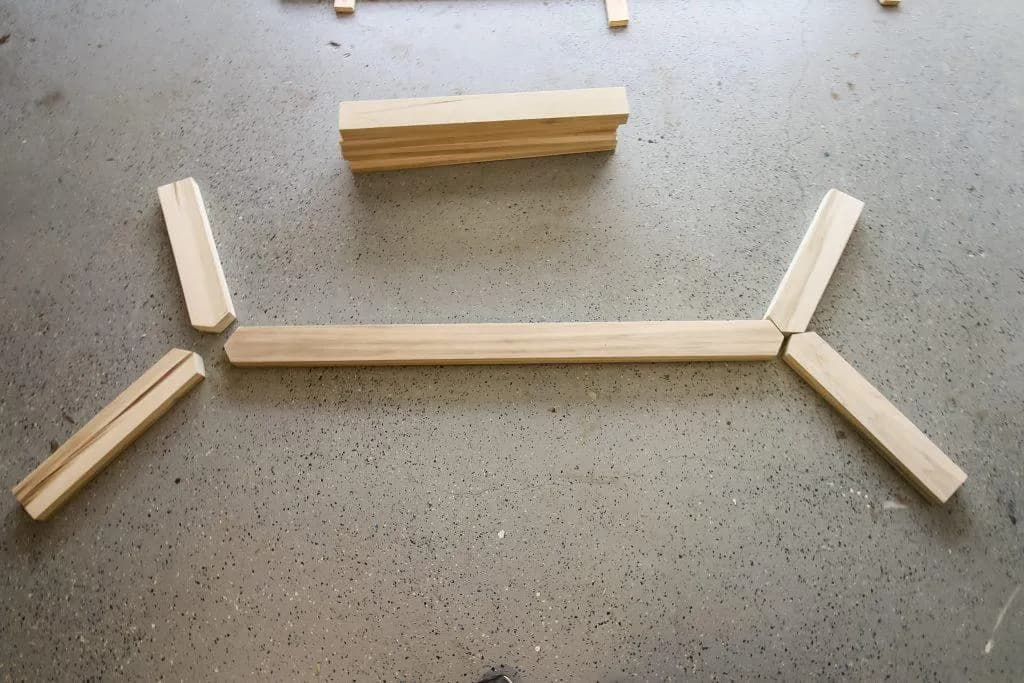
All of the base pieces are made from two 1x4s glued together. You can also use 2x4 lumber for the base if you want to go with a more rustic look. This would eliminate the need for gluing. Glue 1x4 boards together, then make cuts for base. For top, make cuts as specified.
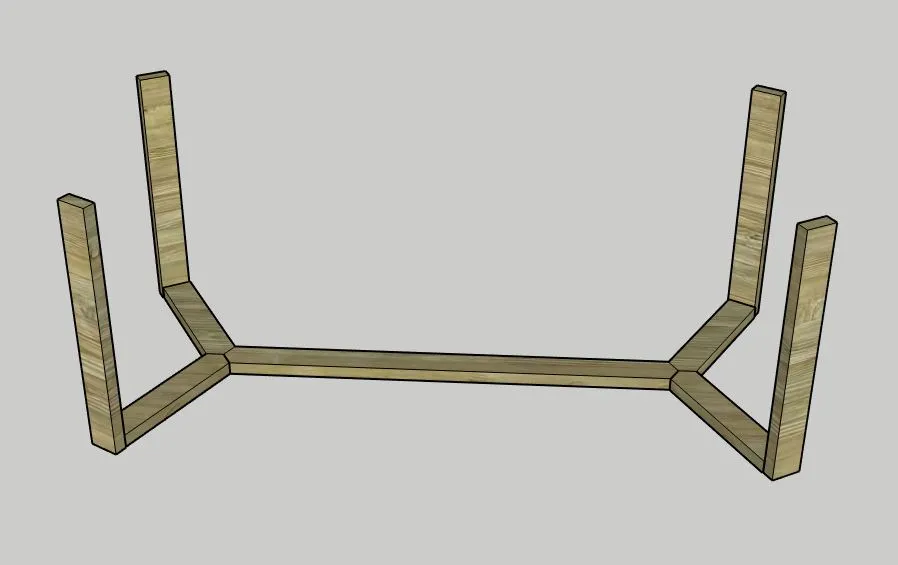
2Construct Legs
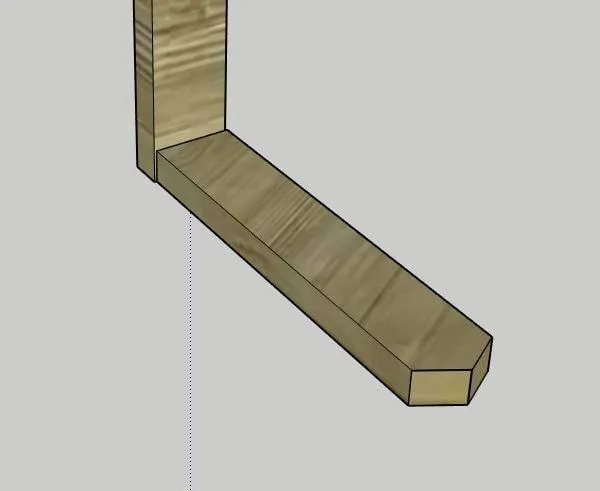
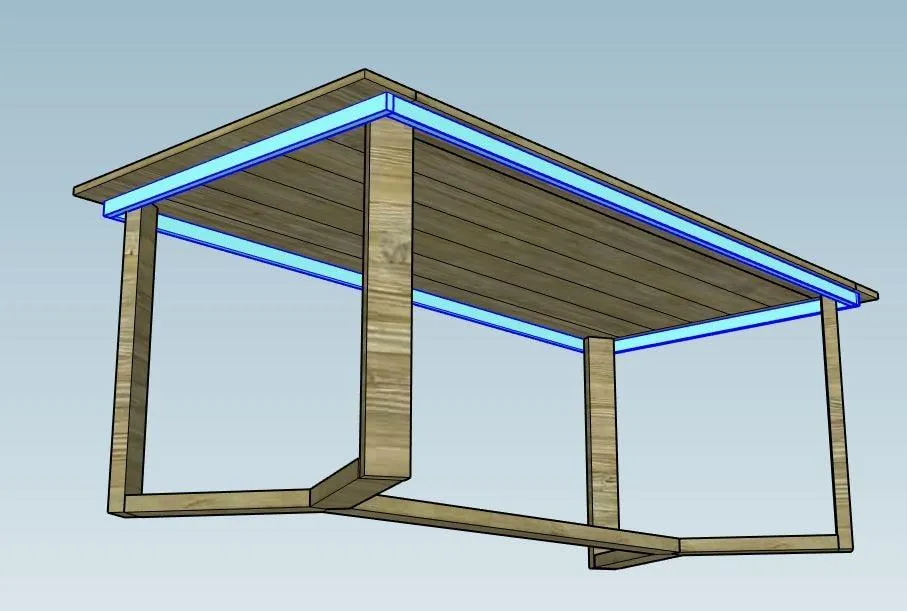
On each of the four Angled Base Pieces, mark the center of one short end, then cut off a 30 degree angle to both sides, creating a point. Drill two pocket holes in the other end and connect to the Straight Legs.
3Cut Base Spreader
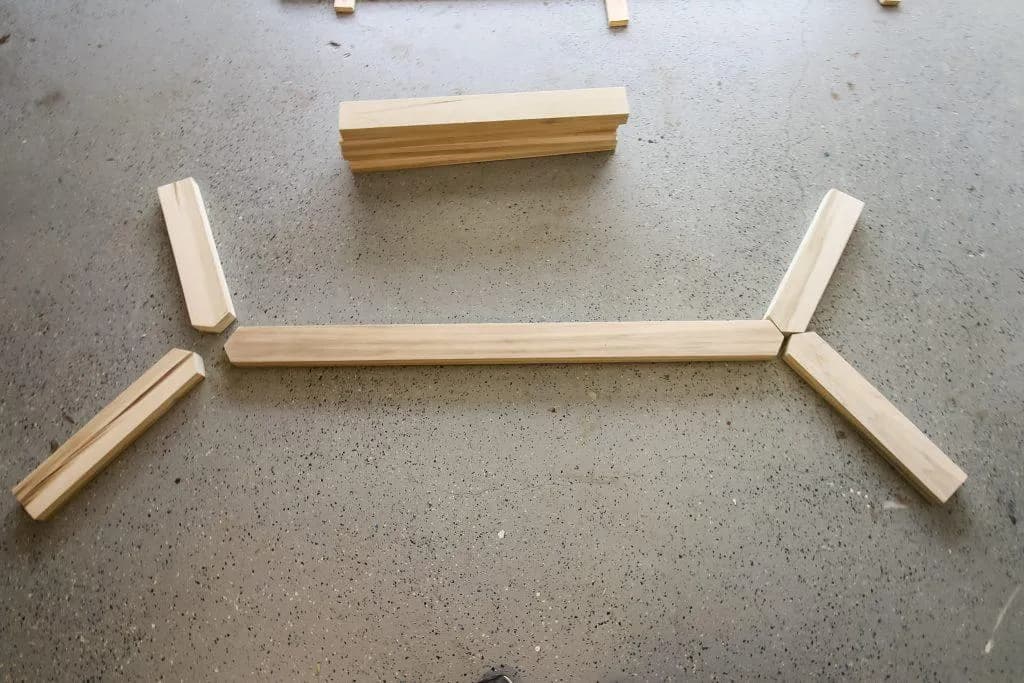
On the Base Spreader, mark the center of each short end and cut off a 30 degree angle to both sides, the same as in the previous step.
4Assemble Base
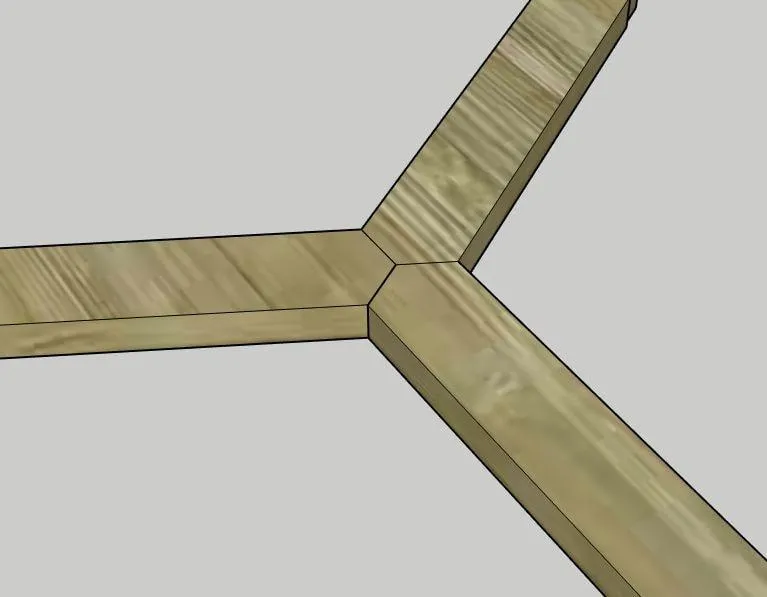
Drill one pocket hole to the left angle of each Angled Leg Base piece and the Base Spreader. Using pocket screws and wood glue, attach where all three angles meet.
5Repeat
Repeat on the other side and finalize base assembly.
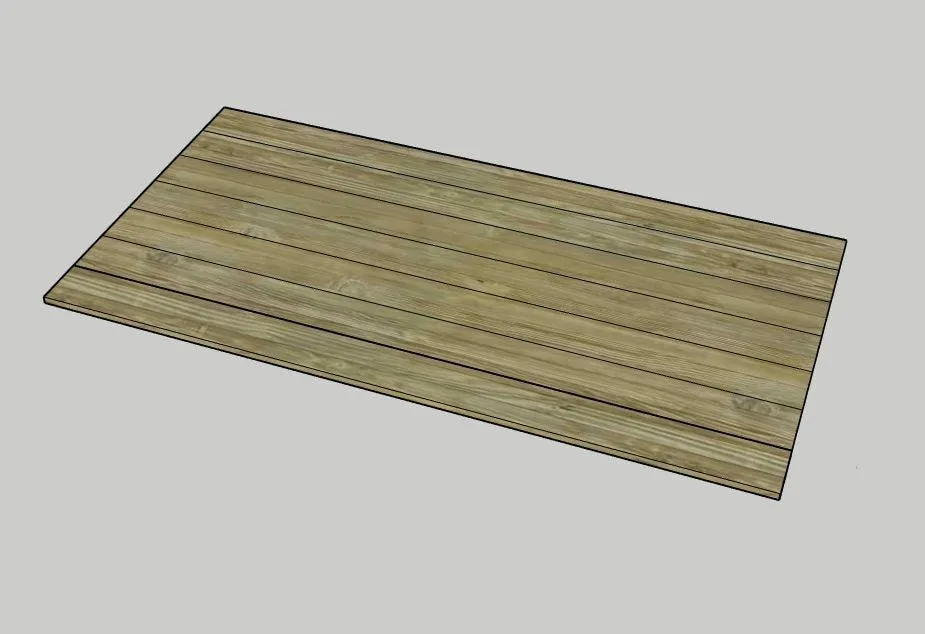
6Construct Top
Attach all of the Long Top pieces together with pocket holes and screws.
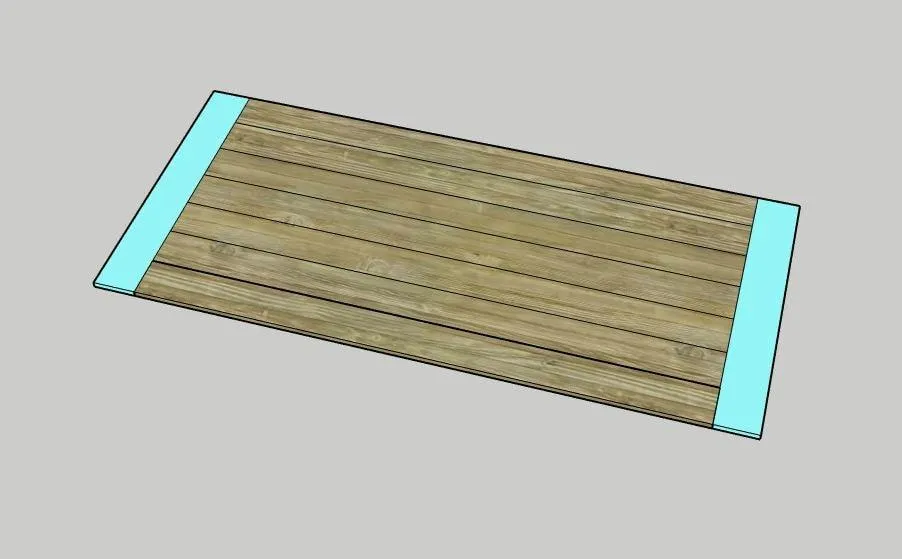
7Add Top Ends
Then attach the two Top Ends to either edge.
8Attach Top to Base
Drill two 3/4" pocket holes on the end of each Leg (this is important because the top is not the same thickness as the legs, so you must drill holes appropriate for the top's thickness). Center the Top on the Base and attach with pocket hole screws.
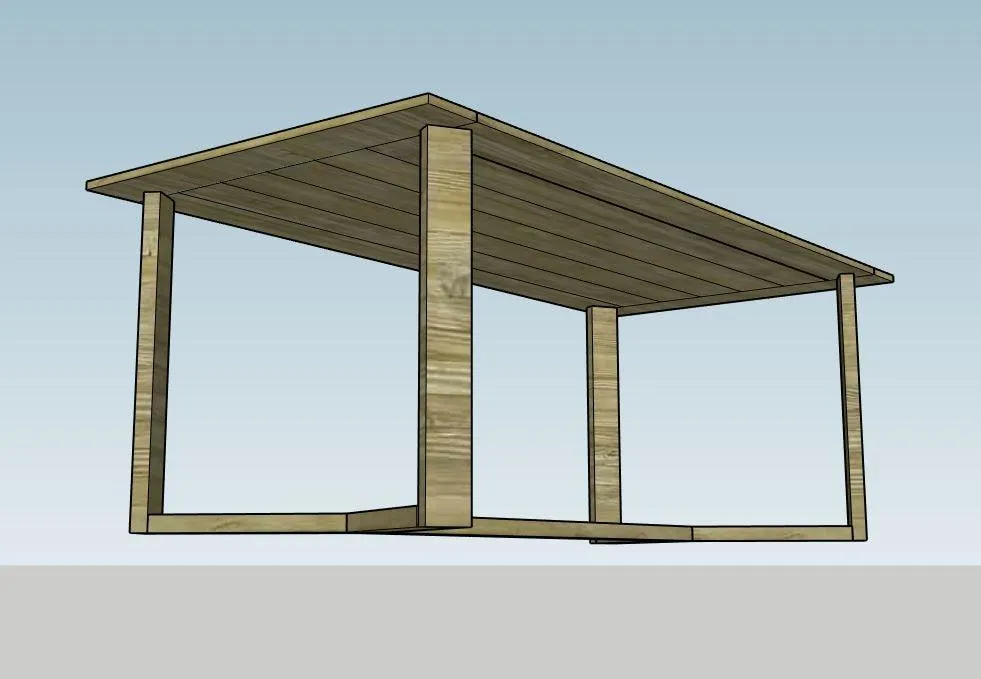
9Add Lips Around Legs
Attach the Short and Long Lips to the underside of the table on the outside of the Legs using finishing nails and wood glue.
10Get Bench at CharlestonCrafted.com
For more projects and printable plans, including for a corresponding bench, visit www.CharlestonCrafted.com
Tags
- Kitchen
- Advanced
Reviews & builds
No reviews yet
Sign in to review this plan or share your build.
No reviews yet. Be the first to build this.