 Notch
Notch- Difficulty
- Advanced
- Time
- 3.3–6.3 hours
- Cost
- $$
About this build
This Adirondack style side table completes your outdoor seating area by providing a flat functional surface area. The side table coordinates with the Adirondack counter height chair and makes the perfect outdoor seating area.
Tools
Essential
- Brad Nailer
- Drill / Driver
- Jigsaw
- Miter Saw
- Pocket Hole Jig
- Random Orbit Sander
Optional / nice to have
- Tape Measure
Materials
| Item | Qty |
|---|---|
| Board, 1x3 96" | 1 board |
| Board, 1x4 96" | 2 board |
| Board, 2x2 72" | 2 board |
| 1 1/4" pocket hole screws | 24 each |
| 1 1/4" finish nails | 12 each |
Overall cost: $$. Lumber prices vary by region, species, and season, so we give a band rather than a figure we would only be pretending to know.
Cut list
| Part | Qty | T × W × L |
|---|---|---|
| Legs | 4 | 1 1/2" × 1 1/2" × 4" |
| Short side aprons | 4 | 3/4" × 2 1/2" × 2" |
| Long side aprons | 4 | 3/4" × 2 1/2" × 14" |
| Table top middle | 2 | 3/4" × 3 1/2" × 22" |
| Table top sides | 2 | 3/4" × 2 1/2" × 21" |
| Table top outer edge | 2 | 3/4" × 2 1/2" × 20" |
| Bottom shelf slats | 4 | 3/4" × 3 1/2" × 2" |
What to buy
Buy 4 boards at 8 ft.
1 1/2" × 1 1/2"
1 board
3/4" × 3 1/2"
1 board
3/4" × 2 1/2"
2 boards
Assumes 8 ft stock, a 1/8" saw kerf, and buying each part at its own width. Change the board size or kerf on the full board plan →
Instructions
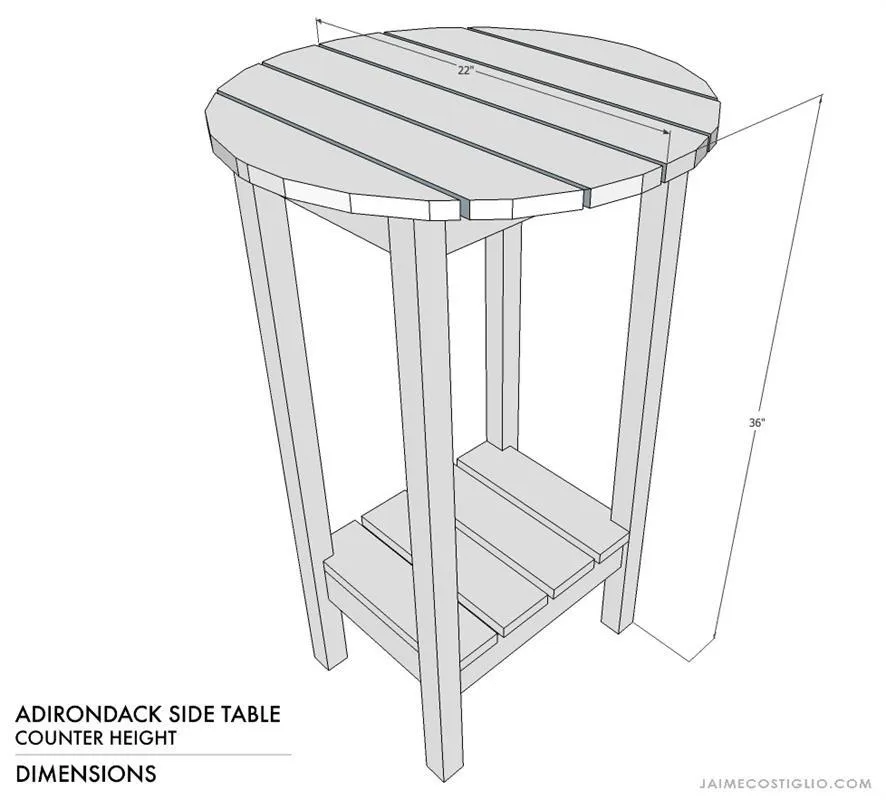
1Dimensions
22"diameter top x 36"h
2Step 1
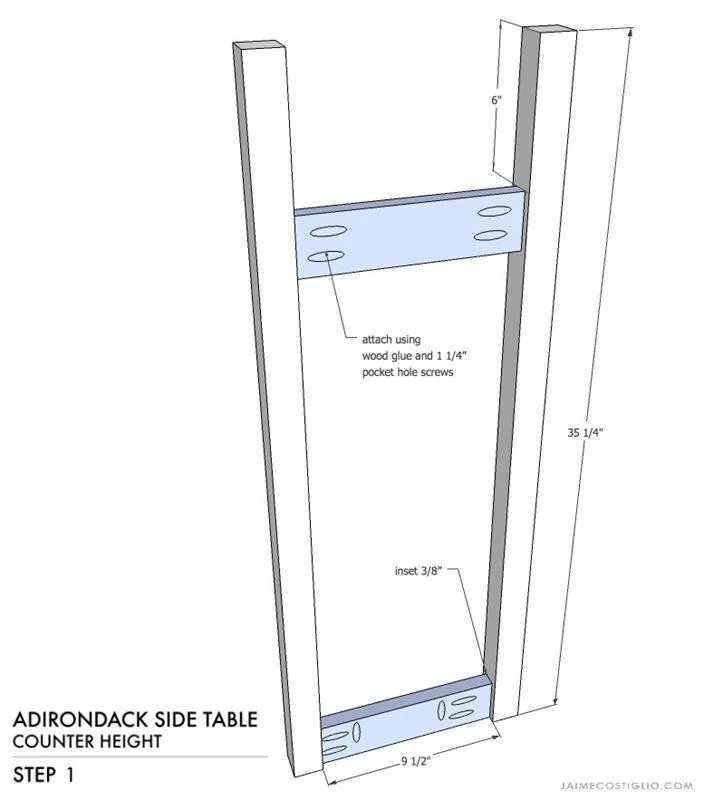
STEP 1: Attach short side aprons to legs using wood glue and 1 ¼” pocket hole screws. Keep apron inset 3/8”. Make 2 sets.
3Step 2
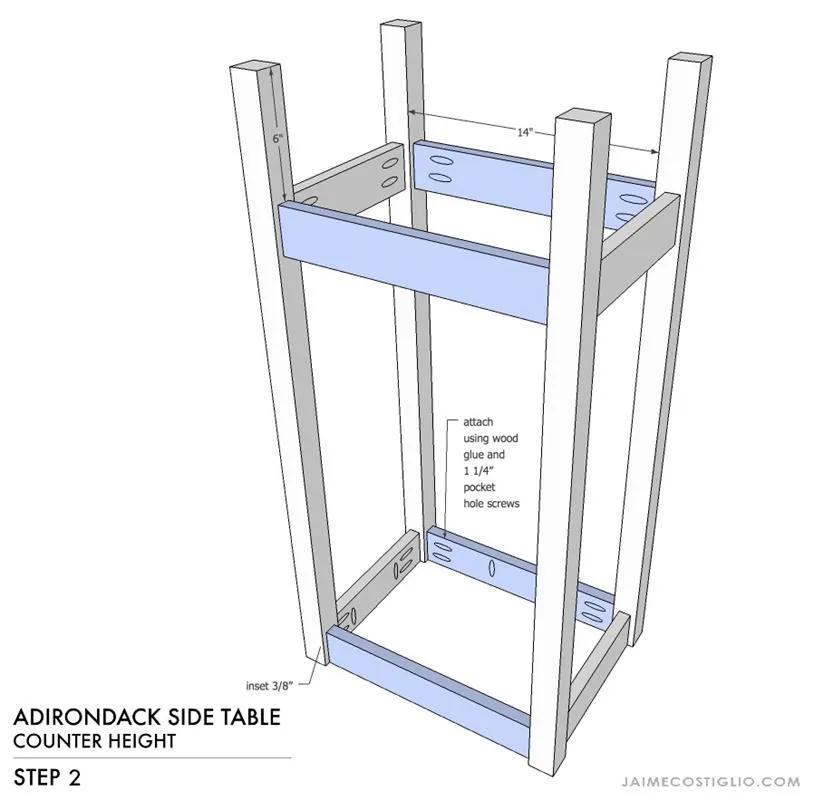
STEP 2: Attach long side aprons to short side panels at legs using wood glue and 1 ¼” pocket hole screws.
4Step 3
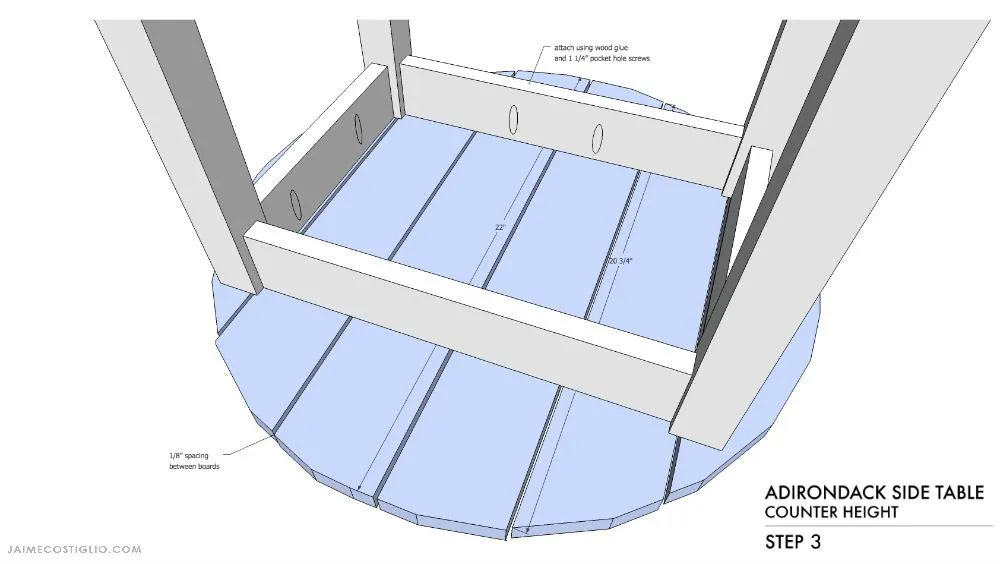
STEP 3: Attach table top pieces to aprons using wood glue and 1 ¼” pocket hole screws. Keep 1/8” spacing between boards. Use a jig saw to trim boards to 22” diameter circle.
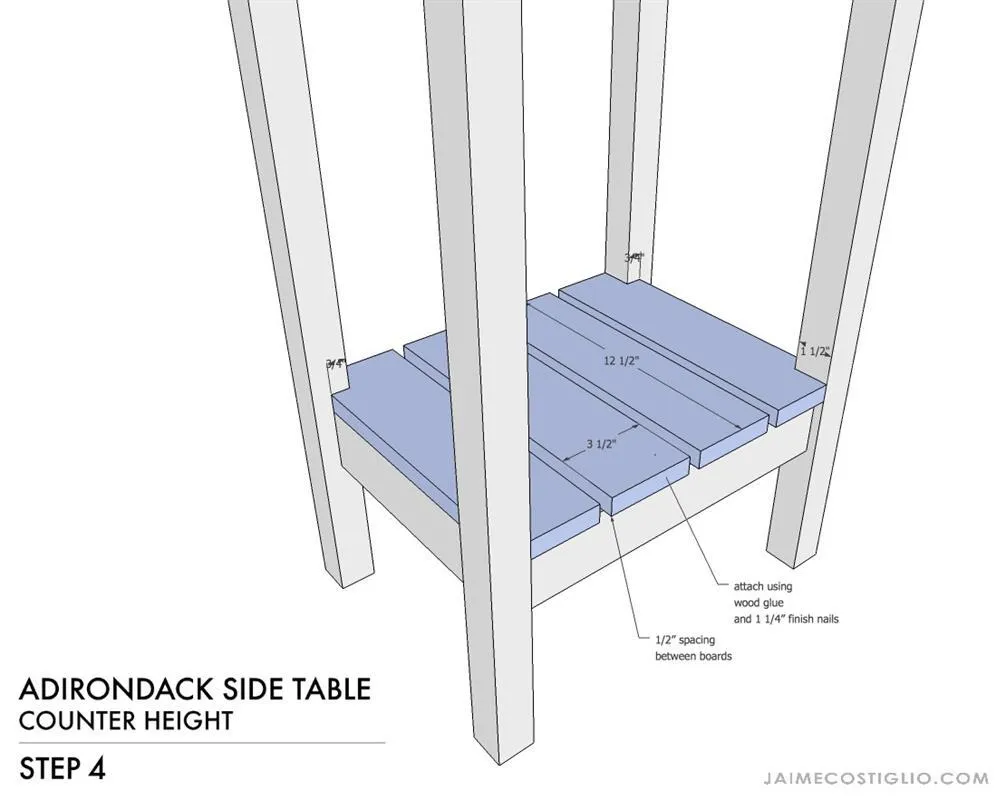
5Step 4
STEP 4: Attach bottom shelf slats to aprons using wood glue and 1 ¼” finish nails. Notch out corners using jigsaw to fit around legs.
Tags
- Outdoor Living
- Advanced
Reviews & builds
No reviews yet
Sign in to review this plan or share your build.
No reviews yet. Be the first to build this.